
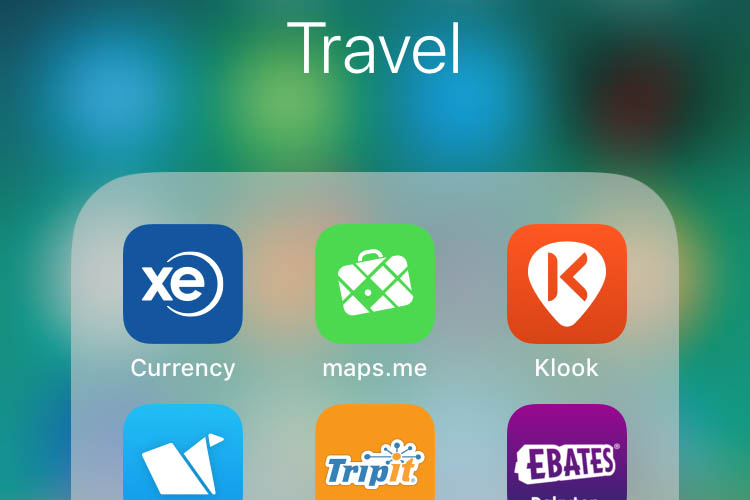
17 Best Travel Apps to Download Before your Next Trip (2026 Guide)
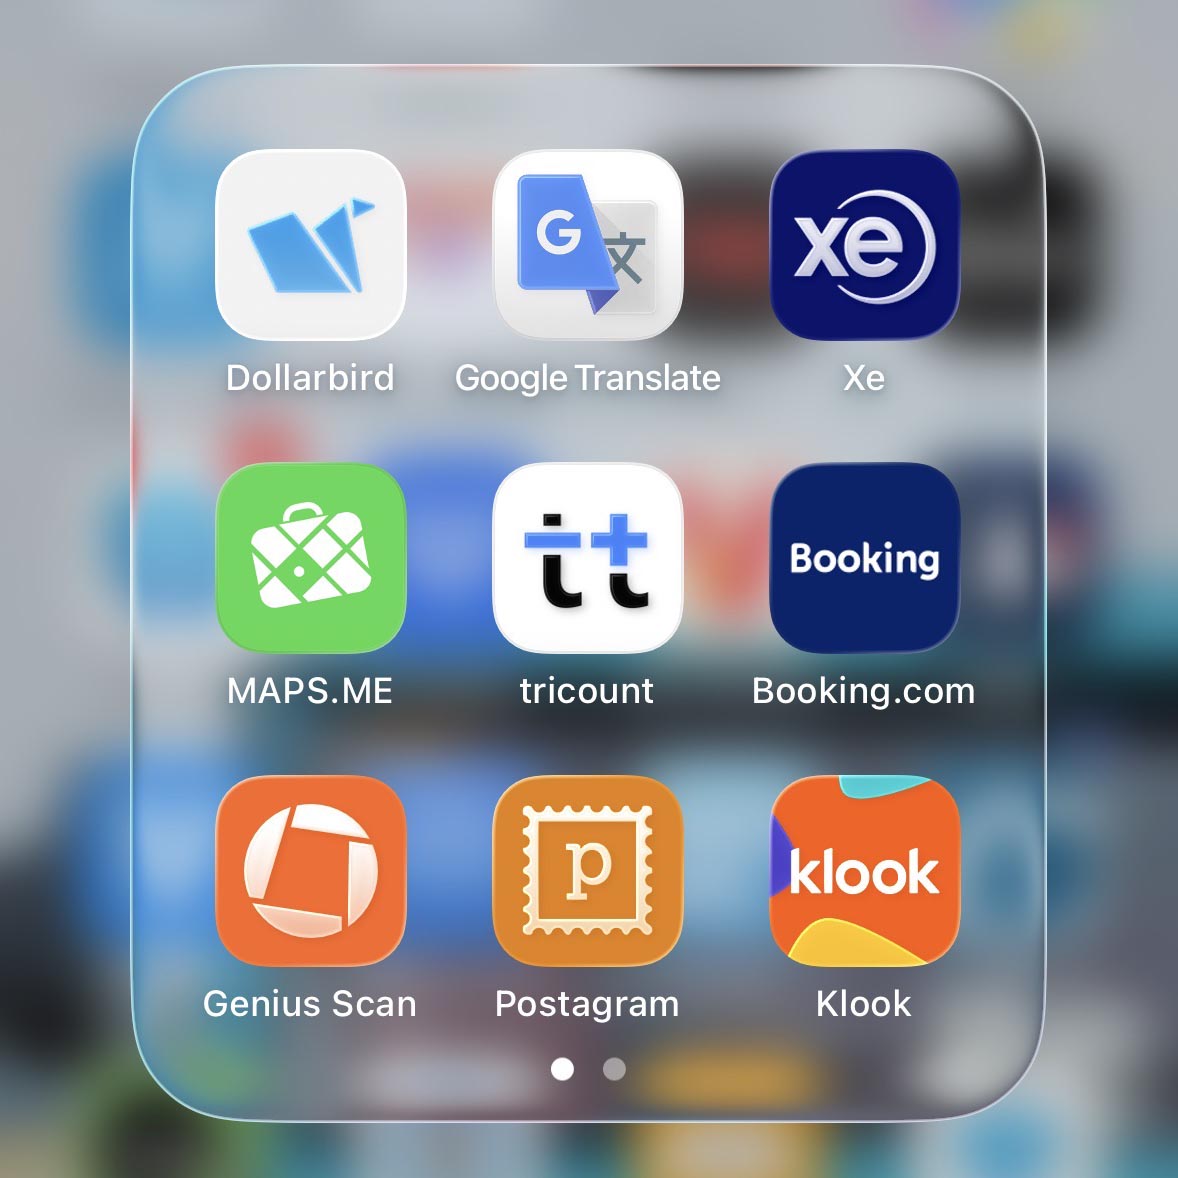
From tracking expenses to booking flights, here are the 17 best travel apps I use as a full-time traveler to ensure my adventures are seamless.
In 2002, I took my first trip overseas to study abroad in England. Smartphones didn’t exist. Texting wasn’t even a thing yet. While the nostalgic part of me misses the days of paper maps and film cameras, smartphones do make travel and life a lot easier.
I recently wrapped up a seven-month trip abroad to three different continents, and these apps simplified my travels and life. They include currency converters and making your own postcards to planning the perfect outdoor photoshoot and filing travel insurance claims. Most have free versions across phone platforms and many have web versions. Add downloading these apps to your digital packing list.
Affiliate links are used in this post. If you make a purchase, I earn a small commission at no cost to you, which goes toward the cost of maintaining this blog.
In this Article
The apps are organized in the following categories:
Expense Tracking & Currency Apps
Health, Safety & Logistics Apps
Photography & Entertainment Apps
Discount Travel Booking Apps
Klook (Free)
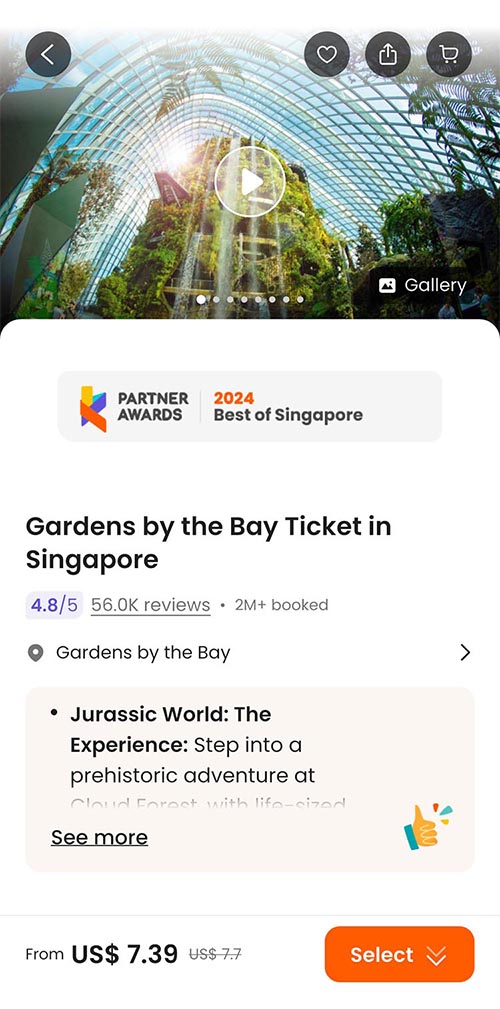 The Klook app allows me to skip ticket lines!
I’ve used Klook to buy discounted admission tickets and transportation online across the world. It saved me roughly $10 on entry to Gardens by the Bay in Singapore and $13 on the cable car to the big Buddha in Hong Kong. I’ve also used it for private transfers in Vietnam.
The best part of the app is the tiered Klook Rewards program, where users earn KlookCash to redeem on future purchases. Additional points can be earned by posting reviews. The free loyalty program includes member-only rates and exclusive perks. Overall, I’m a big fan because it saves me money, and I never have to stand in long queues. Book on the app or directly on the website.
Booking.com (Free)
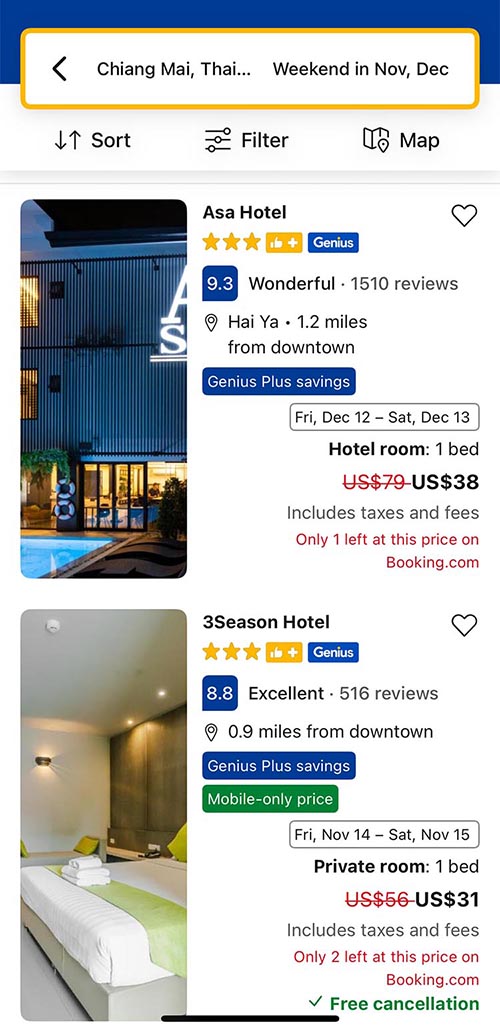
Take advantage of Booking.com’s cheaper mobile rates in the app.
The majority of the time, I find Booking.com has the lowest rates for accommodation, especially when booking on their mobile app where prices can be 15-30% cheaper than booking on their website. (I’ve written a deep dive into why mobile rates are cheaper.)
Now that I’ve reached tier three of their Genius loyalty program, I get even more discounts. When pricing accommodation, cars and even flights, it’s worth doing a quick mobile search on Booking.com’s app to compare with other platforms.
Finance Apps
Tricount (Free)
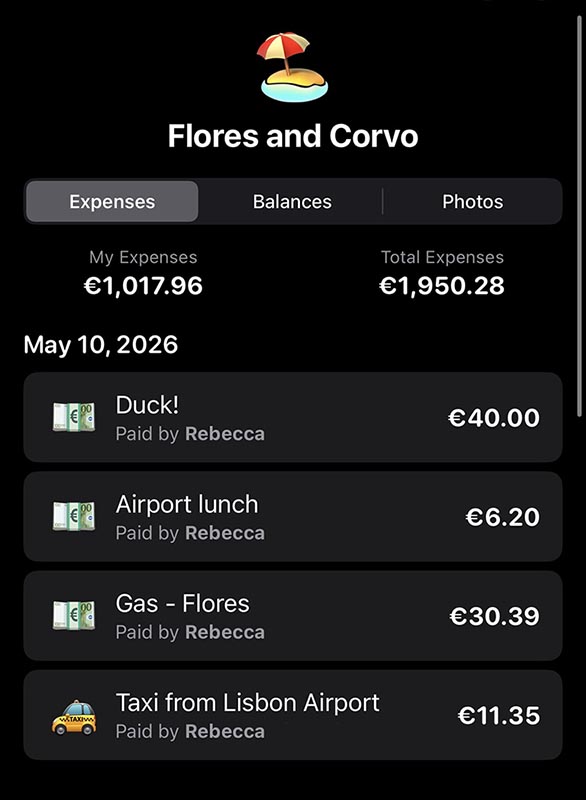 I used the Tricount app in May to track expenses on a nine-day trip in the Azores to Flores and Corvo.
Tricount is a free expense-splitting app that makes it easy to track travel expenses. I tested this recently on a week-long trip in the Azores with a friend, and it was seamless. The user-friendly interface includes functions to split expenses unevenly and upload receipt photos. A built-in calculator and currency converter tool do all the math for you. And, the best part is you can start using it instantly without creating an account. (To sync data across multiple devices, you will need to create an account.)
The app is owned by the Amsterdam-based bank bunq B.V. and is currently ad-free, which is why I stopped using Splitwise and exclusively use Tricount now.
Dollarbird (Paid)
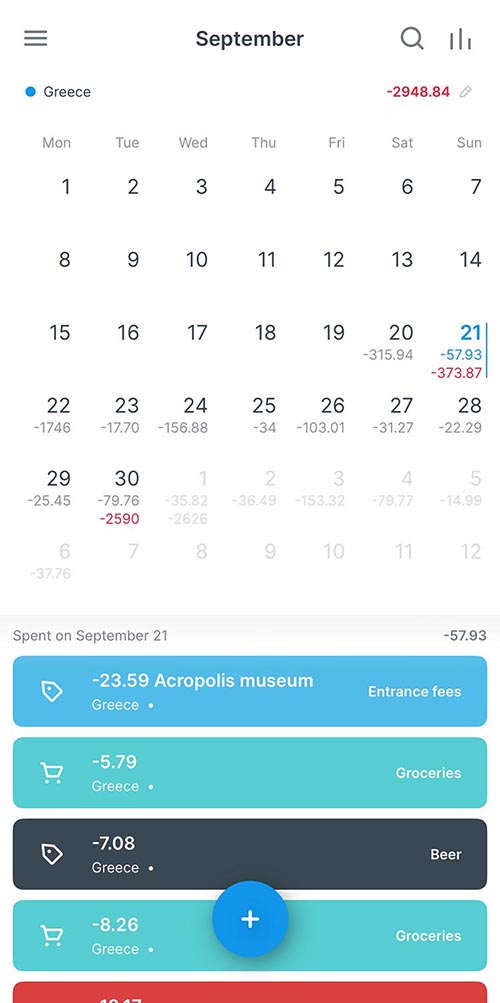 I’ve used Dollarbird for years to track my travel spending. I’m currently using it for my two-month Africa trip.
Dollarbird is an expense tracking app that I use to track my spending on my travels. (It’s $4.99/month or $39.99/year.) It can be used for your regular budgeting. I make custom categories and manually add my expenses. It provides a running balance summary and allows you to export the data to a spreadsheet. (I only use it to track expenses, not income.) I used this app to create the charts in my post about the cost of my two-month trip in Southern Africa.
XE Currency Converter (Free)
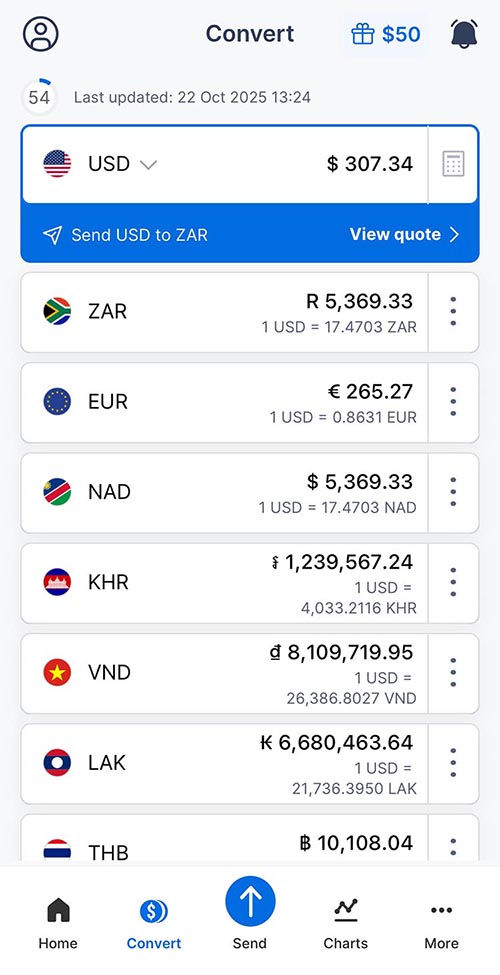 The free XE Currency Converter even works offline with the last updated rate.
XE is my favorite currency app. It allows you to add up to 10 currencies and switch easily been them. The best part is that it even works offline using the last updated rate. I use this all the time to check the cost of things to make sure I’m not overspending.
TIP: If you have the option to pay in different currencies, check the rate for both to see which is cheaper. It’s almost always cheaper to pay in the local currency than in USD, which I dig into deeper in my travel banking post.
iPhone Calculator App Currency and Unit Conversion (Free)

The iPhone calculator app has a feature that allows you to convert currency and units.
When Apple introduced iOS 18 in September 2024, it included a conversion function in the calculator that allows you to convert categories ranging from currencies to units (speed, time and weight). To access the feature, click on the calculator symbol to the left of the 0 button, then turn on Convert. Use the arrow to choose the unit or currencies to convert from.
Genius Scan (Free)
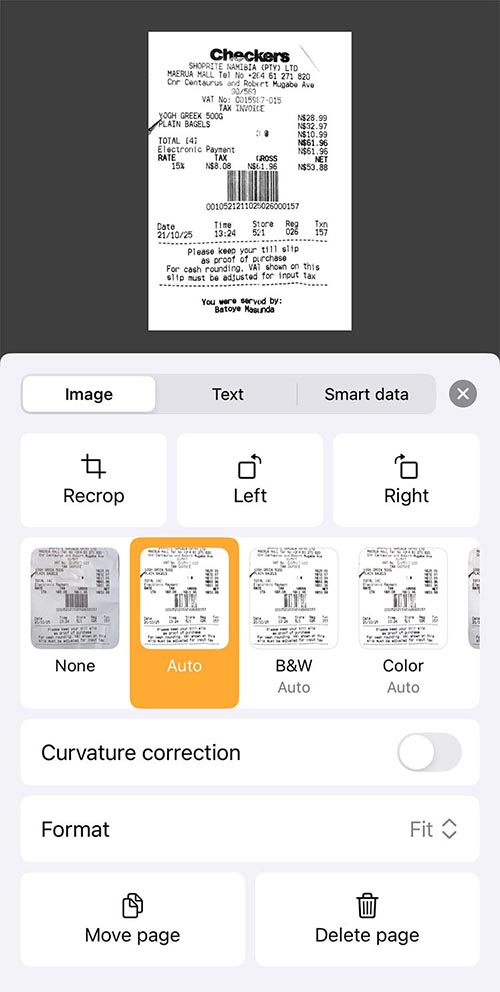 Genius Scan helps sort my receipts for taxes and work travel. I export the files to my Mac as a backup.
This PDF-scanner app is super helpful. It allows you to photograph anything – receipts, maps, brochures—and make a PDF file from the documents. It’s the best for tracking expenses for business travel. You can take photos through the app or import them from the camera roll on your phone. I find it useful for both tracking receipts when I travel and sending them to Dropbox. I also use it to photograph brochures to reduce my paper usage. The PDFs can be easily sent via email, AirDrop and messaging apps.
1Password (Paid)
 1Password helps manage passwords, bank accounts and loyalty programs. It’s secure and allows you to copy and paste numbers for online shopping.
1Password is my favorite app of all time, even when I’m not traveling. The app securely stores and organizes all your passwords in one place. It’s easily searchable for what you need. I keep EVERYTHING in it – bank details, frequently flyer accounts and email passwords. It syncs across devices easily and is very secure. You use one password to open the app. (TIP: Use a password that you’ve never used elsewhere.) I use it to copy and paste my credit card number when shopping online.
While the app isn’t free, it’s inexpensive – $2.99/month or $4.99 for a family of 5. There’s a free 14-day trial. (Full disclosure: I got this app for free through an old job, so I don’t pay for it.) While Apple has introduced the free Passwords app, I find 1Password to have a better interface and organization system when it comes to credit cards and membership numbers, etc.
Communication Apps
Airalo (Free)
Airalo eSIMs make it easy and affordable to stay connected while traveling.
eSIM cards are an affordable way to stay connected abroad. The Airalo app makes it easy to purchase, install and monitor your balance while traveling across over 200 countries and regions. Airalo was the world’s first eSIM store and often has the best partner networks abroad.
Use promo code NEWTOAIRALO15 for 15% off your first purchase. Existing users can save 10% with AIRALOESIM10.
Google Voice (Free)
Google Voice is an easy way to call U.S.-numbers for free while abroad.
As someone who travels most of the year, two-step verification is the bane of my existence. Google Voice has changed this—I’ve started using it as my phone number for two-step verification. (If you have trouble with codes coming through on the app, log in on your computer.) Google Voice allows you to have a second phone number to use for calls, texts and voicemail. To set up, you need an existing Google account and a phone number. U.S. and Canadian users can choose their phone numbers. Google Voice is also available in select European countries.
You can also call U.S. numbers for free so it’s easy for me to call family members or even airline customer service, etc. (Google Voice has been my replacement for the now-defunct Skype. RIP.)
Google Translate (Free)
 Google Translate offers both text and photo translations.
Google Translate has been a lifesaver. I simply type a phrase and show it to my taxi driver or anyone I need to communicate with. It also lets you save phrases to use later. There’s a camera option so you can translate labels, which is helpful if you’re trying to find lotion that doesn’t have whitening cream in it in Asia. (It’s nearly impossible in Vietnam.) My favorite app in Spanish speaking countries is SpanishDICT, it allows you to translate phrases and also provides conjugations.
WhatsApp (Free)
The chances are high that you are already using WhatsApp. If not, then you need to download this text and voice message app NOW. The app is owned by Meta and works across all phone platforms and locations. It’s a great way to connect with friends and even business when you are traveling. Outside of the U.S., it’s the primary means of personal and business communications, from booking dinner reservations to taxis. You’ll need a phone number to register.
Postagram (Free;$1.60-$2/postcard)
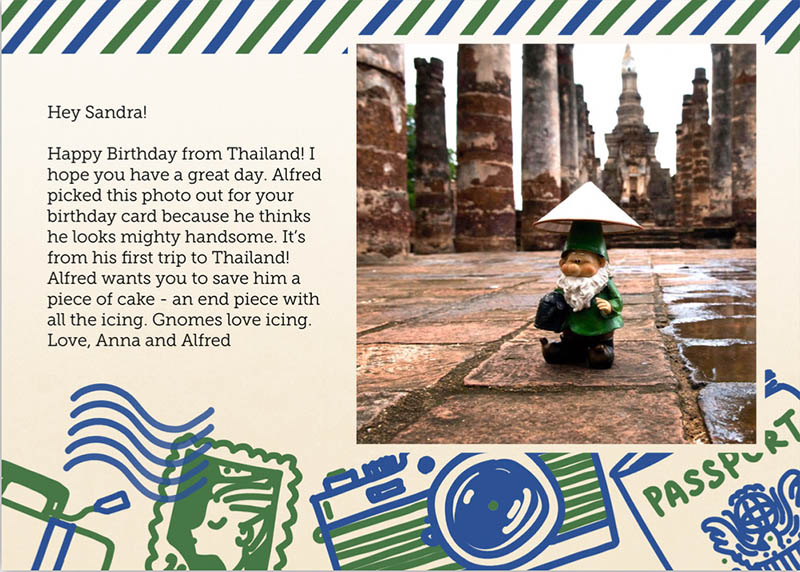 This is a postcard I sent my Aunt with one of my own photos of my globetrotting gnome, Alfred. I’m a big fan of the Postagram app and how you can customize everything including delivery dates so I never miss a birthday!
Let’s be honest—everyone appreciates real mail! I’ve spent countless hours on trips writing postcards to friends and family, and even more time waiting in endless post office lines just to buy stamps! (I spent thirty minutes in Greece recently waiting in line to buy postcard stamps, which were 2 Euros each!)
I’ve used the Postagram app for years to send printed postcards using my photos. The app allows you to customize the background design and colors. The most important feature is that it allows you to schedule a delivery date, so I never miss a birthday or holiday.
While I still send real postcards when I can, Postagram has been the next best option. International locations cost $3/card, while U.S. addresses start at $2. The price decreases if you buy in bulk. The printing quality is excellent. (Full disclosure: I did have an issue once when a postcard did not arrive, and they resent it for free.)
Health, Safety & Logistics Apps
Maps.me (Free)
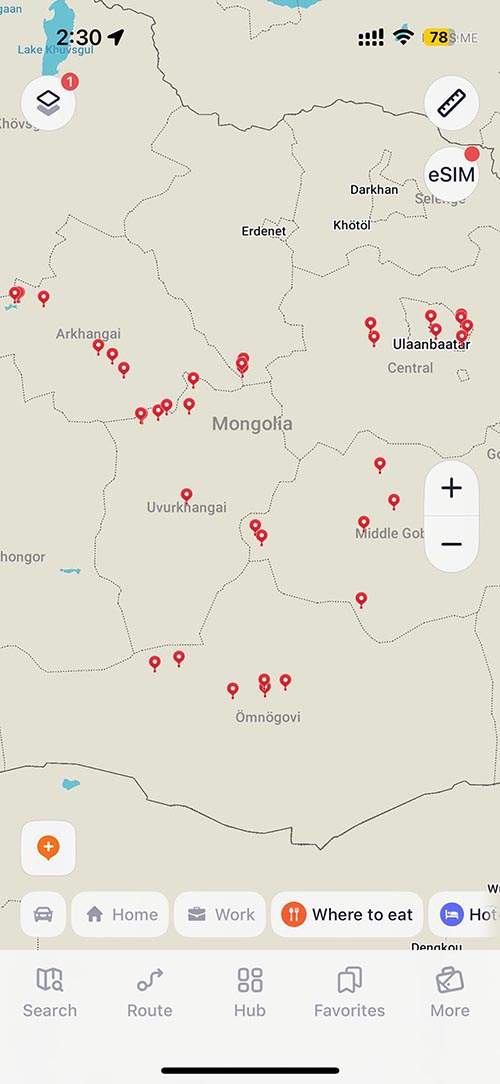
I used Maps.me to track all the places we stopped on my Mongolia trip. It’s a great, customizable offline map tool.
The offline GPS app Maps.me is a must-have for all hikers and anyone traveling to areas without phone service. Simply download a map of where you are going, and the app will help you navigate turn-by-turn efficiently without phone service. It allows you to create and edit routes, which many hikers share online. Read the app user guide before using it in remote locations. The app was initially completely free, but now, they’ve added in-app purchases and the ability to make travel bookings. The free version allows 10 downloaded maps at a time.
I loved using this for my Mongolia trip, which was 90% off-road, to label all the locations where we stopped. I also used it for my Namibia road trip over the winter.
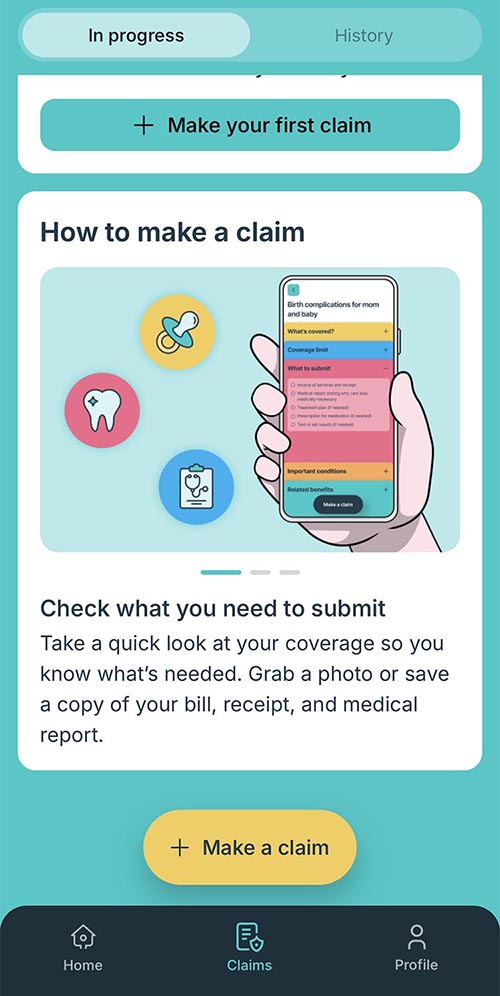
SafetyWing Travel Medical Insurance
SafteyWing offers affordable travel medical insurance for 180+ countries.
SafetyWing is currently my go-to company for flexible travel medical insurance. They offer two plans: Essential and Complete. (I always use the Essential plan.) The new claims process can be done in the app in just five minutes. For more details, check out my SafetyWing review.
NordVPN (Paid)
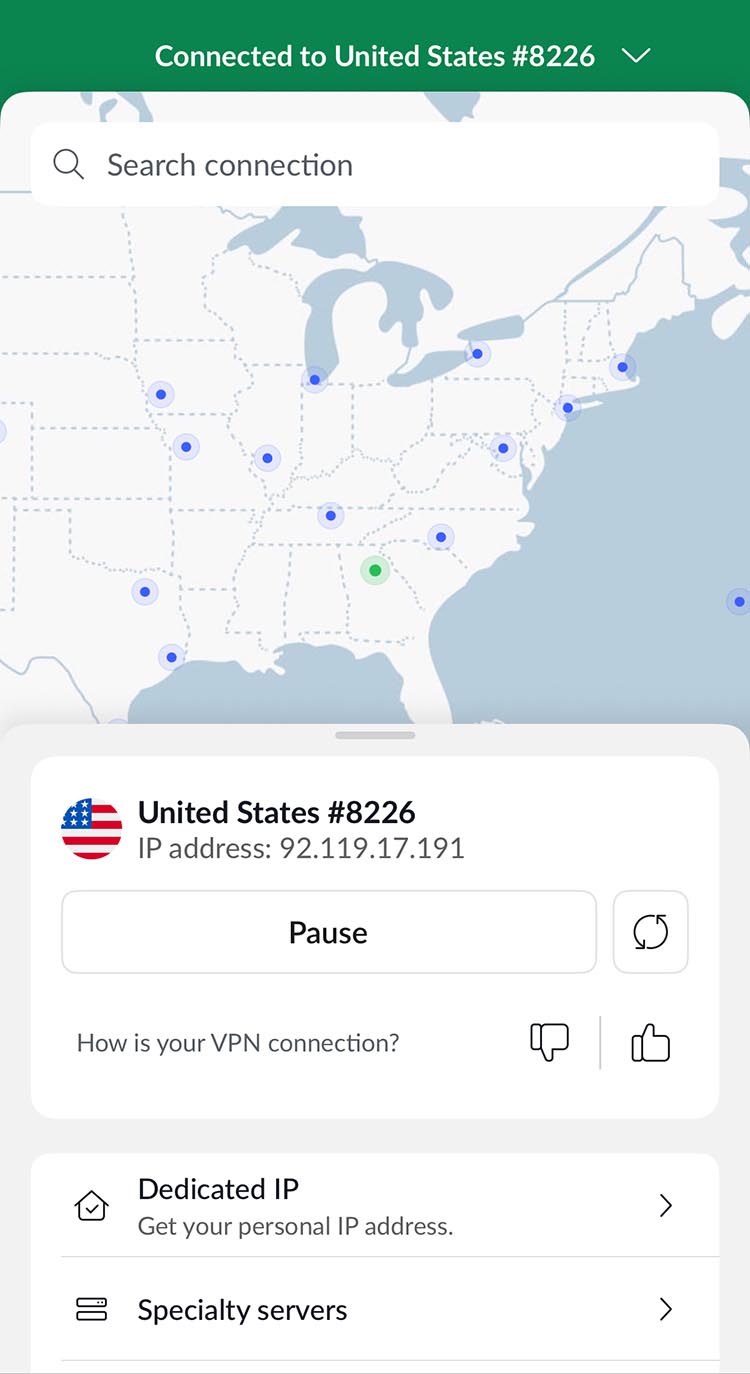 NordVPN makes it easy to safely browse the internet from any corner of the globe.
I started using NordVPN about four years ago to protect my data and identity online while traveling both in the U.S. and abroad. It just makes it safer to browse the internet, check up my banking and even to use streaming services, like Disney+, which sometimes are location dependent. I usually buy a two-year subscription that works on both my Mac and iPhone.
AirVisual (Free)
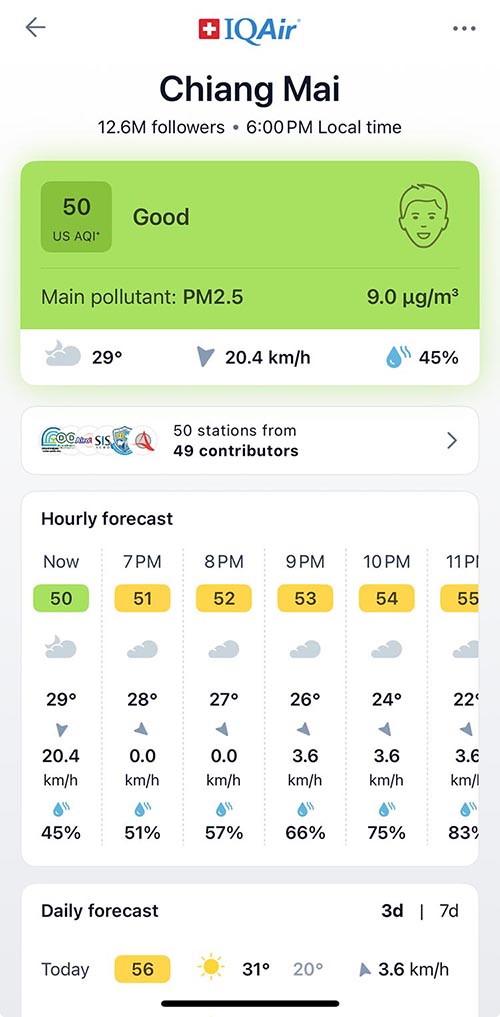 AirVisual makes it easy to track the air quality anywhere you are traveling.
If you’re traveling anywhere in Asia, then I recommend the free AirVisual app to check the air quality. It uses sources from government agencies to tell you the current air quality. It’s really helpful in places with pollution (India) or burning seasons like Chiang Mai, where you might need to wear masks! It works worldwide.
Photography & Entertainment Apps
TPE Photo Ephemeris (one-time fee of $9.99)
 TPE is my go-to app for planning outdoor photo shoots based on the sun’s location.
This photography app is life-changing for photographers because it allows you to plan outdoor shoots in natural light. TPE shows where the light will fall on any part of the globe both day and night. The AR feature lets you visualize a shoot by overlaying the features over your camera app in a location. The app has a one-time $9.99 fee and additional in-app purchases.
Hoopla (Free)
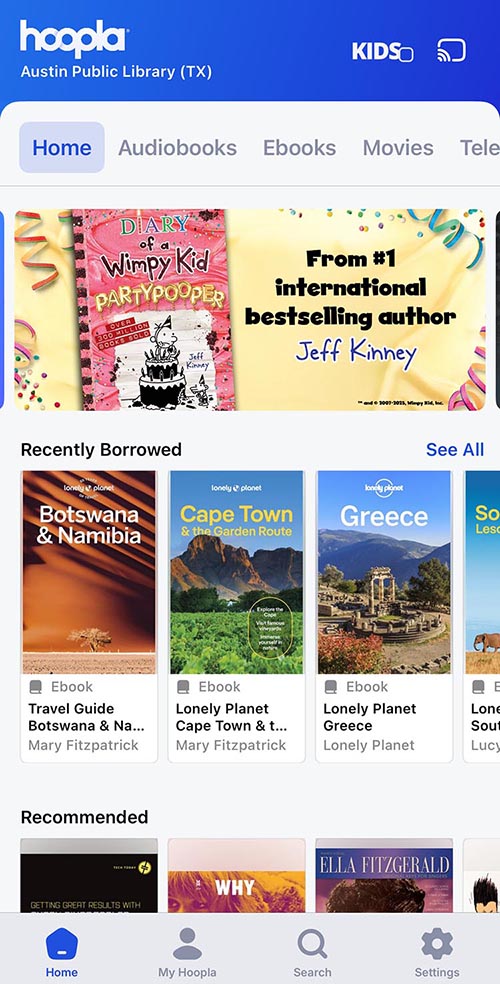 I read a lot more books thanks to the Hoopla app and my public library membership.
Hoopla is an online platform that allows you to read eBooks and listen to audiobooks for free with your public library membership across North America. It also works on web browsers. I use it a lot for travel guides and audiobooks when I travel. There’s a monthly limit for the number of books you can check out that varies based on your library membership. I get four per month from the library in Austin. This is also great to use when you aren’t traveling.
14 Best Things to Do in Austin, Texas, From a Local Travel Writer
 The 11-acre Waterloo Park near the Capitol Building is one of Austin’s newest greenspaces and part of a larger on-going project extending to Lady Bird Lake.
Post Updated in May 2026.
Austin, the Texas state capital, is famous for many things, from music to barbecue and spring-fed swimming holes. Most of all, the city is known for its laid-back “Keep Austin Weird” vibe that makes it a great place to visit but hard to leave.
The capital city has been my home base since December 2013. It is a mixture of all the things I love about the South (biscuits, grits, the word “y’all,” and barbecue), merged with the things I loved about California (fitness-focused outdoor culture and the ability to recycle everything easily) sprinkled with a little LA-style traffic and no state income tax.
As a travel writer, it’s literally my job to write and photograph many of the coolest spots in my current hometown and the great state of Texas. If you’re heading to Austin for SXSW, ACL or a football game, here’s my list of all the best things to do in Austin, Texas categorized by topic for easy scrolling! (I’ve been to every place on the list!) Of course, I’ve also written about the where to eat in Austin and the best hotels organized by neighborhood!
In this Post
1. Paddleboarding on Lady Bird Lake
2. Swim at Barton Springs Pool
3. Tour the Texas State Capitol
4. Hike the Barton Creek Greenbelt
5. Play a Round at Peter Pan Mini Golf
8. Attend an Austin City Limits Taping
9. Stroll Through Austin’s Parks
10. Visit Austin’s Central Library
12. Take Advantage of Free Museum Days
1. Paddleboarding on Lady Bird Lake
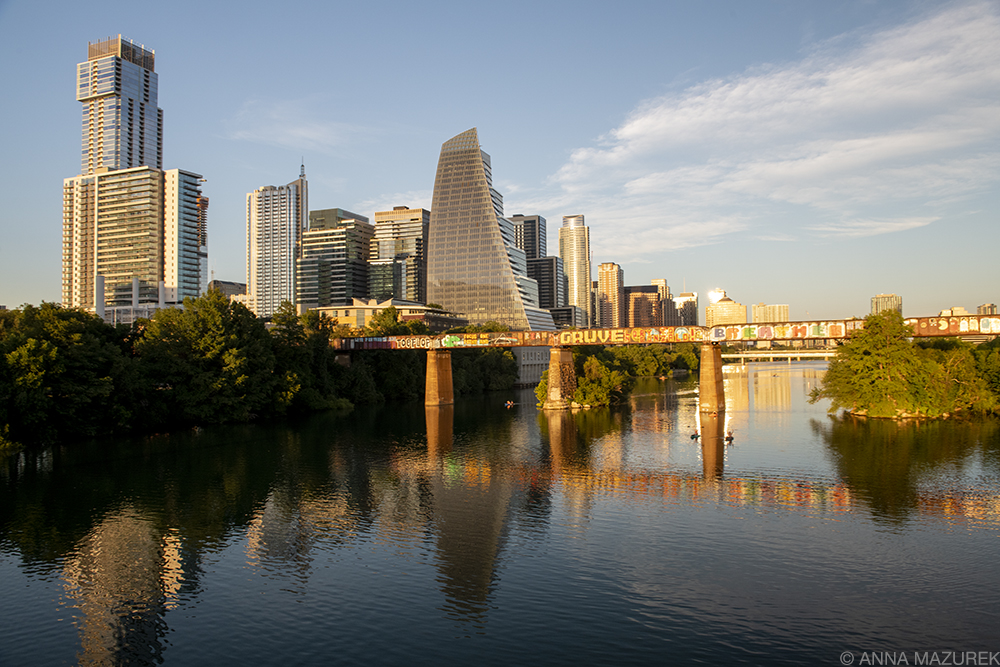
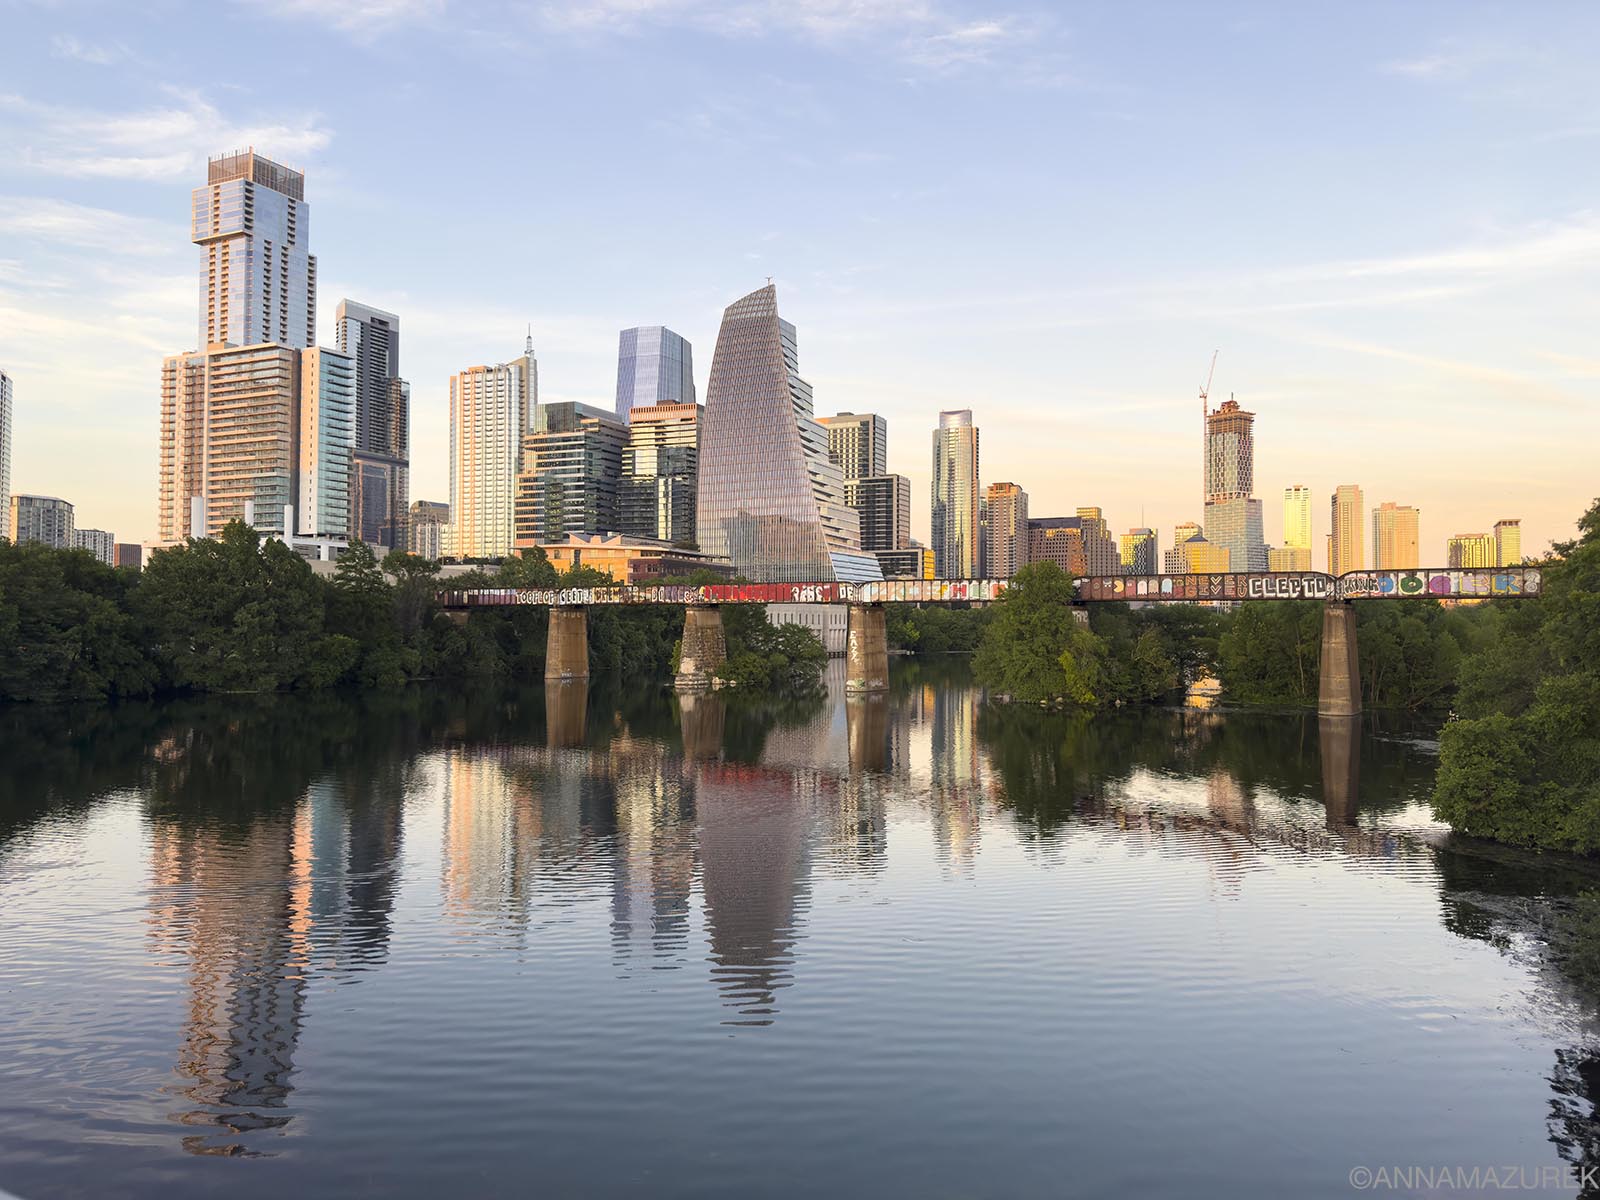 The ever-changing Austin skyline photographed from the Lamar pedestrian bridge
Location: Zilker / Barton Springs | Google Maps (boat rental)
Hours: Public access generally 5 a.m.–10 p.m
Lady Bird Lake is the heart of the city and one of the best places to enjoy the city skyline. There are several boat rental places on the lake, so choose the one closest to you. I like Zilker Park Boat Rentals, which is located adjacent to Barton Springs Pool. They offer buy-one-get-one coupons on weekdays! You can also rent kayaks and canoes. The 10-mile Ann and Roy Butler Hike and Bike Trail around the lake is great for running, walking and biking. (I run a five-mile section every week.)
2. Swim at Barton Springs Pool
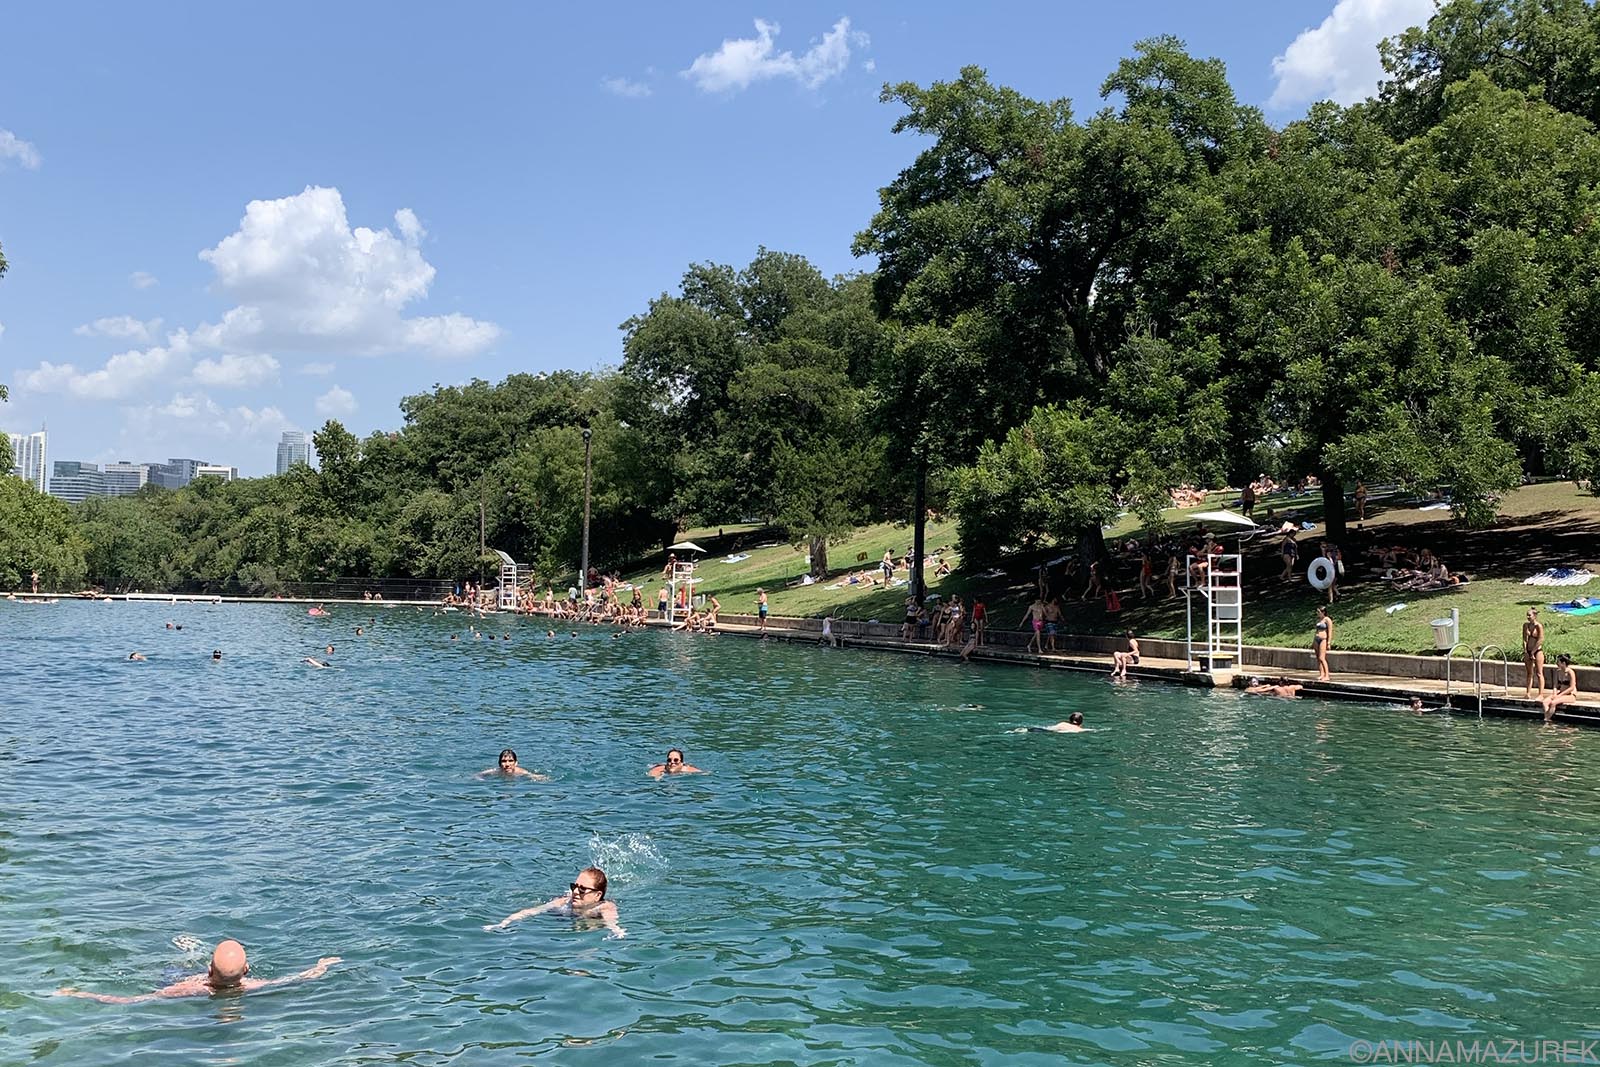 Barton Springs Pool is open year-round from 5 a.m. to 10 p.m. except Thursdays when it’s open only in the morning and evening.
Location: Zilker/Barton Springs | Google Maps
Hours: Usually 5 a.m.–10 p.m.; closed for cleaning part of Thursday.
Barton Springs Pool is 68-70 degrees year-round and a great way to cool off on sizzling summer days. The spring-fed pool is a local favorite tucked in Zilker Park and open year-round. Another option for a dip is the 100-year-old Deep Eddy Pool, the oldest swimming pool in Texas.
3. Tour the Texas State Capitol
 The interior dome of the Texas State Capitol Building
Location: Downtown | Google Maps
Hours: Usually Mon–Fri 7 a.m.–8 p.m.; Sat–Sun 9 a.m.–8 p.m. (tour times vary).
The Texas State Capitol building is an icon of the Austin skyline. The stunning four-block complex is taller than the U.S. Capitol in Washington, D.C. Free guided and self-guided tours are available daily. Don’t miss the interior dome with an eight-foot-wide star and the view from 15th Street of the glass-roofed extension.
4. Hike the Barton Creek Greenbelt
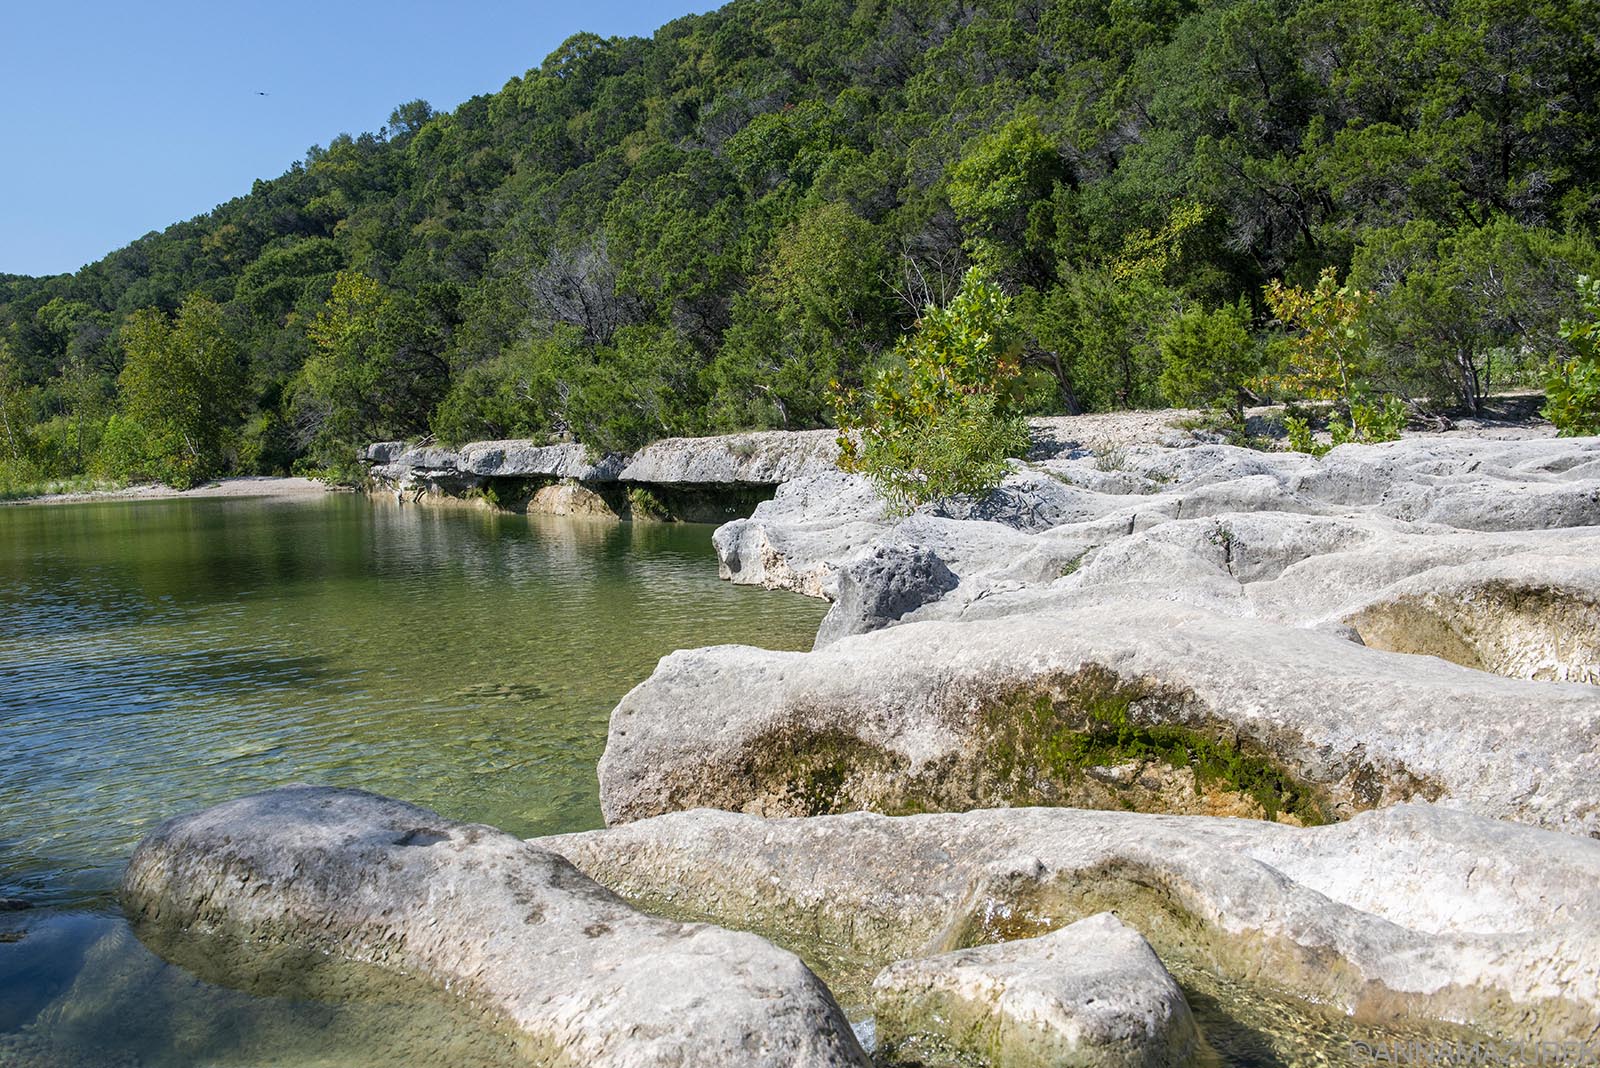 The Barton Creek Greenbelt is one of the best places to go for a hike or a swim.
Location: South Austin / Barton Creek | Google Maps (Twin Falls access point)
Hours: Generally 5 a.m.–10 p.m. (city park hours).
The Barton Creek Greenbelt is a hiking and biking trail that covers 12.86 miles with multiple access points. It’s one of the most popular spots for taking a dip in the summer months. (Twin Falls is one of my favorite spots for a swim.) Hiking the entire trail one way takes roughly three hours and can be broken into sections.
5. Play a Round at Peter Pan Mini Golf
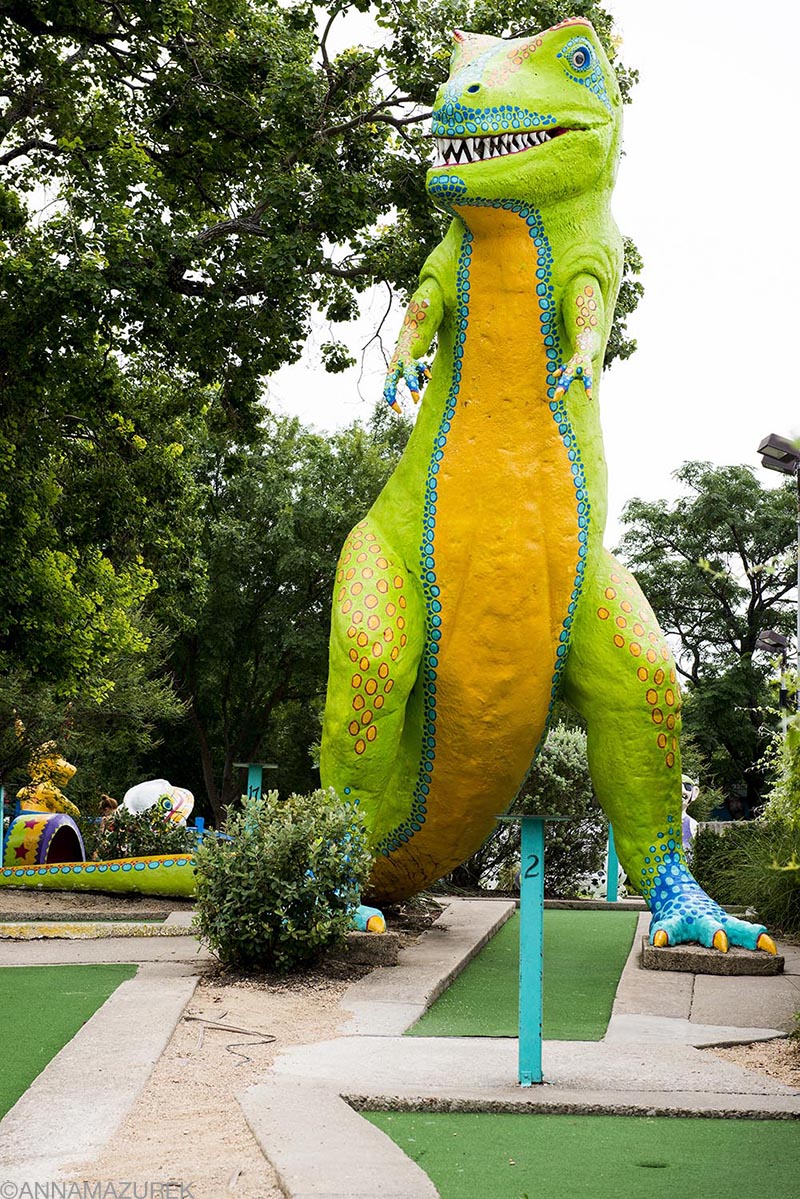 Peter Pan Mini Golf is an Austin icon that’s managed to survive despite an uncertain future due to lease uncertainty.
Location: South Lamar / Zilker | Google Maps
Hours: Usually Sun–Thu 9 a.m.–11 p.m.; Fri–Sat 9 a.m.–midnight (seasonal).
You can’t miss the giant green T.rex statue at Peter Pan Mini-Golf overlooking the corner of Barton Springs and South Lamar. This colorful putt-putt spot opened in 1948 and has two courses with colorful statues of Austin landmarks and Peter Pan characters. The courses are challenging but fun. And the best part about the course is that it’s BYOB – no glass containers.
6. Play Chicken Shit Bingo
Location: North Austin (Burnet Road) | Google Maps
Hours: Sunday 4p.m. to 8 p.m.
Sundays in Austin are for Chicken Shit Bingo. The Little Longhorn Saloon, a tiny hole-in-the-wall honky-tonk off Burnet Road, has been hosting the event for over 40 years. To play bingo, you buy a ticket and hope the chicken literally poops on your ticket number. There’s always live music and cold beer.
7. Watch the Bats on Congress Avenue
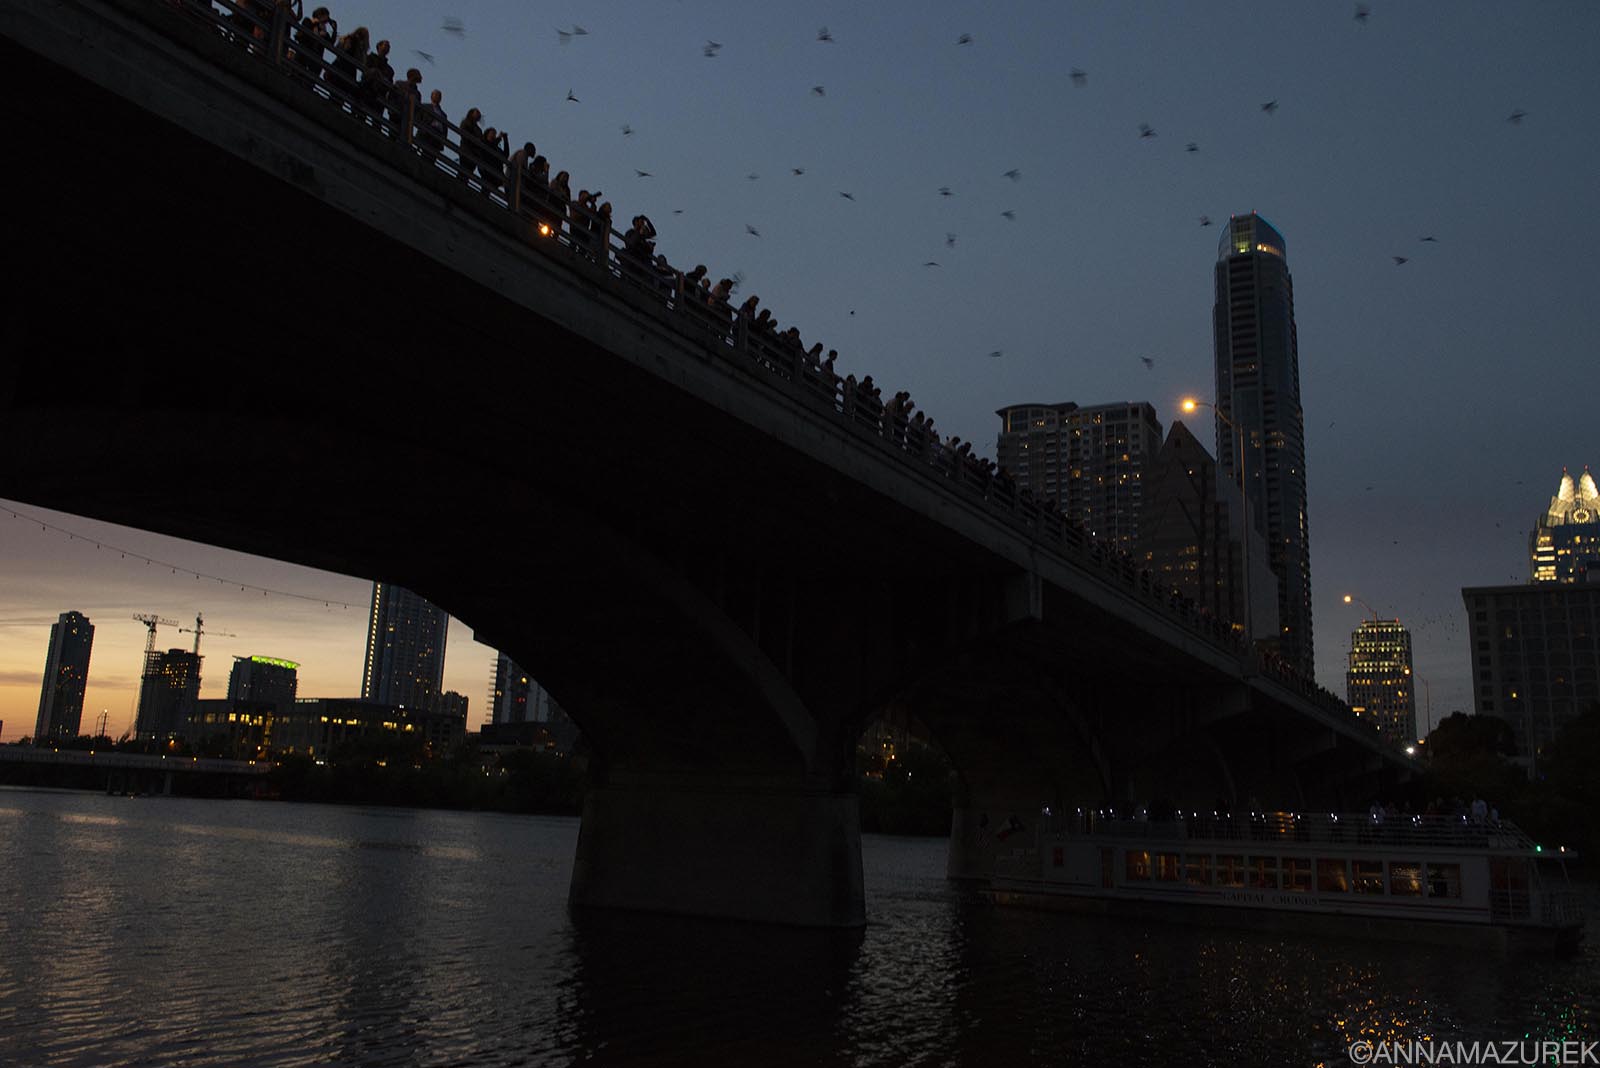 Crowds gather every night along the Congress Avenue Bridge to watch the bats spiral into the sky.
Location: Downtown | Google Maps
Hours: Bats emerge at sunset March–November.
The world’s largest urban bat colony lives under Congress Avenue Bridge. From mid-March to November, the bats spiral into the sky every night for a spectacular show. Check here to find the best time to see the bats nightly. For the best photos, watch the bats from the Statesman Bat Observation Center adjacent to the Congress Avenue Bridge.
8. Attend an Austin City Limits Taping
Location: Downtown | Google Maps
Want to be in the audience for a taping of the Austin City Limits TV show? All tickets are distributed through a free online lottery. If you don’t win, you can also wait in line to see if there are extra tickets available on the day of the show. The lottery opens usually a week before tapings, and winners are announced roughly two days before. For details about upcoming tapings, visit https://acltv.com/upcoming-tapings.
9. Stroll Through Austin’s Parks
 Pease Park’s new suspended treehouse (left) and troll statue (right), Malin, by Danish artist Thomas Dambo are part of the space’s ongoing renovation projects.
Hours: General city park hours 5 a.m. – 10 p.m.
The City of Austin is home to 512 parks, according to the Trust for Public Land. The 351-acre Zilker Park is the most famous and the hub for large events and festivals. It’s also home to Barton Springs and a great spot for paddleboarding. While it’s worth exploring, don’t miss out on some of the smaller but equally amazing outdoor spaces.
The new downtown ADA-accessible Waterloo Park has unparalleled views of the skyline and the Capitol Building. The 11-acre park, home to a 5,000-seat Moody Amphitheater, is part of a larger Waterloo Greenway Project connecting 15th Street to Lady Bird Lake.
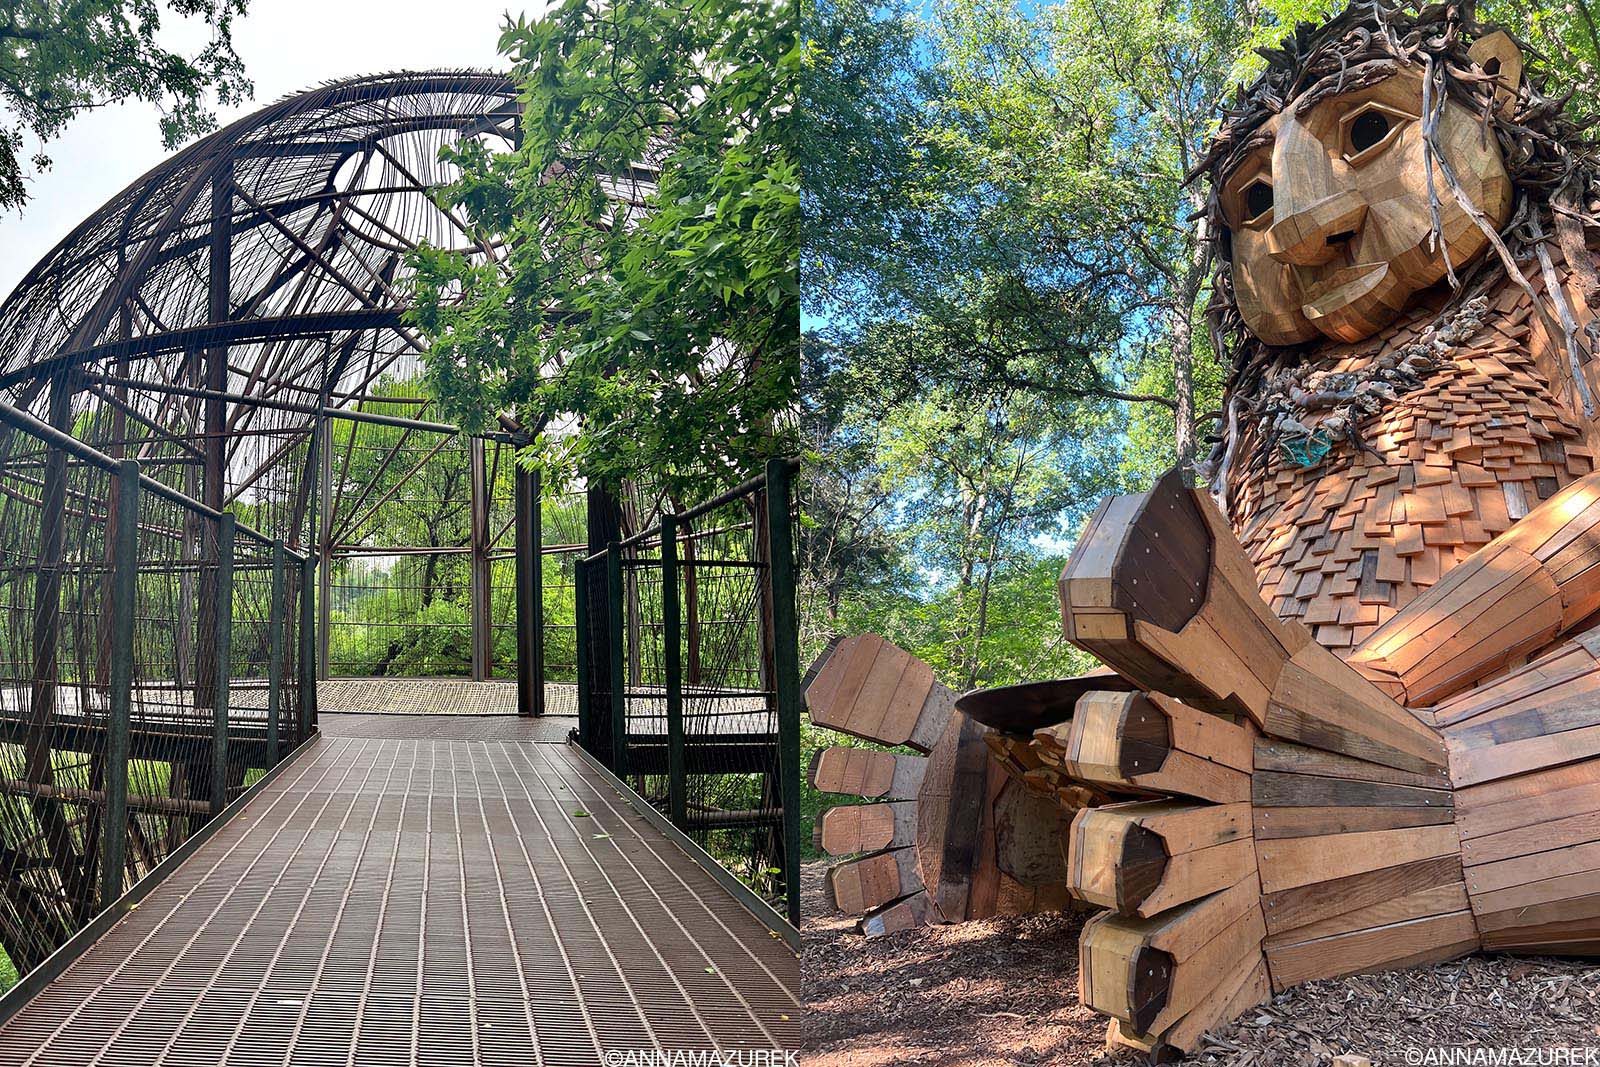
Pease Park, an 84-acre green space along the banks of Shoal Creek, is famous for its photogenic treehouse, 40-foot circular observation pod suspended in the air, and giant wooden troll sculpture by Danish artist Thomas Dambo.
Other favorites include Mayfield Park and Preserve, a 23-acre nature area with a historic cottage and two gardens filled with peacocks. It’s walking distance from The Contemporary Austin’s Betty and Edward Marcus Sculpture Park at Laguna Gloria, which is a stunning outdoor space. Nearby, Mount Bonnell, a ridge-line peak overlooking the Colorado River, is great for sunset.
10. Visit Austin’s Central Library
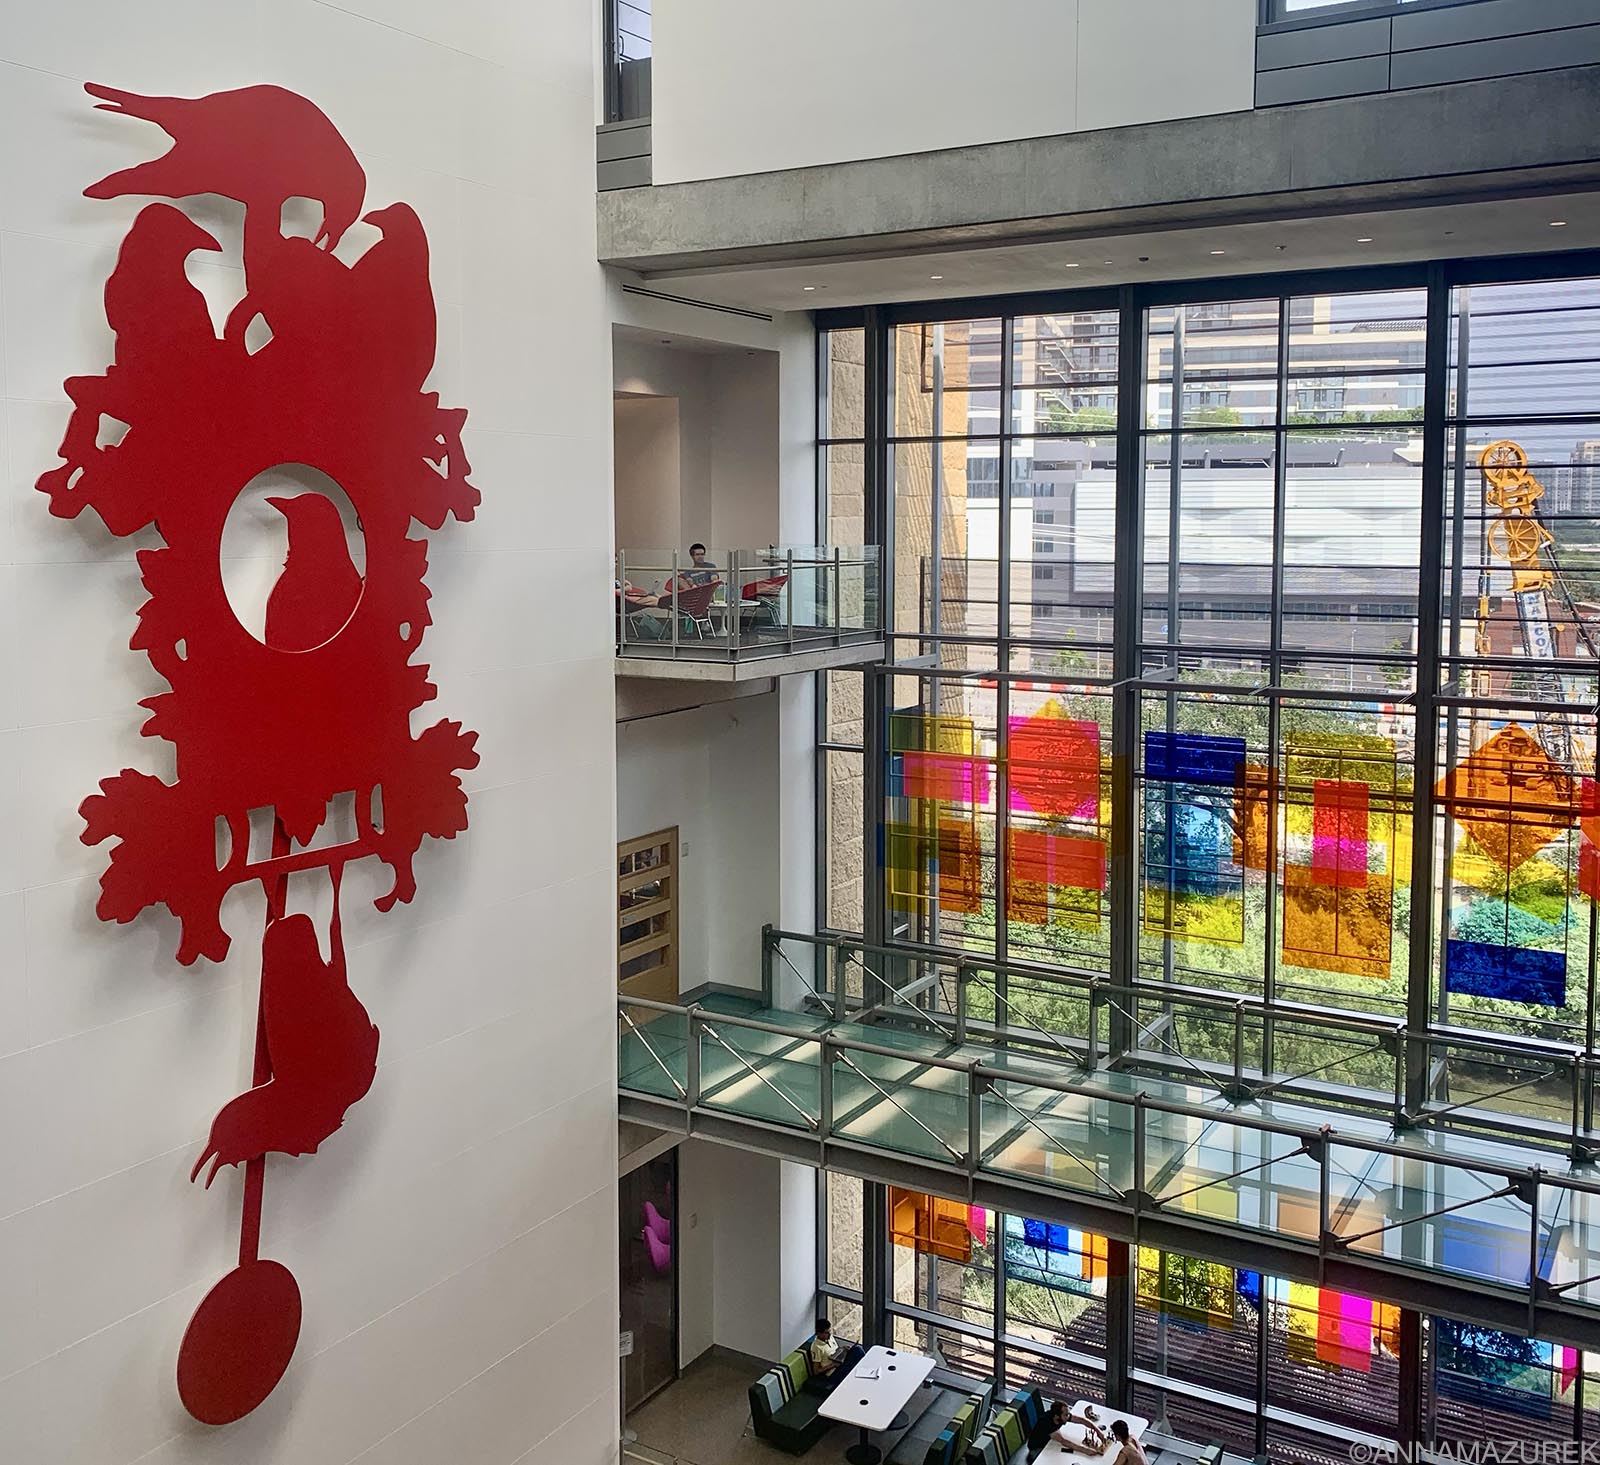 Austin’s Central Library building and grounds showcase a variety of temporary and permanent artwork, including Christian Moelle’s CAW, a red 37-foot-tall kinetic sculpture.
Location: Downtown (Seaholm) | Google Maps
Hours: Mon–Thu 9 a.m.–8 p.m.; Fri 9 a.m.–6 p.m.; Sat 10 a.m.–6 p.m.; Sun 12–6 p.m.
Austin’s new downtown Central Library is one of the coolest buildings in town! The state-of-the-art facility feels like a swanky boutique hotel combined with an upscale mall with sweeping skyline views. Highlights include the rooftop butterfly garden, second-floor art gallery with rotating exhibits and a technology petting zoo featuring the latest gadgets. There’s WIFI, free computers to check out, and “shared learning” rooms that offer video conferencing capabilities for meetings and workshops.
11. Listen to Live Music
 A night view of the Paramount Theater, a historic movie theater listed on the National Register of Historic Places.
Austin lives up to its reputation as the Live Music Capital. Start a visit to Austin at the “grandaddy” of live music venues, The Continental Club is one of the oldest in town, dating back to 1955. The Broken Spoke is another legend—a proper honky tonk that offers two-step lessons.
Mohawk has been one of my favorites since my first trip to Austin in 2007. The multi-level bar has both an indoor and outdoor stage. The Paramount Theater, a 1915 movie theater, is one of my favorite places to photograph live shows. (The Paramount is closing for an 11-month renovation starting June 2026.)
Other options include Antone’s (old school blues downtown), Hole in the Wall (campus dive bar), Donn’s Depot (dive bar in old train depot), The Parish (sweet Sixth Street spot that relocated a few blocks to East Austin), Historic Scoot Inn (Eastside outdoor venue recently bought by C3), and Elephant Room (jazz and cocktails).
12. Take Advantage of Free Museum Days
 You can’t miss the giant star outside the Bullock Museum.
Bullock Texas State History Museum
Location: Capitol | Google Maps
Hours: Bullock Texas Stat Daily 10 a.m.–5 p.m.; free first Sundays.
The Bullock Museum focuses on the history of Texas and offers free admission on the first Sunday of every month. Each floor represents a different time period in state’s history, from early European exploration to the Texas Revolution and modern culture including oil and music. If it’s your first visit to Texas, this is a great place to start your trip.
Blanton Museum of Art
Location: UT Campus | Google Maps
Hours: Tue–Sat 10 a.m.–5 p.m.; Sun 1–5 p.m.; closed Mon; free Tuesdays.
The Blanton Museum of Art, located on the UT campus, offers free admission on Tuesdays. The museum hosts a series of visiting and rotating art exhibitions sourced from its vast 21,000-piece collection. These museums are a five minute walk and can easily be visited together.
13. Tour Austin’s Art Gallery Scene
 Austin is filled with cutting-edge galleries and large public art pieces like the 10-floor high, Tau Ceti mural by Josef Kristofoletti on the corner of East Second Street and Brazos Street.
Austin’s art scene is not to be missed, from street art to top-notch galleries. Start your art tour at Canopy Austin, a former East Austin Goodwill warehouse that’s been transformed into 89 galleries, studios and offices, including ICOSA, an artist-run cooperative gallery.
My downtown favorites include McLennon Pen Co., a contemporary arts space on West Fifth Street named after founder Jill McLennon’s grandfather’s Chicago luxury pen shop, and West Chelsea Contemporary, specializing in museum-quality exhibitions. The Creek Show is one of my favorite annual outdoor public art shows—it’s located on Waller Creek and happens every fall, usually in November.
14. Hope Outdoor Gallery
 The Hope Outdoor Gallery is a place for adults ands kids to both view and create art.
Location: Airport area | Google Maps
Hours: Wednesday to Sunday 10 a.m. to 6 p.m.
Hope Outdoor Gallery is a free space for artists to create and was one of my favorite things when I first moved to Austin in 2013. The original park closed for years and was relocated to a larger eight-acre space near the airport that opened in late November 2025. The outdoor art park campus includes outdoor mural walls, a 6,000-square-foot event venue and a park space. On my first visit to the new space on Friday afternoon, the place was buzzing with adults and families creating colorful artwork with spray paint .
Thailand Travel Tips: Insurance, SIM Cards, Transport & Logistics (2026 Guide)
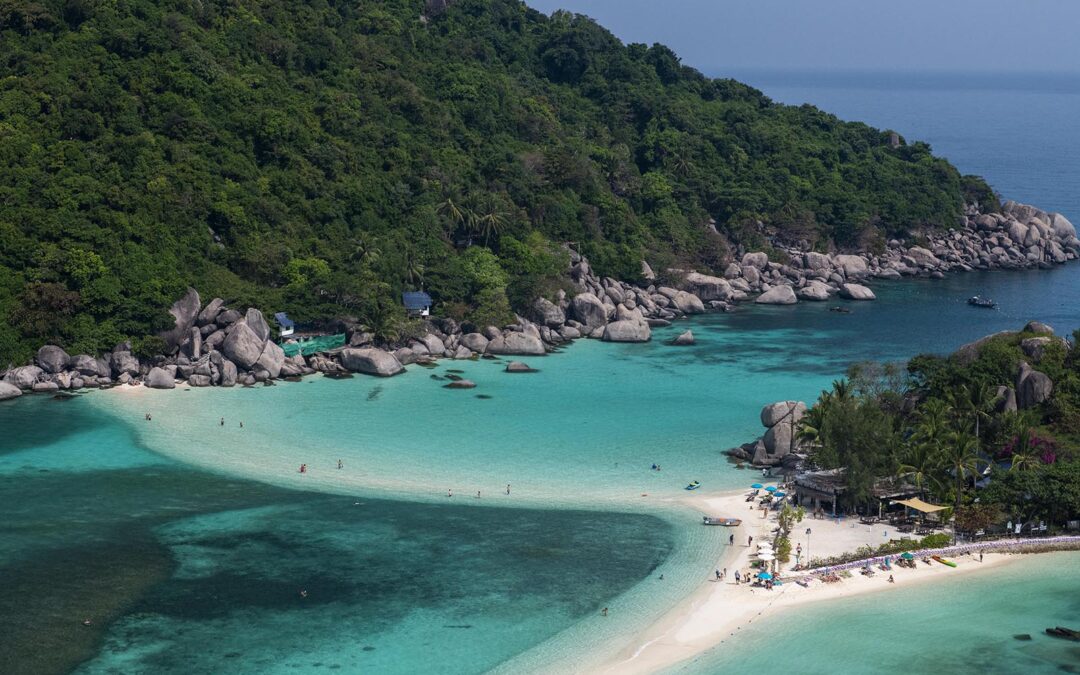
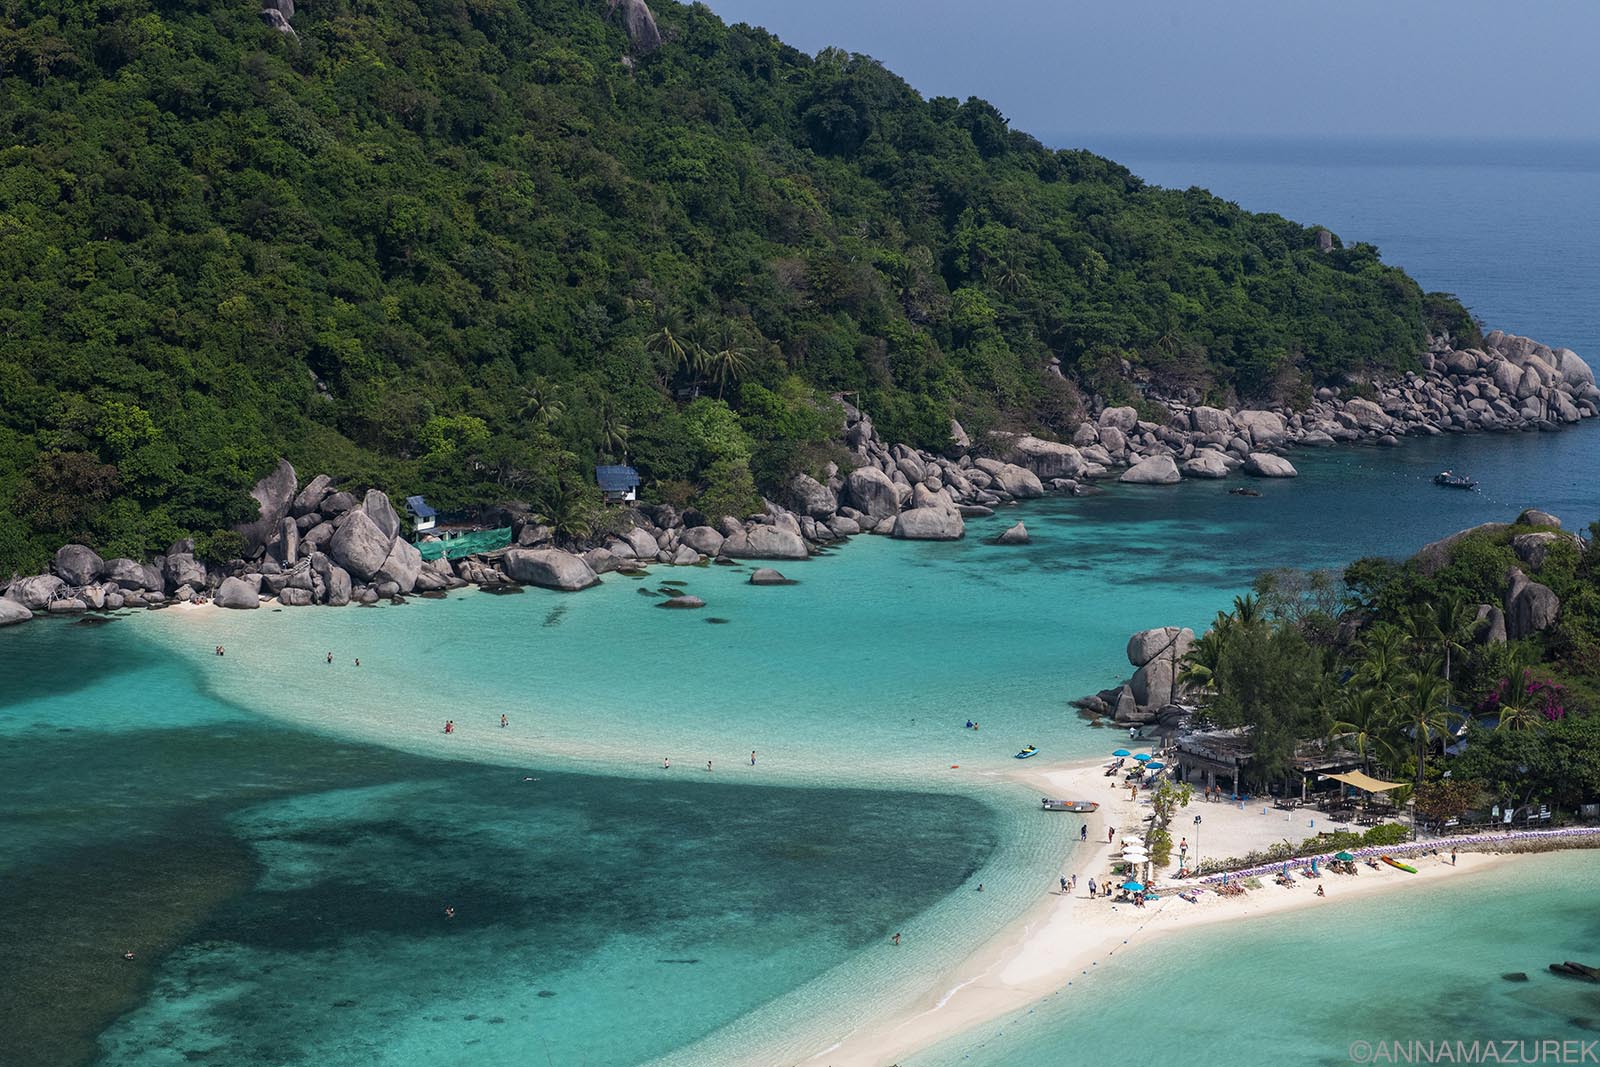 Ko Tao on Thailand’s east coast is best visited from February to April (hot, clear weather with calm seas) or May to September for good visiablity for diving with potential whale shark sightings.
Planning a trip to Thailand can feel overwhelming, especially if it’s your first time in Southeast Asia. Lucky for you, I live here every winter, so the logistics are a breeze. Below, I’ve answered the most common questions readers ask me—from money and travel medical insurance, eSIM cards and getting around—so you can spend less time worrying about logistics and more time enjoying your trip.
Need more help planning? Check out my Thailand travel guide. I’ve also made in-depth posts on the best things to do in Bangkok and Chiang Mai.
Affiliate links are used in this post. If you make a purchase, I earn a small commission at no cost to you, which goes toward the cost of maintaining this blog.
When is the Best Time to go to Thailand?
It will be hot year-round in Thailand, even in the “cool” season. The rainy season lasts from May to October, but it usually only rains a little each day. The occasional deluge can occur so keep an umbrella handy. (I honestly prefer the rainy season because it’s much greener and lusher. But, it’s been rough lately due to climate change with heavier rains.)
Avoid the burning season near Chiang Mai starting in February/March, when the air quality is the worst in the world. This lasts through April and sometimes into May.
March to May is steaming hot across the country, so avoid this time of year if possible. November through February is peak travel season when temperatures drop (low 80’s Fahrenheit in the north), and prices increase dramatically. The water festival (Songkran) in mid-April is another peak travel time so book ahead for accommodation. I personally love October and early November, when everything is still lush from rainy season. By January, it’s cooler but all the trees have lost their leaves.
What’s the best eSIM card for Thailand?
 Wat Phra That Doi Suthep, Chiang Mai
The easiest thing to do is buy a Thailand-specific eSIM card from Airalo that will work instantly when you arrive. If you are traveling to multiple countries in Southeast Asia on a short trip, try one of the convenient Asia Regional eSIMs, though a country-specific eSIMs are usually cheaper. Both types have worked well for me and support mobile hotspot, which I rely on for remote work.
For more about my experience, read my Southeast Asia Airalo review. Save 10% with code AIRALOESIM10.
If you are staying for a month or more in Thailand, go by an AIS store and buy a local SIM or eSIM card for the cheapest deal. (AIS is Thailand’s largest mobile network operator.)
Do you need travel medical insurance for Thailand?
Yes, travel medical insurance is important things for any trip abroad, including Thailand, to help cover medical emergencies and travel issues like lost luggage and delays.
I use SafetyWing’s Nomad Insurance, which offers $0 deductible travel medical insurance coverage for over 180 countries for travelers aged 69 and under outside their home country. It only costs a few dollars a day, and you can visit any hospital or doctor.
Other benefits of Nomad Insurance include coverage for lost checked luggage, travel delays over 12 hours, motor accidents (with proper license, safety gear and not intoxication) and injuries from sports or leisure activities. You can optionally add adventure sports, electronics theft and U.S. coverage (for non-residents).
If you’re abroad for 90 days, the policy includes 30 days of home-country coverage (15 days for U.S. residents.) For more about my experience in Southeast Asia, read my SafetyWing Review.
Thailand Transport Tips & Logistics
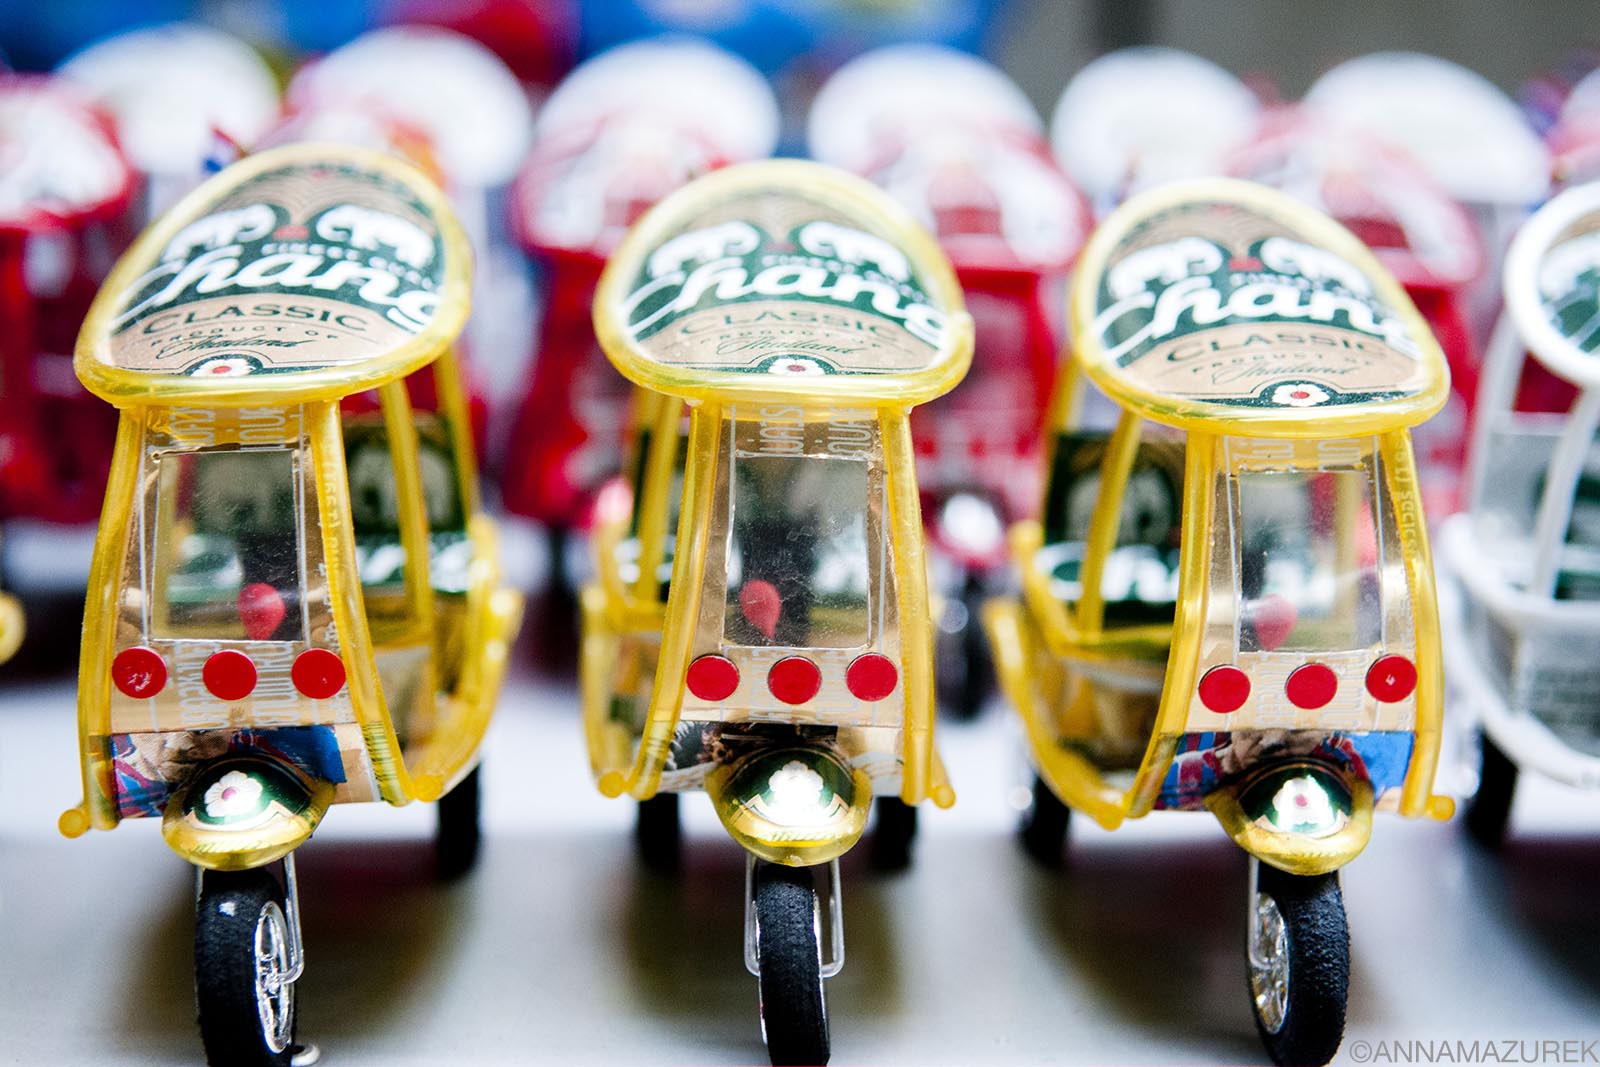 Tuk tuks made from beer cans at a market in Bangkok.
What’s the best way to get around Thailand?
Long-Distance Trains
The long-distance trains in Thailand are good but usually late by at least 30 minutes to a couple of hours. The sleeper trains are old but quite comfy and one of my favorite forms of travel. (Always get the bottom bunk – it’s bigger. Plus, the air conditioner makes the top bunk FREEZING.) Book directly at the train station or through 12go.asia. Bottom bunks can sell out so try to buy a day or two in advance.
Bus
Buses are more efficient than trains. Always take the second-class buses instead of the VIP tourist buses. It’s half the price and nicer. (The VIP buses are always blaring music all night and can be targets for people to get robbed since it’s all foreigners. I’ve heard rumors of bus staff going through bags when coming from the beaches.) The second-class buses are usually only locals, so they are safer in my opinion. They have air conditioning and bathrooms, too.
Budget Airlines
While buses are the cheapest option, budget airline like AirAsia and VietJet offer some steals to fly domestically and internationally if you don’t have a lot of luggage and want to save time. (Most budget airlines fly out of Bangkok’s Don Mueang International Airport (DMK).
I’ve flown VietJet recently and it was an overall good experience. I only had carry-on luggage. If I have a lot of luggage, I tend to fly Thai Airways because I prefer flying out Suvarnabhumi Airport (BKK) where most long-haul flights depart.
Tuk Tuks
Tuk tuks (auto rickshaw) prices are outrageous in Bangkok and Chiang Mai. Always get a taxi in Bangkok – it’s significantly cheaper to pay by taxi meter than the horrible flat rate tuk tuk prices. They can be cheaper in other parts of the country. Negotiate the price beforehand. Consider using the price in the rideshare app to help with negotiations.
Rideshares
Grab is the Uber of Southeast Asia and the most reliable of the rideshare apps. You can even schedule pickups in advance, which is great for airport runs. There are other apps as well like Maxim that are slightly cheaper but a bit more glitchy. Bolt also works, but it’s not as reliable.
Can you use credit cards in Thailand?
 Bring cash for street vendors and markets in Thailand.
Credit cards are accepted in most major cities but it’s still a very cash dependent society. You’ll always need cash on hand. For credit cards, some places will charge a 3% fee or set a minimum transaction limit (300 THB/$9 USD), which is much higher than the average meal cost. Most places allow you to pay with a QR code but you need a local bank account for that.
If you are brining cash to exchange, rates are always better in towns than at the airport. All ATMs in Thailand are now charging ATM fees for withdrawals. To avoid these fees, be sure to open a fee-free travel bank account before your trip, which will save you a significant amount of money. For more details, check out my post on Travel Banking 101.
What should I wear in Thailand?
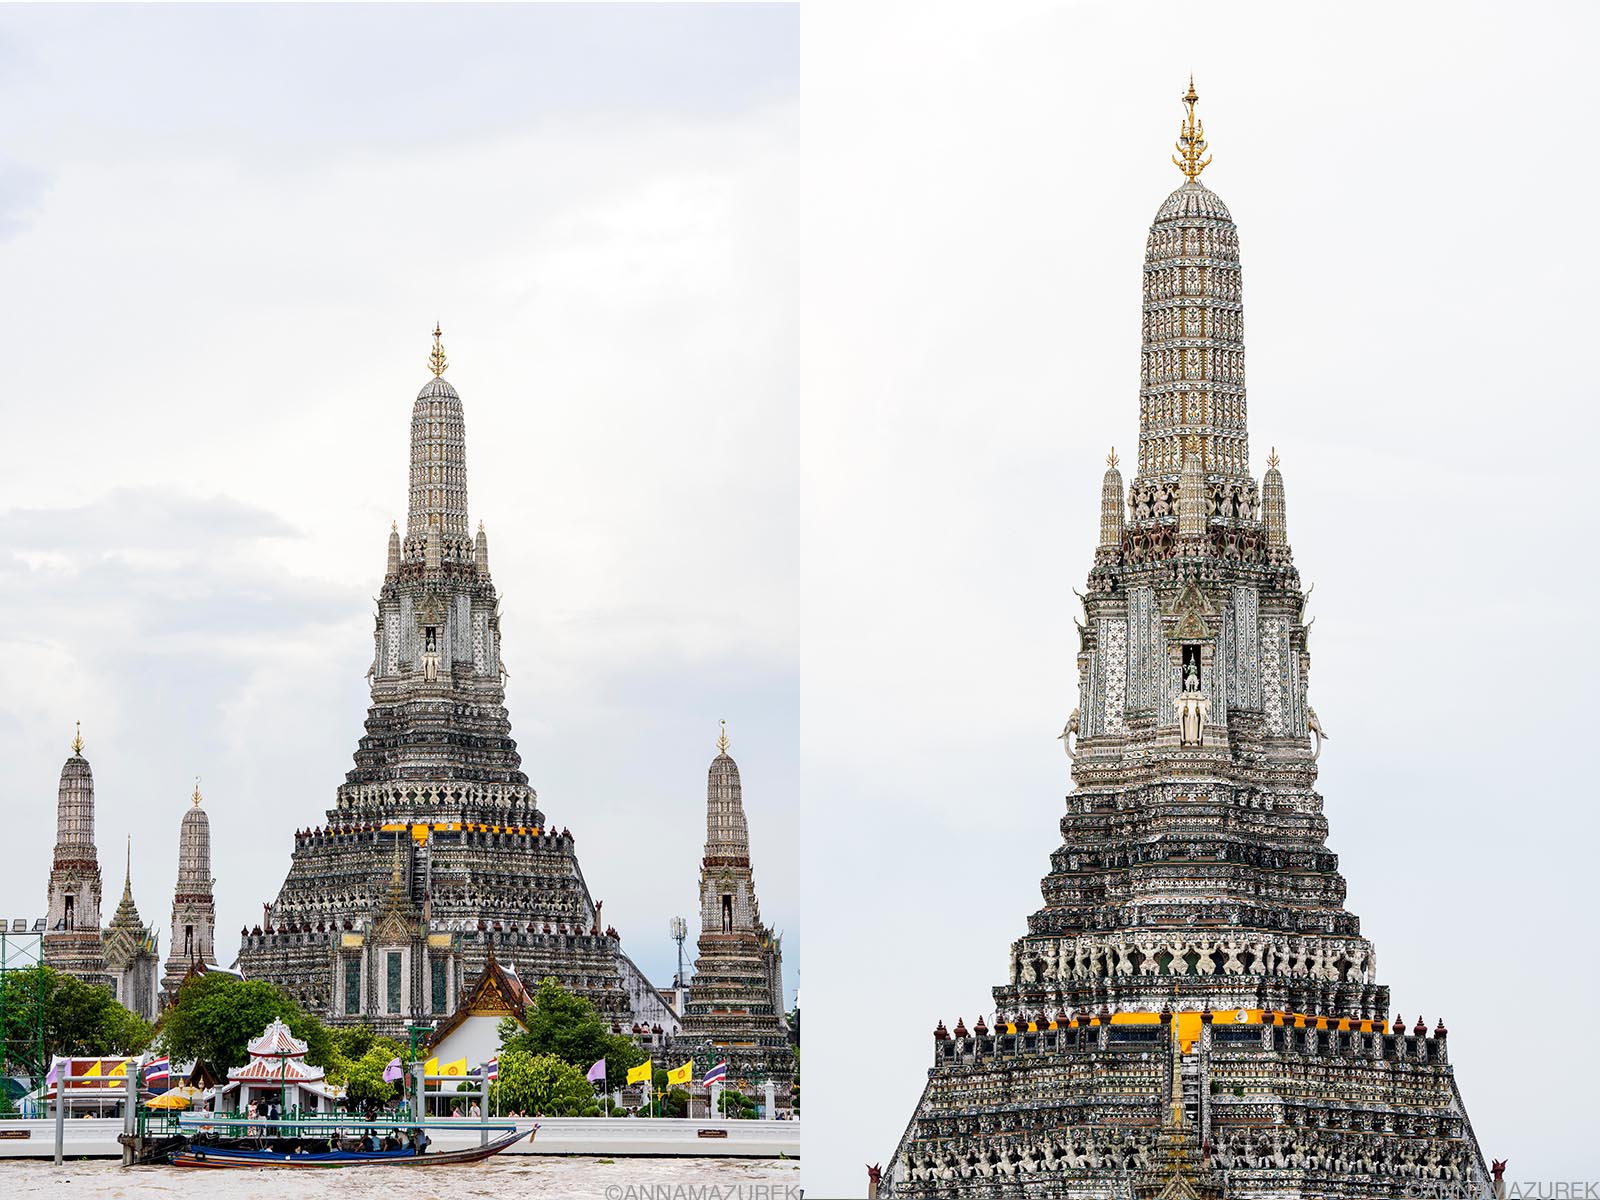 Bangkok’s Wat Arun is best photographed from across the river.
Thailand is very conservative, so be sure to cover your knees and shoulders in temples! Many temples in Bangkok even require long pants and long sleeves, and they will require you to rent clothing if you are not dressed appropriately. Be respectful at all times. Normal shorts are okay in Bangkok and Chiang Mai. Anything goes along the beaches in Southern Thailand.
An Easy Guide to Getting American Airlines Elite Status—And How to Optimize it Once You Do
 A work trip to Egypt in January helped me earn American Airlines AAdvantage Platinum status thanks to a stopover in Dubai and flying oneworld alliance airlines.
This post was originally published in April 2024 and updated in March 2026 to reflect how I earned status in 2025 and recent changes to the program.
In 2024, I achieved American Airlines Platinum status, my first elite status on any airline. For the past two years, I’ve hacked the system to reach Platinum Pro status. How did I do it? (Hint: Hotels are the secret!) Is it worth the effort? Until June 2025, I would have set yes for these reasons. After the June 12, 2025 update removing the popular mileage upgrade award chart, I have to say that I don’t really see the value for Platinum Pro over Platinum, which I dig into in this post. Upgrades on international flights are no longer an attainable perk for most AA elite status members because of the skyrocketing costs.
Here’s my guide to American Airlines Elite Status, including pie charts with a breakdown of how I earned status!
Affiliate links are used in this post. If you make a purchase, I earn a small commission at no cost to you, which goes toward the cost of maintaining this blog.
In this Article
How I Got American Airlines Platinum Pro Status (2026)
How I Got American Airlines Platinum Pro Status (2025)
How I used Hotels to get American Airlines Status
Is American Airlines Platinum worth the effort?
American Airlines Frequent Flyer Mile FAQ
Why American Airlines’ Instant Upgrade System is Terrible
American Airlines Status Levels
There are four American Airlines status levels: Gold (40,000 loyalty points), Platinum (75,000 loyalty points), Platinum Pro (125,000 loyalty points) and Executive Platinum (200,000). Status levels are calculated annually from March 1 to February 28. (For example, I hit Platinum Pro again in December 2025 and my status is valid until March 31, 2027.)
How are American Airlines Loyalty Points Calculated
My loyalty has always been with American Airlines because I’ve always lived near one of their hub cities. In 2022, the airline revamped its loyalty program to focus solely on a loyalty point system for achieving elite status. For each qualifying mile you earn, you also earn one loyalty point from flying on American, oneworld airline partners and Jet Blue. In addition, you can earn loyalty points for using their branded credit cards, shopping on their portal sites (SimplyMiles, AAdvantage eShopping, AAdvantage Dining, American Airlines Vacations) or through other partners. The more money you spend, the easier it is to earn elite status. It’s no longer about how much or far you fly—it’s all about money.
Loyalty points for flights are calculated using the base fare before taxes. You’ll earn a loyalty point for every dollar spent. You earn a significant mileage bonus for every dollar spent based on your status:
AAdvantage member: 5 miles per dollar
AAdvantage Gold: 7 miles per dollar
AAdvantage Platinum: 8 miles per dollar
AAdvantage Platinum Pro: 9 miles per dollar
AAdvantage Executive Platinum: 11 miles per dollar
Example: If the base fare for a flight is $500, that equals 4,000 loyalty points for that flight with the 8-mile multiplier for platinum status.
How I got American Airlines Platinum Pro Status (2026)
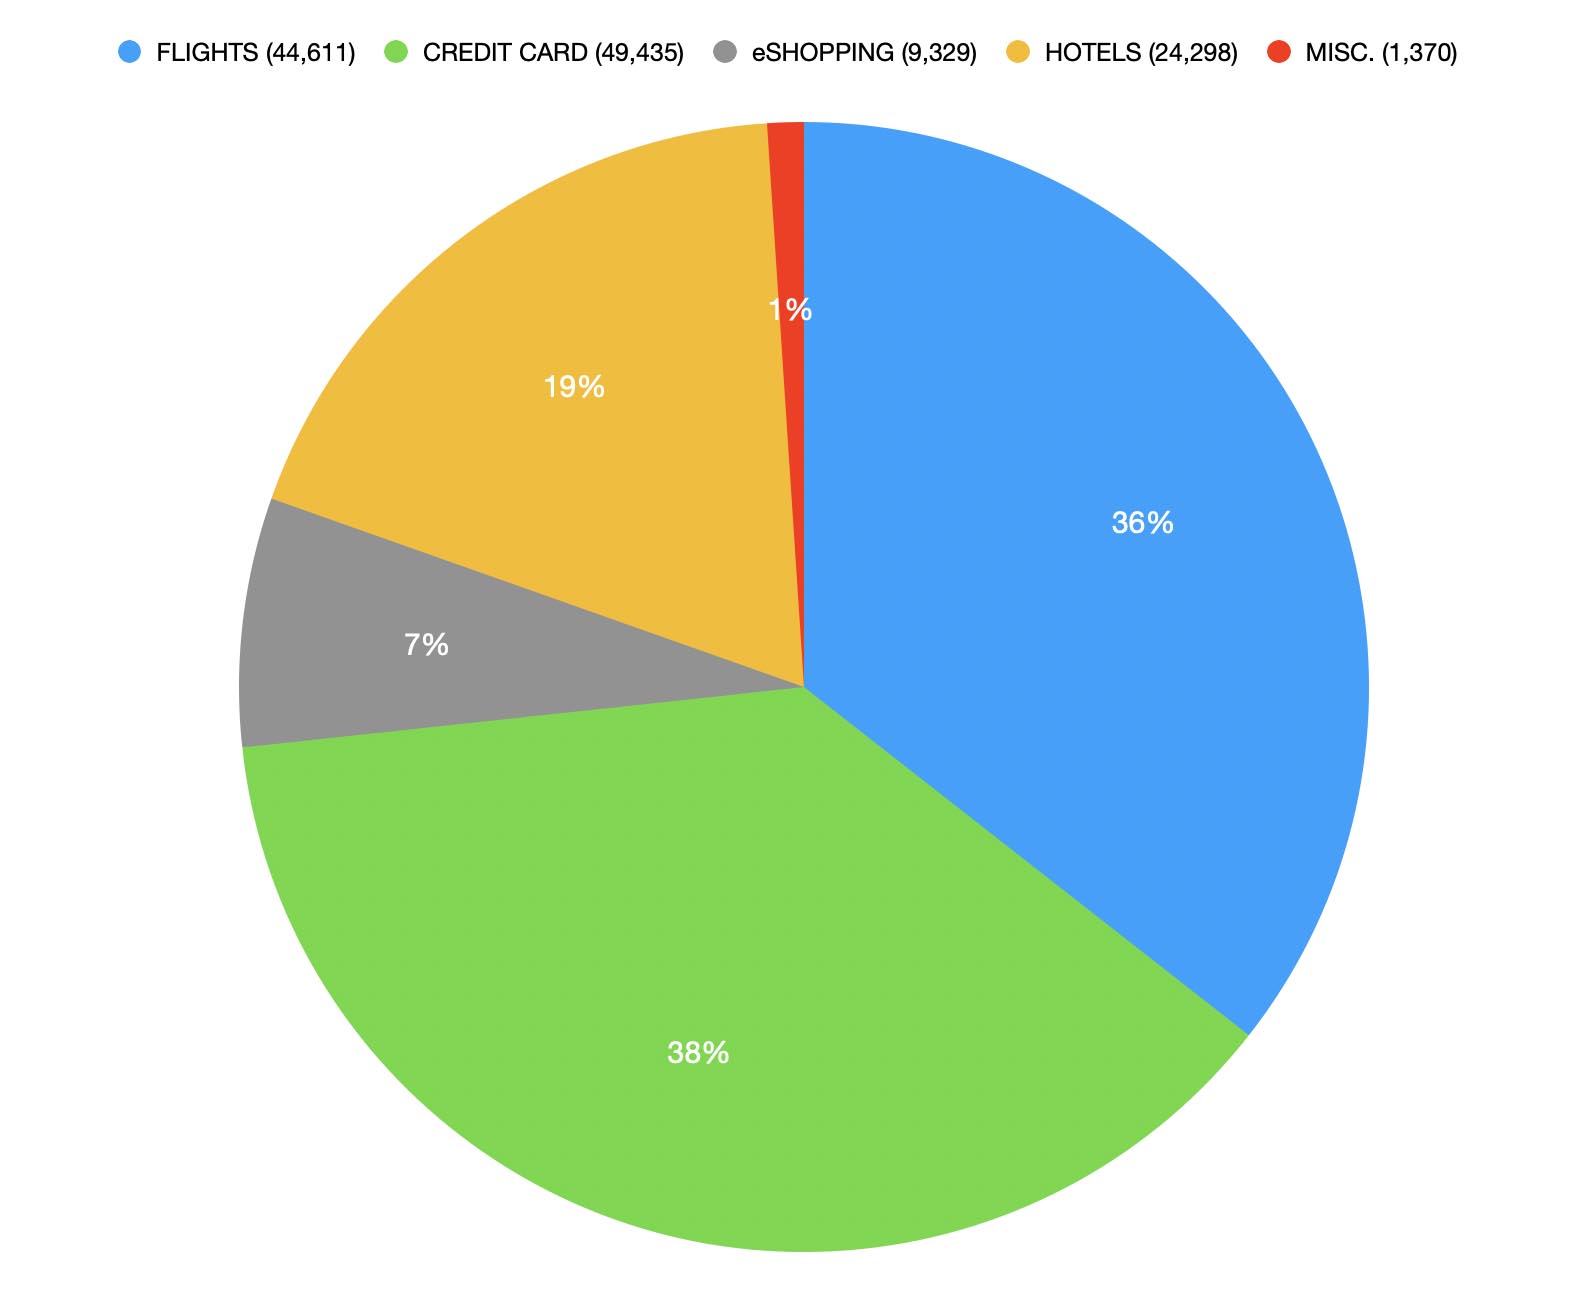
To achieve American Airlines Platinum Pro status in 2025, I earned 131,043 loyalty points from the following: Flights (36%; 46,611), Credit Card Spending (38%; 49,435), Hotels (19%; 24,298), eShopping ( 7%; 9,329) and miscellaneous (1%; 1,370 from rental cards, Simply Miles and the 1,000 point loyalty bonus once you reach 15,000 points.)
It took a calculated combination of efforts to earn status because I’m a pretty frugal person who doesn’t spend a lot of money and usually saves half of my income. This makes it extremely difficult to earn elite airline status since it’s all about how much money you spend.
Full Disclosure: One of my freelance jobs is teaching photography for a luxury travel company, so most of my flights are paid for by my job. This alone is the only reason I’m currently able to earn status because I wouldn’t be flying as much without this job. I try to strategize the best I can to stay loyal to American Airlines or oneworld airlines when convenient. Since traveling is exhausting, I’ll always fly a non-oneworld airline if they have a direct flight versus having to connect or even worse, overnight somewhere just to stay loyal.
A few notes:
-
I flew 12 American Airlines and oneworld alliance flights for a total of 46,611 points. Since one of my freelance jobs pays for my flights, I only got loyalty points for flying, not for purchasing them.
- My credit card spending was higher than normal because I spent two months traveling in Africa with friends. I booked and paid for most of our accommodation on my AA card.
-
Once I hit the 15,000-point level, American Airlines let me choose a reward, and I selected the bonus of 1,000 loyalty points.
-
After hitting the 60,000 level, you can earn a 20% loyalty point bonus reward, which includes AAdvantage Hotel bookings. After achieving 100,000 loyalty points, it increased to 30%, which was instrumental in helping me get status. (In 2026, this changed to only a 25% bonus when you hit the 60,000 level.)
How I got American Airlines Platinum Pro Status (2025)
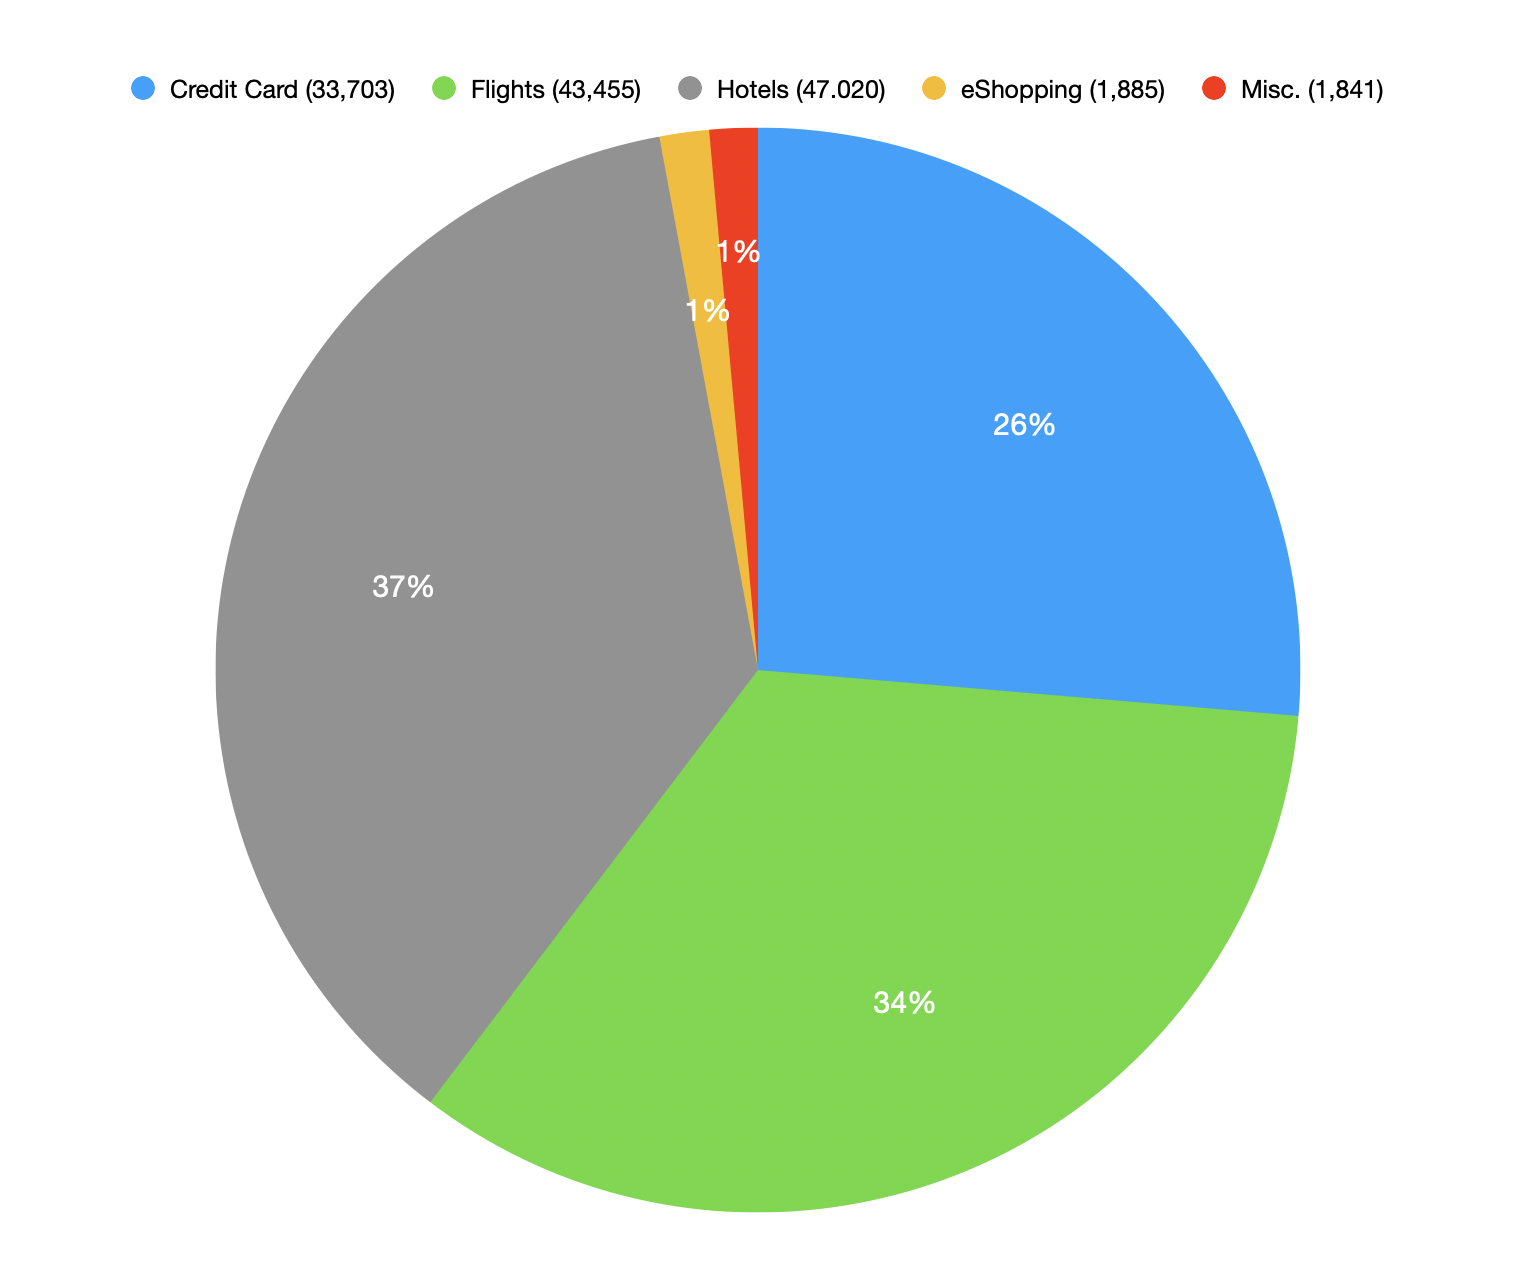 To earn American Airlines Platinum Pro status, I earned 127, 096 through the following: credit card spending (26%; 33,703 points ); flights (34%; 43,455 points); hotels booked through AAdvantage Hotels (37%; 47,020 points); eShopping through the American Airlines portal (1%; 1,885 points) and miscellaneous (1%;1,841 points from a rental car, dining and the 1,000 point loyalty bonus once you reach 15,000 points.)
A few notes:
- I flew 10 American Airline and oneworld alliance flights for a total of 38,832 points. Since one of my freelance jobs pays for my flights, I only got loyalty points for flying, not for purchasing them.
- My credit card spending was higher than normal because I dropped $10,000 on new camera system (switched from Nikon to Sony). Roughly, 10% of my credit card spending was reimbursable from work expenses.
- Once I hit the 15,000 point level, American Airlines lets you choose a bonus of 1,000 loyalty points, which helped.
- After hitting the 60,000 level, you can earn a 20% loyalty point bonus rewards, which includes AAdvantage Hotel bookings. After achieving 100,000 loyalty points, it increased to 30%, which was instrumental in helping me get status.
How I used Hotels to get American Airlines Status
 Three nights at the Chatrium Grand Bangkok worth nearly 10,000 loyatly points each helped me achieve American Airlines Platinum Pro status.
The secret for me was booking hotels through AAdvantage Hotels after I was eligible for the loyalty point bonuses. (Again, there’s a 25% bonus at 60,000 points as of 2026.) Keep in mind booking through AAdvantage Hotels is always more expensive than booking directly—at least 20% by my calculations but sometimes more. You are always paying more for the points.
Here’s how I did in 2024 and 2025:
Once I achieved Platinum status (75,000 loyalty points) in late August 2024, I needed 47,000 points to reach Platinum Pro, which seemed unrealistic because I wasn’t going to be flying any oneworld airlines again until March. There was no way I’d spend nearly that much on my credit card over the next six months. (I was in Southeast Asia where things are often cash-based.)
By November, I needed 42,000 points for Platinum Pro and decided to try to hack the system with hotels for some January trips. I booked four hotel nights for $1,431.25 totaling 39,660 points. To earn the same amount of loyalty points from flights, I would have had to spend $4,957 on airfare (base fare, excluding taxes). By booking the hotels, it was essentially a 72% discount on money spent!
I found an amazing 5-star hotel in Bangkok (Chatrium Grand Bangkok) that I booked three individual nights back-to-back to get roughly 9,300 to 10,000 points each night. (The rewards are higher for individual nights than multi-night stays booked together.) I emailed the hotel in advance to ensure I had the same room the entire time and “checked in/out” daily. It was roughly $400/night, which is more than I’ve ever spent on a hotel. Don’t get me wrong it was a stunning hotel, but I could have gotten it at least $100 cheaper on Booking.com. The loyalty points for each stay posted individually less than a week later.
In late 2025, I needed roughly 25,000 points to hit Platinum Pro, so I booked the same Bangkok hotel for three nights. It was $364/night roughly and 6,700 points per night (8,710 because the 30% bonus was still in effect). It was cheaper than last year (and the rate included breakfast) but less points per night. I booked three individual nights again because the points value was higher. And, it worked to get me to Platinum Pro!
I booked another hotel in Hanoi for $167/night for 4,300 points. (I booked a second night at the same hotel fairly last minute for a discounted $66 on Booking.com.) I only chose these hotels because they had the highest loyalty point value and good reviews. These were trips I was taking anyway and not every city I was visiting had great deals like this. To be honest, I was really concerned this wouldn’t work, and I’d wasted my money, so I was grateful it paid off.
Benefits of American Airlines’ Platinum Status
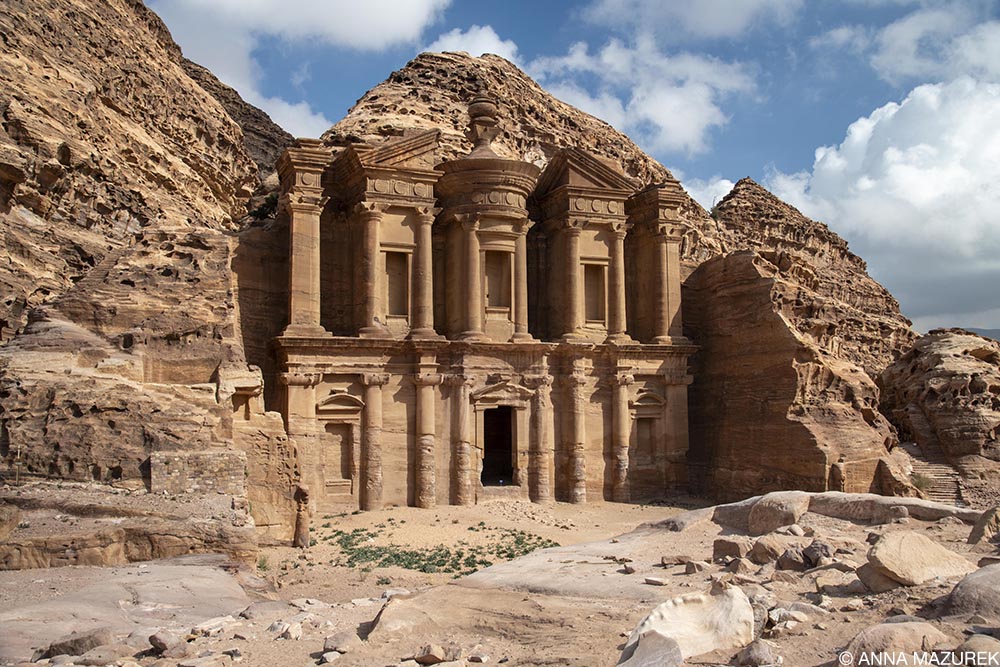 Flying Royal Jordanian, a oneworld airline, to Jordan for work also helped me earn status on American Airlines, and my status got me access to their lounge in the Amman Airport, which is also a Priority Pass lounge. While in Jordan, I hiked to the monastery in Petra, which is best photographed in the afternoon.
Upgrades: The popular mileage award chart for upgrades was discontinued on June 12, 2025. While unlimited domestic upgrades are still a benefit for all status tiers, American Airlines no longer offers the option to upgrade on international flights to business class for 25,000 miles + $350 fee for those with status. (This was the main benefit of status for me and makes it not worth the effort for me anymore to be Platinum Pro. Due to the benefits below, I still think Platinum is worth the effort.)
Main Cabin Extra: After booking, you have access to extra-leg room seats (these are up to a $100 value). I would never pay for these, but this is a huge help for long-haul flights where I can’t get the upgrade.
60% Status Mileage Bonus: For every dollar spent on flights, you earn a 60% bonus on flights that helps you earn status faster.
Two Free Checked Bags + Priority Handling: This is nice, but I never check two bags. The priority handling is great when I have Global Entry and don’t want to wait ages for all the bags to come.
Priority Lanes for Check-in Security and Boarding: My biggest pet peeve with flying now is having to fight to carry on my camera gear, which I don’t want to check for fear of theft or damage. Priority boarding resolves this easily. You get group 2 with platinum pro, group 3 with platinum, group 4 with gold and group 5 if you have an American Airlines credit card. Group 5 has been fine for me with my luggage previously, so this isn’t as much of a game changer as other things.
Priority boarding has been a lifesaver with oneworld airline flights—that’s huge for me because British Airways was recently trying to make me check my carry-on bag with my camera gear. Priority boarding saved me last summer. The priority boarding with gold status was enough to make a difference.
Oneworld Sapphire Status: Lounge access is one of the top three benefits for me because I literally hate being in airports and love anything that makes it more tolerable. You only get access to lounges when flying oneworld airlines. If you’re flying internationally, you can get into business class lounges. For American Airlines, this means I get Admirals Club access, which is a game-changer—free champagne, delicious food and showers. It’s a nice space to work as well.
Other benefits include same-day priority standby and a designated travel planning desk.
Benefits of American Airlines Platinum Pro
It includes all of the benefits of Platinum listed above with some added perks. The two biggest are an 80% mile bonus on every dollar spent on flights and oneworld Emerald Status, which means access to fancier lounges and priority boarding on oneworld flights. In addition, you get three free checked bags with priority handling. You also get to priority check-in and boarding on all oneworld airlines.
American Airlines Frequent Flyer Mile FAQ
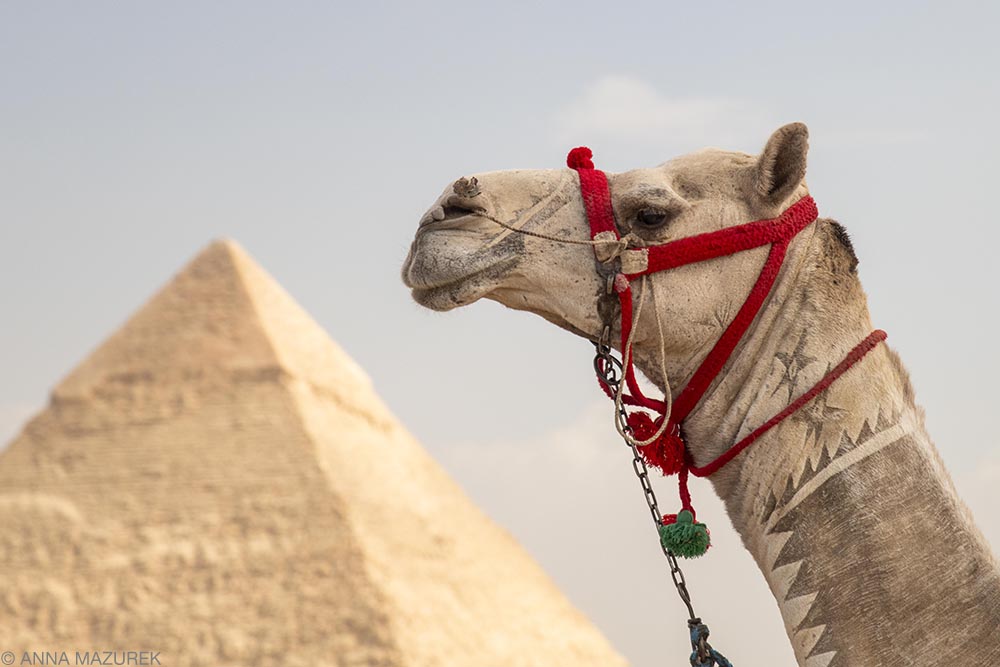
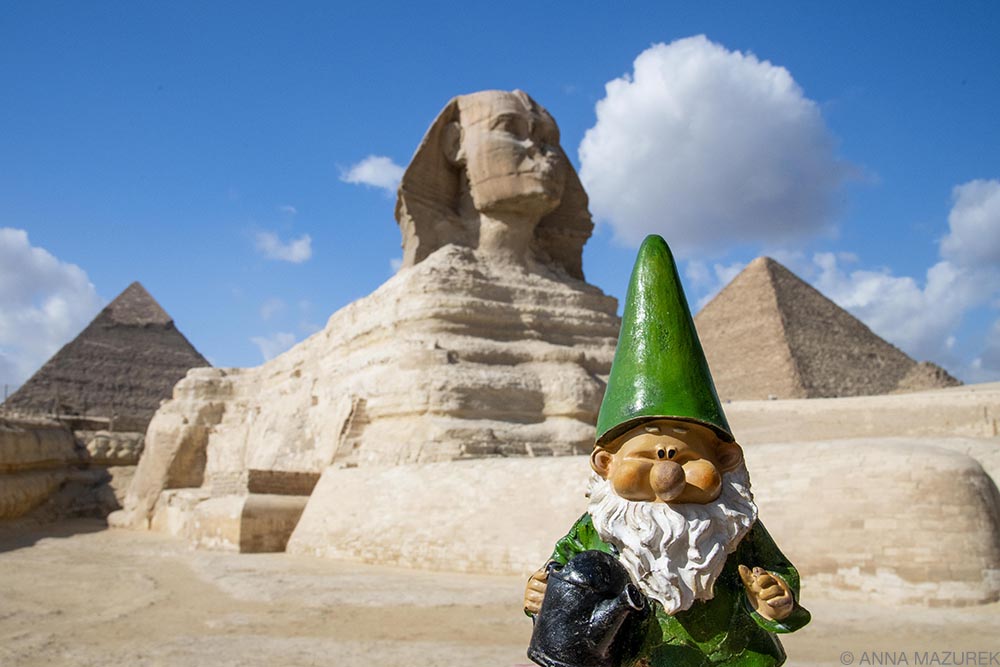 Alfred the Gnome at the Sphnix in Egypt. We had a private tour of the Sphnix and were able to get closer than you can with general admission tickets.
How does American Airlines Gold status compare to Platinum?
Gold status offers priority upgrades on domestic flights (very difficult), but no free main cabin extra and only one free checked bag. The mileage bonus is slightly less, and you only get oneworld Sapphire status, which gives you priority boarding but no lounge access.
Gold status was worth it for me in 2023 for the priority boarding on other oneworld airlines, which prevented me from having to check my camera gear. It also allowed me to upgrade to business class on a 15-hour flight from LAX to Sydney, but that benefit was discontinued in August 2025.)
Is American Airlines Platinum worth the effort?
If it’s convenient for you to fly American Airlines or another oneworld alliance airline regularly, then yes, it can be worth the effort.
The most valuable benefits of Platinum are the free main cabin extra seats, priority boarding (especially on partner airlines) and lounge access. Platinum Pro provides access to first-class lounges, which are often less crowded. [Check free main cabin extra bookable at booking for platinum]
For me, American Airlines Platinum status has definitely been worth it but ONLY because I organized most of my flights with American Airlines and oneworld airlines. First of all, it gave me access to Fast Track security in London Heathrow with British Airways, which is similar to TSA PreCheck. This was a game changer because I was through security in minutes without having to take out all my electronics.
I got access to the Cathy Pacific Lounge, which is the best lounge in Heathrow Terminal 3, with my oneworld emerald status. The spacious and quiet lounge had a NOODLE BAR and free-flowing champagne. I boarded the plane a happy girl with a belly full of bao and pho. Literally, it was the best airport lounge I’ve ever visited.
The priority boarding and seating meant that I didn’t have to check my carry-on bags on British Airways flights. I was able to choose main cabin extra seats with extra legroom for free. (You can’t upgrade with miles on British Airways flights, which is a bit of a bummer.)
In July 2024, I was trying to fly from Austin to Charlotte but was hit by multiple delays (10 hours of sitting in the Austin airport!). I ended up switching flights in the app and was upgraded for free to first class for the flight! This was the first time I’ve ever been upgraded domestically, which seems like a bit of a fluke related to the delays and switching flights. Two weeks later, I got upgraded again on a domestic flight from CLT to SFO.
These are the only two domestic upgrades I’ve ever received on domestic flights in three years of chasing status. Since then, I’ve always been very far back on the list. I don’t see this as a valuable benefit to
Then, I was approved for an upgrade on an 11-hour LAX to Tokyo flight to business class, which is paid ($350 plus 25,000 miles). (As mentioned above, this benefit was discontinued in Summer 2025.)
My connecting flight to Bangkok was on Japan Airlines, another oneworld airline, so I got priority boarding AND Fast Track security, a total game changer. (I’ve add issues with Japan Airlines being stern about the weight of my carry-on luggage. I was really concerned about this in Tokyo, but they didn’t weight my bags at all.)
I had two rough and long weather-related delays so my status really helped make the flights more manageable thanks to the Cathy Pacific lounge at Narita Airport in Tokyo. It was a quiet reprieve to get some work done, shower, eat and drink a glass of champagne.
Why American Airlines’ Instant Upgrade System is Terrible
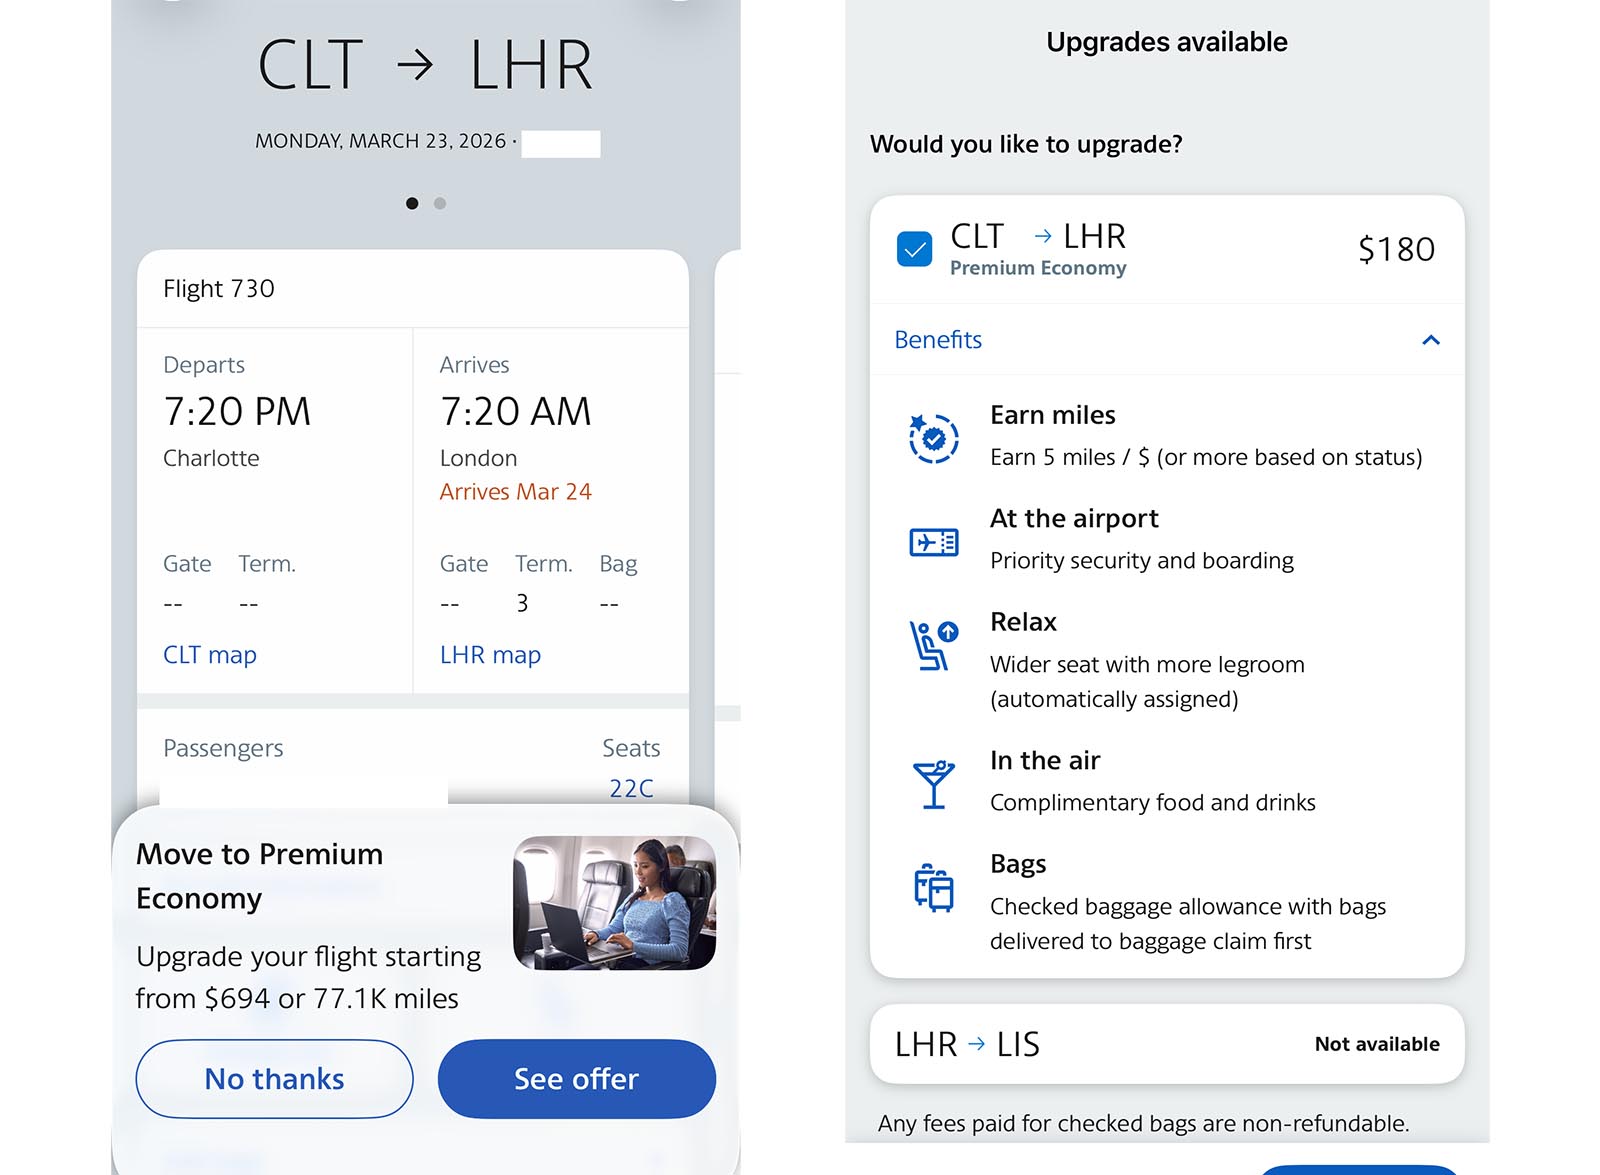
The screenshot on the left shows the ridiculous upgrade cost for premium economy in advance on a flight from CLT to LHR, while the right image shows what I was offered at checkin for a middle seat.
American Airlines new upgrade system is outrageous. In August 2025, the airline nixed the consumer-friendly mileage upgrade award chart and instituted a new one called Instant Upgrades with the option to upgrade for cash or miles. Dynamic pricing is used to determine cost.
To upgrade an economy ticket from LAX to Tokyo, it was 450,000 miles compared to roughly 350,000 miles to buy the business ticket directly! For domestic upgrades, it was offering $726 or 67.5K miles from LAX to CLT. From CLT to AUS (3-hour flight), it offered the option of $471 or 48.7K miles to upgrade. Both of these are ridiculous because I’m already on the waitlist due to my status. (I haven’t gotten a domestic upgrade in ages.)
On a recent flight from CLT to London Heathrow, it offered me to upgrade to premium economy for $674 or 77.1K miles. When I checked in for the flight, it offered me the same upgrade for $180 but with the caveat that seats were automatically assigned. Being savvy, I searched for the same flight as if I was buying a ticket to check the open seats—only middle seats. It wasn’t worth the value to me since I already had an aisle bulkhead seat just a few rows back. It’s very interesting that American is now offering upgrades like this at check-in.
The new upgrade policy is a terrible deal for American Airlines flights, especially compared to the old system. (Most airlines have outrageous pricing on their own award flights, so this is the industry standard.) But, American still offers some excellent deals for tickets booked with miles on partner airlines.
American Airlines Credit Card Versus
Chase Sapphire Reserve
Starting in April 2026, all American Airlines credit cards are switching to Citibank. Many of the old Barclay’s cards transitioned directly to CITI, except for mine. I had to apply for a new card, which was a literal nightmare. Instead of going with the lateral $99/annual card, I decided to try the Executive World Elite that is $595 and includes Admirals club access. The laborious process took a month—Global Entry is easier to get—because they had to snail mail a code to my address then, snail mail an IRS form to fill out.
My goal this year is to test this new card and the Chase Sapphire Reserve. I will downgrade one of the cards next year to a free version. Currently, I use my American Airlines card for all spending until I hit the status level I want, then I only use my Chase card. I primarily use the Chase points to book hotels. Now that the Chase annual fee has skyrocketed to $795, I find it less useful because most of the benefits are useless to me because I’m abroad most of the year. Priority Pass is the main reason I’m keeping it now but I do find that these lounges are degrading in quality.
Even if your loyalty is with another airline, they will have very similar benefits and ways to earn miles/status. I hope you find this helpful.
15 Things to do in Ho Chi Minh City (Saigon) that are Actually Worth Your Time
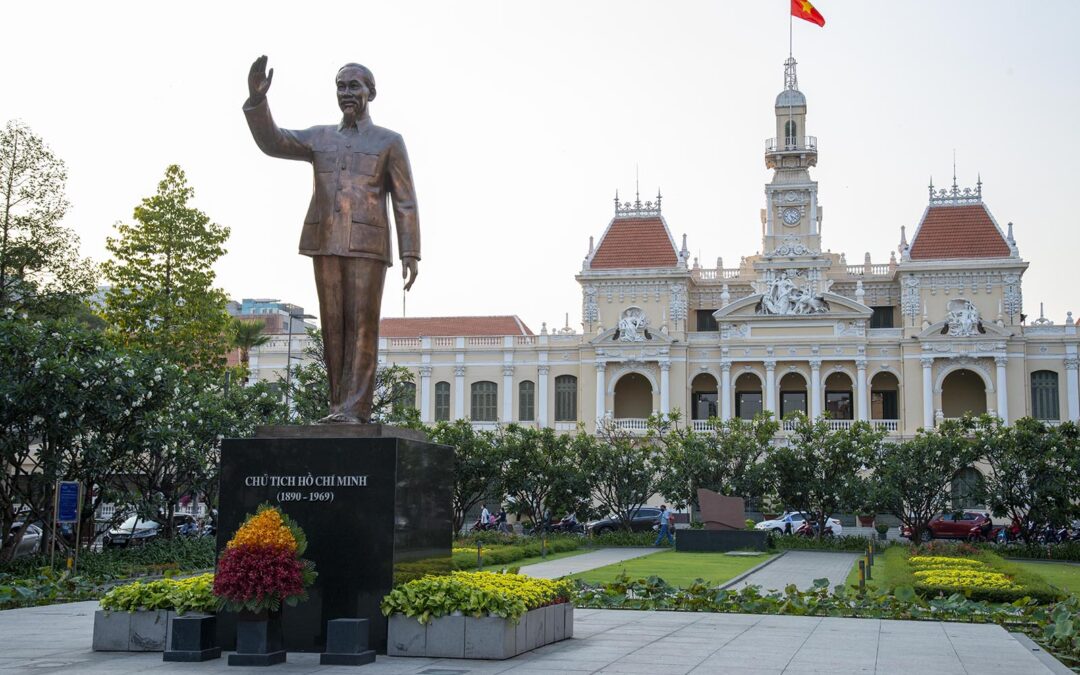
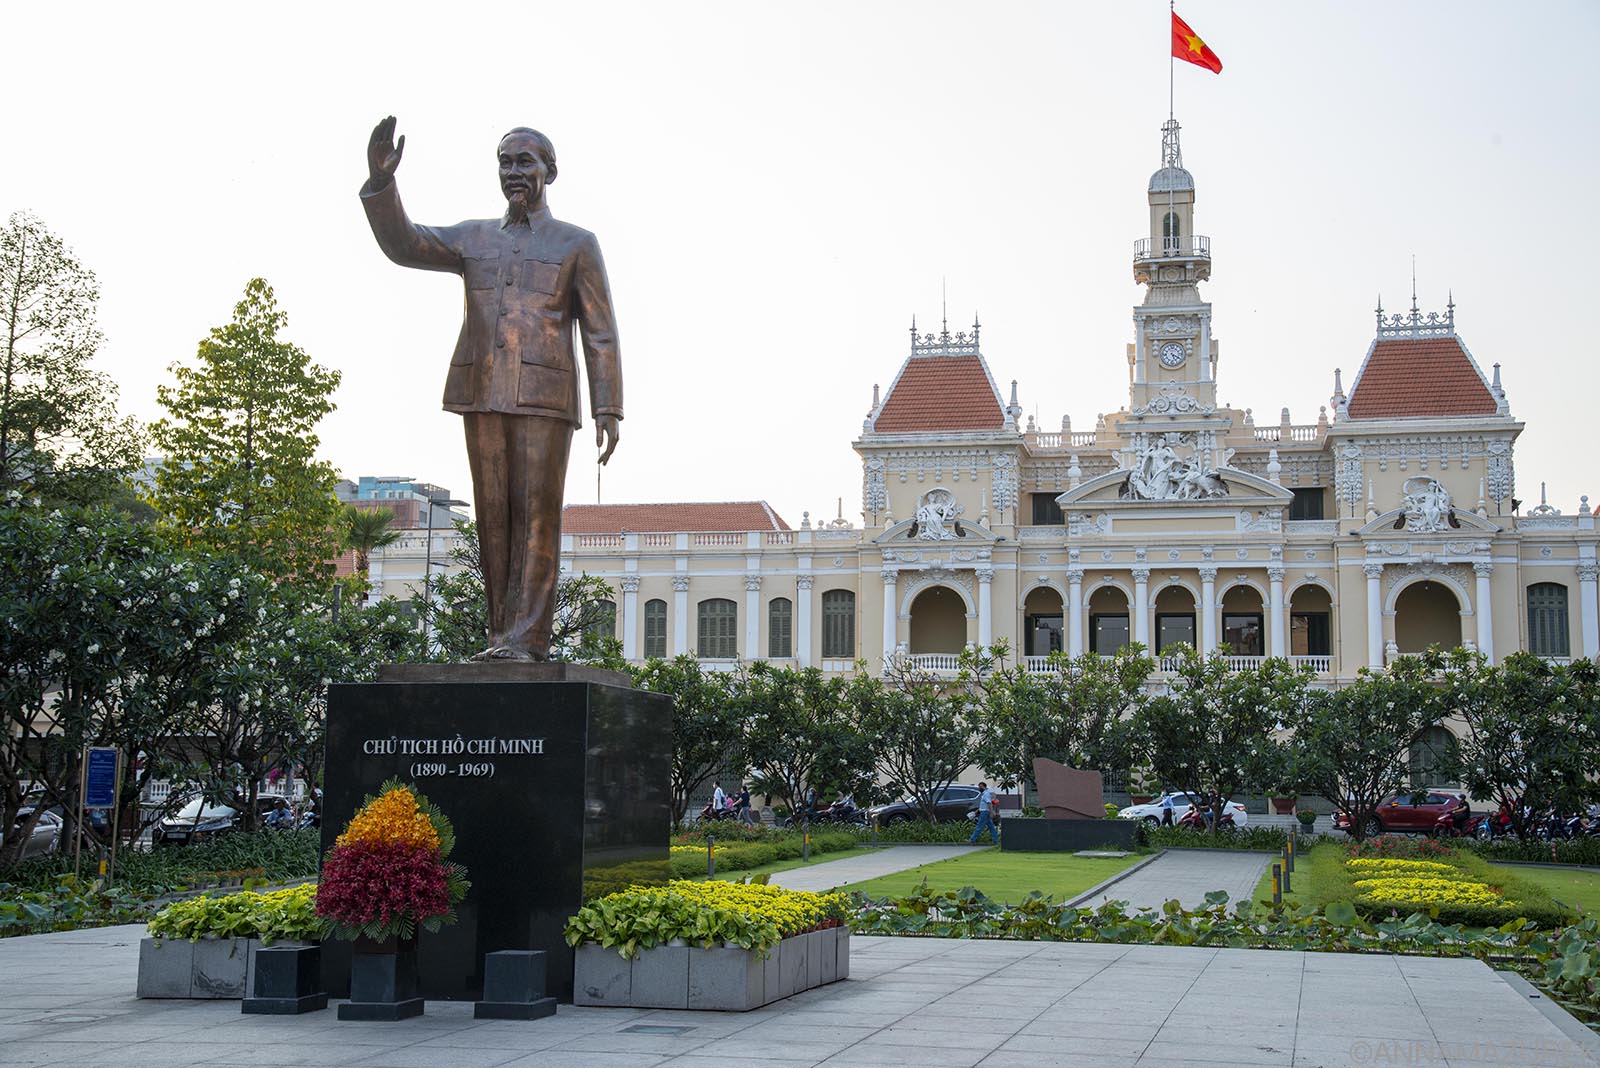 A statue of Ho Chi Minh sits outside the People’s Committee of Ho Chi Minh City building on Nguyen Hue Walking Street.
Ho Chi Minh City (Saigon) is the sleek modern paradox to Hanoi’s ancient streets. With a population of eight million, the city is flooded with motorbike traffic—crossing the street isn’t for the faint of heart—and towering skyscrapers. While most of the main sights in the city center are war-related, Saigon has an unmistakable vibe that will make it hard to leave and some of the best craft beer in Asia.
These recommendations are based on my experience living and working for travel companies in Southeast Asia for the past decade. (I visit Vietnam multiple times a year for work.) Ho Chi Minh City, known as HCMC, has a vibrant energy that I love. I enjoy spending a few days here simply eating and hitting up the breweries.
Here are the best things to do in Ho Chi Minh (Saigon), along with the best time to visit and where to stay!
You can easily do all these things on your own, but if you’re short on time, consider a city tour.
Affiliate links are used in this post. If you make a purchase, I earn a small commission at no cost to you, which goes toward the cost of maintaining this blog.
Plan Your Trip
Currency: Vietnamese Dong (VND)
When to Go: November to April for dry weather.
Travel Insurance: Protect yourself with SafetyWing travel medical insurance to cover accidents and travel delays.
Mobile eSIM Card: Get seamless connectivity worldwide with Airalo minus the hassle of physical SIM card.
1. Bitexco Financial Tower
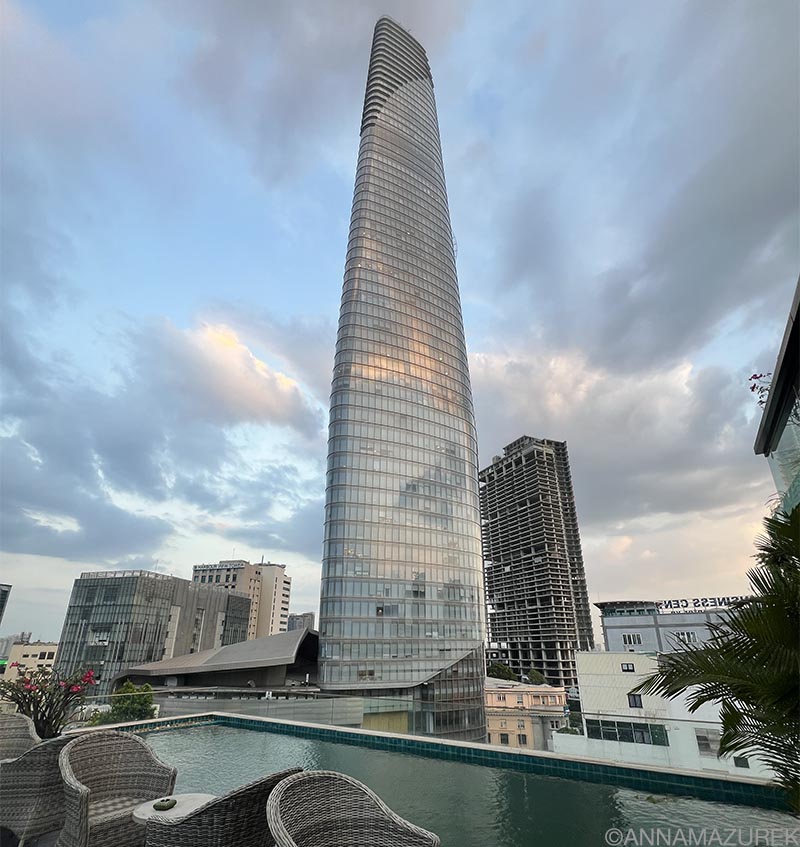
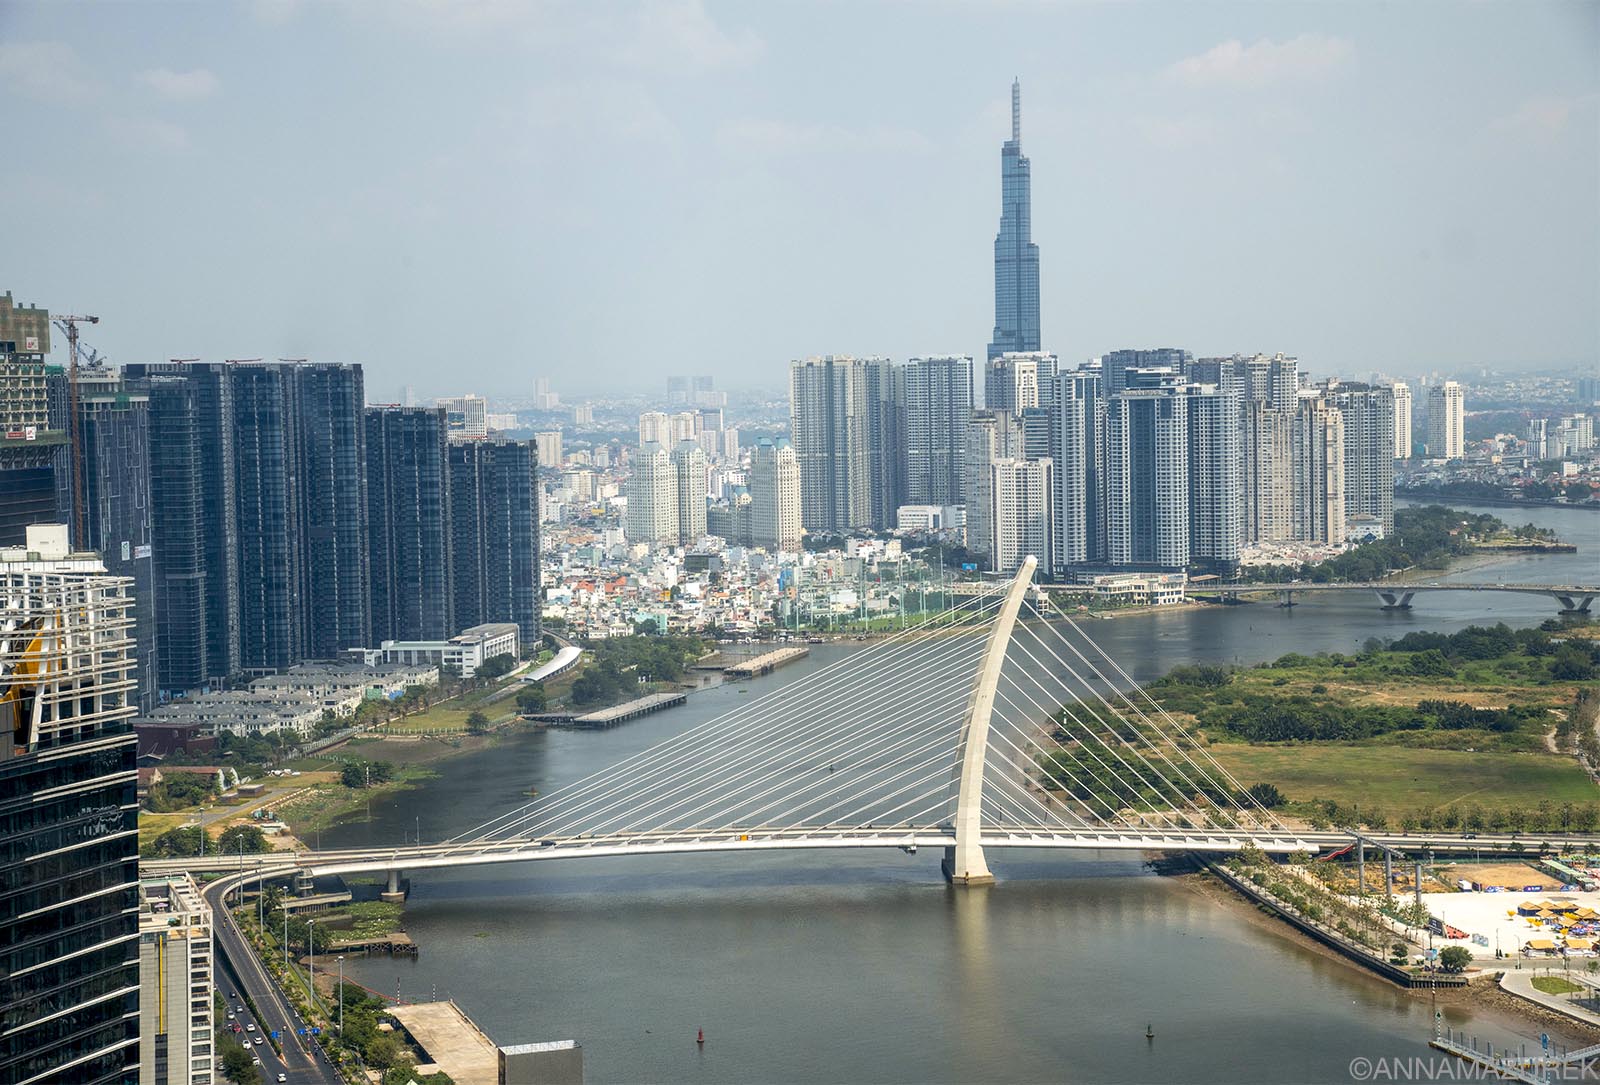 The view of the Landmark 81 building from the Bitexco Financial Tower.
Nothing puts the massive size of the city into perspective like the view from the 49th floor of the Bitexco Financial Tower ($9 USD) in District 1. (I suggest buying advance tickets through Klook for your preferred time slot because it’s the same price as buying in person without any lines.)
An alternative with a higher view and slightly steeper admission rate ($12 USD) is the Landmark 81—a nearby District 1 skyscraper that was the tallest building in Southeast Asia until 2024 when the Merdeka 118 Tower opened in Kuala Lumpur. Combo tickets can be bought on Klook to avoid the queue. (I haven’t found any other way to buy them online.)
2. War Remnants Museum
This powerful museum is devoted to showcasing the impact of the U.S. invasion of Vietnam on civilians from a Vietnamese perspective in eight thematic exhibitions with over 20,000 artifacts. (Please note the Vietnam War is often referred to as the American War across the country.)
The images of the atrocities, horrific destruction and effects of Agent Orange are upsetting, so prepare yourself emotionally before visiting. While it’s a deeply moving experience, visiting the museum is essential for gaining a larger understanding of the conflict and modern-day Vietnam.
The upstairs Requiem Exhibition showcases the work of photographers on both sides killed during the conflict, including Robert Capa. The grounds display a series of U.S. armored vehicles, weapons and bombs. Allow an hour or two to visit. Tickets can be bought in advance on Klook ($1.85 USD).
3. Reunification Palace
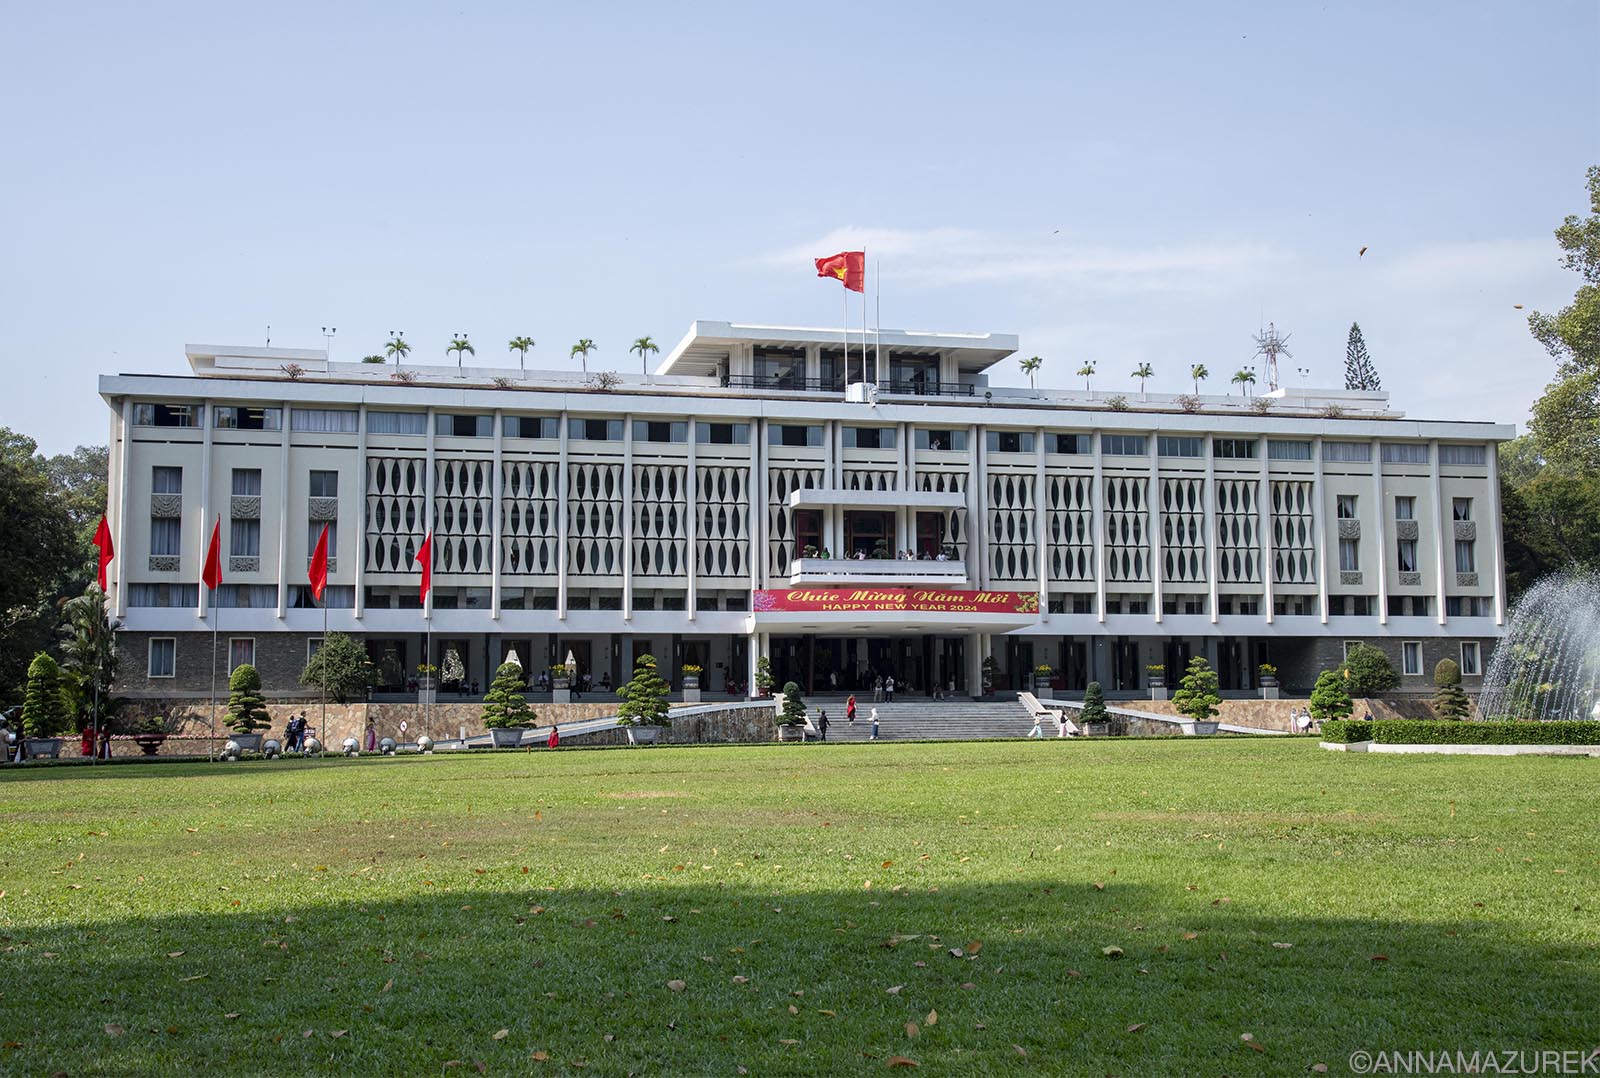 The Reunification Palace was the home and office of the president of South Vietnam.
Once you’ve wrapped your head around the size of the city, start digging into the history. This airy 1960s government building is a landmark—communist tanks rolled through the gates on April 30, 1975, marking the fall of Saigon during the Vietnam War. The building, also known as the Independence Palace, was formerly the home of the South Vietnamese president and originally the site of the 1868 French governor-general of Cochin-China. The interior features lavish reception rooms and the president’s living quarters. The most interesting part is the basement war room and telecommunications center featuring a photogenic collection of vintage rotary phones. Tickets are $1.89 USD and can be bought in advance on Klook.
4. Chu Chi Tunnels
 Left: The entrance to one of the Ben Douc tunnels, part of the Cu Chi Tunnels. Right: Artillery left over after the Vietnam War.
No trip to Saigon is complete without a visit to the spiderweb of narrow tunnels used by the Viet Cong in the 1960s.There are two sets of tunnels, Ben Dinh and Ben Duoc, located 30 to 40 kilometers from the city. Ben Dinh is the most touristy one because it’s more easily accessible by a scenic boat ride or a day tour.
I’ve been to both and prefer Ben Duoc because it’s not as touristy—there was only a handful of people when I went. (I went by public bus from the town center (formerly District 1) in Saigon, which I highly recommend—it’s one of my favorite experiences in Vietnam.
For details, I wrote a post about how to get to the Ben Douc tunnels by public bus.) You need a full day to go by bus to Ben Duoc. If you have less time, consider booking a half-day tour to Ben Dinh from Klook.
5. The ÀÕ Show at the Saigon Opera House
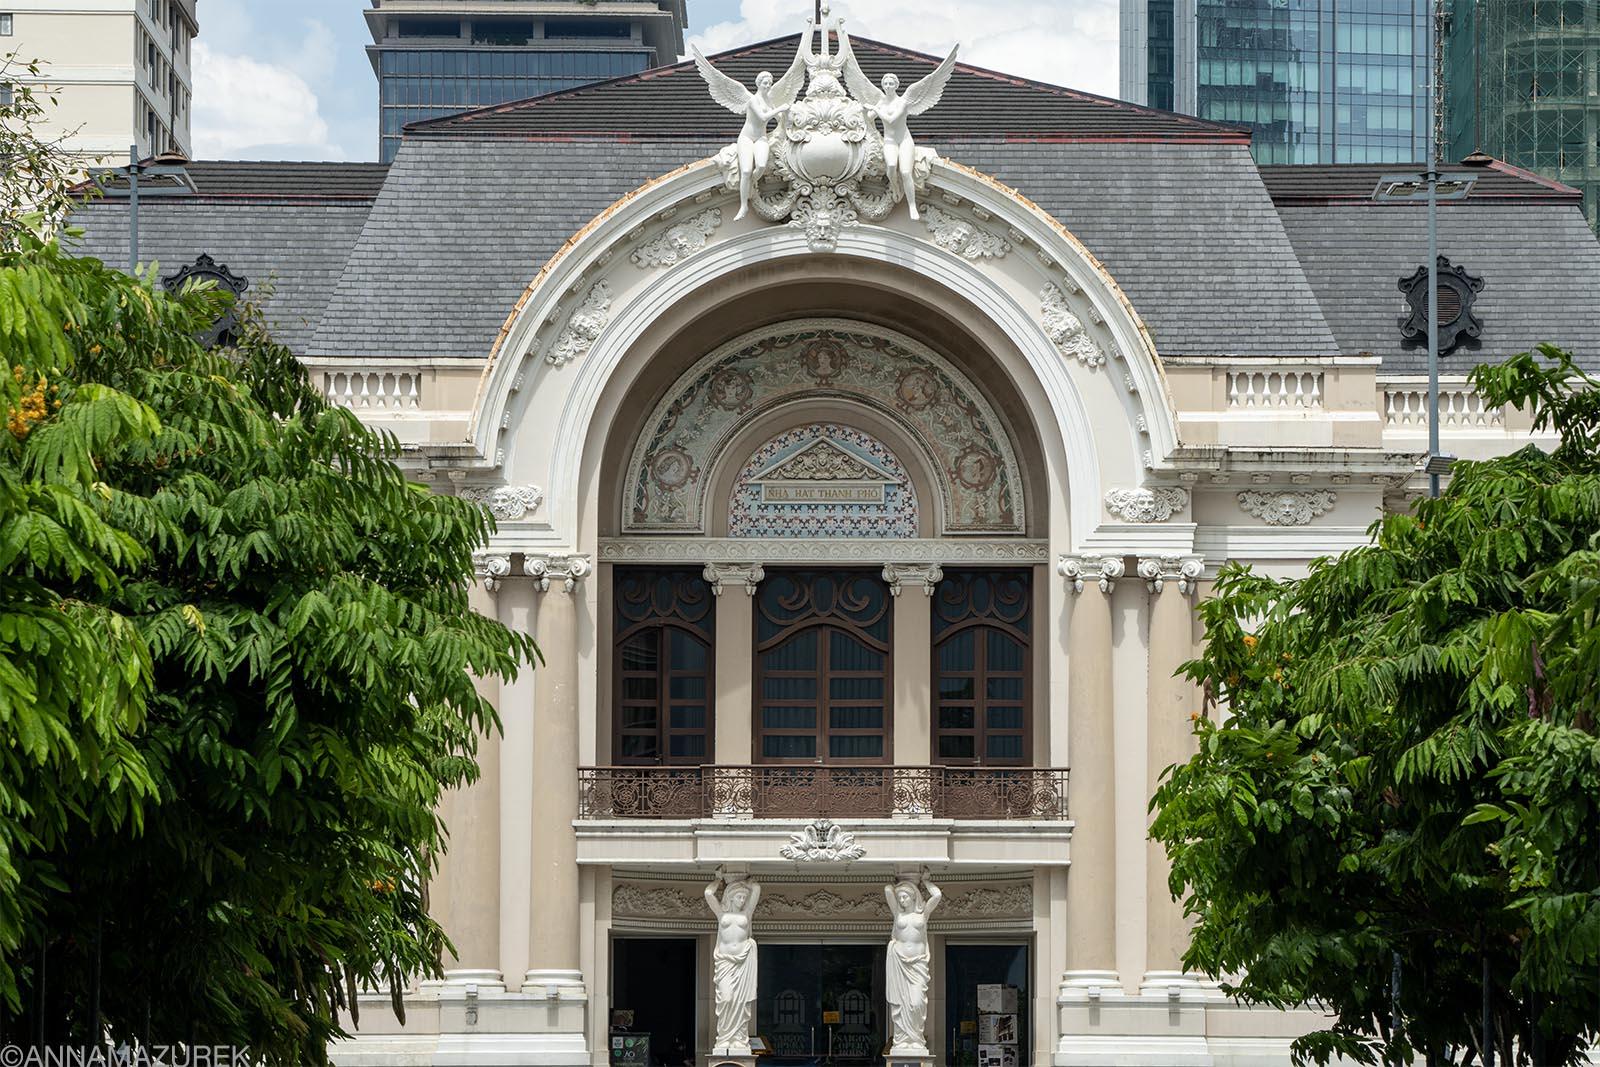 The best (and only) way to see the inside of the Saigon Opera House is to attend one of the spectacular ÀÕ Show, a bamboo circus, performances!
The only way to see the stunning interior of the 1898 opera house is to attend an event or a performance. While the Ho Chi Minh Ballet Symphony and Opera occasionally hold performances, the most frequent is the ÀÕ Show, an acrobatic bamboo circus with Cirque du Soleil elements and a touch of humor. The scenes are a fun mix of gymnastics and tumbling elements with some traditional props, like round basket boats and gigantic bamboo poles with a live music soundtrack of traditional and modern instruments. I really enjoyed the hour-long performance!
Seating is assigned, so I recommend booking in advance. Prices are steep for Vietnam with three categories: 1,750,000 VND ($66 USD), 1,250,000 ($47 USD) and 800,000 ($30 USD). I booked six weeks in advance and got a $30 USD front-row seat (seat A15), which is literally the seat beside the more expensive section! (No photos are allowed during performance, which is why I don’t have a photo to share!)
6. Ben Thanh Market
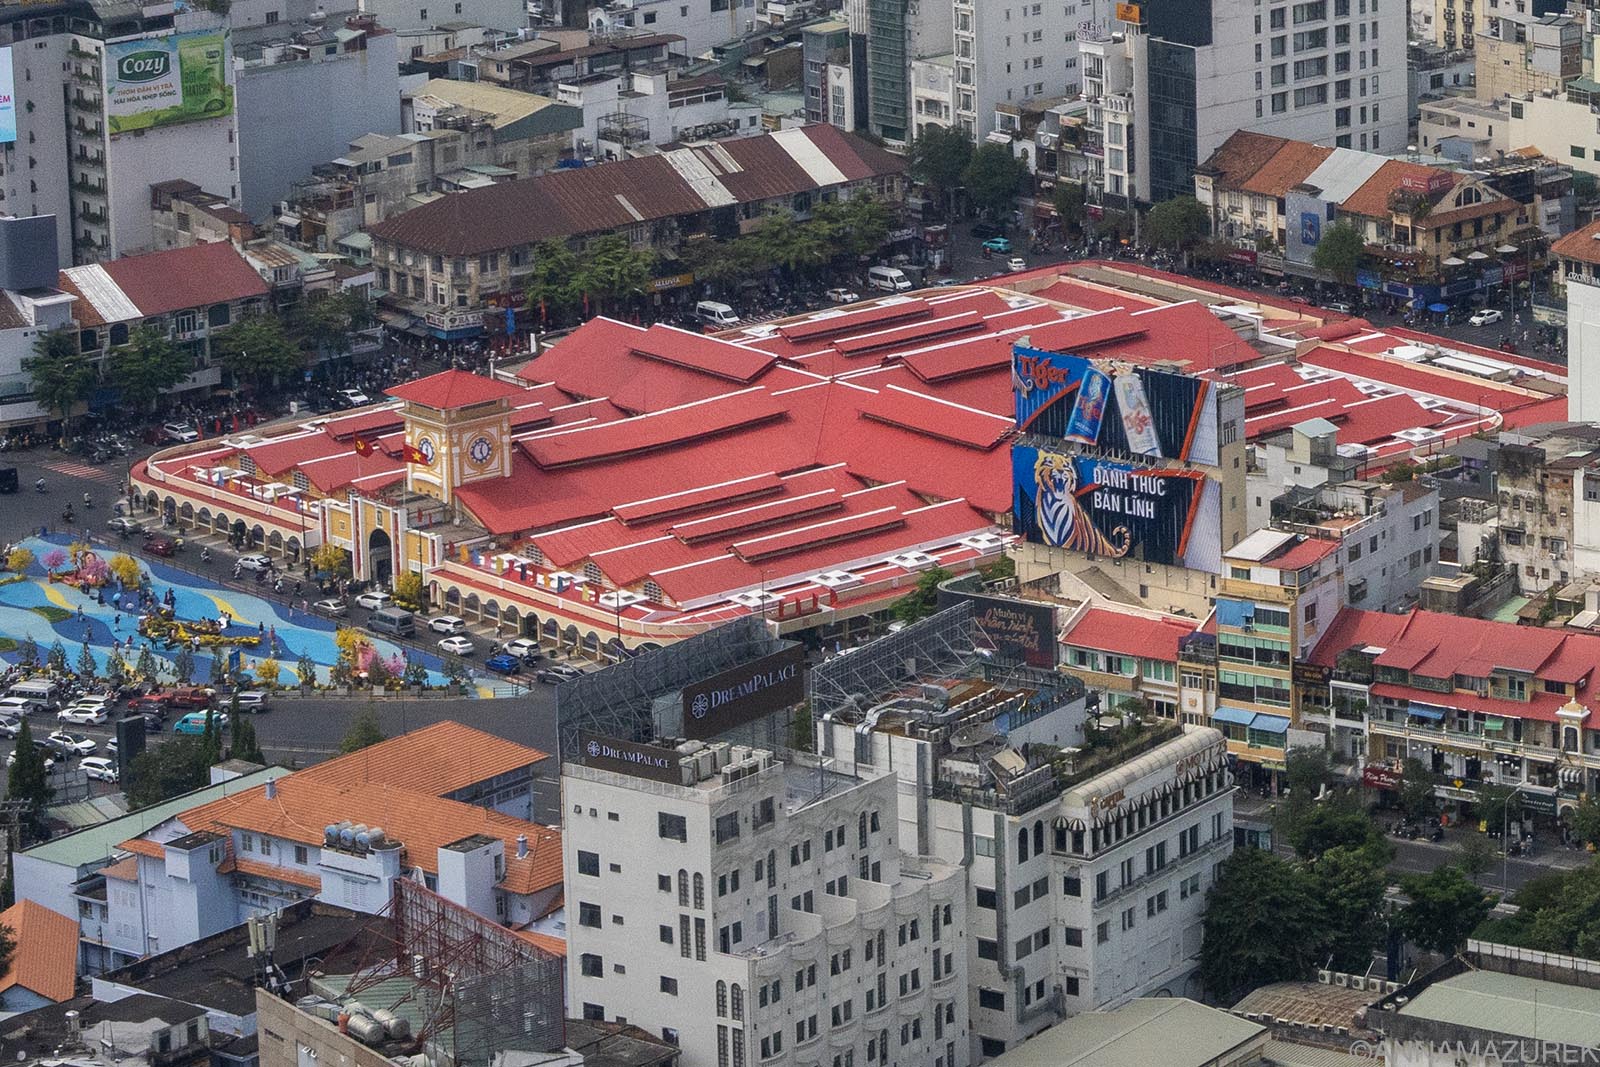 An aerial view of the red-roofed Ben Thanh Market building shot from the Bitexco Financial Tower.
The yellow-façade of this Indochine-style bazaar has been a city landmark for over a century, and a key orientation point for the city. Open daily from 6 a.m. to 10 p.m., you’ll find vendors hawking everything from cheap eats to fake watches. The market has 1,500 vendors covering 13,000 square meters, so wear comfortable walking shoes.
The market has four main and 12 smaller side entrances. Here is a short list organized by goods sold:
- South Entrance: Main gate by the clock tower with wide variety of goods, from fabric to dried food.
- East Entrance: Cosmetics, skin and hair care products.
- West Entrance: Shoes, handmade crafts and souvenirs.
- North Entrance: Fresh flowers and fruits.
Even if you are not a shopper (like me!), it’s worth a stroll to get a sense of the atmosphere. There’s a lot of junk for sale, like most tourist shops, so you’ll have to look for quality. The outer perimeter is mostly fixed price shops, usually with clear signage, while the interior shops are fair game for bargaining, which you should do!
7. Saigon Central Post Office & Nguyen Van Binh Book Street
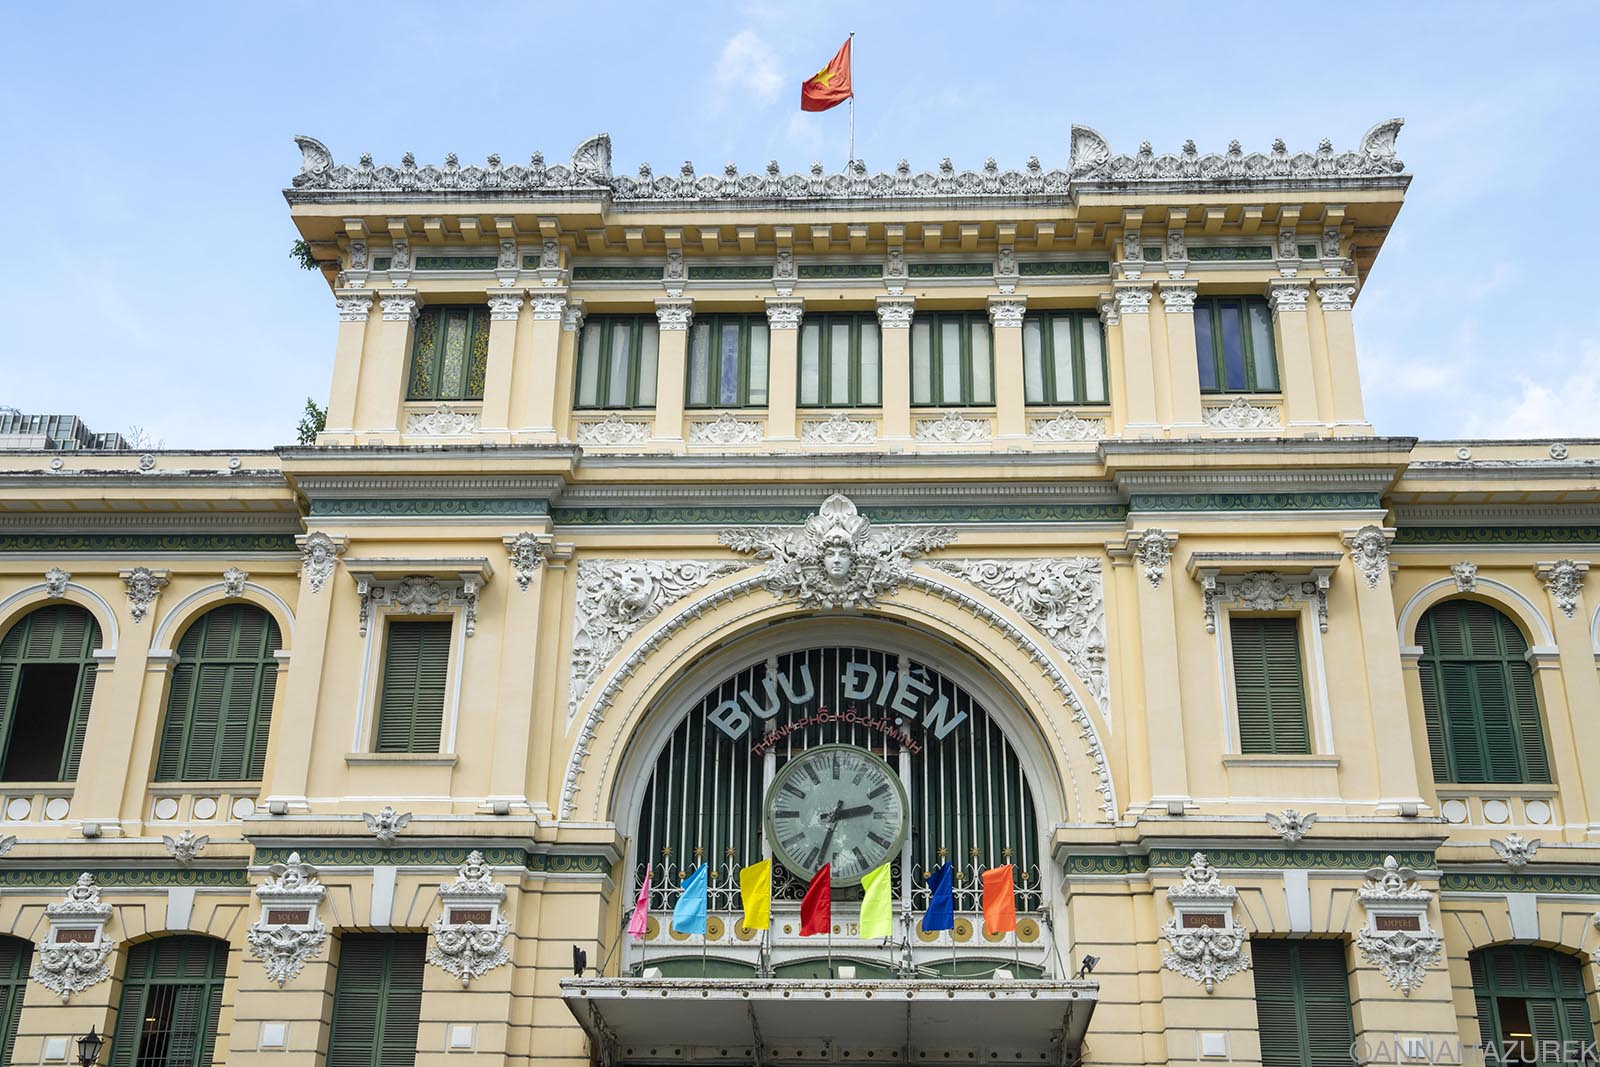 The 1891 Central Post Office is one of Saigon’s many French Colonial era buildings and a great place to buy postcard stamps.
You can’t miss the yellow and green façade of the 1891 French-era Central Post Office. The interior is a functioning post office with side hallways filled with stalls hawking tourist trinkets that distract from the tiled floors and Ho Chi Minh mosaic. Even though the building is crowded—nearly every day tour stops here—, I do think it’s worth a visit just to peek at the architecture for a few minutes.
Across the street is the Notre Dame Cathedral, which has been flanked by restoration scaffolding since 2017 but is scheduled to complete in 2027. The interior is currently only open during mass times.
Don’t miss the Nguyen Van Binh Book Street around the corner. The pedestrian-only zone is lined with bookshops selling both Vietnamese and English titles and cozy cafes, a haven from the buzzing streets. I personally love all the public benches for relaxing in the shade. I’m embarrassed to say I didn’t know this existed for years, and now, it’s become a little reprieve.
8. Traditional Water Puppet Show
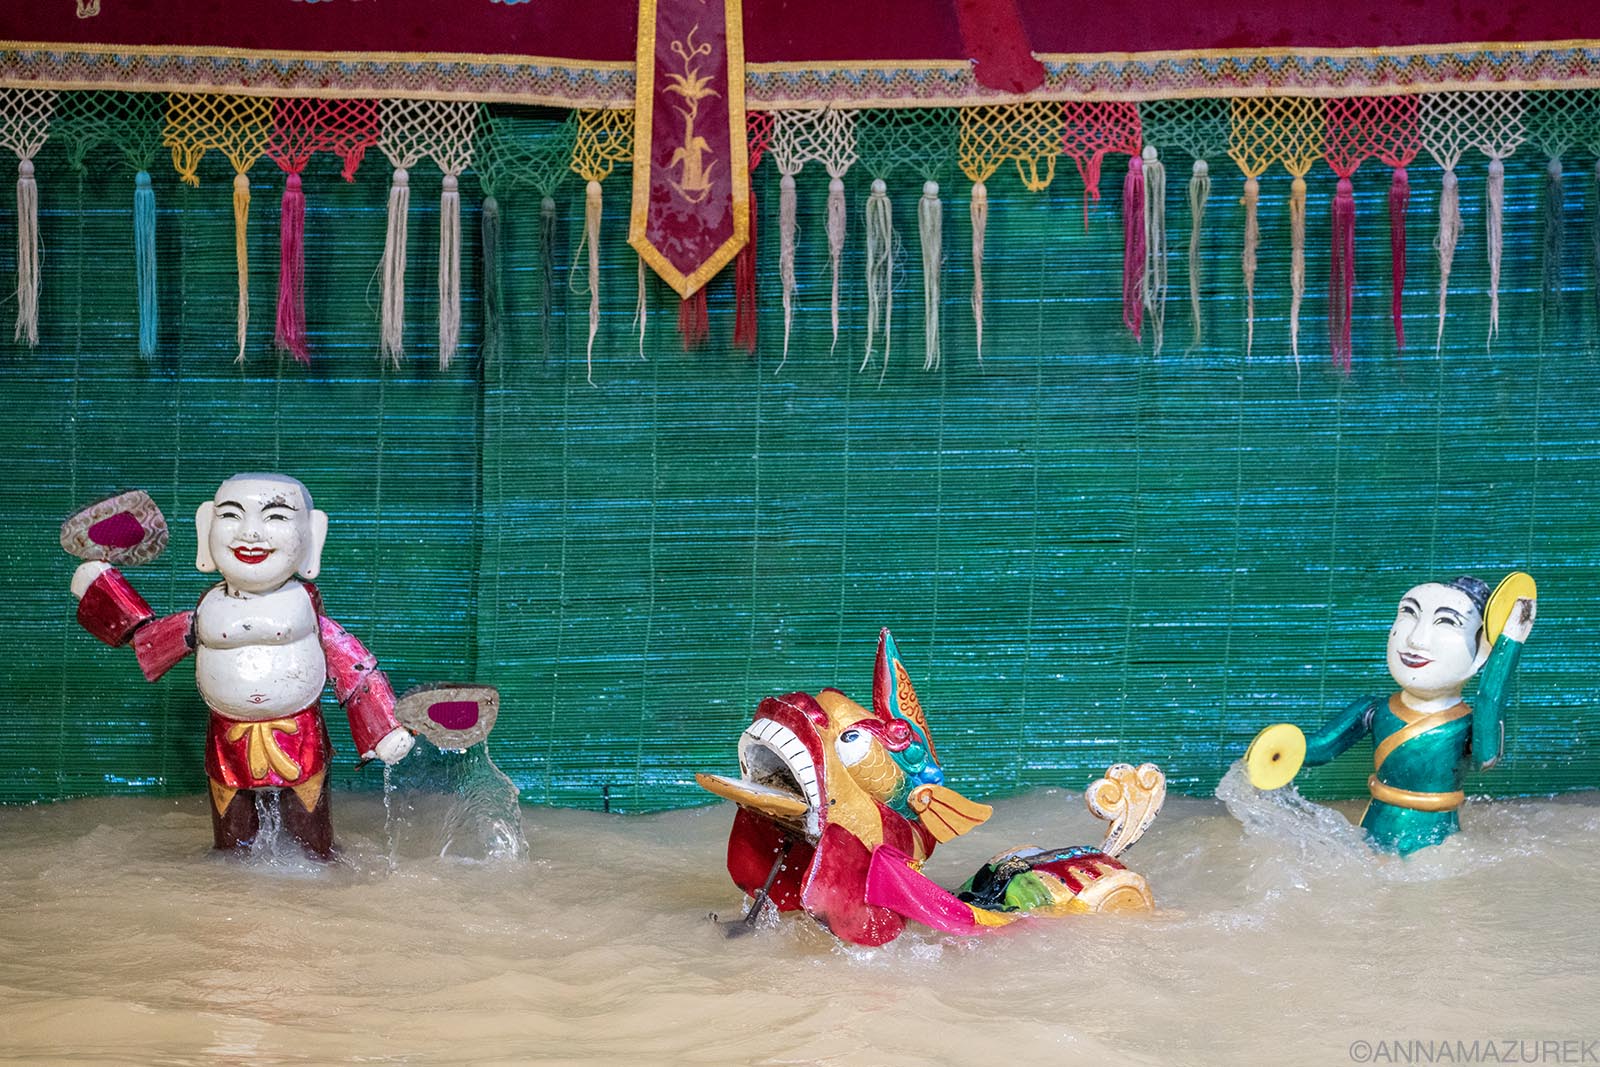 A Vietnamese water puppet show at the Golden Dragon Water Puppet Theater is a fun-filled attraction for all ages.
Water puppetry, a century-old form of Vietnamese theater, is a great insight into local culture. The colorful puppets depict scenes of local life in a waist-deep pool accompanied by traditional folk music. While the show is entirely in Vietnamese, it’s easy to follow along with the action and laughs. (I go to one water puppet show every year for work, and it’s really fun to experience at least once.)
The Golden Dragon Water Puppet Theater (nightly at 6:30 p.m.) and the Museum of Vietnamese History have regular performances. (You can buy tickets in person or in advance on Klook for the same price.) All water puppet shows across Vietnam have similar storylines, so no need to see shows in multiple cities.
9. Nguyen Hue Walking Street
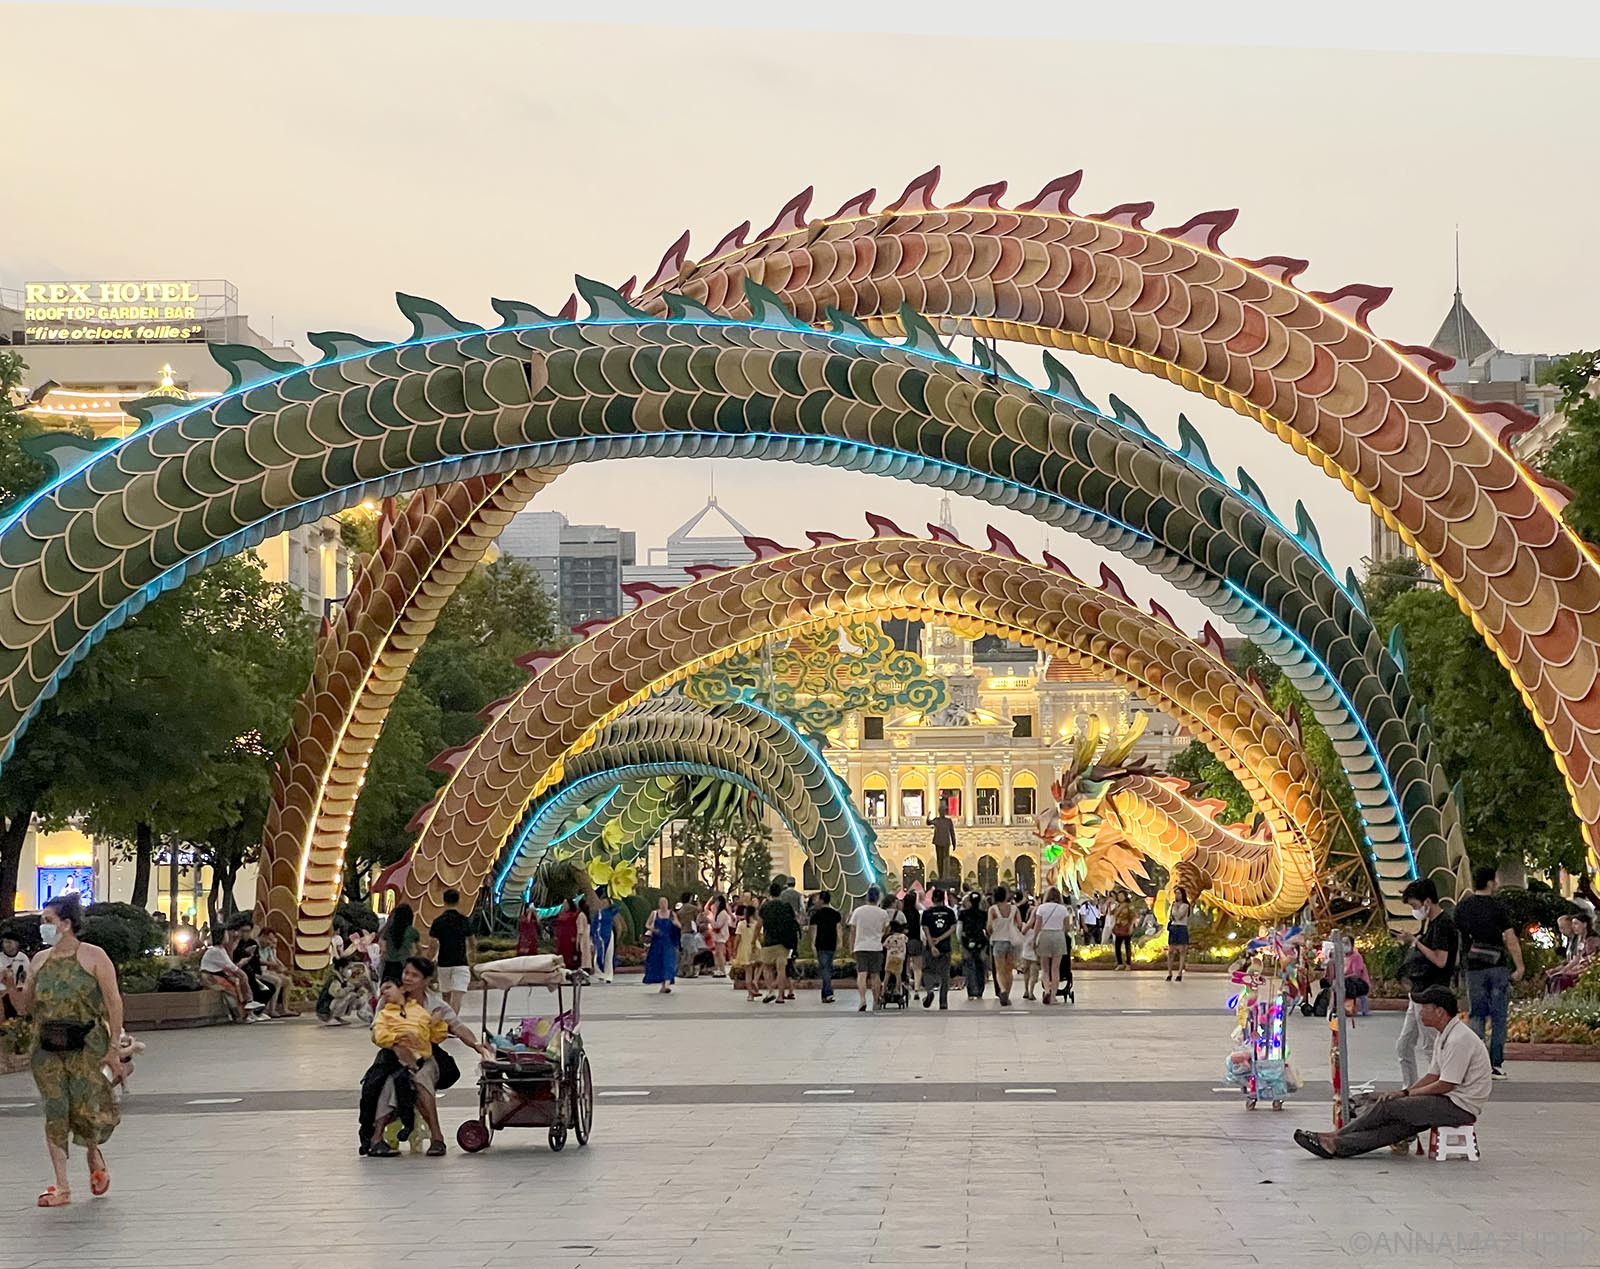 The Nguyen Hue Walking Street decorated for Lunar New Year (TET) in HCMC.
This pedestrian-only walking street stretches 900 meters from the photogenic People’s Committee of Ho Chi Minh City building to the Saigon River. It comes alive on weekend nights with street performers and food stalls. During special occasions like Lunar New Year, it’s heavily decorated. This is one of my favorite parts of the city. It’s the perfect place for people watching and a sunset walk.
Don’t miss the Cafe Apartments located at 42 Nguyen Hue Walking Street. This nine-story, 1960s-era apartment building is now a vertical hub of cafes, shops and coworking spaces. Everyone has their own balcony overlooking the walking street.
10. Sample Saigon’s Craft Beer Scene
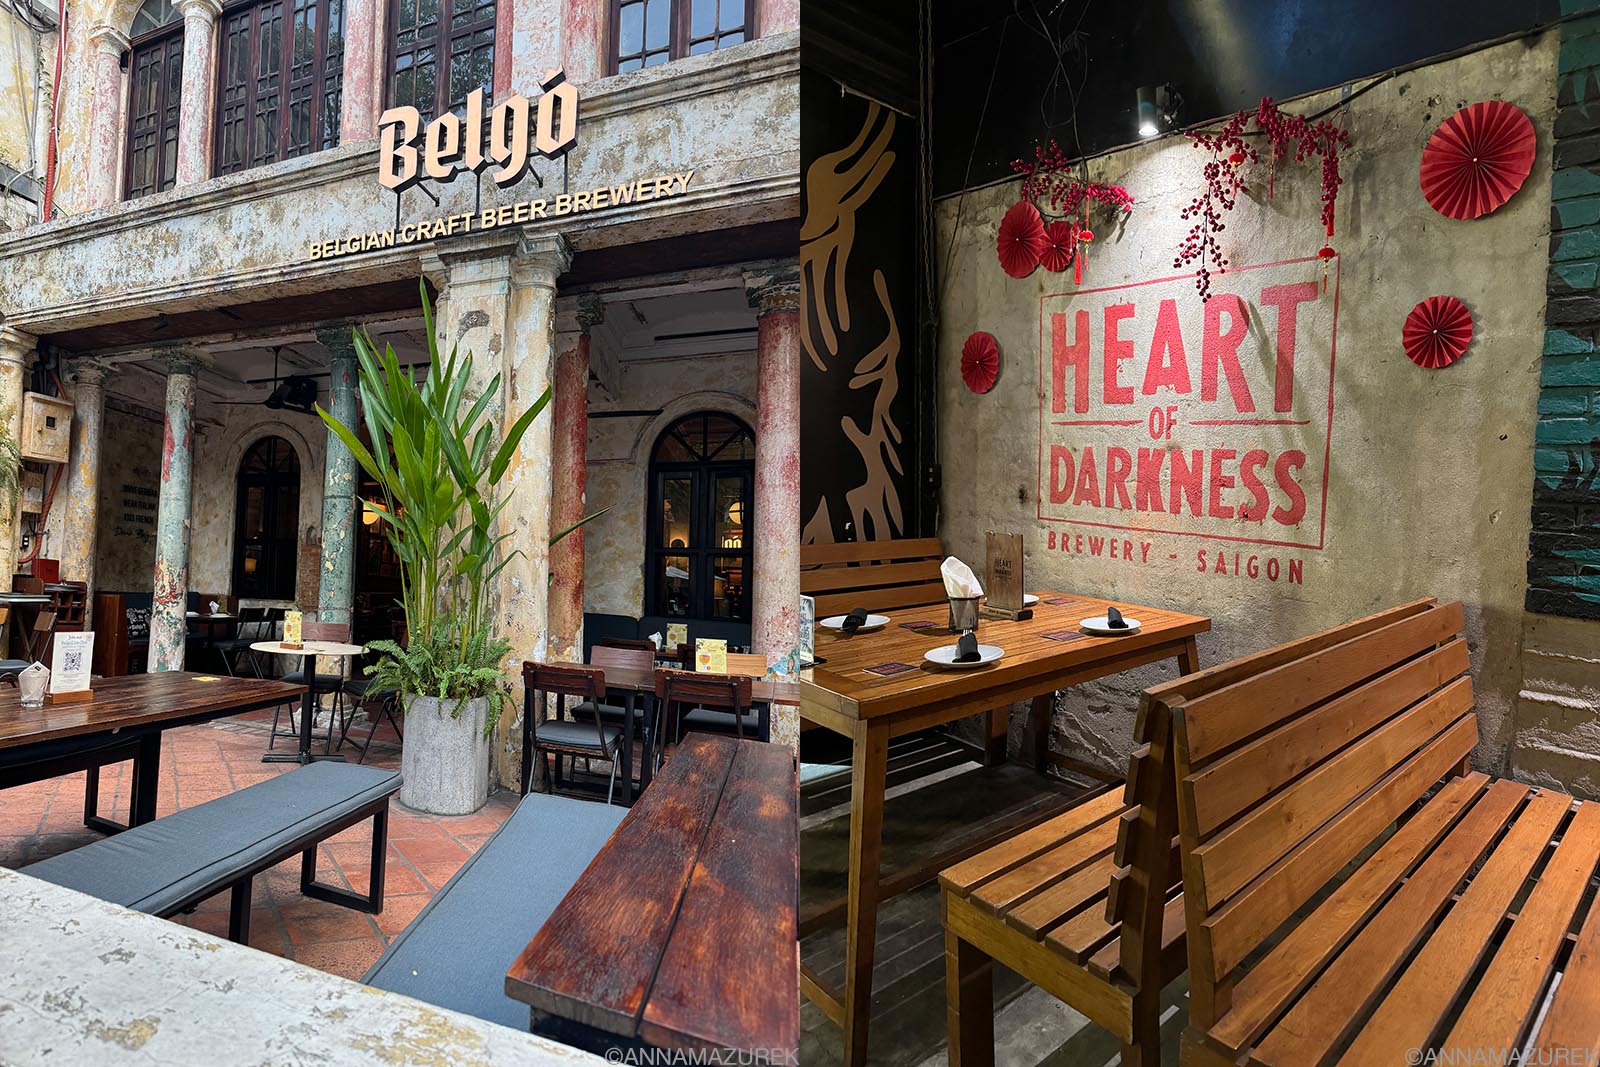 Belgo (left) and Heart of Darkness (right) are two craft breweries with great patios.
One of my favorite things to do is brewery hop around HCMC—the craft beer capital of Southeast Asia. Pasteur Street Brewing ignited the trend in 2015 and has multiple taprooms (all serve food) spread across the city (and one in Hanoi). I love the vibe of their original location on Pasteur Street. (The flagship Jasmine IPA and Pomelo IPA are my favorite brews.)
The Heart of Darkness taproom is always hopping on weekends and serves up some tasty hazy IPAs. (I’m an IPA girl if you can’t tell.) A new addition to the scene— Belgo, a Belgian brewery—is quickly becoming a favorite because the patio, beer and food are fantastic. BiaCraft is also a great spot.
Don’t miss the two taprooms for 7 Bridges Brewing Co. The Da Nang-based brewery just won gold at the 2025 Asia Beer Championships for best small brewery and best beer!
11. Tai Dinh Church (Church of the Sacred Heart of Jesus)
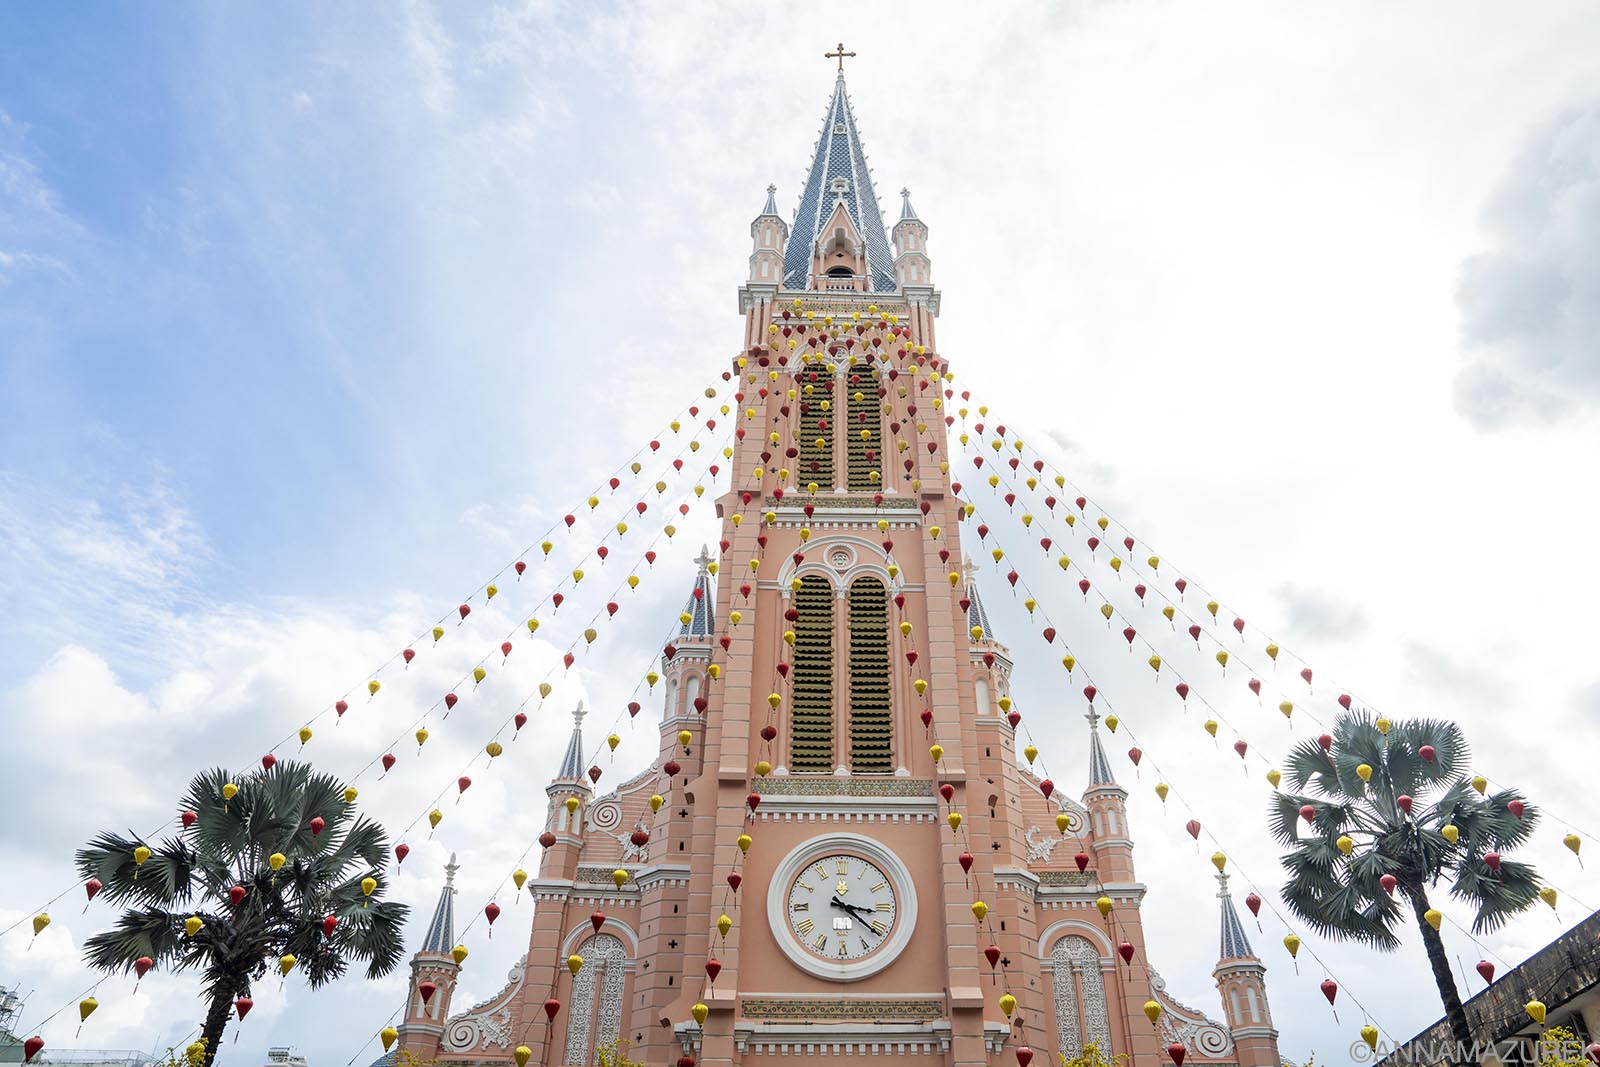 The rose-hued exterior of the historic Tai Dinh Church, an active Catholic church, is a great photo spot.
This stunning 1876 pink French and Gothic-style church is part of the Roman Catholic Archdiocese of Ho Chi Minh City. It is the second largest church in the city after the Notre Dame Cathedral of Saigon. It was painted in its famous rose hue in 1957. While it’s a gorgeous photo spot, the Tai Dinh Church interior is not open to the public because it’s an active church. Only people attending mass can go inside. Visitors are allowed to wander around in the front courtyard to take photos for free.
For me, the best photo spot is directly across the road on street level. You’ll need a bit of patience to wait for cars to pass to get a clean shot. Across the street, Cong Coffee has an upstairs, outdoor patio with nice views, but I still preferred the view from the street level.
I recommend visiting the nearby pink-hued Jade Emperor Pagoda (below) afterwards, which is only a 15-minute walk away. Both sites are about 2.5 kilometers from the tourist center near Ben Thanh Market.
12. Jade Emperor Pagoda
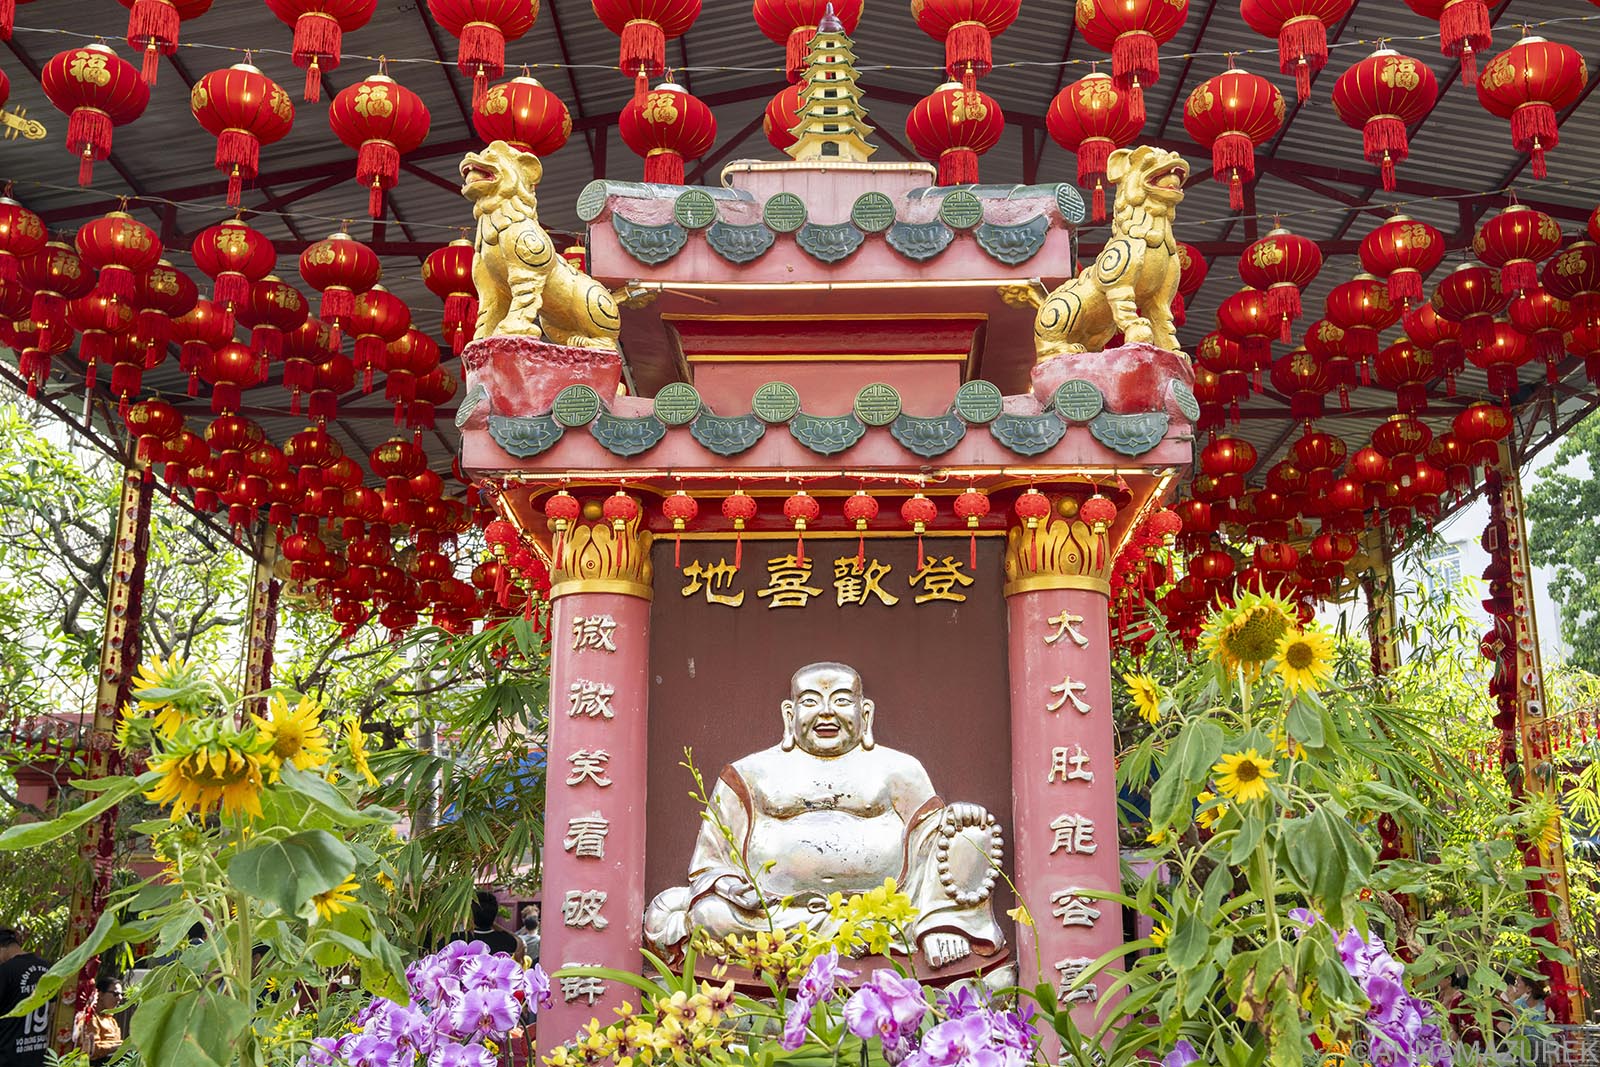 For an authentic temple experience, visit the Jade Emperor Pagoda to watch locals honoring the supreme Taoist god.
One of the city’s most revered and bustling Taoist temples, the Jade Emperor Pagoda, lies on an unassuming neighborhood street. The pink-hued Chinese-style temple was built in 1909 to honor the supreme god, the Jade Emperor, Ngoc Hoang. Clouds of incense linger across the fountain-filled courtyard. Be sure to cover your knees and shoulders before entering.
Pair this temple with a visit to the nearby rose-colored Tan Dinh Church above.
13. Ho Thi Ky Flower Market
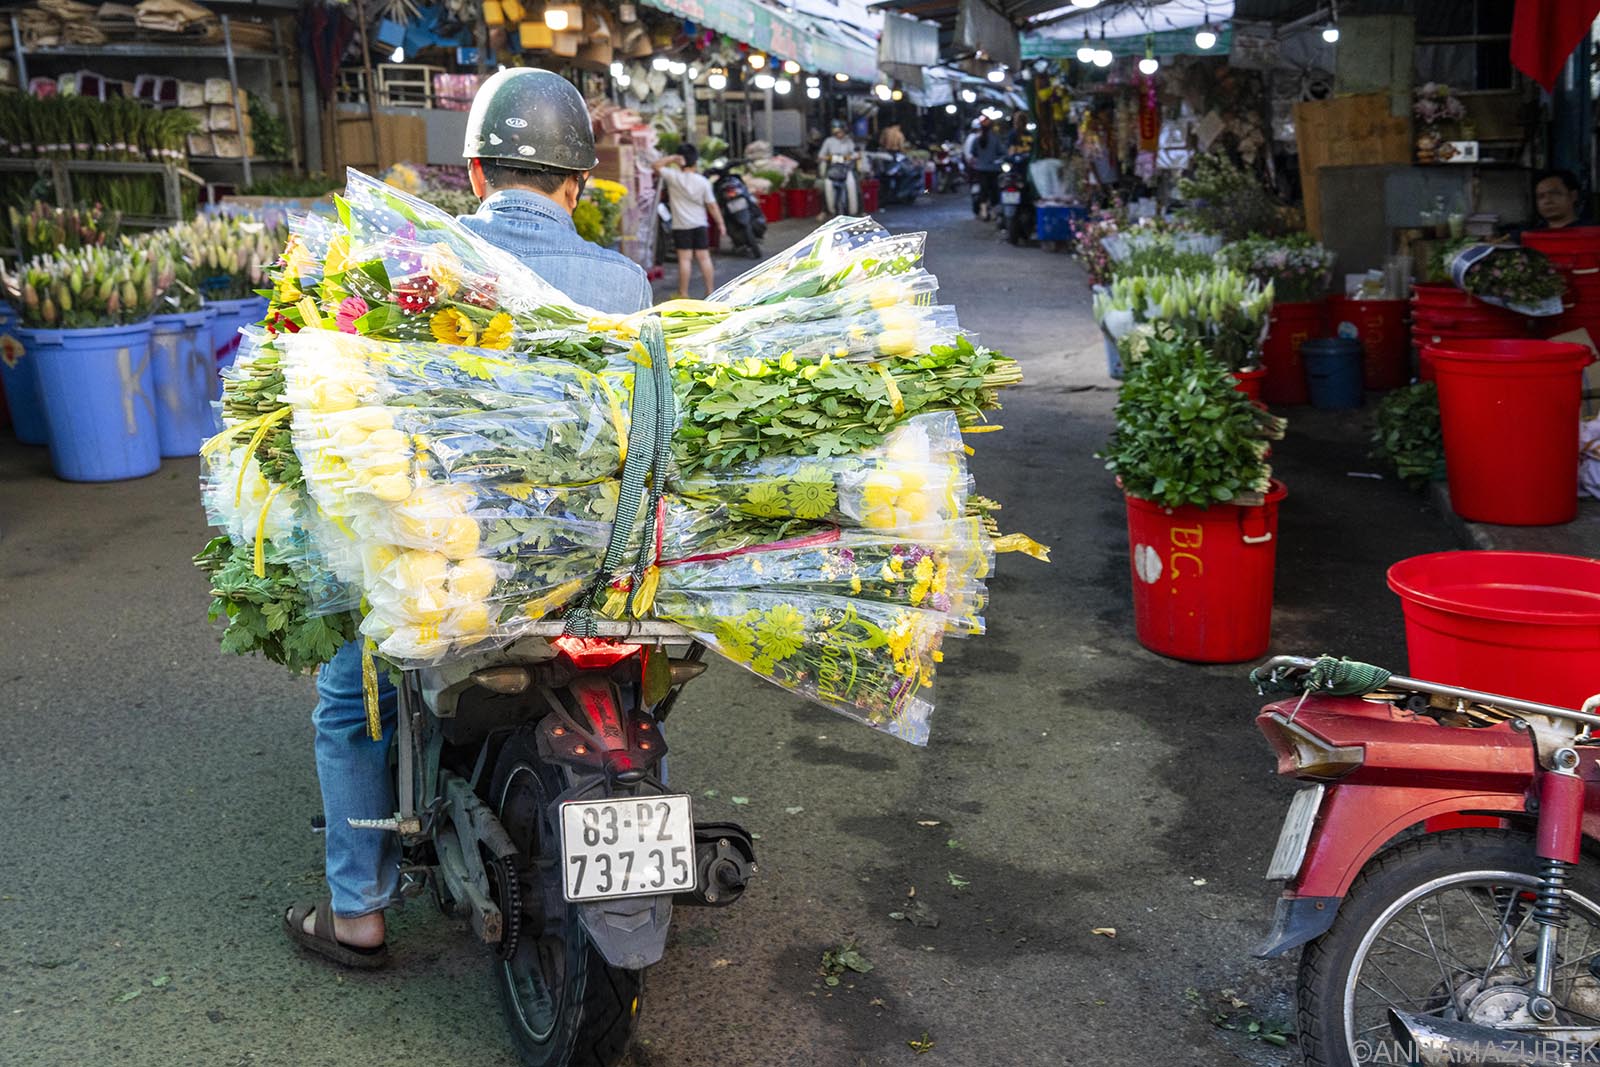 A motorbike loaded up with flowers during an early morning visit to Ho Thi Ky Flower Market.
Located a short Grab ride away from the main tourist area, this 2,000 square-meter market is the largest wholesale flower market in the city. It’s one of the best places to snap photos and people watch in the city. The market is open 24 hours with fresh deliveries arriving in the early morning hours (midnight to 3 a.m.). A nearby food area opens in late afternoon and into the evening.
I visited at 7 a.m. because I wanted to have nice light for photography. I spent over an hour wandering through the streets, memorized at the piles of flowers being strapped to motorbikes. It was a great slice of local life because I didn’t see another foreigner the entire time I was there!
Be sure to ask permission before taking close-up shots of vendors. I did see several “no photo” signs, and please respect the locals.
14. Ride the NEW HCMC Metro Line
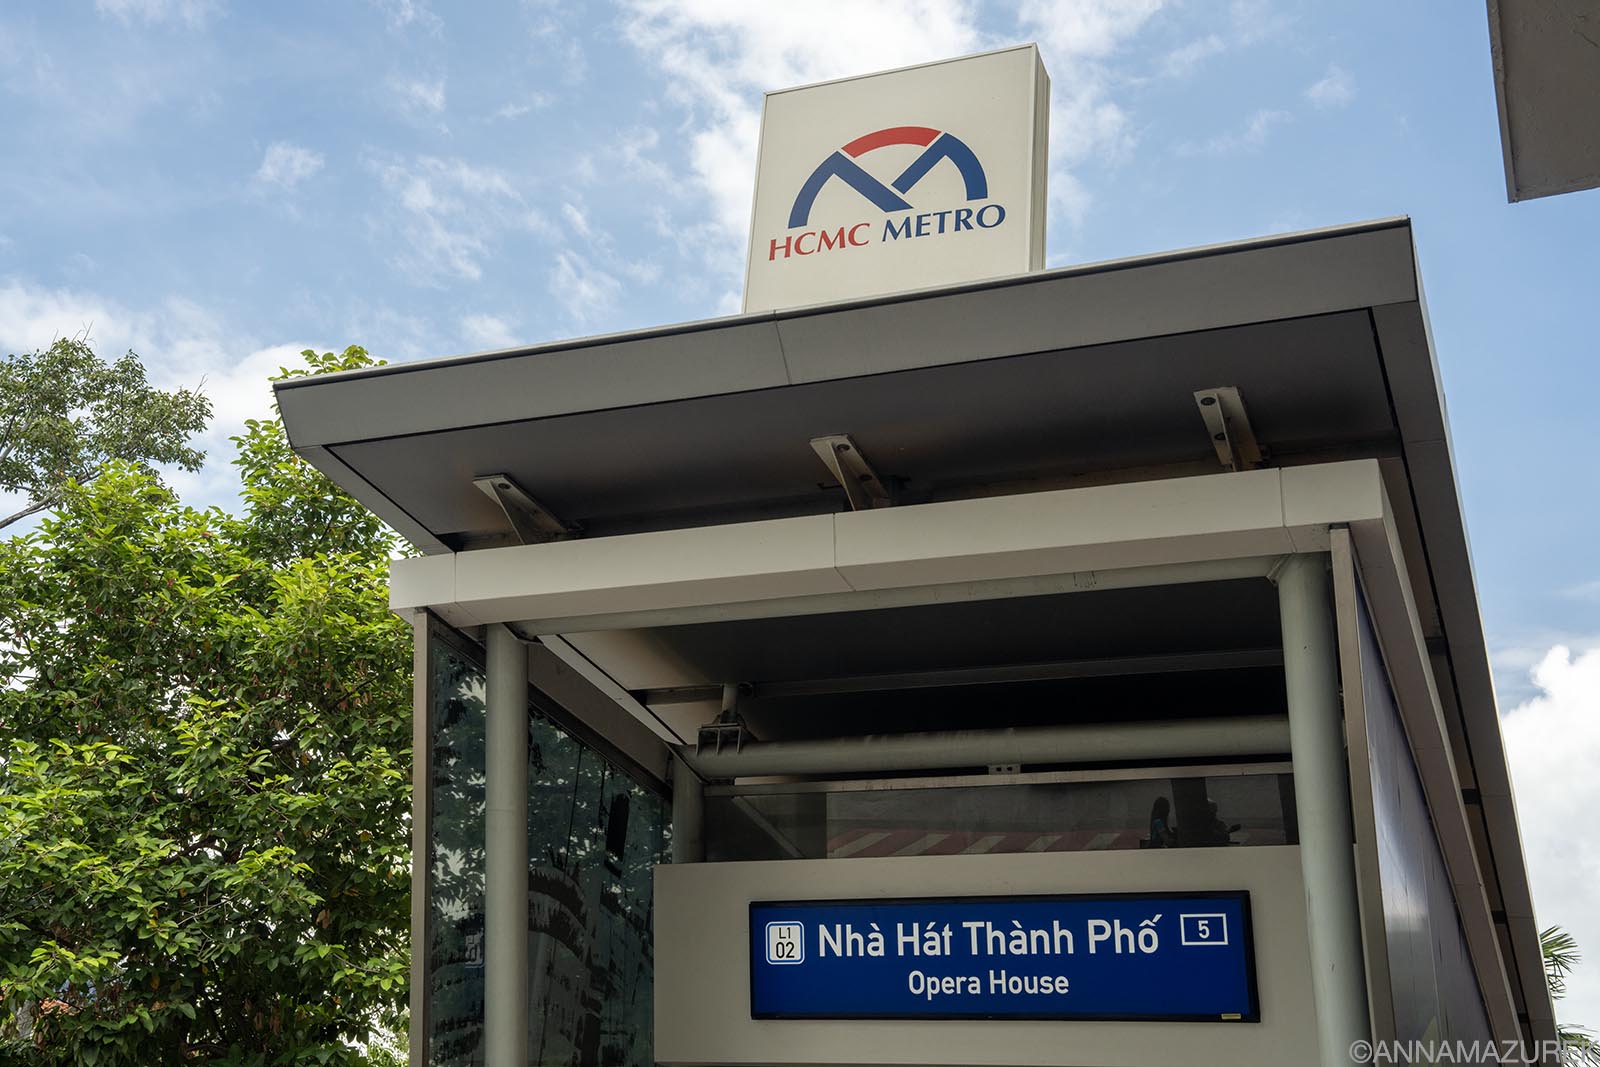 Three metro lines are aimed to be completed by 2030 in HCMC.
In December 2024, HCMC opened its first metro line (Metro Line 1) connecting Ben Thanh Market (town center) and Suoi Tien (Eastern suburb). The line connects 14 stations, three underground and the rest above ground, and takes about 30 minutes to ride the entire line. Aside from the first three stops, the metro isn’t very useful for most travelers, but it is an air-conditioned reprieve with toilets (after you pay train fare), especially in the rainy season.
I took the metro one stop from the Opera House to Ben Thanh out of curiosity. It is very sleek and modern, thanks to Japan, who funded the majority of the project. The fares are very cheap, and it’s easy to tap to pay with a credit card! Card payments range from 6,000 to 19,000 VND (23 to 72 cents USD) for a ride.
15. Visit the Mekong Delta
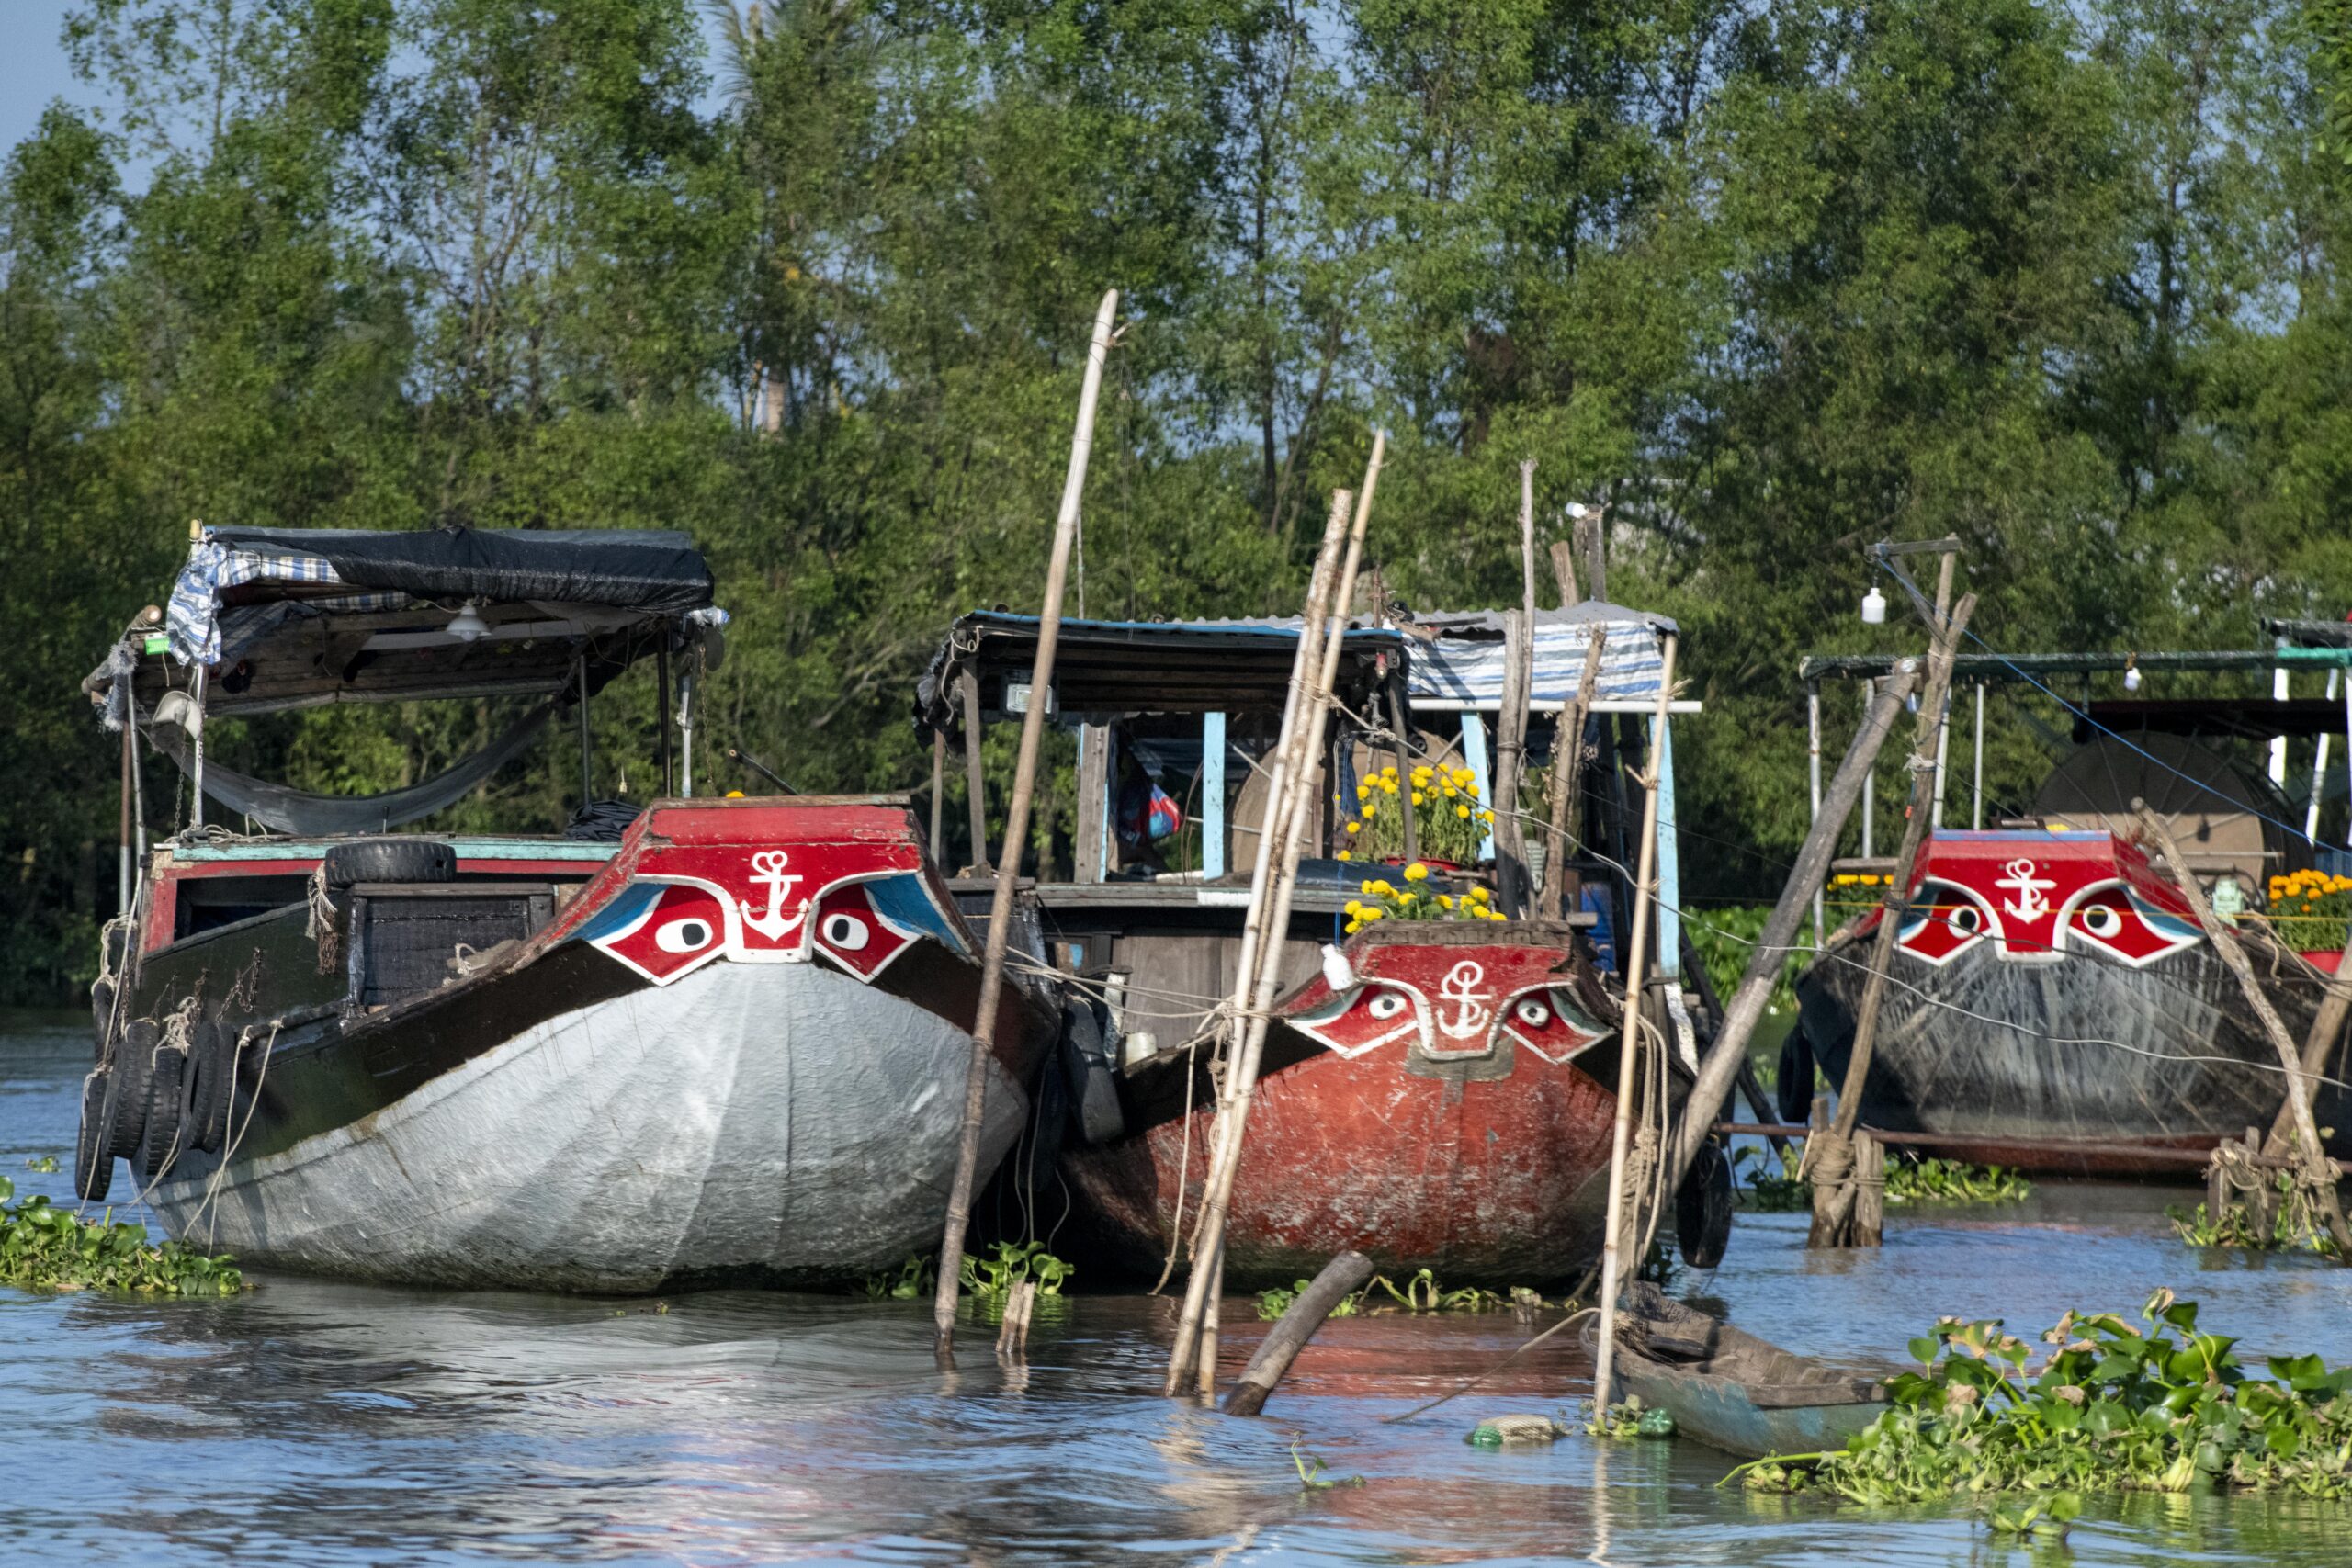 Boats along the Mekong Delta have eyes painted on the bow to ward off evil spirits.
The Mekong Delta is a must-visit if you’re already in HCMC. Ideally, it’s best to spend a few days exploring the water world of bustling markets, scenic boat trips and beaches. Can Tho is the hub of all the excitement, but I love the wet market at Chau Doc. Keep an eye out for the large ships with eyes painted on the front to ward off evil spirits and sea monsters. If your time is limited, Klook and GetYourGuide offer great day and multi-day trip options.
Where to Eat in Ho Chi Minh City
 A banh mi from L’Usine.
My favorite cafes and sandwich spots to eat are The Old Compass, L’Usine, The Vintage Emporium, and Banh Mi 3362. ABC Bakery Café was a great spot to grab a fast and cheap breakfast to go!
If you are looking to splurge, the Park Hyatt’s breakfast buffet is worth the $40 because it includes all-you-can-drink Prosecco and ordering items off the menu—the banh mi and French toast are fabulous.
All the craft breweries have tasty food, but Belgo is my favorite brewery food.
Where to Stay in Ho Chi Minh City (Saigon)
 If you’ve got some credit card miles to cash in, the Park Hyatt Saigon is a great place to treat yourself.
All of the accommodation options below are centered around the city’s main attractions.
Hotels: The sleek, spacious rooms and delicious breakfast buffet at the Fusion Original Saigon Centre ($133/night) are the perfect peaceful reprieve from the bustling city below. Located around the corner from the Bitexco Financial Tower, Au Lac Charner ($105/night) is a great spot with a rooftop pool and free breakfast (and afternoon tea!).
Hostels: The majority of District 1 hostels are concentrated around Pham Ngu Lao and Bui Vien. While most have lackluster reviews, the conveniently located Loan Võ Hostel shines with a 9.1 rating for clean dorms and private rooms. The sleek design and bunks with curtains make The Common Room another great choice.
Splurge: If you’re looking to splurge, the Park Hyatt Saigon ($289) is the nicest hotel in town with an amazing pool, gym and a mind-blowing breakfast! (I stay here for work every year. Otherwise, Au Lac Charner or Fusion Original are my go-to spots.)
How to get to Ho Chi Minh City
Ho Chi Minh is home to the busiest airport in Vietnam and the main transport hub. (I always fly through Ho Chi Minh when I’m flying back to the U.S. from Southeast Asia because I can connect in Japan. This really helped me successfully hack my way to elite status on American Airlines.)
You can take buses, vans and the train anywhere in Vietnam from there. Keep in mind that Hanoi and Ho Chi Minh are on opposite ends of the country and a 30-hour train ride apart.
I recommend booking transfers on Klook for convenience and using 12go.asia for bus and train tickets if it’s too much hassle to go to the station. Please read reviews before booking.
The Best Time to go to Ho Chi Minh City (Saigon)
HCMC has two seasons: the dry season and the monsoon. The dry season from November to April is the best time to visit. The monsoon season brings high humidity (83%!) and brief but powerful storms along with occasional flooding. (I always visit in January and February.) The air quality is often better during the rainy season because the rain cleans pollutants from the air. Consider a visit just after the rainy season for the best air quality and while all the plant life is still lush.
Vietnam FAQ
 A view of the Bitexco Tower from the Au Lac Charner hotel.
Where’s the best place to buy a SIM card in Vietnam?
The easiest thing to do is buy a Vietnam-specific eSIM card from Airalo that will work instantly when you arrive. (Airalo partners with Viettel, the fastest network in Vietnam.) For more details, read my review of Airalo eSIM cards in Southeast Asia.
Promo Codes: New customers save 15% off with NEWTOAIRALO15 and existing users save 10% with AIRALOESIM10.
If you are traveling to multiple countries in Southeast Asia on a short trip, then consider one of their Asia Regional eSIM cards. (Both the country-specific and regional eSIMs have worked wonderfully for me and even have a mobile hotspot option that’s critical because I’m always working remotely.) Keep in mind it’s always cheaper to buy a country-specific eSIM than a regional one.
Do you need travel medical insurance for Vietnam?
Yes, travel medical insurance is one of the most important things to purchase for any trip abroad, especially Vietnam. It covers all the things that could go wrong, from injuries to travel delays, so that you don’t have to worry and can focus on traveling!
SafetyWing’s Nomad Insurance offers $0 deductible travel medical insurance coverage for over 180 countries for people aged 69 and under when traveling outside their home country. The best part is that it only costs a few dollars a day! If you get sick or injured abroad, you can visit any hospital or doctor. I’ve found SafetyWing to be the best option for me.
Other benefits of Nomad Insurance include coverage for lost checked luggage, travel delays over 12 hours, motor accidents (if properly licensed, wearing all safety equipment and not intoxicated) and injuries from sports or leisure activities. You can even add adventure sports, electronics theft and U.S. coverage (for non-residents) to your policy.
One of the best things about SafetyWing is that you can buy policies abroad and speak to a REAL human from the 24/7 customer support team if you have questions! (I can vouch that they are excellent at assisting and will follow up with you afterward.) Pay in full or choose an auto-renewing plan that can be canceled anytime.
For more details, read my review of using SafetyWing in Southeast Asia.

Why I go Abroad for Health Care
 Photo Credit: Stock image from Pexels.com
This post was written in 2019 and is updated annually. Latest update: February 2026.
As a full-time freelancer, health care has always been one of my biggest burdens due to the lack of cost transparency and the complicated structure of the American medical system. Since I work for a travel company for part of the year, I have a travel insurance policy that covers me when I’m working abroad.
Travel insurance is $92/month (It would be cheaper if I was under 40.) with no copays or deductibles while my U.S. insurance was $450/month in 2017 with high copays and deductibles.
Health insurance is one of those topics that gets me all riled up, so I’ll do my best to avoid getting on a soapbox. I feel so strongly about the subject that I even wrote a chapter in my book about how to hack the cost of U.S. healthcare because I understand it well, especially the flaws.
In short, the American healthcare system is inefficient and expensive. (Source: The Atlantic) While the quality of care is high in the U.S., the lack of transparency about cost is what frustrates me more than anything because I want to pay upfront and not wait months for some mystery bill to arrive in the mail. Plus, it often takes months to get an appointment, which is nightmare because of my work schedule.
Due to this, I’ve started going abroad for my annual physical, routine dental cleaning and other routine doctor appointments. I wanted to explain how I handle medical care in my nomadic lifestyle and dispel myths about the quality of care abroad. I highly recommend it and wish I’d started doing this sooner!
This post includes my experience and pricing from 2019 until 2026. In 2025, I signed up for a Cigna global healthcare policy that I review at the end of the post.
The goal of this post is to show what works for me and share my experience. I hope you find this helpful or at least, interesting!
Affiliate links are used in this post for travel insurance only. If you make a purchase, I earn a small commission at no cost to you, which goes toward the cost of maintaining this blog.
Why I Go To Thailand for Medical Care
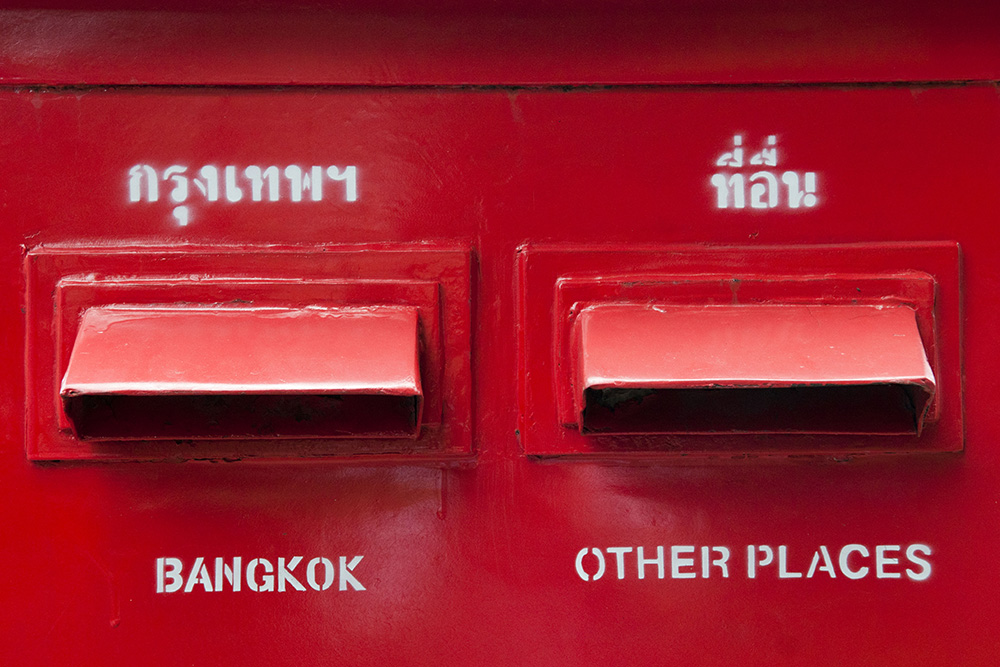 All the mailboxes in Bangkok are separated by location.
I have lived and worked in Thailand off and on for the last decade. I love the country and live in Chiang Mai every winter. I’ll probably retire in Thailand because it just feels like home and it’s always warm.
I had a great experience in 2012 when I went to Bumrundgrad Hospital in Bangkok when one of my running injuries flared up. They did a hip x-ray and gave me the results immediately. It all cost a total of $70 compared to the $700 my insurance was billed for the exact same x-ray I had six months prior in the U.S.
Bumrundgrad and Bangkok Hospital have been recommended by all the expats I’ve met living abroad and even my Thai friends. And, these Thai friends have all lived in New York City and other parts of the U.S., so they understand the U.S. healthcare system.
In Hong Kong in 2018, I had lunch with some old friends — a wealthy retired couple from Australia who spend part of their year in Phuket. They both go to Bangkok Hospital in Phuket for their annual physical, which is what led me to start getting health screenings in Thailand as well! I’ve started conversations with other foreigners I’ve met at these hospitals. Most are more affluent than me proving this isn’t something that lower-middle-class folks due to save money. It’s high-end care at an affordable rate! (My income has doubled since I started getting my healthcare done in Thailand, so I can afford to pay for care in the U.S. but prefer the efficiency, quality and refreshing price transparency of Thailand. )
Private healthcare in Thailand is affordable at baseline. Travel insurance doesn’t cover routine care like annual physicals and dental visits. I pay out of pocket for these, but the hospitals all accept insurance.
If you’d like to read more about the quality of Thai healthcare, The Economist recently did a story, Why is Thai health care so good?, and a case study about how the U.S. and Thailand compare on healthcare spending.
The Cost of an Annual Health Checkup in Thailand
 The central interior courtyard at Bumrundgrad Hospital in Bangkok looks like a posh hotel more than a hospital!
The quality of the private healthcare system in Thailand is extremely high, safe, efficient and affordable. Unlike in the U.S., the prices are clear and posted. Bloodwork and other test results are delivered in roughly 60-90 minutes. They also take insurance.
There is a set price list for annual health check options online for both of the major hospital brands in Thailand. Prices increase based on your age due to the extra tests that are included in the package. The prices below are for Bumrungrad Hospital.
2019: I chose the cheapest option since I was under 40, and the cost was 7,140 Baht/$235 USD. (Note prices are higher for females because a pap smear is included.) This includes normal physical blood work, a pap smear, a chest x-ray, urine and stool samples and detailed consultation with an English-speaking doctor. This takes two to three hours.
2022: I chose a higher-priced package since I turned 40 that included a mammogram with ultrasound, pap smear, EKG, ultrasound of the whole abdomen, chest x-ray, extensive bloodwork and urine/stool samples, and detailed consultation with an English-speaking doctor. All results except the pap smear were given to me at the appointment. Cost was 30,500 Baht/$847 USD. Clearly, this is higher than 2019, but it also includes a lot more. Again, prices are cheaper for men because they don’t need a pap smear or mammogram. This takes roughly three to four hours.
2023: The cost of the same package increased to 33,420 Baht/$991 USD, which was about a 17 percent increase from the previous year.
2024: The cost of the same package increased only slight to 34,700 Baht/$1,029 USD, which was only a 4 percent increase. It only took me three hours from when they took my bloodwork until the end when the doctor sat down and gave me all my results.
2025: The cost of the same package increased 4.5% to 36,300 THB/ $1,168.71 USD in December 2025. The Thai Baht was extremely high, which lead to part of the pricing difference.
The doctors all speak fluent English. You can choose a doctor off the website based on their credentials. (My doctor grew up in Florida, and she’s awesome!)
 Bumrunggrad International Hospital in Bangkok is constanlty rated one of the best in the world by Newsweek.
Step-by-step guide to a health checkup process at Bumrundgrad Hospital in Bangkok
When you arrive at the hospital, you check in and register to be in the hospital system. If it is your first visit, you’ll need your passport, and they’ll take your photo for their charts. You’ll be given a hospital number that’s your reference for future visits and medical records.
Next, you go to the health screening floor. You take a number and are called up to the registration counter in less than 10 minutes. They go over what package you’ve chosen and what’s included. If you have any medical records or previous x-rays/labs, bring those with you as well. They give you a hospital bracelet with your name and birthday and a barcode they scan at every step of the process. They give you a little buzzer like you’d get a restaurant that lets you know when you are next for all the procedures. Very efficient!
The next counter is the cashier. (You only pay for health screenings in advance since they are packages. Payment is done for normal appointments afterward. Unlike in the U.S., they can easily quote you exact prices before you are given any treatment or tests.)
The floor is set up in a giant circle with the central glass-enclosed area looking down on a well-manicured courtyard below. Each area you proceed to is labeled by letter from A to D.
Counter A: Bloodwork
At Counter A, they take your blood pressure and weight, do bloodwork, measure your waist and check your vision. When doing any records or bloodwork, the nurses are constantly asking you to verify your information on the paperwork and labels. They scan you hospital bracelet for everything. They have you verify your name on the vials for the blood, which is printed on a label. Everything is sealed, packaged and sanitary just like in the U.S. (I used to work in India, so I’ve been to some proper third-world hospitals, so I know the difference!)
Counter B: X-Rays, Mammograms, EKG & Ultrasounds
At Counter B, they ask for a urine and stool sample. This is also where you do your chest x-ray, mammogram with ultrasound, EKG and whole abdomen ultrasound. They give you a key to a locker in a giant changing room/bathroom that’s separated by gender. Each locker has a set of clean scrubs, slippers and hangers for your clothes. They even give you a cute free scarf to wear if you are cold.
Your name is printed on the containers for the urine/stool samples. You place those in a little cubby inside the bathroom for the nurses to retrieve. You sit in the lobby for your x-ray and other tests for just a few minutes. They call you, and you are done quickly. (Again, they scan your hospital bracelet and manually verify your name with each test.) After you are finished, you toss your scrubs in the bins provided and give back the key. They go through, clean and replenish the lockers after each use. The slippers are disposable, so they aren’t reused, so I just use my own shoes.
Counter C: Meet with Doctor & Breakfast Buffet
Counter C is my favorite because it’s where they feed you! A free breakfast buffet catered by the J.W. Marriot is provided! All your bloodwork and test results are processed while you wait. For the basic package, it is roughly a 60-90 minute process from when they take the bloodwork, which was at Counter A. Keep in mind that they already started processing my bloodwork while I was doing the X-ray and other tests. There’s free, fast WIFI, so I brought my laptop so I could work while waiting. I barely had a chance to do any work previously because they were so quick to call me!
I usually sit at Counter C for about 30 minutes or so before they call me back to see the doctor. The doctor goes over your full bloodwork and chest X-ray, mammogram, EKG and abdomen ultrasound results in detail. They ask about preexisting conditions and if you have any concerns. They also do a normal exam listening to your heart and lungs, etc. For women, this includes a breast exam if you didn’t get a mammogram. (You are randomly assigned a doctor. I really liked my doctor. She grew up in Florida and went to medical school in Thailand. I really liked her, so I always request her.) Afterward, men are free to go, but women are ushered over to another hallway to see another doctor to have a pap smear, which is a quick process. This is the only result that’s emailed to you afterward. I got the email about three days later with a detailed PDF with all my test results, including the pap smear.
After this, I was done and free to leave. The entire process takes about three to four hours depending on the packages you choose. The cost of the health screening and the roundtrip flight to Thailand is cheaper than paying for three months of my old insurance plan in the U.S.!
Important Note: I have no preexisting conditions or major health concerns. I’ve often thought about what I would do if I did, which was live abroad most of the year. Currently, I’m already living abroad most of the year anyways with my base in Thailand. I’m only in the U.S. now three to four months a year.
I spent too many years working jobs in the U.S. that I hated just for the health insurance and decided life was too short to be that miserable. (It’s amazing how my career took off the minute I quit the job I was working just for the healthcare because I finally had the time to devote to what I really wanted to do.) And, again, this is what’s best for me. I just all this information is helpful to others!
Specialist Doctors in Thailand
 The lobby at Bangkok Hospital in Chiang Mai, Thailand.
Dermatologist
Since skin cancer runs in my family, I always go to a dermatologist for a full-body skin cancer screening. There is an option to choose a doctor off the website based on their photo and their bio, which is what I had done.
I chose one who went to school in Boston. (From this experience and my last experience in the U.S., never choose the young, pretty dermatologists because they will make you feel bad about how you are aging and try to sell you all these cosmetic procedures that aren’t necessary. Older women are always nicer.) This was the only doctor I didn’t really like, but I also felt exactly the same about the last dermatologist in the U.S. who tried to sell me cosmetic procedures. I ended up with a different one last year who I like.
2019 Total Cost: 1,730 Baht/$57.12 USD
2022 Total Cost: 2,000 Baht/$55.54 USD
2023 Total Cost: 2,860 Baht/$84.82 USD (This was a much longer appointment to cover different skin concerns and questions I had, so it cost a bit more.)
2024 Total Cost: 2,675 Baht/$79.34 USD (This year, I had a new doctor who charged a bit more for a new patient visit, but it was still cheaper than last year.)
2025 Total Cost: 2,190 THB/ $70.51USD
I also had two large moles laser removed off my face and scalp for 9,533 THB/ $306.92 USD. It was a quick and great experience.
Gynecologist
I had a golf-ball-sized ovarian cyst a few years ago, so as a preliminary measure I went to see a gynecologist for an ultrasound as a precautionary measure in 2019. This entire process from meeting with the doctor to doing the ultrasound was less than 45 minutes. We sat in her office and discussed everything first. I showed her the results from my previous ultrasound in the U.S., which I keep on my computer.
During the process, she even had the ultrasound on the screen and labeled everything during the process. (Thankfully, everything was good!) I feel more comfortable with a woman doctor in most situations especially this one, so I chose a woman off the website who went to school in Germany. She reminded me of my grandma with her accent, and I totally loved her. I knew this would cost more, but I wanted to be sure things were okay. I knew I was paying for peace of mind! 2019 Total Cost: 7,060 Baht/ $233 USD ($100 for ultrasound, $100 for doctor fee & $33 for supplies) Now that I’m 40, my healthcare package includes an ultrasound, so I don’t pay extra for this anymore.
Colonoscopy/Endoscopy
Since I turn 45 in 2026, I had my first colonoscopy in early January 2025. (Due to the increase in colorectal cancer, doctors are recommending getting one at age 45.) I also did an endoscopy at the same time. The prep wasn’t fun but not nearly as bad as people make it sound. Thankfully, all my results were good.
I had the procedure at Bangkok Hospital in Chiang Mai. The colonoscopy and endoscopy cost 38,000 Bhat/ $1,223.44 USD. The doctor went over all the results and showed me photos as soon as I got out of the recovery room. They send a few things out for testing, which were all fine. The follow-up appointment cost 2,931 THB/ $94.37 USD.
The medicines needed for the procedure were around $20-30 USD. To save money, I bought them all at a pharmacy outside the hospital, except for the powder I had to drink the night before and morning of the procedure. (I had my first endoscopy in 2019 for around $700 USD.)
I did not need a referral. I just made an appointment to talk to the doctor and set the date for the procedure. My Cigna insurance would have paid $350 of this if I had waited until August when I turn 45. I decided to just do it now while I had the time.
Which is better: Bangkok Hospital or Bumrundgrad?
 A sample of the health screening options offered by Bumrundgrad International Hospital in Bangkok.
Both Bumrundgrad International Hospital and Bangkok Hospital offer similar packages. Bangkok Hospital offers discouts making them a bit cheaper. Since Bumrundgrad has my medical records and I like my doctor, I decided to keep using them. Prices increase yearly for all packages, which I covered above.
For appointments, I’d book at least a week ahead. I booked a few weeks ahead so I could get an early morning appointment and my doctor of choice. In Bangkok, both hospitals are fairly accessible by public transit. Bumrundgrad offers two free shuttles in Bangkok and an airport pickup service.
Since Bumrundgrad doesn’t have a branch in Chiang Mai, I go to Bangkok Hospital in Chiang Mai, which is $3 taxi ride from the center of town.
Bangkok Hospital is the largest network in Thailand with over 40 hospitals in big cities including Phuket. My Thai friends (even the one who lived in New York) like Bangkok Hospital better but say both have the same quality of healthcare.
Keep in mind that the cost of these hospitals is very expensive to most locals. The average income in Thailand is $10-15 USD/day. (This figure comes from a nonprofit I volunteered with several years ago but has likely increased. I see other sources saying it’s $20/day but can’t verify the accuracy.) The two hospitals I mention are private and the most expensive in the country. There are significantly cheaper options that offer quality care for locals, but those doctors don’t always speak English, which is why I go to the private hospitals, which cater to foreigners.
Medicine in Thailand
 Photo Credit: Stock image from Pexels.com
In Thailand, you can buy common antibiotics at the pharmacy without a prescription like doxycycline (malaria drug) and azithromycin (used to treat strep throat, food poisoning, etc.). This does NOT include controlled substances like pain or anxiety meds, etc. Certain medications are only available at pharmacies inside hospitals with prescriptions.
When I am prescribed or suggested to take a medication or dosage that I’m not sure about while traveling, I call a 24-hour pharmacy in the U.S., like Walgreens or CVS, and ask to speak to a pharmacist to get their opinion. I do this in the U.S. all the time to check drug interactions, etc. (You can call U.S. numbers abroad for free with Google Voice.)
If a doctor at any hospital in Thailand prescribes you medicine, it’s much cheaper (almost 50%!) to buy it outside the hospital. Siam Pharmacy near Bumrundgrad Hospital in Bangkok has a wide selection. In Chiang Mai, Dara Pharmacy, not far from Bangkok Hospital, has a wide selection at better prices than the hospital.
Travel Vaccines in Thailand
For travel vaccines, I verify the name of the vaccine to ensure it is one that’s approved by the FDA in the U.S. I recently got my Typhoid Fever vaccine again, which was a shot that lasts for two years. It was a simple process, and the vaccine cost 1,533 Baht/$42 USD (2022 prices), which is half the cost in the U.S.
In late 2024, I got my Yellow Fever vaccine since I was going to Africa in 2025. It was 5,269 Baht/$155, including the shot and doctor’s fees. (It costs $240 to get the Yellow Fever vaccine at Walgreens. I called while I was in the waiting room just to check.) I had to see a doctor in the infectious disease department, who used to live in Texas oddly enough, to get the shot. He was great and it was a quick process with a same-day appointment. I mainly got this abroad for convenience, but the price savings was a nice bonus.
In December 2025, I got my Tdap vaccine for diphtheria, pertussis, and tetanus for 2,500 Baht/$80.49 USD.
Dentists in Thailand
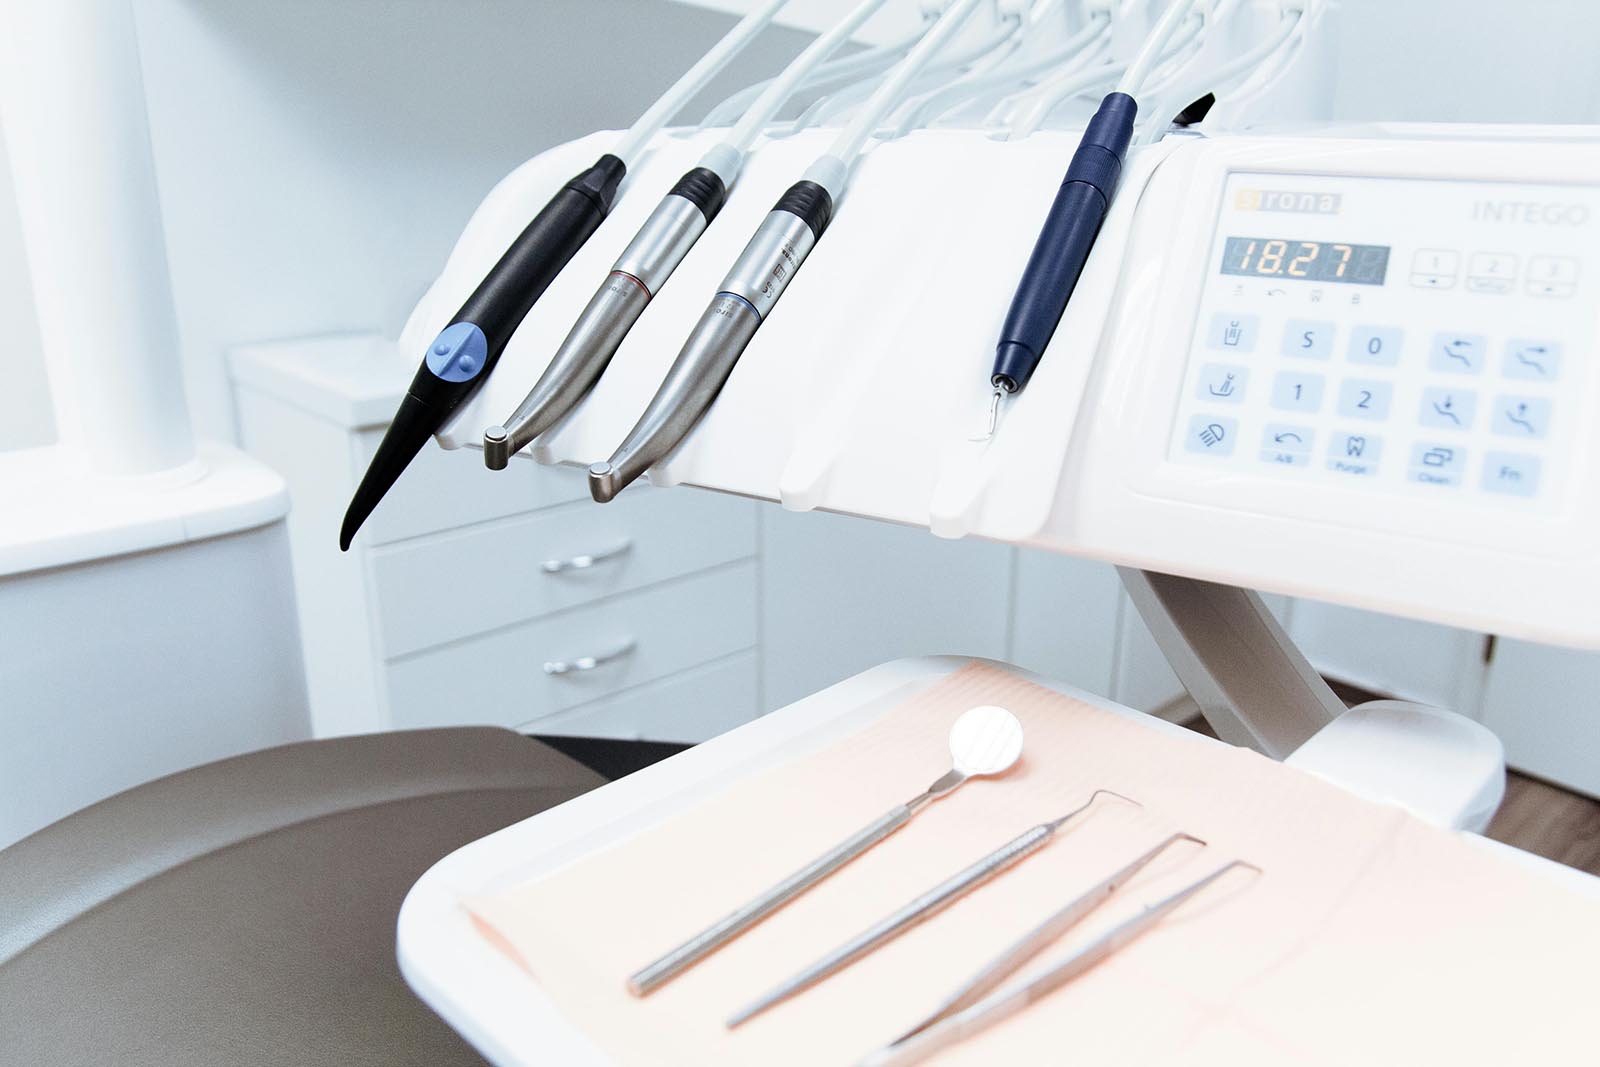 Photo Credit: Stock image from Pexels.com
I also get my teeth cleaned in Bangkok at Thantakit International Dental Center at their All Season’s branch. This was recommended to me years ago by my expat friends. The best part about this place is that my teeth cleaning, included free pick-up and drop-off in a private car!
I started getting my teeth cleaned in Thailand in 2013 after my dental hygienist in Santa Barbara recommended it after she’d scolded me for going too long between cleanings because I’d been living in Asia! She’d lived in Bali previously and said the quality of dentists in Asia was good. In Thailand, an actual dentist cleans your teeth.
2019 Total Price: 1,350 Baht/ $44.56 USD (Thantakit gives you a 10% discount if you pay cash.)
2022 Total Price: $1,200 Baht/ $33 USD + 800 Baht/$22 USD for fluoride application. (I’ll decline the fluoride application in the future because it’s not really needed and I didn’t realize it was extra. It was just added like it was part of the procedure. They still give you a 10% discount for paying in cash. My dentist was lovely so I’d go back to her.)
2023 Total Price: 1,350 baht/$44.46 USD (It was 1,500 Baht but they gave me a 10% discount for paying cash.)
2024: Total Price: 1,500/$44.49 USD (They stopped doing the 10% cash discount so I just pay with a card now to earn my airline loyalty points!)
2025 Total Price: 1,500 Baht/$48.29 USD (The Thai Baht is really strong, so the USD price increased even though price did not change.)
Full disclosure: I have perfect teeth, but I went through literal hell to get them, including five years of braces, a cracked tooth, a root canal and a crown that was another two-year hellish ordeal. I’ve lived in five states in the U.S. and been to many dentists, only liked three. Now, I only trust my hometown dentist with major dental work and will not do that abroad or in another state in the U.S. (I wish I’d driven 18 hours to him instead of getting that damn root canal/crown in Texas.) While I’m open to doing most things abroad even surgery, I won’t let anyone else touch my teeth for major dental work. No one does teeth as well as America.
Dental tourism is a huge business in Thailand. The island of Koh Samui in Southern Thailand is filled with dental centers, especially ones that do implants. People literally fly in and start the process on the first day of their vacation. They vacation and then come back at the end to finish the process!
To dig in a bit deeper into medical care abroad, I also wrote a Travel Insurance Guide here!
When I lived in Austin, I had insurance through a job then switched to a ACA plan. Now, I live abroad and use a global health insurance policy.
What I Do for Health Insurance in the U.S. as a Freelancer
When I quit a part-time job that provided health insurance in May 2017, I paid for a middle-grade healthcare plan through a Texas company called Sendero Health. I purchased it through the health care exchange (Affordable Care Act). Initially, I had a subsidy for my policy, but my income increased, so I owed the full amount.
My monthly premium was $350 but jumped to $450 in January 2018. All my co-pays and deductibles doubled, which is why I immediately canceled the plan. While a lot of doctors in Austin were in-network, they often had a limited “quota” for my type of plan that was already filled.
Most of the doctors who I found that would take my insurance were terrible. I canceled the plan because it was useless and focused on other alternatives. (For the self-employed, the Affordable Care Act (ACA) isn’t perfect, but it is a step in the right direction because it covers preexisting conditions without increasing premiums.)
To be VERY clear, I ALWAYS have some form of health care coverage. It’s too risky to do without. When I’m traveling, I have travel medical insurance, which is roughly $92/month with no deductible through SafetyWing. (Again, this was half the cost before I turned 40.) This covers if I get sick while traveling and emergency evacuation. For these policies, I pay upfront or monthly depending on how long I need the policy. and they reimburse me in roughly seven to 30 days. (U.S. health insurance rarely covers you abroad.) I’ve written a detailed review of my experience with SafetyWing travel medical insurance.
For U.S. coverage, I previously used a short-term high-deductible major medical plan that cost roughly $175/month to cover major emergencies with a $7,500 and 100% co-insurance. This meant that if I got sick, I paid the first $7,500, and they pay 100% of the rest. As of September 2024, the U.S. government restricted short-term major medical policies to only four months maximum in a 12 month period. (This varies by state, and some states have a shorter duration.)
Due to this change, I started investigating global polices that cover up to 180 days each year in the U.S. for Americans who live abroad (Thailand is my current base.) and decided on a Cigna Global plan. (Other similar options include GeoBlue and Vumi, which both have shorter limits for U.S. visits (21 days at a time). Those limits are why I chose Cigna Global.) You can read my review of Cigna in the new section.
Important Note: Most of the ACA plans and even private plans have very limited coverage outside of the state that you live in, so read the fine print carefully. If you have an emergency out of state, the doctor will most likely be out-of-network so you’ll be on the hook for that amount.
In January 2022, Congress passed the No Surprises Act, which expands restrictions on charging health care plan holders out-of-network rates for certain services. While this can help, I still want to stress the importance of fully understanding your out-of-network benefits within the U.S. for ACA plans.
I’m currently investigating cash-based and direct primary care practices that don’t accept insurance as an alternative. (An example of one these practices is Brightmark Health in Birmingham, Ala. if you’re interested in looking into details. I chatted with the owner, Dr. Jospeh Wu, about the business model recently for a potential freelance story.)
These cash or direct primary care practices paired with a lower cost high-deductible catastrophic insurance plan could potentially lower healthcare costs while also increasing the efficiency of medical care and more quality one-on-one time with the doctor. This could be a game changer for many Americans, including freelancers like myself.
My Review of my Cigna Global Policy
I switched to a Cigna Globa Policy last year with Thailand as my residence. (This plan limits you to only six months a year in the U.S., and I only visit the U.S. three to four months anyway.) I have the Silver plan with a $10,000 USD deductible and 0% cost share. This means that I pay the first $10,000 and Cigna covers the rest. This is a basic policy that keeps me from going bankrupt from a medical emergency when I’m in the U.S. It does include a health and wellbeing option that covers some preventative care and screenings. I pay for these upfront and they refund the covered amount.
2025 Annual Cost: $1,456 USD
2026 Annual Cost: $1,603 USD (10% increase)
When I submitted my claim for reimbursement for the preventative care (annual physical and skin cancer screening), I got an email back the next day saying I was entitled to a higher reimbursement than I had submitted in the claim. I was shocked! What insurance company emails to say they will pay you more money? I got reimbursed the next day for a total of $680, more than half of what I had paid for both ($1,239).
Keep in mind that I chose a health screening package that included a lot of extra things, which I knew I’d pay out of pocket for and would definitely not have been covered by U.S. insurance. And, a few of the items I was reimbursed for are only covered every two to three years.
In 2025, I spent about $3,700 on health insurance and doctor’s appointments and tests. (I included the colonoscopy/endoscopy I had in early January in this cost.) I spent about $678.83 on travel medical insurance. If I lived in the U.S., I’d be paying more than that just for the insurance premiums.

What travel medical insurance is best for Thailand?
Travel medical insurance is one of the most important things to purchase for any trip abroad, especially Thailand. It covers all the things that could go wrong from injuries to travel delays so that you don’t have to worry and can focus on traveling! I’m a big fan of SafetyWing’s Nomad Insurance, which offers $0 deductible travel medical insurance coverage for over 180 countries for people aged 69 and under when traveling outside their home country. (Please note that travel medicial insurance will not cover any of the routine doctor’s visits above but will cover injury or illness.) For more details on my experience, read my review of SafetyWing in Thailand!
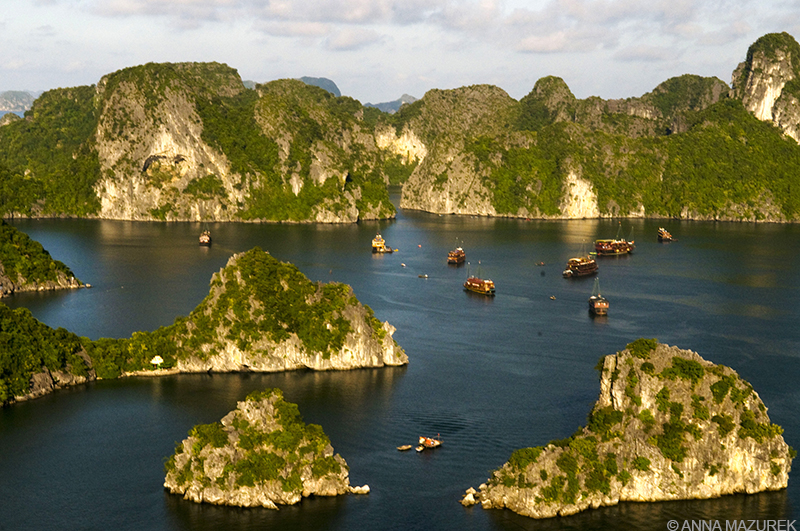
I Visit Vietnam Every Year – Here are my Favorite Places (and Where to Avoid)
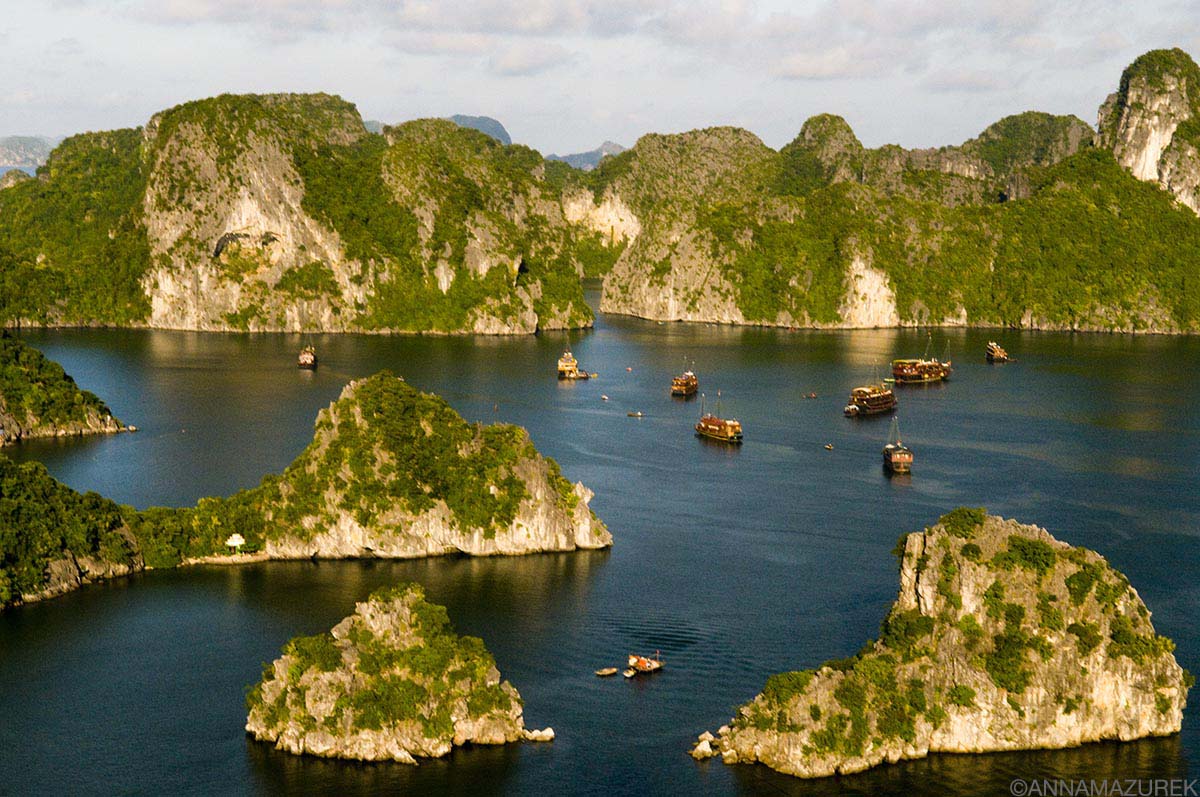
Ha Long Bay is a must-see on any trip to Vietnam. Avoid winter, so it’s not too cold to swim.
Vietnam is unmatched in Southeast Asia in terms of scenery. The country stretches more than 1,000 miles from north to south with a diverse landscape, from the towering limestone pillars of Ha Long Bay to the flat, flooded plains of the Mekong Delta. And, of course, there’s the delicious food—a cooking class is a must!
And, if Vietnam couldn’t get any more appealing—it’s also one of the cheapest places to travel in Southeast Asia. I work in the travel industry and visit Vietnam multiple times a year, so I made this travel guide to help you prepare for your trip. The locations in the post are organized by region: north, central and southern Vietnam. Keep reading for the best places to visit in Vietnam and where to avoid (the beaches!).
To simplify travel, I always book private and shared transfers on Klook for convenience and suggest using 12go.asia for bus and train tickets if it’s too much hassle to go to the station. Please read reviews before booking.
Affiliate links are used in this post. If you make a purchase, I earn a small commission at no cost to you, which goes toward the cost of maintaining this blog.
Plan Your Trip
Currency: Vietnamese Dong (VND)
When to Go: July to September for beaches. December to March for cooler temperatures.
Travel Insurance: Protect yourself with SafetyWing travel medical insurance to cover accidents and travel delays.
Mobile eSIM Card: Get seamless connectivity worldwide with Airalo minus the hassle of physical SIM card. (Save 10% with code AIRALOESIM10!)
Northern Vietnam
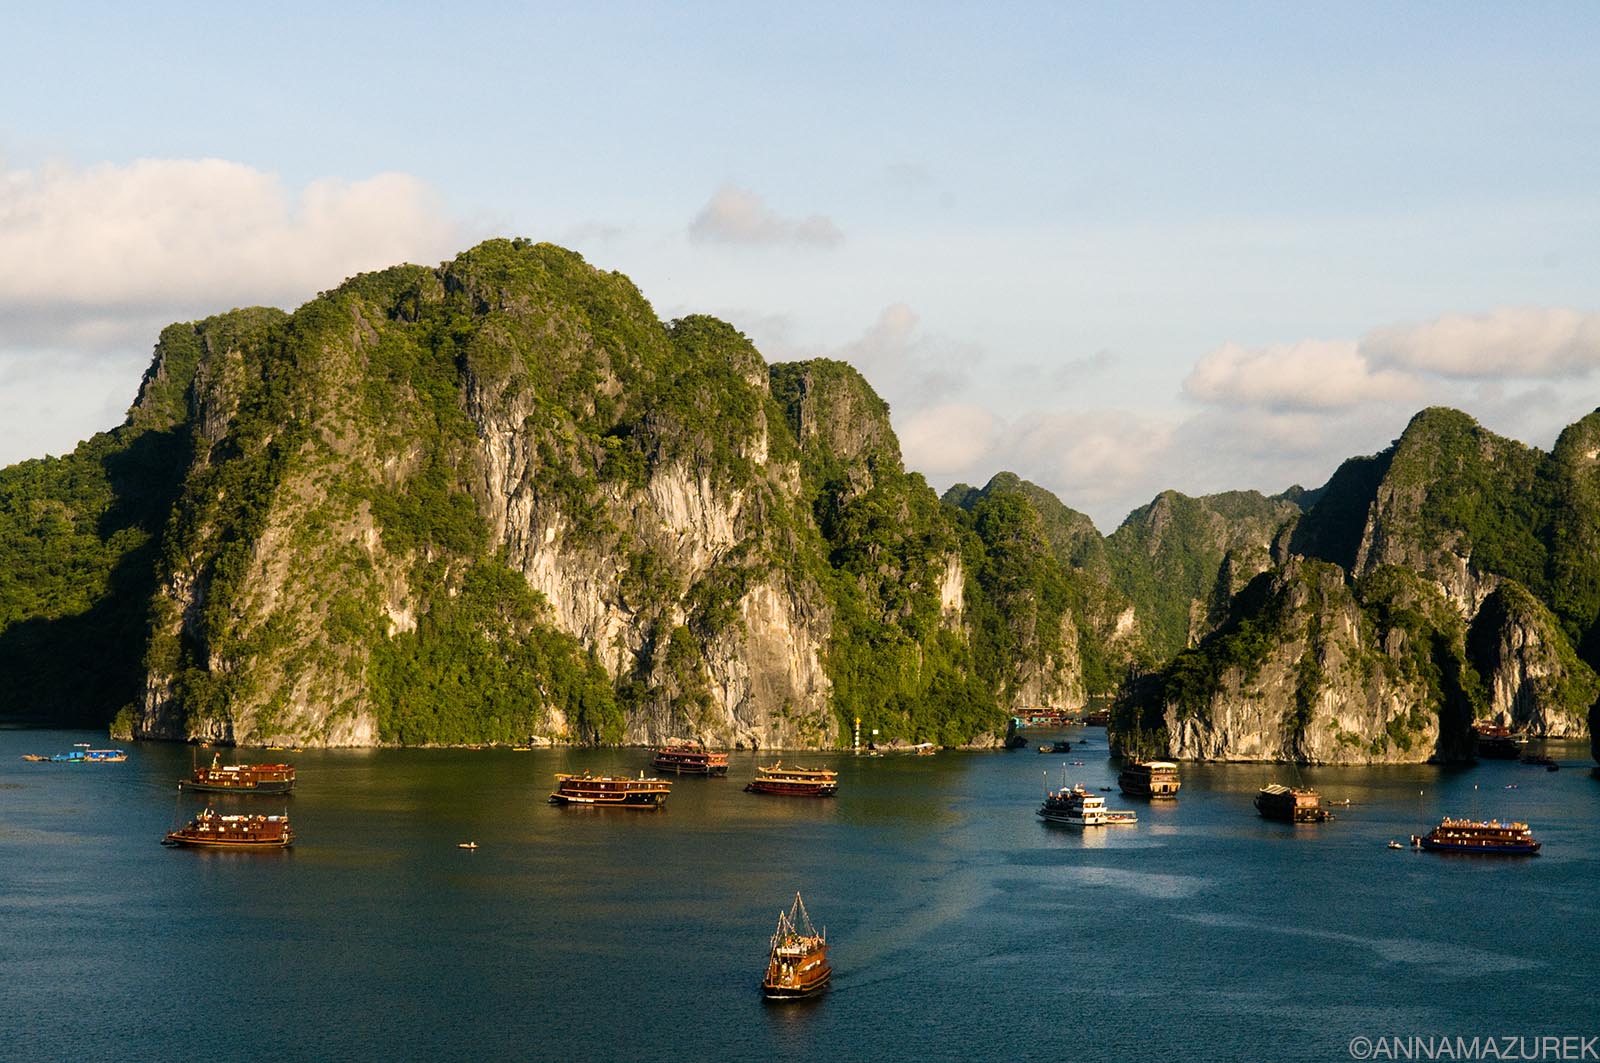 The best time to go swimming in Ha Long Bay, Vietnam is between April and October.
1. Ha Long Bay & Lan Ha Bay
Why Go: Overnight boat trips among limestone karsts
How to get there: Three-hour public bus or private transfer from Hanoi
Ha Long Bay, a UNESCO site, is one of those places like Machu Picchu that you must visit once in your life. The scenery is postcard-perfect: towering limestone karsts and over 1,100 islands scattered through the Gulf of Tonkin’s emerald waters. It is the number one attraction in Vietnam.
The best way to experience the bay is to do a multiple-day cruise on a houseboat to explore the islands, swim and eat year weight in fresh seafood! There are day boat trips and overnight cruises for every budget. I recommend spending a night or two on a houseboat!
Ha Long Bay vs. Lan Ha Bay
Historically, Ha Long Bay spread across two provinces and was split into sections controlled by two different local governments—Ha Long Bay to the north and the Lan Ha Bay to the south bordering the coast of Cat Ba Island. (Both bays are included in the UNESCO area.) Over 300 boats operate in Ha Long Bay (popular with Chinese tourists) but only 64 in Lan Ha Bay, according to my local guide on a recent visit.
While both share the same scenery, Lan Han Bay has less pollution and tourists, but less infrastructure, which I’ve witnessed on my visits to both. There are no caves in Lan Ha Bay or scenic viewpoints like the one in my photo above from Ha Long Bay. The caves are one of the noteworthy features in the UNESCO nomination. While the caves are stunning, they get crowded.
While it’s possible to book last-minute budget tours on Klook or GetYourGuide, luxury boats, like the Ginger by Heritage Line, (stunning ship I stayed on for work trip) fill up four months in advance. To visit both bays, consider booking separate back-to-back one-night trips on different boats. (Only a couple of boats with good government relationships can operate in both bays.)
When to Visit Ha Long Bay & Lan Ha Bay
If you want blue skies, visit from April to October. June to August is steaming hot but less crowded. November to March brings cooler weather (highs in the 60s in January) but often consistent gray skies. September to October is packed with tourists. My visits have always been in January or July. I prefer July for blue skies.
How to Get to Ha Long Bay
Most people fly into Hanoi’s Noi Bai International Airport, the country’s second-largest airport, and take a transfer. (There are two smaller airports near Ha Long Bay—Van Don International and Cat Bi International.) If a transfer isn’t included in your boat tour, you can find affordable transfers through Klook. It’s roughly a three-hour drive.
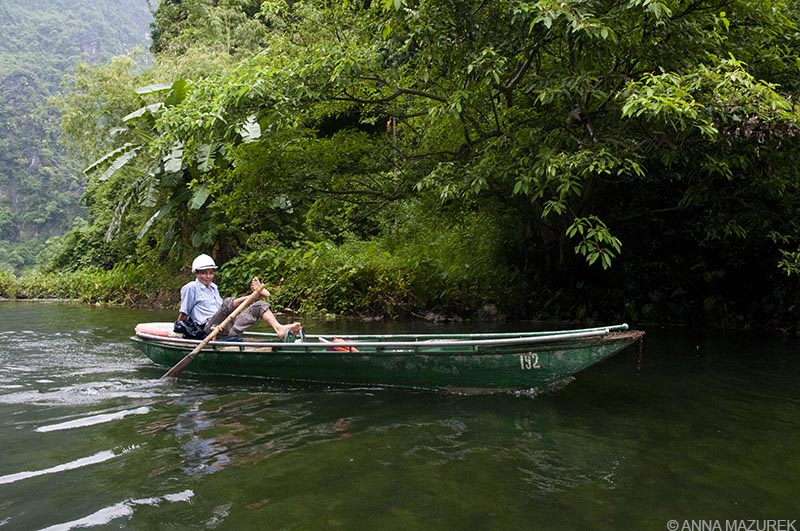 If you like the idea of riding a boat through stunning caves, then add Tam Coc to your list. The rowers use their feet to move the oars just like this guy!
2. Ninh Binh
Why go: Rowboat trips through the “Ha Long Bay on land” with caves & ricefields
How to get there: Three hours south of Hanoi by public bus or $7 shared transfer
Where to stay: Tam Coc Mountain Sunset and Garden Hotel
The Ninh Binh province is known as the “Ha Long Bay on land” famous for row boat tours through giant caves and alongside limestone karsts. The most stunning boat ride is Trang An (Route 3), which is a three-hour tour through spectacular scenery and the kilometer-long Hang Dot cave.
When the rice fields are green (wet season), Tam Coc, a 1.5-hour boat trip where the boat guides row with their feet, is beautiful, but Trang An is better if you only have time for one.
The viewpoint from Mua Cave is worth the 500-stair climb but again is best when the rice fields are green. My other favorite places include the picturesque Bich Dong Pagoda and cave temple (free entry), and Bai Dinh Pagoda, a photogenic 4,200-acre Buddhist complex, one of the largest in Southeast Asia, that’s easily explored on an electric cart shuttle.
Hoa Lu Old Town in Ninh Binh City is a stunning sight of two towering modern pagodas lit up at night with detailed carvings inside. This free attraction was built in 2022, so don’t get it confused with Hoa Lu Ancient Town, the historic site of the first capital of Vietnam that’s 11 kilometers away.
Tam Coc is a good base for exploring the area. In January 2025, I stayed at Tam Coc Mountain Sunset and Garden Hotel ($30 USD/night) with spacious rooms with a convenient location with a pool and helpful English-speaking owner. I recommend staying a few nights in the area, but there’s also plenty of day tours from Hanoi if you are short on time.
For more details, check out my Ninh Binh guide!
How to Get to Ninh Binh Province
The Ninh Binh province is roughly an hour and 45 minutes southeast of Hanoi. The cheapest option is public buses from Hanoi. I recently took this $7 shared transfer from Hanoi, which was efficient and involved transferring to an SUV to drop me off directly at my hotel.
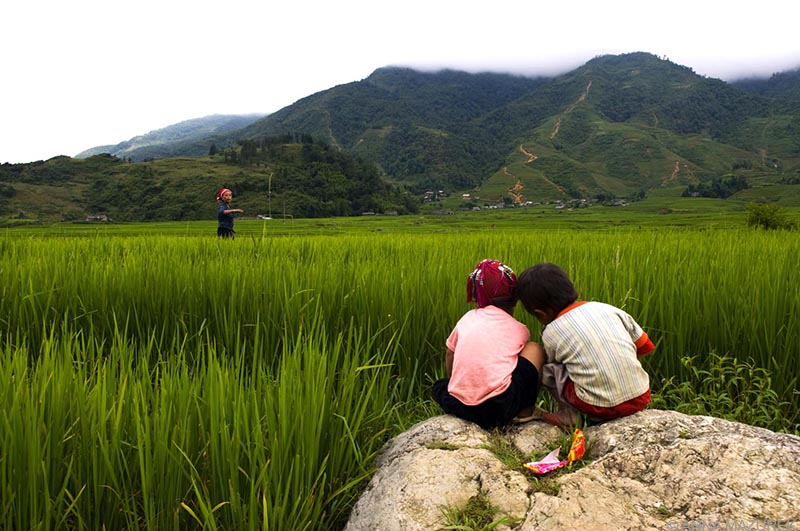
This shot from Sapa is one of my favorite travel images from Asia.
3. Sapa
Why Go: Trekking base with lush rice fields and local villages.
How to get there: Around seven hours by sleeper train (plus a 50-minute transfer), sleeper bus or private/shared car transfer from Hanoi
The former 1922 French hill station is the trekking capital of Vietnam. The views of the valley from the town are stunning. (The photo above is one of my favorite images I’ve shot in all my years in Asia.)
Popular treks include Fansipan, the highest mountain in Vietnam (3,143 meters); Cat Cat, a village three kilometers south of Sapa; Ta Phin Village, a 10-kilometer hike from the city; Sa Seng & Hang Da, a hike along the eastern ridge is great for valley views. Be warned—the tourist touts and aggressive vendors are relentless in Sapa. (I visited a village with a student group and each student had one vendor following them around town the entire day trying to see them something.) Despite this, the scenery is unreal and worth the trip!
How to get to Sapa
Sapa is located 195 miles northwest of Hanoi (closest airport) near the China border. By car or bus, it’s about a five-to-six-hour journey depending on traffic. I’ve taken the roughly seven-hour sleeper train previously, which goes from Hanoi to Lao Cai (closest station to Sapa). It’s an additional 50-minute transfer from there to Sapa. There are also cheaper sleeper buses for about half the price of the train ($11-16 USD).
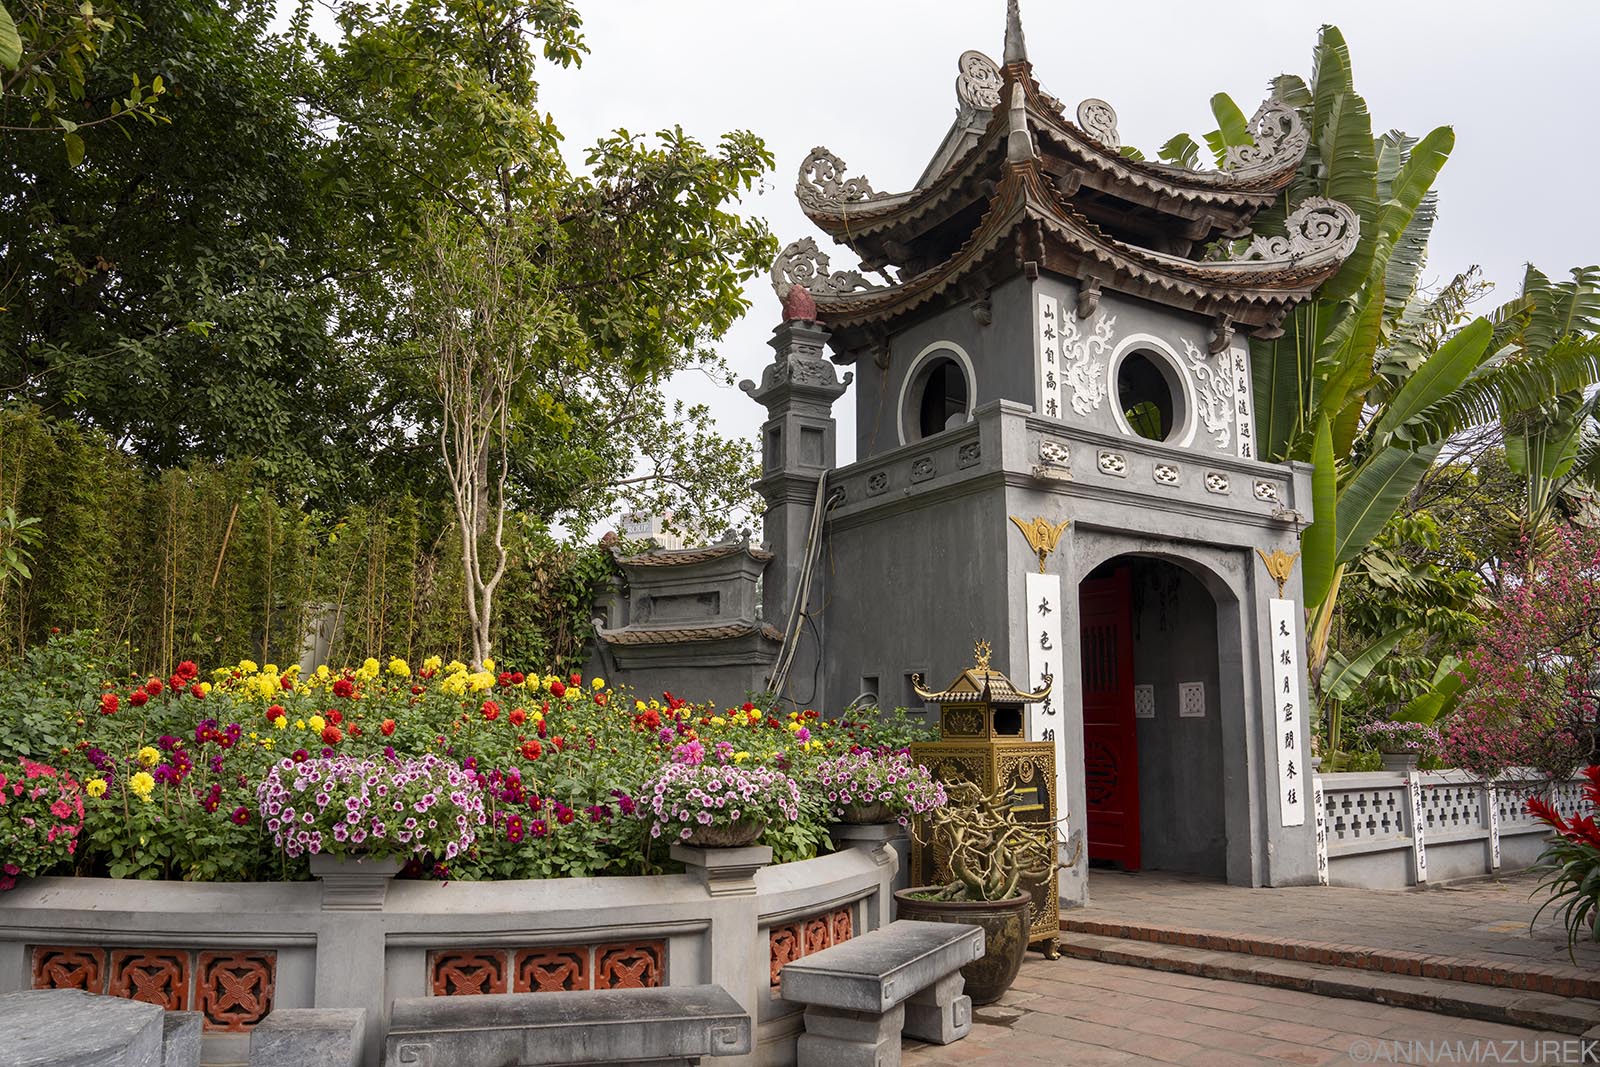 Ngoc Son Temple on Hoàn Kiếm Lake in Hanoi is beautiful year-round but even more vibrant during the TET holiday.
4. Hanoi
Why Go: Historical Old Quarter, cafes, museums and great travel base
How to get there: Fly into Noi Bai International Airport & take a 40-minute taxiWhere to Stay: La Sinfonia del Rey Hotel & Spa and Hanoi Authentic Boutique Hotel
Hanoi is both the capital of the country and the chaos. Hordes of motorbikes cover the streets. Find a safe spot on the sidewalk to people watch as the motorbikes defy gravity and logic with their loads which range from refrigerators to a family of five with a dog and my favorite – dozens of plastic bags filled with water and live goldfish tied to a giant hoop structure on the back of the bike.
Wander the streets of the Old Quarter and the Hoan Kiemshopping district where streets are organized by the goods they sell. (This is really annoying if you need to buy a pen and you’re on the shoe street.) Pho bo (beef noodle shop) is a must for breakfast along with a traditional Vietnamese coffee, which is medium to coarse ground dark roast with a small metal drip filter.
For a bánh mi, try Banh Mi 25. The Note Cafe is an Instagramable spot covered floor-to-ceiling in post-it notes while JOMA is one of my favorite café chains in Southeast Asia for breakfast. For an adrenaline adventure, visit Hanoi 1990s, a small cafe perched on the edge of Hanoi’s famous train street where a handful of trains come buzzing by daily just inches from your table.
Go for a stroll around Hoàn Kiếm Lake and cross the red bridge to Ngoc Son Temple. Stop by the Temple of Literature and the Ho Chi Minh Museum. If you want to say hello to “Uncle Ho”, stop by his mausoleum. Be warned – he’s been preserved and is on full display in typical communist fashion. For more details on the city, check out my Hanoi guide.
How to get to Hanoi
Hanoi is home to the second busiest airport in the Vietnam and connected by bus or train easily to major destinations across the country. While Ho Chi Minh City has more international flights, Hanoi is also easy to get to.
Central Vietnam
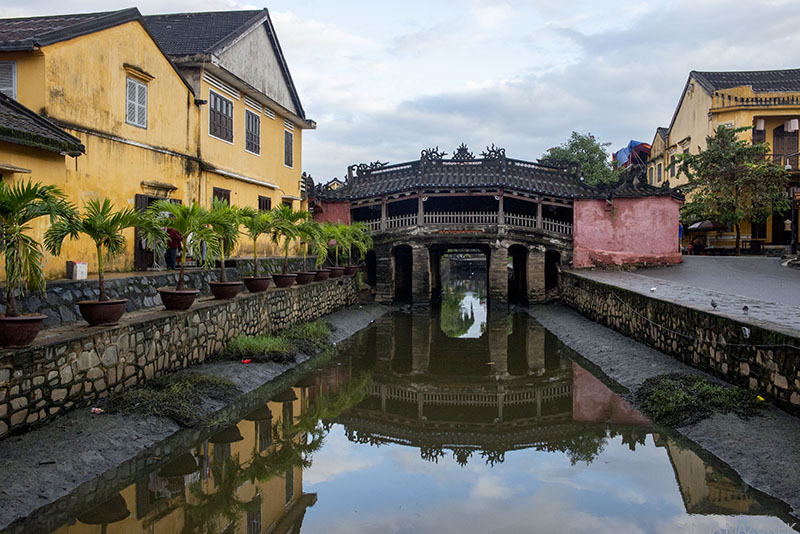 The Japanese Covered Bridge is one of the top sights in Hoi An. After a week of rain, this is the first time I saw blue sky!
5. Hoi An
Why Go: Atmospheric UNESCO old town with lantern-lit streets known for temples, food & clothing tailors
How to get there: Fly into Da Nang & book a 30-minute transfer to town.
Where to stay: Sol’s Villa and Hoianese Tranquil Heritage Hotel
Hoi An is my favorite city in Vietnam. The UNESCO site is one of Southeast Asia’s major seaports and reminds me a bit of Charleston—the same quaint historic charm, old colonial buildings and an overload of tourists.
As per usual, I got up at sunrise every morning to photograph the city and did the same at sunset. Highlights include the Japanese Covered Bridge, the Assembly Hall of Cantonese Chine Congregation, which has cool dragon carvings, and the Assembly Hall of the Fujian Chinese Congregation.
The best Banh Mi spots in town are Banh Mi Queen (I loved the chicken!) and Banh Mi Phuong (Anthony Bourdain loved this spot). Streets Restaurant Café had the best Cau Lau I had on the whole trip. It’s also a nonprofit that trains underprivileged youth to work in culinary and hospitality fields.
How to get to Hoi An
The closest airport is Da Nang, which is roughly a 30-minute drive. I booked a direct transfer to Hoi A from Da Nang on Klook for around $10, but there are even cheaper group transfers. Read reviews before booking!
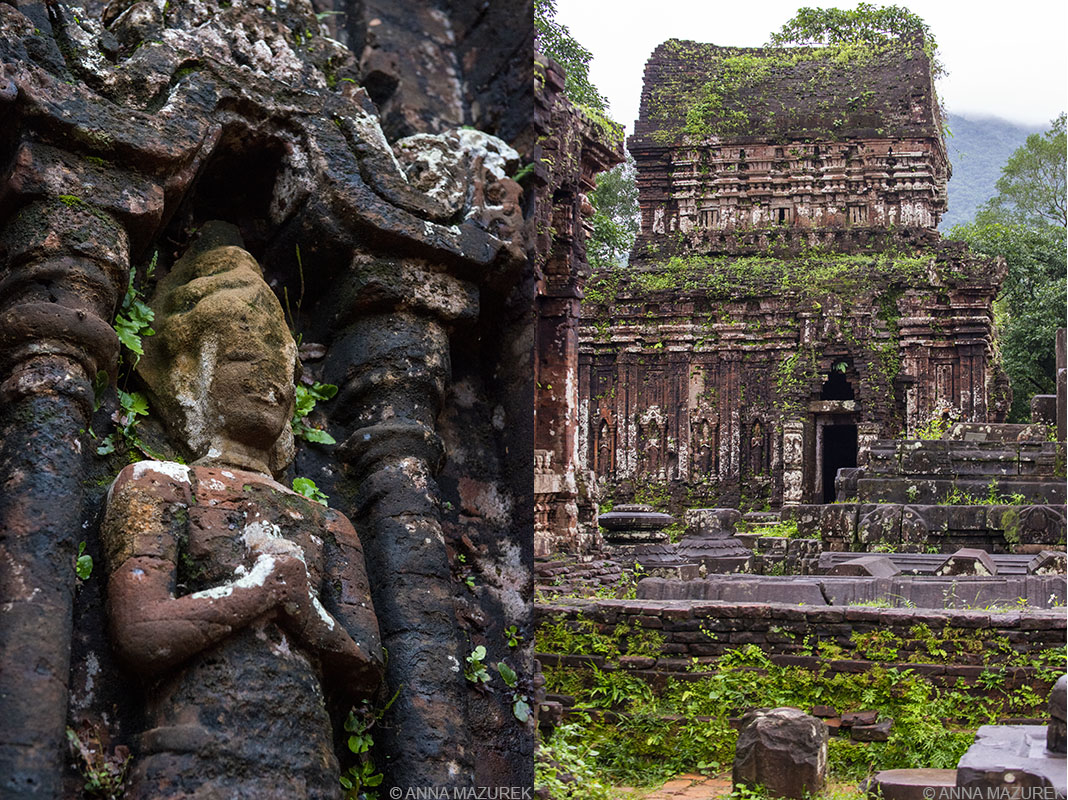 I highly recommend visiting the ruins of My Son, a Hindu temple complex built between the 4th and 14th Century to honor the god Shiva. It’s easily assessable from Hoi An or Da Nang by tour, car or motorbike. I did the sunrise tour to avoid the crowds in my photos.
Day Trips from Hoi An
Hoi An is a great hub to do a few day trips including visiting My Son, the ruins of a Hindu temple complex. (Consider booking one of the sunrise tours I loved being there so early!) You can do it on your own if you have a motorbike. I also recommend renting a bicycle and heading over to the coconut village for a boat ride on one of the circular boats. It’s a very touristy thing but such a fun experience. Check out my Vietnam Instagram story for videos from the trip!
Read my guides to Hanoi, Ho Chi Minh City, Thailand, Chiang Mai, Bangkok and Singapore!

Left: The Nine Brone Urns (tripod cauldrons) in front of The To Temple at Hue’s Imperial Capital. Right: The life-size statues at the Khai Dinh Tomb.
6. Hue
Why go: Former imperial capital on the Perfume River with Imperial City, pagoda and ornate royal tombs
How to get there: Scenic train or bus ride (2.5 hours) from Da Nang over the Hai Van Pass or fly into nearby Phu Bai International Airport
Where to Stay: Azerai La Residence (fancy spot to splurge)
Hue, a former feudal capital, lies along the Perfume River. Explore the remnants of the Nguyen Dynasty, Vietnam’s last dynasty that ruled from 1802 to 1945. Start at the Imperial Capital, a UNESCO site and walled city with 2.5-kilometer-long enclosures. While the site was bombed by both the French and Americans, it’s still worth setting aside a few hours to visit the 20 remaining buildings. The Thiên Mụ Pagoda is worth a quick visit, too.
My favorite part of the city is visiting the seven royal tombs on the outskirts of town, including the Tomb of Khai Dinh Tomb (amazing statues), Gia Long (oldest and rarely visited) and Minh Mang (most stately). All the tombs are located outside the city, so you’ll need a day tour or your own wheels to visit. It would take two days to visit all seven.
How to Get to Hue
While there’s an airport about nine miles from the city center, the best way to get to Hue is driving or riding the train from Da Nang along the scenic Hai Van Pass. Book ahead for the train via 12Go.Asia to secure a window seat facing the sea for the roughly 2.5-hour journey.
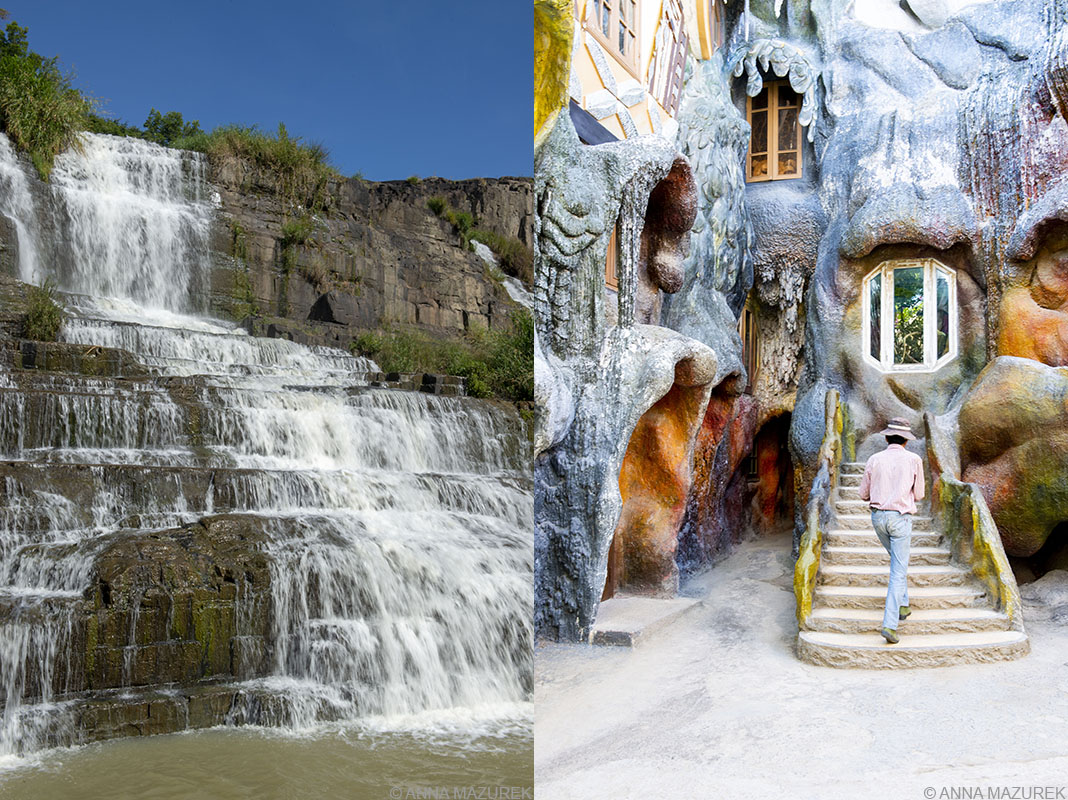 Left: Pongour Waterfalls outside of Da Lat. Right: Crazy House, a Gaudi-inspired tourist site that is also a hotel mixed in the site.
7. Da Lat
Why Go: Cooler climate mountain city for waterfalls, adventure sports & quirky architecture
How to get there: Fly to Lien Khuong Airport nearby or take buses/vans from Nha Trang, Mui Ne or long‑haul routes.
Da Lat is the Medellin of Vietnam. The French fled to this mountainous region to escape the heat. It’s now the adventure capital—trekking, canyoning, white water rafting and mountain biking are all options. The vibe is much more laid back than the rest of Vietnam, which I loved.
I spent most of my time here visiting waterfalls. My favorite was Pongour, but the roller coaster at Datanla waterfall is a must. (It’s a one-car self-controlled system so it’s super fun!) I recommend checking out the Hang Nga Crazy House, which was built by a Vietnamese architect inspired by Gaudi. You can visit and also book a room for the night! Don’t miss the 100 Roofs Bar that resembles the set of a Lord of the Rings movie.
How to get to Da Lat
The closest airport is Lien Khuong Airport, roughly 18 miles south of the city. There are sleeper buses from Hanoi (7 hours) and vans/buses from Nha Trang (4 hours) and Mui Ne (5 hours). I took a long-haul sleeper bus from Hoi An (14 hours).
Southern Vietnam
 Left: Fairy Spring in Mui Ne, Vietnam. Right: The “white” sand dunes that are 24 km from town.
8. Mui Ne
Why Go: Kitesurfing base with red and white sand dunes, Fairy Spring and access to Ke Ga Lighthouse
How to get there: Bus 5.5 hours from Da Lat or 3.5 hours to Ho Chi Minh City (closest airport)
Mui Ne is the kitesurfing capital of Vietnam. The town itself doesn’t have the best beach but the town is close to some cool attractions. For $5, you can take a jeep tour to the red sand dunes near town and the white sand dunes (24 km from town). The tours also take you to Fairy Spring, a stream that flows through some cool rock formations and sand dunes. (It’s easily accessible from town by foot.)
The best place to eat in town is a Mediterranean spot called Sindbad and Dong Vui Food Court, an open-air food court with independently run stalls that range from German sausages to paella. There are also loads of Vietnamese options and tons of beer.
 Ke Ga Lighthouse was one of my favorite spots in Central Vietnam! Very few people visit so I totally recommend it. I had the island to myself!
The main reason I went to Mui Ne was to visit the Ke Ga Lighthouse, a remote lighthouse built by the French in 1899 that lies on a rocky islet 300 meters from the coast. I’m obsessed with lighthouses so I had to go. To get to the lighthouse, you need a scooter or a car. Then, you have to take a ferry to the island ($6 USD in 2019). I had the island mostly to myself except for a few officials working on the island.
For the best photos of the lighthouse, take the dirt paths that lead off to the side and shoot back toward the lighthouse. The lighthouse is right by a fishing village, so the sea is lined with boats to the right of the islet, which is also great for photos.
How to get to Mui Ne
I took a bus from Da Lat to Mui Ne (5 hours) then I took a bus to Ho Chi Minh (3 hours). There is no train station in Mui Ne and the nearest airport is Ho Chi Minh. You can book group and private car transfers on Klook to Ho Chi Minh and other cities.
 Banh Mi from L’Usine cafe in Ho Chi Minh.
9. Ho Chi Minh City (Saigon)
Why Go: Big‑city energy, war history museums, colonial landmarks and standout craft beer scene.
How to get there: Fly into country’s busiest airport at HCMC, then onward by bus or train nationwide.
Where to stay: Fusion Oriental Saigon Centre and Au Lac Charner Hotel
Ho Chi Minh City (HCMC) is another epicenter of the motorbike madness. This city is worth a visit for a few days just to witness the chaos and visit the war museum and other war-era sights. The view from Bitexco Financial Tower ($9 USD) really helps put into perspective the expansive size of the city. (I suggest buying tickets advance through Klook for your preferred time slot because it’s same price as buying in person without any lines.)
Surprisingly, HCMC is the craft beer capital of Southeast Asia. My favorite breweries were Pasteur Street Brewing Company (great IPA & tap room) and Heart of Darkness. BiaCraft and Belgo (Belgian brewery) also have good brews and food.
Take a morning walk to view the 19th-century French colonial architecture, including the yellow Central Post Office, Notre Dame Cathedral (under renovation until 2027) and the 1897 Opera House. The only way to see the opera house interior is to attend a show—one of the frequent AO Show performances combining acrobatics, music and dance, or a production of the Ho Chi Minh Ballet Symphony and Opera.
My favorite cafes and sandwich spots to eat are The Old Compass, L’Usine, The Vintage Emporium, and Banh Mi 3362. ABC Bakery Café was a great spot to grab a fast and cheap breakfast to go!
Where to Stay in Ho Chi Minh City
The spacious, modern rooms and location of Fusion Original Saigon Centre ($133/night) can’t be beat. Another favorite is the Au Lac Charner ($105/night)l with a rooftop pool with great views of the adjacent Bitexco Financial Tower.
If you’re looking to splurge, the Park Hyatt Saigon ($289) is the nicest hotel in town with an amazing pool, gym and a mind-blowing breakfast! (I stay at the Park Hyatt for work but stay at Au Lac Charner or Fusion otherwise.)
Fore more details, check out my Ho Chi Minh City Guide!
How to get to Ho Chi Minh City
Ho Chi Minh is home to the busiest airport in Vietnam and the main transport hub. (I always fly through Ho Chi Minh when I’m flying back to the U.S. from Southeast Asia because I fly through Japan because of my successful points hacking with American Airlines/ oneworld alliance.) You can take buses, vans and the train anywhere in Vietnam from there. Keep in mind that Hanoi and Ho Chi Minh are on opposite ends of the country and a 30-hour train ride apart.
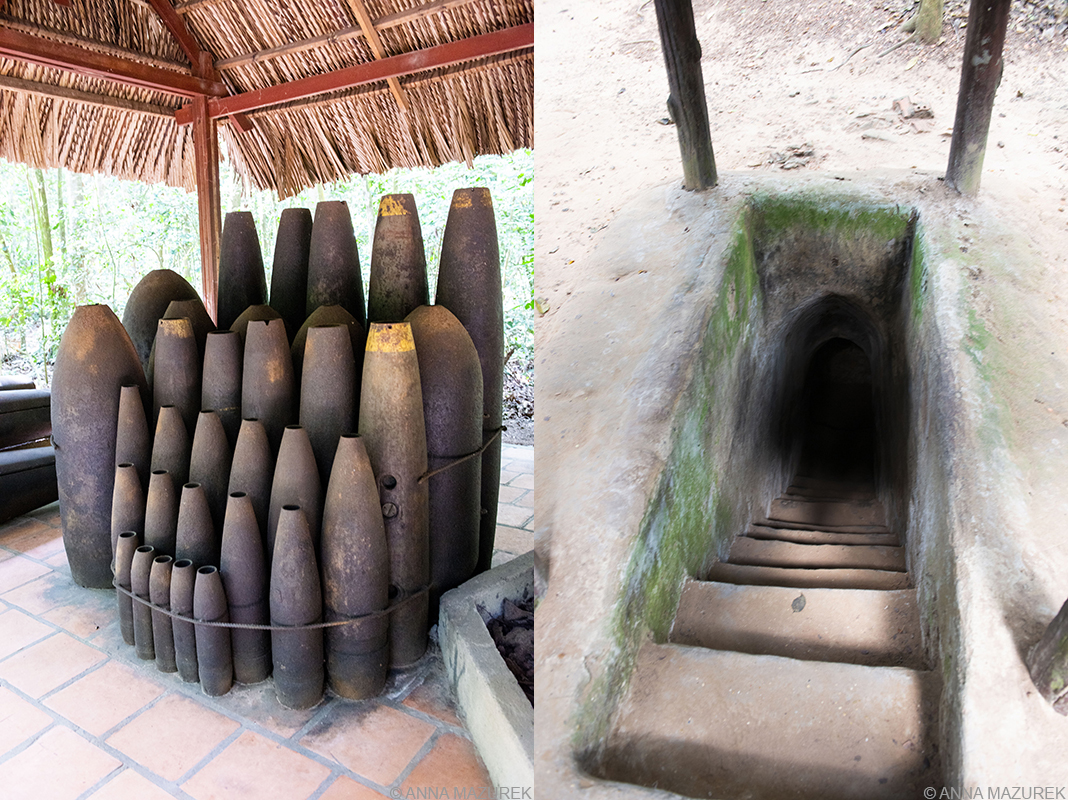 Left: Artillery left over after the Vietnam War is on display at the Ben Douc tunnels, part of the Cu Chi Tunnels. Right: The entrance to one of the tunnels.
10. Cu Chi Tunnels
Why Go: Historic Viet Cong tunnel network offering an up‑close perspective on the war.
How to get there: Day tour from Ho Chi Minh City or public buses to Ben Duoc/Ben Dinh.
Cu Chi is a rural area about 30 to 40 km from Ho Chi Min that’s famous for a legendary spiderweb of tunnels used in the 1960s by the Viet Cong to control the area. There are two sets of tunnels: Ben Dinh and Ben Duoc. Ben Dinh is the most touristy one because it’s easier for tour buses to reach it. Ben Duoc is the best one in my opinion because it’s not touristy. (Trust me, I’ve been to both!) There was only a handful of people when we went. (We went by public bus from Ho Chi Minh City, which was one of my favorite days in Vietnam. I wrote a post about how to get to the Ben Douc tunnels by public bus.)
I’ve found conflicting sources that state that Ben Dinh was constructed only for tourists and Ben Douc is part of the real tunnel network. I can’t find a reliable source to verify this. Lonely Planet says that Ben Douc was widened for tourists but is less touristy. (There’s a set of stairs leading into the tunnels, which clearly aren’t original. Honestly, they probably both were widened at the entrances, but they are still tiny inside.)
How to get to the Cu Chi Tunnels
While it’s easy to find tours to visit Ben Dinh, I recommend taking the public buses (they have air conditioning!) to Ben Douc using my step-by-step guide!
Mekong Delta
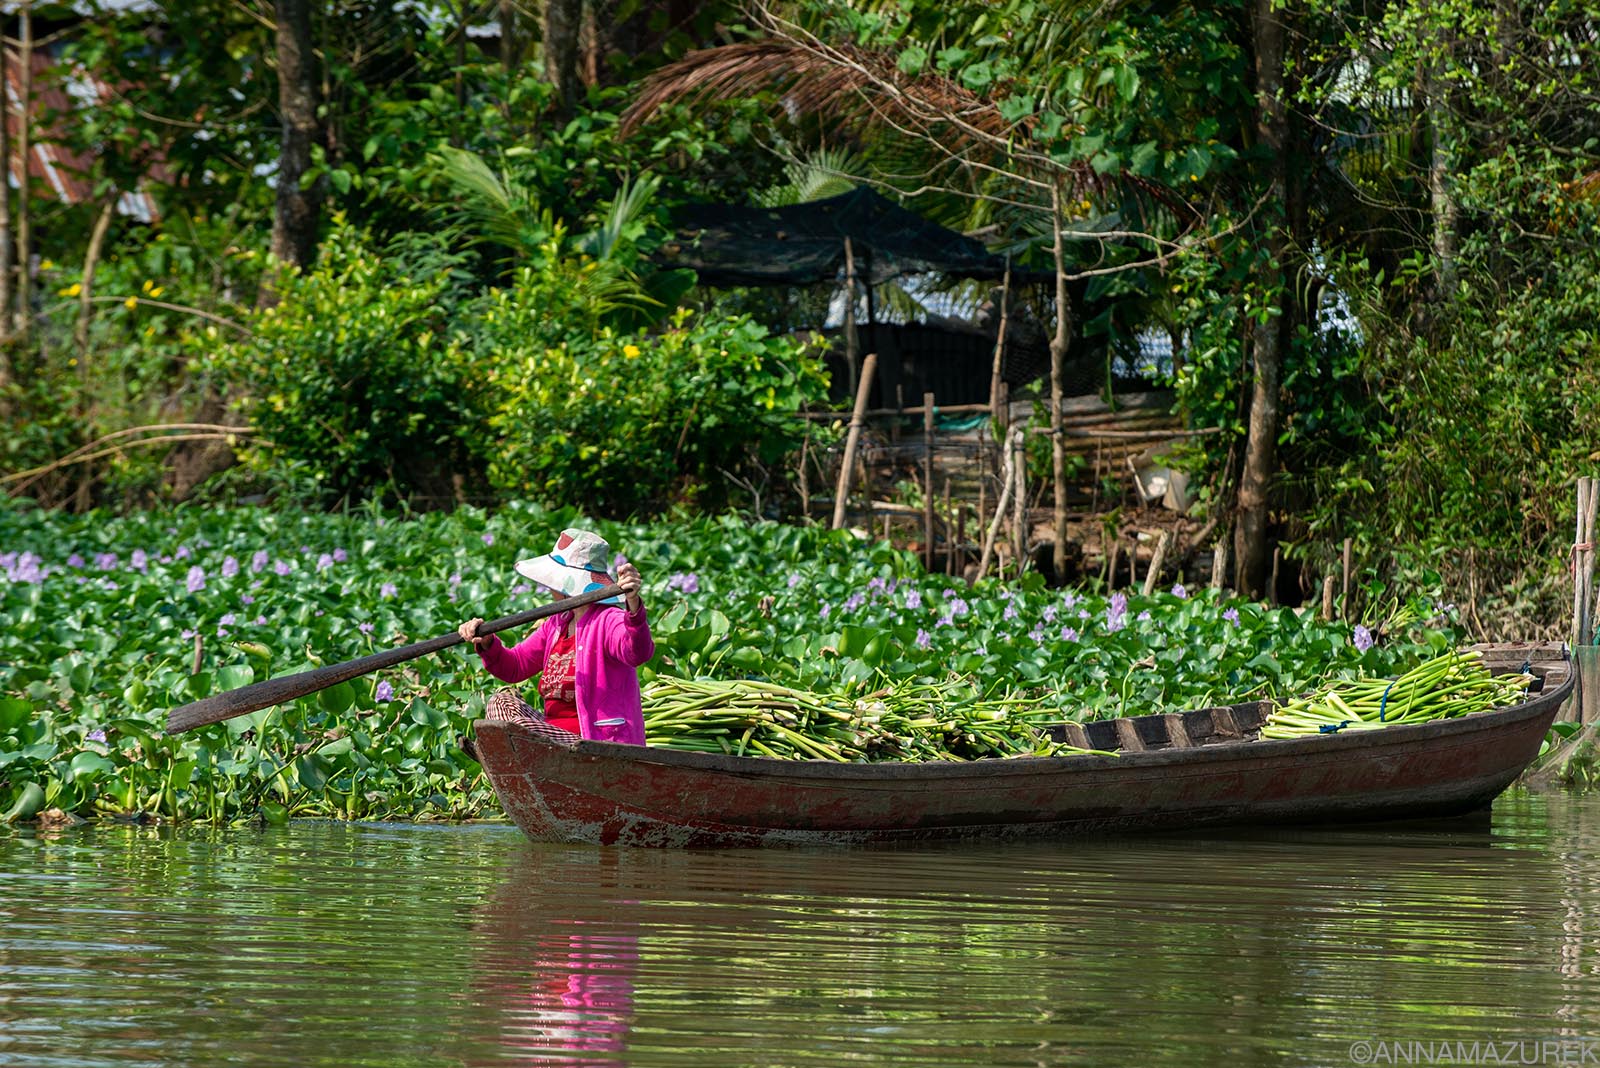 A woman collects water hyacinth, an invasive speices that’s made into baskets and other items, along the waterways near Cai Be.
11. My Tho, Ben Tre & Cai Be
Why Go: Gateway Mekong Delta city with boat trips on narrow canals, orchards and Vinh Trang Pagoda
How to get there: Day tours or a roughly two-hour bus ride from Ho Chi Minh City
Most day trips from Ho Chi Minh City visit one of these three places: My Tho, Ben Tre and Cai Be due to their proximity to the city. Tours usually include sampan boat rides on the river, visits to fruit farms and a coconut candy workshop. Most include a stop at the enormous Vinh Trang Pagoda, an enormous Buddhist temple that I absolutely love. It’s always decorated beautifully, especially during TET.
If you are short on time, there are early-departing day tours that visit the Cu Chi Tunnels and Mekong Delta in one day. If you have more time, go further south to Can Tho or deeper into the delta to Chau Doc.
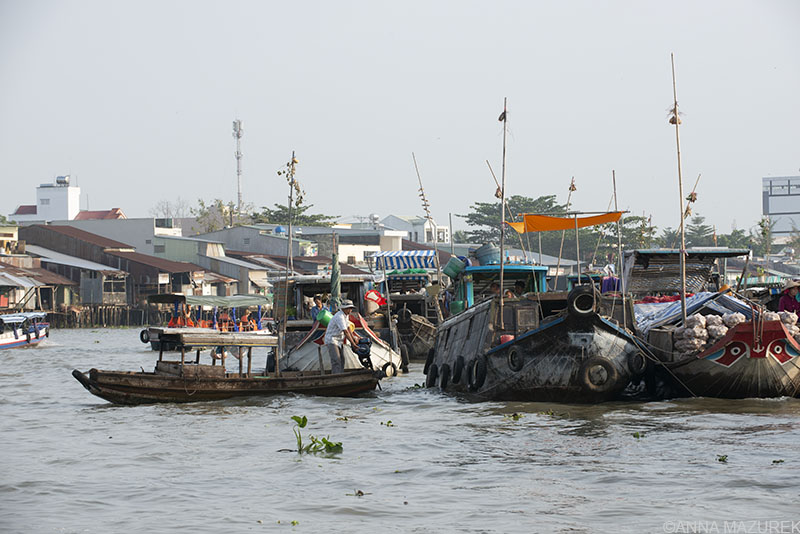 Vendors tie what they are selling to poles at the Cai Rang Floating Market in the Mekong Delta near Can Tho.
12. Can Tho
Why Go: River‑life experience with floating market, orchards and nearby market towns.
How to get there: About a four‑hour bus from Ho Chi Minh City or fly to nearby Can Tho Airport.
Can Tho is the main hub in the Mekong Delta that’s filled with large gardens and bustling markets. It’s the jumping-off point for visiting the famous Cai Rang Floating Market, the biggest one in the Delta. Vendors tie what they are selling to a pole so you can shop easily. There are also boats that serve coffee.
Tours are available, but I recommend showing up at the dock at 5 a.m. to negotiate for your own boat. I went with a friend and we met three cool Australians who joined us. We paid about $4.30 USD each. One of the highlights was stopping by a fruit orchard. We got to paddle around in little boats in the orchard and sample the fruits. This town is also memorable because it’s how I ended up in a van with a rooster for five hours.
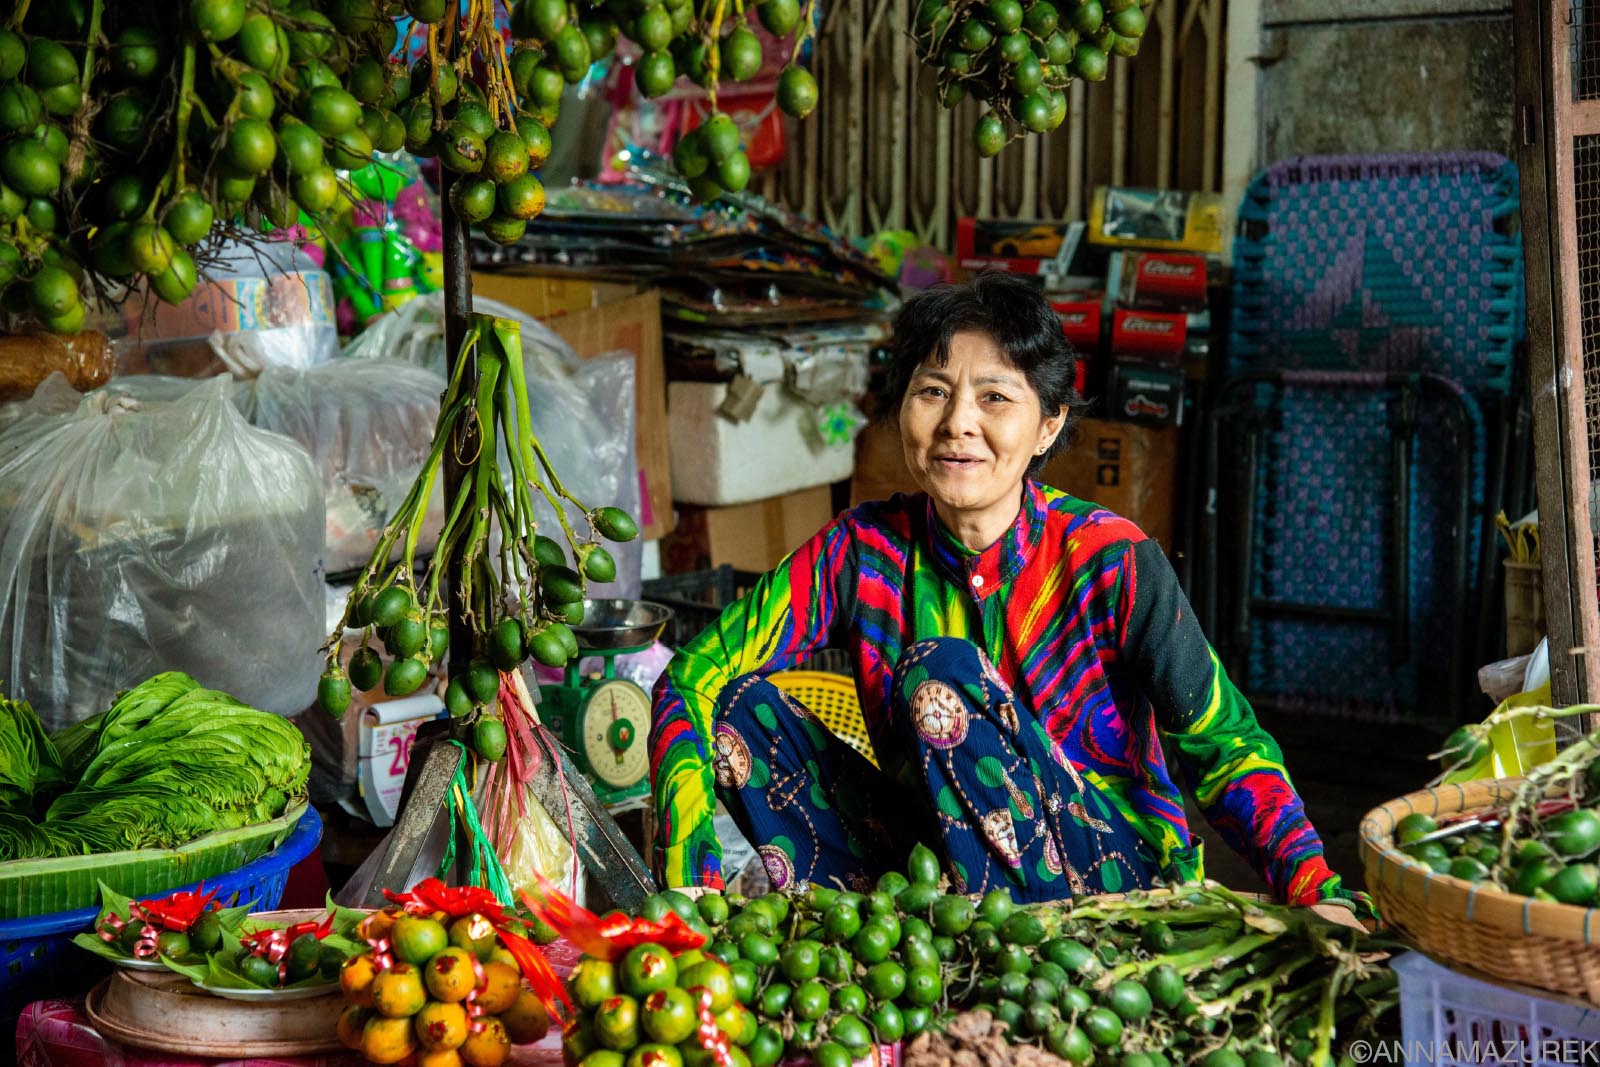 A friuit vendor at the Chau Doc market, one of the least touristy parts of the Mekong Delta in Vietnam.
13. Chau Doc
Why Go: Lesser visited Mekong town near Cambodia border with rainbow-hued floating villages, photogenic markets and Cham communities
How to get there: Five-hour bus from Ho Chi Minh City or three-hour bus from Can Tho
Where to stay: Victoria Chau Doc Hotel
This lesser-visited Mekong Delta town is located on the Hau River near the Cambodia border. It’s surrounded by floating villages and fish farms painted in rainbow hues, a recent ploy by the tourism board to lure visitors. Opt for a boat ride to visit one of the farms.
It’s honestly my favorite town on the delta because I love the photogenic market—the water-side wet market isn’t for the squeamish but is an excellent slice of daily life. Hop on a trishaw, a three-wheeled rickshaw, for a loop of the city through the bustling dry goods market streets and stopping at the colorful temples, like Đình thần Châu Phú.
How to Get to the Mekong Delta
The main airport is in Can Tho (Can Tho International Airport), but there are smaller regional airports. Most people fly into Saigon and either drive or bus to the delta, which is what I’ve also done. It’s about a four-to-six-hour bus ride depending on your destination. Book in advance on 12go.asia to make sure you get a lower-level bed on a sleeping bus!
If your schedule doesn’t allow an overnight visit, there’s plethora of day trips from Saigon that typically visit the My Tho area. Be warned—a day trip will make you want to come back and spend more time.
Vietnam FAQ
 SafetyWing travel medical insurance covers travelers in Vietnam and over 180 countries.
Do you need travel medical insurance for Vietnam?
Yes, travel medical insurance is important things for any trip abroad, including Thailand, to help cover medical emergencies and travel issues like lost luggage and delays.
I use SafetyWing’s Nomad Insurance, which offers $0 deductible travel medical insurance coverage for over 180 countries for travelers aged 69 and under outside their home country. It only costs a few dollars a day, and you can visit any hospital or doctor. Read my SafetyWing Review for more details in Southeast Asia.
Other benefits of Nomad Insurance include coverage for lost checked luggage, travel delays over 12 hours, motor accidents (with proper license, safety gear and not intoxication) and injuries from sports or leisure activities. You can optionally add adventure sports, electronics theft and U.S. coverage (for non-residents).
If you’re abroad for 90 days, the policy includes 30 days of home-country coverage (15 days for U.S. residents.)
Where’s the best place to buy a SIM card in Vietnam?
The easiest thing to do is buy a Vietnam-specific eSIM card from Airalo that will work instantly when you arrive. Airalo partners with Viettel, the fastest network in Vietnam. For more details, read my review of Airalo eSIM cards in Southeast Asia.
If you are traveling to multiple countries in Southeast Asia on a short trip, then consider one of their Asia Regional eSIM cards, though country-specific eSIMs are usually cheaper. Both types have worked well for me and support mobile hotspot, which I rely on for remote work.
Promo Codes: New customers save 15% off with NEWTOAIRALO15 and existing users save 10% with AIRALOESIM10.
Be sure to join the free Airalo Loyalty Program to earn 5% cash back for every purchase. Want to know more about eSIM cards? Read about the pros and cons of eSIM cards!
Where is the best place to get clothes made in Vietnam?
While Ho Ani is the most popular spot in Vietnam to get clothes made, I was unimpressed because every tailor shop I visited only seemed to only have material to make winter suits or wedding dresses. I was looking for wrinkle-resistant fabric for summer dresses and tanks. I tried again in Ho Chi Minh City but didn’t have any luck until a friend introduced me to Elegant Silk, the best place to get clothes made in Ho Chi Minh. This tailor had a wide variety of fabric options. She had silk blend fabric that was fairly wrinkle-resistant. In early 2024, I had her copy an existing tank and dress while also making a new wrap-around skirt for $70 USD.
In Hoi An, I have friends who raved about Blue Chic for men’s suits and Two Ladies for summer dresses.
Where is the best craft beer in Vietnam?
Vietnam has the best craft beer in Asia. Trust me, I’m a craft beer connoisseur and have traveled and lived all over Asia. While Ho Chi Minh is the epicenter, there are also taprooms in Hanoi. The two biggest brands—Pasteur Street Brewing and Heart of Darkness—have multiple tap rooms in HCMC while Pasteur has one in Hanoi. Both do a great job of incorporating local flavors like jasmine and pomelo. (Pasteur Street’s signature Jasmine IPA and Pomelo IPA are my two favorites.) BiaCraft and Belgo (Belgian brewery) also have good brews and food in Ho Chi Minh City. In Da Nang, stop by the Heart of Darkness taproom.
What about the caves in Vietnam?
Phong Nha-Ke Bang National Park, a UNESCO site, is filled with hundreds of caves including the world’s biggest cave, Hang Son Doong. (Two of my friends went to Hang Son Doong and loved it. It’s not cheap and you have to book months if not a year in advance.) I was in the area during the rainy season so I didn’t visit any of the caves. (Water levels are a huge safety issue during the rainy season. ) April to August is the best time to go.
How are the beaches in Vietnam?
I’m not a fan of the beaches in Vietnam. I’ve been on a quest to find the best beaches in the world, and they aren’t in Vietnam or even Southeast Asia for that matter. To be brutally honest, every beach I went to in Vietnam was badly polluted.
I even went to Phu Quoc island, one of the main attractions. I went to all the prime snorkeling spots and there was trash and beer cans in the coral. This part of the world is notorious for plastic pollution, which is really bad in rainy season. But, I was there in January in the dry season, and it was still bad!
 This is a shot from one of the islands near Phu Quoc that’s part of all the snorkeling tours. All the debris you see on the left side of the frame under the trees is some kind of trash or plastic. Aside from the main small bit of beach, the sides of the island were covered with trash like this.
I visited three beaches in Vietnam—Mui Ne, Na Trang and Phu Quoc—on a 2019 trip and never wanted to go back to them. They were mostly polluted or overrun with tourists. If you stay at a resort then, it’s nice because they clean the beaches, but the snorkeling will still be polluted. (In my opinion, the best beaches in the world are in the Caribbean. Anguilla and Costa Rica are hard to beat. Maldives (resort islands) and Fiji are nice, too.)
Please be kind to the environment and avoid single-use plastics in this part of the world. Read this post about how to be a better eco-friendly traveler.
Vietnam 101: Logistics, Costs & Safety
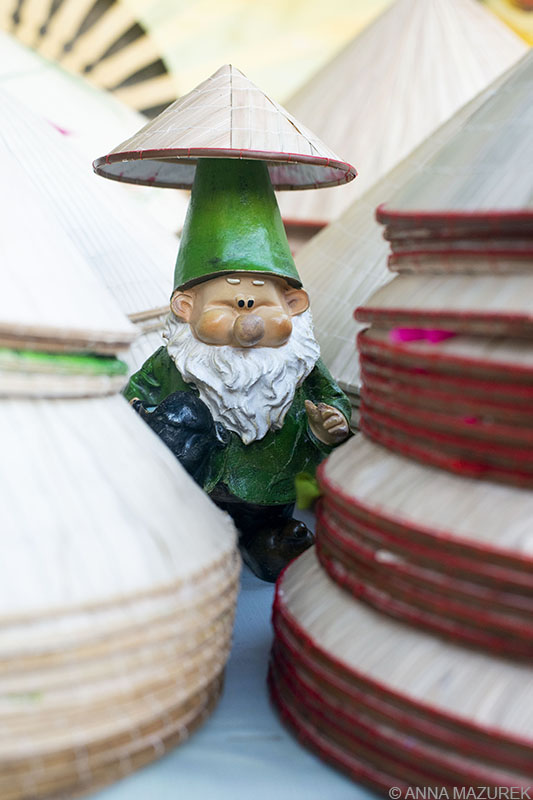 Alfred the Gnome did a bit of hat shopping in Hoi An. Clearly, this hat was meant for a gnome.
When to Go To Vietnam
Hanoi, Sapa & Northern Vietnam: March – May & September – November
Central Vietnam (Hoi An, Mui Ne, Da Lat): March – September
Ho Chi Minh & South: November to February
July and August are high season. Monsoon rains are common. It’s really cold in Hanoi and northern Vietnam during January so avoid those months especially if you want to swim in Ha Long Bay.
The Cost of Traveling in Vietnam for a Month
In 2019, I spent a month in Vietnam and spent $991 in total. If you look through my Vietnam Instagram story, you’ll find a saved story highlight on Vietnam with a detailed breakdown. This includes my $156 flight from Thailand.
Average Transport Costs: overnight buses ($15); overnight trains ($30) and the ferry roundtrip to Phu Quoc was $20.
Accommodation: Hostels cost about $4-9/night.
Food: Street food ranges from $1.40-2/meal. Restaurants start at $3 and up. Craft beer is $5 in the big cities.
Splurges: I splurged on a $32 snorkeling trip in Phu Quoc (not worth it), $45 lighthouse tour (Ke Ga Lighthouse – totally amazing) and $50 Ba Na Hills visit (only good if the weather is nice).
 A round boat anchored to the island where Ke Ga Lighthouse is located outside of Mui Ne in Central Vietnam.
How to Get a Vietnam Visa
Americans need a visa before entry into Vietnam, and an e-visa is the easiest option that I always use. (I visit every year.) E-visas are available for up to 90 days with single or multiple entries. I applied online for a 30-day e-visa, which was approved really quickly. The normal turnaround time is three “working” days in Vietnam. Please note these are only valid if you arrive at one of their main ports, which is most of the major airports and major land borders. Be sure to check the list in advance.
The cost is $25 for single entry and $50 for multiple entry. Apply online at https://evisa.gov.vn/. Make sure to apply early. I made a mistake on my recent multi-entry application, and it took them three days to tell me it was wrong. I had to start over again from scratch and wait another three days to get it approved.
Is Vietnam Safe?
Overall, Vietnam is a really safe place to travel. There are a lot of scams in Hanoi, Ho Chi Min and Na Trang. I honestly felt like taxi drivers were always trying to scam me. (Never take a street taxi by meter because the meters are often rigged. Agree on a price in advance or take a Grab, a rideshare app that’s similar to Uber and used all over Asia.)
Keep a steady hand on your phone, wallet or purse in the Hanoi and Ho Chi Minh. Thieves on motorbikes are a real concern. I met people who narrowly avoided losing their phones this way. I use a phone case with a finger loop so I always have a stronger grip on my phone.
There’s still a large amount of unexploded landmines. Be on high alert in rural areas and abide by all signs. For example, the My Son ruins had signs warning you to stay on the trails.
 The short boat ride to Ke Ga Lighthouse was a little sketchy but thankfully, the rest of the transit in Vietnam was reliable and felt a lot safer! (I was really close to the coast, so I knew I was safe.)
Vietnam Transit Options
Buses are the cheapest way to travel. Overall, the sleeping buses are fairly nice. You’ve got a lot of space, and they are air-conditioned. I suggest a bottom bunk if you have a lot of luggage. (You have to take off your shoes and put them in a bag, which I find annoying when you stop at rest stops. They give you communal flip-flops but that grosses me out.)
Trains are okay but pricier. In 2019, it was about $30 for me to go from Da Nang to Na Trang. (There were definitely roaches in my cabin so take a sleep sack to sleep in!) In big cities, I used Grab, a rideshare app that’s popular all over Asia. The app also offers motorbike taxis, which I used a few times. Helmets are provided.
I took a ferry to Phu Quoc island, which was really nice. It was $20 roundtrip. Buy tickets for all transit from the station if possible. It’s always cheaper this way. Domestic flights are fairly cheap but always connect through big cities. In 2019, I traveled by land my entire month-long trip.
Overall, thoughts on Vietnam:
I always enjoy visiting Vietnam. It’s a bit more intense than the rest of Southeast Asia. There is some stunning scenery and the food was amazing. I highly recommend it but just avoid the beaches during the rainy season.
For more about Southeast Asia, check out these posts:
Pros & Cons of eSIM Cards for Travel
Bonifacio, Corsica // I used an EU SIM card I bought in Italy for a trip to three different countries in the Mediterranean with success.
Since I travel full-time, my biggest travel pet peeve is finding affordable cellular data plans abroad. Historically, I’ve always bought local SIM cards because they are significantly cheaper than paying $10/day for my U.S. plan with Verizon to work abroad.
When Apple removed SIM card slots from the iPhone, I had no choice but to reluctantly switch to eSIM cards. For a while, I traveled with my old iPhone 13 as a backup in case I had to buy a physical SIM card. Now, eSIMs have become my lifeline.
I’ve spent the last three years researching and testing eSIM cards across the globe, from Southeast Asia to Southern Africa. Keep reading for more details about eSIM cards for international travel, along with eSIM discount codes to cut costs!
Affiliate links are used in this post. If you make a purchase, I earn a small commission at no cost to you, which goes toward blog maintenance costs. I only recommend products and companies I truly love and use.
In this Post
What are the cons of an eSIM card for travel?
Do eSIMs offer unlimited data?
Are eSIMs cheaper than SIM cards for travel?
Do eSIMs work in the U.S. for travel?
Do eSIMs support personal hotspots?
Are eSIMs safe? Are there privacy concerns with eSIMs?
What is the best eSIM card for international travel?
What is an eSim card?
An eSIM card essentially a digital SIM card included in many newer phones. (Apple nixed the SIM card tray on U.S. models with the iPhone 14, so eSIMs are the only option for those models and newer ones going forward.) It makes things more convenient since people no longer have to go to a store to get a physical SIM card and find a tool or paper clip to open the SIM tray! The main benefit of an eSIM card is that it can work in multiple countries, so it eliminates the hassle of buying multiple SIM cards. Plus, it’s much cheaper than paying for an internatinal plan through a U.S. carrier.
In parts of Asia, you can still buy the newest iPhone model with a physical SIM tray. (The only negative side to buying an iPhone abroad is that the AppleCare plan doesn’t include the theft option.)
What are the cons of an eSIM card for travel?
The cons of eSIM cards are that they can be tricker to activate and aren’t compatible with all phones or phone plans. I had issues with my previous iPhone 13 Pro initially (locked by Verizon) but haven’t had any issues with my current iPhone. Now, most eSIM apps will tell you if your phone is compatible before purchasing.
The biggest problem with eSIM cards is that they don’t cover some remote parts of the world. Options are either limited or very expensive. I struggled to find an affordable eSIM card for my trip to Laos in Southeast Asia last year but was able to buy a cheap one from a local provider at the airport with no issues. I had similar issues in Africa.
Also, learn from my mistakes: If you’re buying a regional or global eSIM card, be sure to check that every country on your trip is covered by your plan.
Honest eSIM Reviews for Travel
Since I travel fulltime, I constantly test eSIMs across the globe. Here are my reviews:
- Airalo eSIM Reviews for Southeast Asia, Europe and Africa.
- Saily eSIM Review for Southeast Asia.
- Truely eSIM Review for Southeast Asia.
- GigSky eSIM Review for Southeast Asia.
How do I get an eSIM card?
To set up an eSIM card on your phone:
1. Download the app on your phone from any of the eSIM card brands, including Airalo, Saily, GigSky, or Truely.
2. Choose and purchase a global, regional or local eSIM card, depending on your needs. (The apps will even tell you right away if your phone is compatible before purchasing!)
3. Follow the on-screen instructions to install, which I recommend doing before leaving for your trip.
4. In the cellular settings on your phone, make sure the eSIM card is selected for cellular data.
Important Note: The plan will not activate until you arrive in the destination. If it doesn’t connect automatically, toggle Airplane mode on and off.
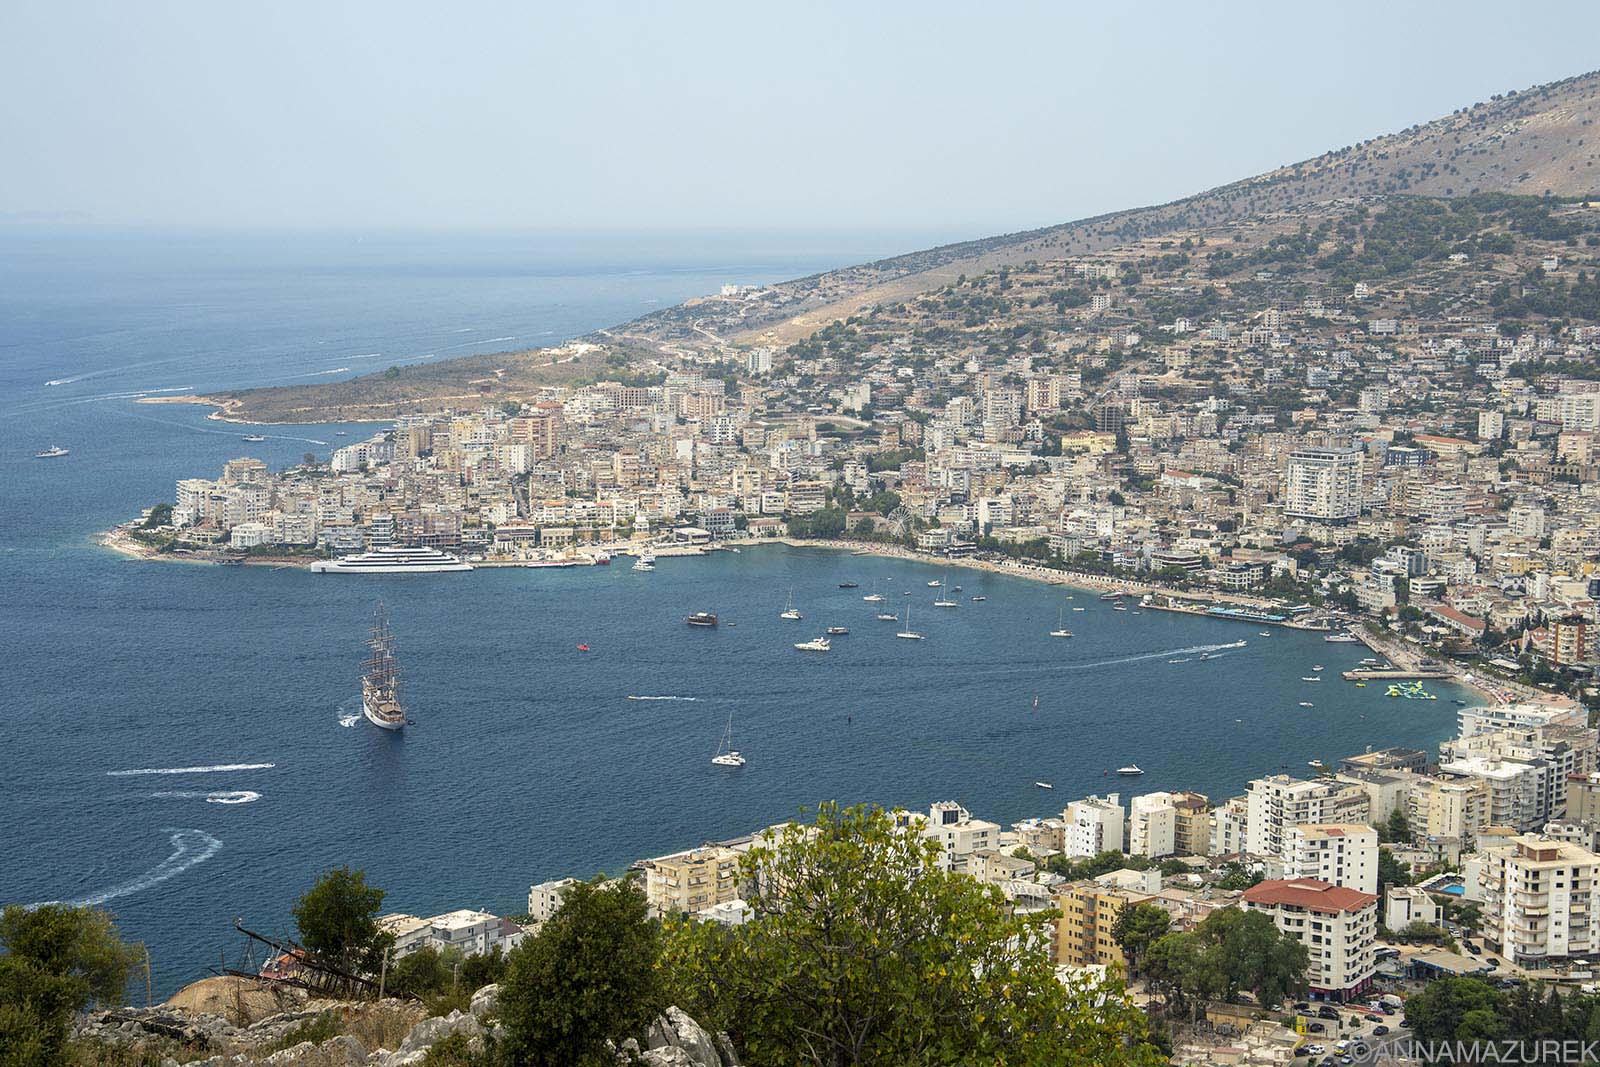 Sarandë, Albania // I used an Airalo 10 GB Europe eSIM for seamless connectivity hopping between Greece, Croatia, Albania and Montenegro recently. Since the latter two are not E.U., so I’d had pervious issues with a physical SIM card bought in Greece not working in those countries. The eSIM solved the issue.
Do eSIMs offer unlimited data?
Yes, there are several eSIM companies that offer an unlimited data option, but read the fine print. The word “unlimited” is deceptive because there’s always a “fair use” data limit, where you get a set amount of high-speed data (usually 3-5GB) per day. After that, data speeds are throttled, which makes sense. This also really affects hotspot users. I’ve seen brands that cap hotspot data at only half a gig a day, which is insane.
Most unlimited plans are more customizable allowing you to pick exactly the number of days you need but are always more expensive that plans with set data limits.
Currently, Airalo, Saily, GigSky and Truely offer unlimited data plans in certain parts of the world, while Holafly specializes solely in unlimited plans worldwide.
Are eSIMs cheaper than SIM cards for travel?
It depends. While eSIMs for travel are cheaper than paying for a U.S. international plan, they are not cheaper than buying a local physical SIM card in most places.
With companies like Airalo or Saily, it’s $16-20 for 5GB in various regions of the world, which is a good deal and more convenient if you’re country-hopping. If you’re staying in one place long-term, it’s still cheaper to buy a local SIM card. In Thailand, I pay roughly $10/month for an unlimited plan and in Laos, I paid $4 for 30 GB a few months ago buying directly from a local network.
Always avoid buying one in an airport—everything is usually half-price outside the airport! I’ve found physical SIM cards to be slightly less expensive than a regular SIM, but most phones don’t have this option anymore.
The Best eSIM Discount Codes
- Airalo: 15% off for new customers with NEWTOAIRALO15, or 10% off for existing users with AIRALOESIM10.
- Saily: Use code ANNA10 for a 10% discount.
- GigSky: Free 15-day plans and up to 30% off all plans for select Visa card holders in the U.S., Canada & Latin America.
- Truely: Use ANNA15 for 15% off all plans, including unlimited data.
Do eSIMs work in the U.S. for travel?
Yes, eSIM cards work in the U.S. for travel. Nearly, every major eSIM card company has plans in the U.S. Last spring, I ran out of data on my Verizon plan right before a three-month trip to Europe, so I but didn’t want to renew for another month. I bought at three-day Airalo plan, and it worked perfectly. This is great for people traveling in the U.S. or expats returning for a short stint. Here is a list of their U.S. plan options.
Do eSIMs support personal hotspots?
The short answer is yes, eSIMs support personal hotspots but not all do! This is a dealbreaker for me because I work while I’m traveling and most of the time, I find that WiFi networks are terrible. I rely heavily on my personal hotspot for WiFi on my computer for Zoom calls.
I’ve had great success using my personal hotspot with both country-specific and regional Airalo eSIMs in Asia recently in Japan, Korea and Southeast Asia. Airalo says it’s available if the carrier supports it, so it’s hard to say if it will work every time, but it’s always worked for me. (I still travel with my old iPhone 13 Pro in remote areas as a backup in case I need to buy a physical SIM to hotspot!)
I’ve successfully been able to hotspot to my computer using plans from Airalo, Saily, GigSky, and Truely.
Are eSIMs safe? Are there privacy concerns with eSIMs?
eSIM are as safe any doing anything on the internet. eSIM providers require you to use their app to activate and use the service, which means you can be tracked. Apple users should turn on the “ask app not to track” setting to avoid this. I’m sure Android devices have a similar setting. In some ways, eSIMs are safer.
If your phone is stolen, you can easily switch the service off your phone to prevent your number from being stolen. If you’re really concerned, you can also use a VPN for added security. (Saily eSIM cards actually include a virtual location feature.) I personally use NordVPN, which is the company that owns Saily, as my VPN for my phone and Mac for traveling. For more about VPNs, check out my post about two-step verification and traveling.
 On a recent two-month trip to Africa, I used Airalo’s plans in South Africa and Botswana seamlessly, which I wrote about in this detailed review.
What is the best eSIM card for international travel?
All eSIM brands have a similar pricing structure, but eSIM cards are only as good as the local partner network. And, networks on regional packages might differ from those used by local country-specific packages.
Research which brand partners with the strongest network in the location you are visiting. (For remote locations like Laos and Namibia, you’re better off going with a local company from my experience. Buy one when you arrive.)
Airalo is the world’s oldest eSIM store with one of the widest variety of plan options, while Saily adds built-in security features including virtual location. I’ve had great experiences with both. Gigsky offers great discounts to select VISA cardholders, while Truely offers seamless connectivity and the option to pause plans. If you decide to purchase these brands, use the discount codes in the next section.
Other brands include Holafly, Flexiroam and Nomad. Apple also has a comprehensive webpage with a list of wireless carriers worldwide that offer eSIM services.
How much does an eSIM card cost for iPhone?
eSIM card plans start as low as $4 USD. While pricing is often consistent between brands, certain companies will have a larger variety of plan options than others. Europe or Southeast Asia will always be cheaper than Africa.
Seven-day plans start around $4 USD for Europe, the U.S. and Asia, while five-day unlimited data plans start around $18.99 USD. Pricing varies based on duration (usually three to 60 days) and data limits (1GB to unlimited).
Save money with these eSIM discount codes:
- Airalo: 15% off for new customers with NEWTOAIRALO15, or 10% off for existing users with AIRALOESIM10.
- Saily: Use code ANNA10 for a 10% discount.
- GigSky: Free 15-day plans and up to 30% off all plans for select Visa card holders in the U.S., Canada & Latin America.
- Truely: All plans are 15% off with code ANNA15.
Loyalty programs are another perk—Airalo gives you 5% to 10% back on purchases, while Saily offers 3% credit and a 15% student discount. Since you can’t usually pair discount codes with the loyalty program, I use discount codes for every purchase since it’s a better deal.
What I do for phone data when I travel long-term
Since Verizon’s international plan is outrageously expensive and never worked for me, I use travel eSIM cards for the region I’m traveling. The only exception is in Thailand, where I spend a few months every winter, when I buy an eSIM directly from AIS (local network).
For two months in Europe last fall, I strictly used Airalo eSIMs, a regional Europe plan and a Greece-specific plan, which has been great.
Final eSIM Takeaways
Overall, eSIMs are the future—ready or not. They are very convenient and cheaper than paying for an international plan for an American phone plan unless you have T-Mobile. Regional eSIM plans are excellent for short trips to multiple countries.
If you’re going to be traveling long-term in a country or region, I still think getting an eSIM or regular SIM card from a local cellular provider is a better deal, especially in places like Southeast Asia. After two months in Africa last year, I feel more confident about the availability of eSIMs for travel in remote locations.
Happy travels!

I Traveled for 2 Months in Southern Africa—Here’s How Much It Cost
 A giraffe has a snack at Okonjima Nature Reserve in Namibia.
How much does it REALLY cost to travel in Africa? The truth is Africa isn’t cheap—you’re either paying for safety (from crime and wildlife), complicated transportation logistics or both! But, yes, there are ways to trim costs.
This trip started with a half joking WhatsApp message—“How about we road trip Namibia?”—almost two years ago. Planning a trip of this scale yourself is discombobulating and made me wonder if the zebras and giraffes were worth the effort. (Of course, they were totally worth it!)
There’s nothing I love more than talking about money and being honest about the cost of travel. It’s why I tracked every peso, dollar and Boliviano I spent on a seven-month backpacking trip in Latin America in 2014. And, I decided to do it again for this pricier two-month Africa adventure.
To make the trip more affordable, I went with my best friend, Becky, and we both worked while we traveled. Neither of us paid rent or a mortgage during this trip—Becky rented out her Lisbon condo, while I simply don’t have a lease or a mortgage by choice. Two other friends joined at different points, too, which helped cut costs. To be clear, I have no debt and would not go into debt for travel. This trip was a grander version of a canceled 2020 trip, so the saving started a long time ago! This was a rare kind of trip for me.
After hours of staring at spreadsheets, I’ve created a detailed breakdown of the cost of traveling in Africa during two-month trip to help you plan your own adventures. I also share ways to trim costs. (All costs are in USD.)
Affiliate links are used in this post. If you make a purchase, I earn a small commission at no cost to you, which goes toward blog maintenance costs.
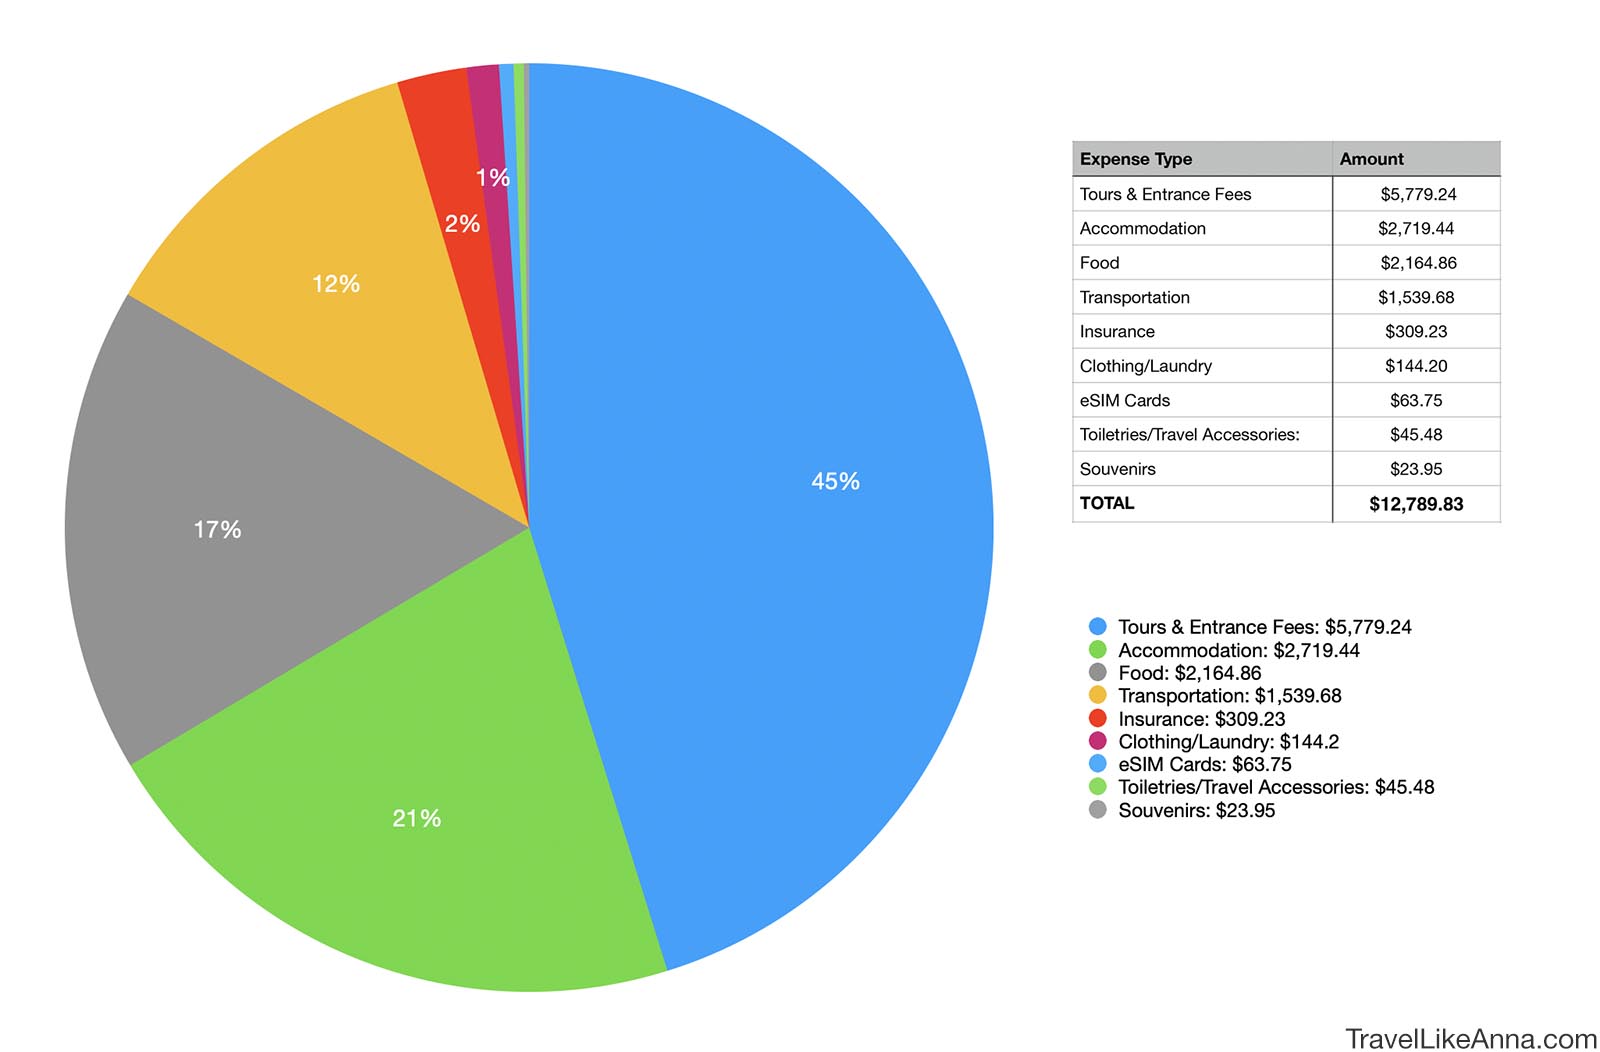 I tracked all my expenses for my two-month Africa trip with the Dollarbird app then exported the data to make these graphics.
Total Cost of Trip: $12,789.83
Cost per Month: $6,394.15
Cost per Day: $203/day for 63 days
Excludes flights. All costs are in USD.
Countries Visited: South Africa, Namibia, Botswana, Zimbabwe, and Zambia
Length of Trip: 63 days
Southern Africa Itinerary
Week 1:Cape Town
Week 2: Safari in Kruger National Park
Week 3: Chill week in Windhoek, Namibia
Week 4: Safari through Botswana and Victoria Falls
Week 5: Chill week in Windhoek, Namibia
Week 6&7: Road Trip Namibia (self-drive)
Week 7&8: Cape Town
Biggest Expenses in Africa
Our two safari tours were the most expensive items:
- 8-Day G Adventures Botswana and Victoria Falls Adventure Tour: Base Rate $2,294.15 + $472.46 (tips, airport transfers, $55 visa, meals & safari drives)
- 8-Day G Adventures Kruger National Park in Depth Tour: Base Rate $1,699 + $448 (tips, airport transfers, meals & safari drives)
- Total for tours = $4,913.61, which was 38.4% of the total cost!
Africa Travel Cost Summary
When looking at the total cost above ($12,789,23 US), you either fall into two mindsets—”That’s crazy expensive!” or “That was a good deal.”—based on your budget and expectations. For context, luxury safaris range from $1-2.5k/day per person, while budget participatory camping trips cost around $166/day per person (without optional excursions), which is roughly 19% cheaper than our trip.
For example, G Adventures offers a 40-day participatory camping trip through eight countries (Nairobi to Cape Town) for a base rate of $6,199 and says to allot an additional $470 for meals that aren’t included. This breaks down to $166/day but doesn’t account for optional safari drives, tips or entry to places like Victoria Falls ($50). (G Adventures always runs sales—we saved about 15% on our tours.)
I tracked all my expenses in the Dollarbird app, which is a paid subscription ($34/year) and the best money management app I’ve found.
Detailed Breakdown of Expenses for Africa Trip
 Big Daddy Dune (left) and Deadvlei (right) in Sossusvlei, Namibia.
Tours and Entrance Fees: $5,779.24
(Visas: $145; Entrance Fees: $426.65; Tours: $4,810.90; Tips: $396.69)
We did two eight-day safaris with G Adventures, a company that was recommended by travel industry friends as a budget option. These tour prices below are the base rate and don’t include the optional safari drives, some meals, tips and airport transfers. We both really enjoyed our tours and highly recommend them!
- 8-Day G Adventures Botswana and Victoria Falls Adventure Tour: $2,294.15
- 8-Day G Adventures Kruger National Park Tour: $1,699
Some things you just can’t do on your own due to safety and environmental regulations, such as Sandwich Harbor Dune Driving ($175 pp) in Namibia, rhino tracking ($116 pp) and leopard spotting ($84 pp). We also paid for several safari drives with guides because the guides have radios and tell each other where the animals are for easier wildlife spotting.
Since it’s a very tip-based society, you need to allot an extra 10% minimum for tips. (Some of the tips were included in the tour pricing in my calculations.) The admission for foreigners to certain sites was hefty—$50 entry for the Zimbabwe side of Victoria Falls.
Visas Costs in Africa
Namibia started requiring a $90 multiple-entry visa for Americans in April 2025, and it was $55 for a multiple-entry Zimbabwe visa that we used to take a day trip to Zambia. (If you are a dual passport holder, you can’t swap around your passports in Africa just to save on visa costs. Immigration will flag you because they look previous stamps to see where you’ve been in Africa.)
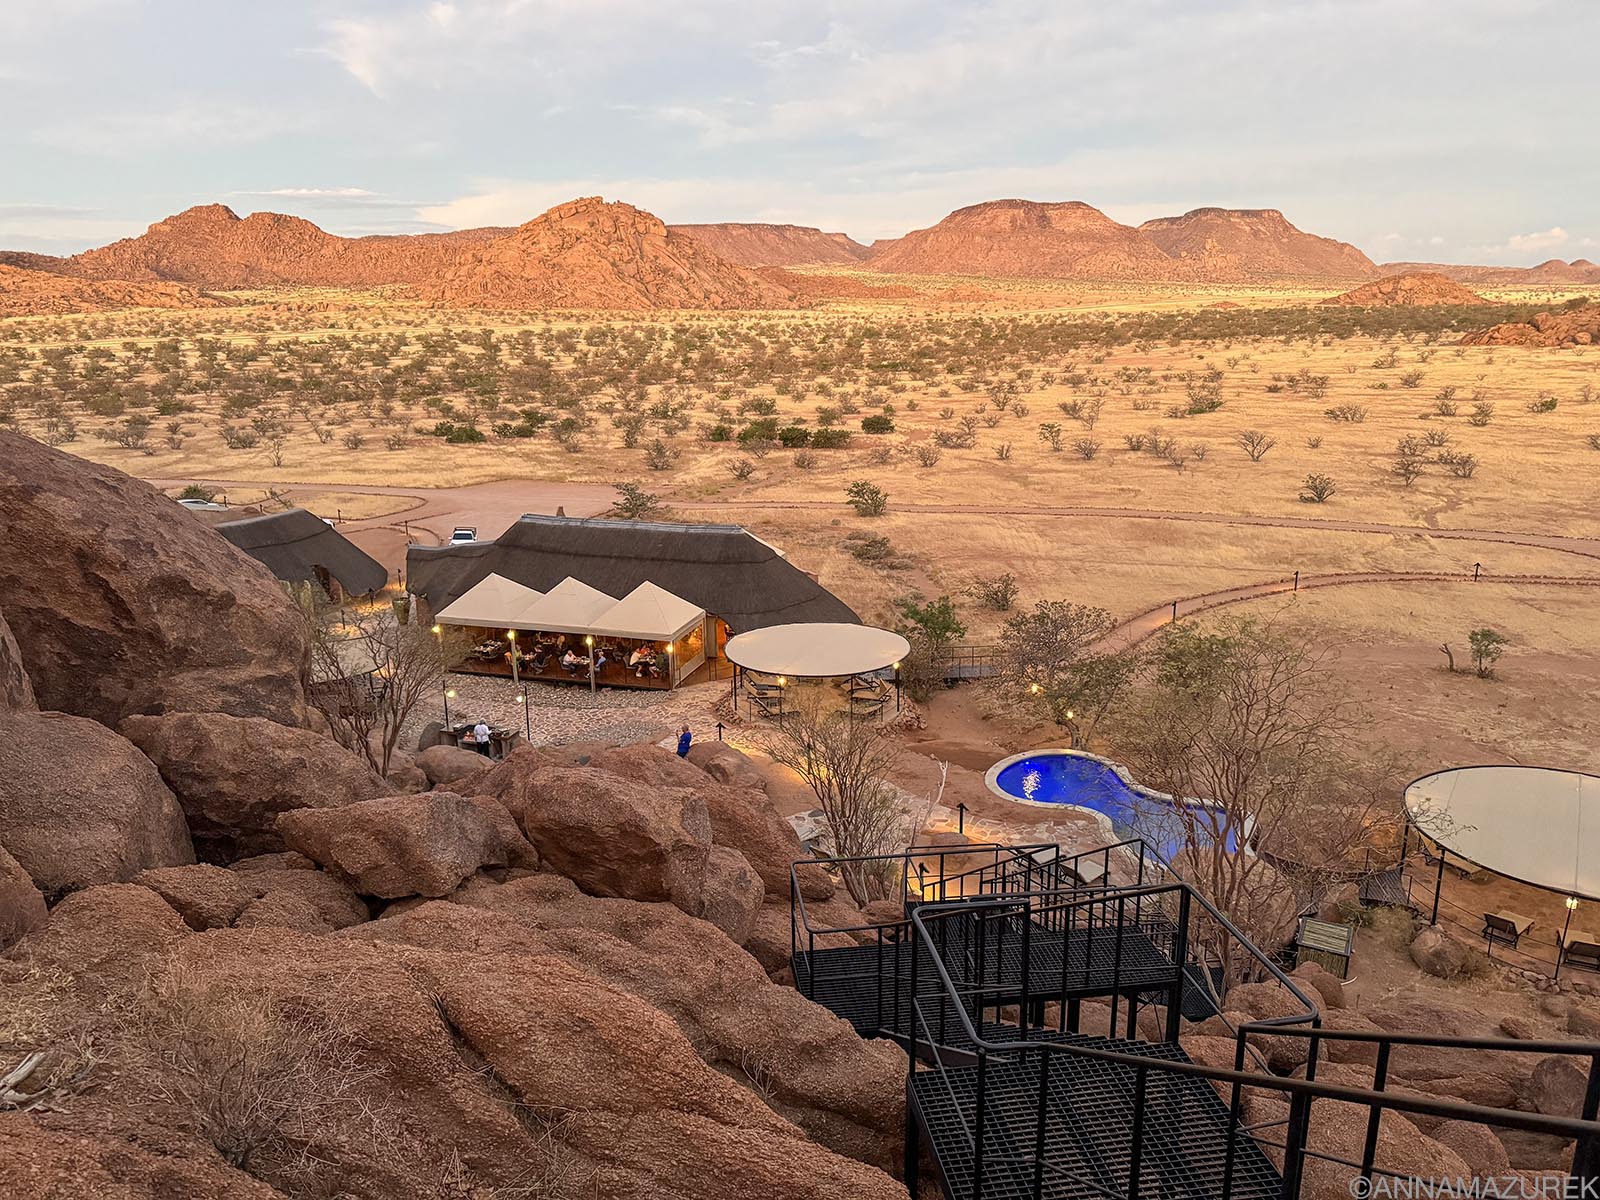 We stayed at Twyfelfontein Adventure Camp after visiting the nearby UNESCO rock art site.
Accommodation: $2,719.44
There are two options for accommodation in rural Africa: camping ($20/per person in Namibia) or swanky lodges. Since we were working remotely, camping wasn’t an option, so we splurged on fancy places for four nights of the entire two months, ranging from $281 pp to $143 pp per night, including two meals. We kept joking that we were retired since we were often the youngest people at these spots! The heat was another reason we opted for fancier accommodation.
The rest of the time we paid around $57/night pp on average for accommodation in cities to rent two-bedroom apartments with full kitchens and laundry facilities. (Swakopmund, Namibia was by far the cheapest—we only paid $19/each a night for a two-bedroom apartment downtown.) In Namibia’s Etosha National Park, we paid $88/night each for a two-bedroom chalet, which was basic but functional.
Food: $2,164.86
(Eating Out: $1,076.33; Groceries: $925.31; Beer: $163.22)
On travel days, we spent a lot of time eating sandwiches and snacks on the long drives. Anytime we were in a proper town, we ate out mostly for convenience. Plus, we were exhausted after the driving days.
My most expensive meal eating out was $38.86, including tip and wine. I only had eight meals that cost over $30 in two months, and the median meal price was $12.97. Eating out was relatively inexpensive—cute cafes in Cape Town had breakfast sandwiches for $6, etc. It’s the cost of alcohol that makes it more expensive. I just tracked beer to be funny but that also includes wine. The wine scene in South Africa and the craft beer options in Cape Town was fantastic!
 Sandwich Harbor, Namibia is one of those places you can’t drive yourself and must book a tour, which is worth every penny!
Transportation: $1,539.68
(Car Rentals: $574.76; Gas: $111.06; Mechanic/Tire: $73.73; Taxis & Private Transfers: $780.13)
We paid for safety when it came to transport. Let me be clear: You cannot walk alone at night, even as a group, in most of Southern Africa. Mostly due to the chance of being robbed but also due to wild animals in the bush. We tried to walk 15 minutes back from the farmer’s market in Green Point in Cape Town, only to run into some Dutch travelers running back, yelling for us to turn around because they’d been robbed up ahead.
We rented a 4×4 SUV ($1,4871 total) for our two-week self-drive road trip in Namibia from Kalahari Car Hire, which I’d highly recommend. After a hilarious turn of events, we ran out of gas 20 miles out of Swakopmund and paid $105 total for the roadside service. The office was so sweet with helping us and checking in on us later. One of the tires got three nails in it, so we had to buy a new one after returning the car for $116 total.
Then, in Cape Town, we rented a normal SUV ($315.20 total for a week) for driving around the area for our first week. The Namibia car cost was split three ways and Cape Town four ways because another friend joined us.
Otherwise, we did taxis, ride shares (Uber) and private transfers. For safety, we had our hotels book us airport pickups to make things easier. In Cape Town, we used Uber Black or Comfort to get around for safety. I also used the women driver feature, which I had great luck with. I also used a private transfer company called Angel Watch for airport pickups and day trips to the wine regions. Book through WhatsApp. I highly recommend them.
Namibia has a rideshare app called Yango. We used it only during the day, and it was fine. It was mostly older cars, but occasionally, the driver would ask for more money. (This is a question they ask you in the app when you rate the driver!) I wouldn’t feel very safe alone in one at night.
 Kruger National Park does not have cell service to deter poaching.
eSIM Cards: $63.75
Staying connected was key for this trip because we were all working remotely at some point, so we needed to have the ability to hotspot our computers. Plus, it was also a safety issue for navigation on our long drives. I used Airalo’s eSIM plans for both South Africa and Botswana with no issues—you can read more in my detailed eSIM review.
In Namibia, MTC (local network) is the best and honestly only network in the country. (They claim to cover 95% of the country, but it only worked in towns and cities.) Buy an eSIM at the airport store outside arrivals. No other eSIM card company works in Namibia. My friend tried his international Verizon plan, but it did not work because they don’t partner with MTC. The same happened with Airalo.
Based on the MTC staff’s comments, they don’t partner with anyone. Basically, you have to use MTC—your international plan with any U.S. carrier will NOT work unless they use MTC. For more details, read my review.
Travel Insurance: $309.23
While SafetyWing is my go-to for travel medical insurance, I ended up going with World Nomads for this trip because SafetyWing was just under the minimum coverage required by G Adventures for tours. World Nomads also has better coverage for travel delays, which was key for my flight to Asia out of Cape Town. (I often use World Nomads in the U.S. when I’m 100 miles from home to cover me on hiking trips.) I switched back to a SafetyWing plan the minute I got back to Asia.
Full disclosure: We receive a fee when you get a quote from World Nomads using this link above. We do not represent World Nomads. This is not a recommendation to buy travel insurance.
Clothing/Laundry: $144.2 & Souvenirs: $23.95
I bought a few dresses and things while we were traveling. I made sure to book apartments or hotels with free laundry to make life easier. (I hate having other people do my laundry because they always mess up my clothes.)
 The plug chaos in my Windhoek hotel! Bring both a European plug and the rounded South African plug.
Toiletries/Travel Accessories: $45.48
The most annoying thing about Southern Africa is the plug situation—they use this giant round version of the British plug. I’ve been to over 70 countries and never seen anything like this. Plus, most places also use the standard European plug. You needed both because you never knew which type was by your bed or desk. The electronics—hair dryer, kettle, etc.—in the room were a mix.
Sometimes, there was even a standard British plug with the rectangular plugs. It was the most confusing thing ever, and the South African plug doesn’t come on the standard travel plug adapter. Buy them at the airport when you arrive or at an electronics shop.
What is the Cost of Flights to Africa?
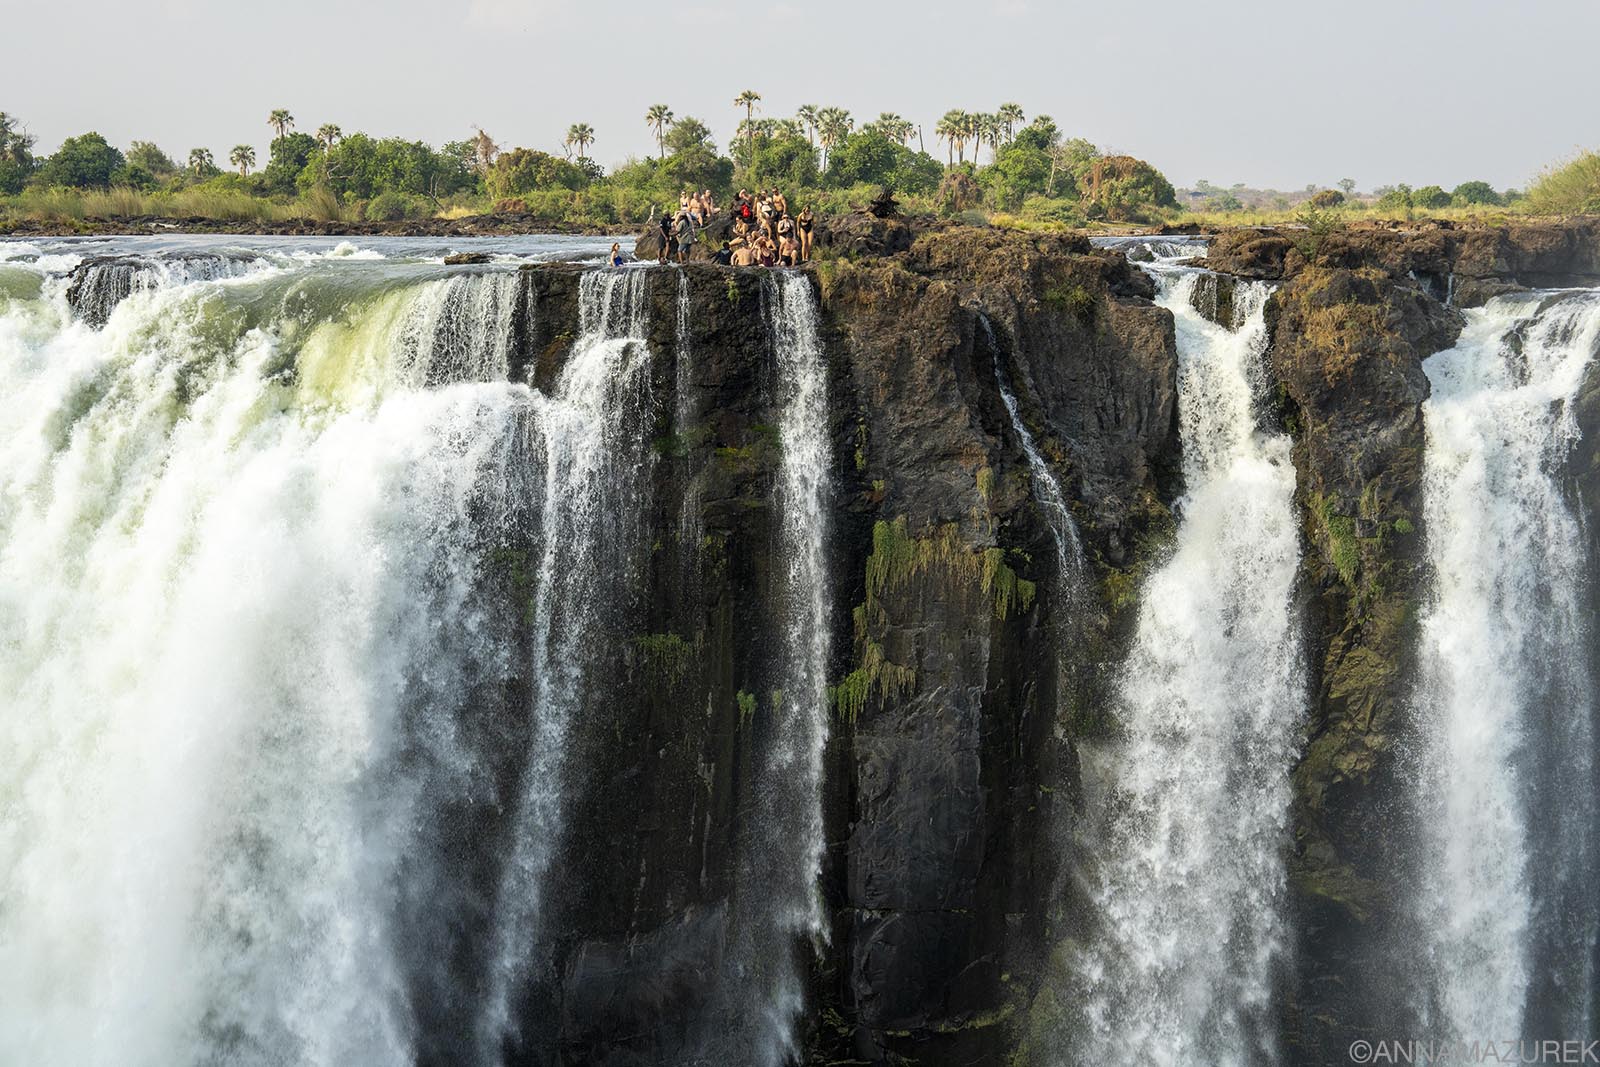 From the Zimbabwe side of Victoria Falls, there’s a nice view of the queue at Devil’s Pool on the Zambian side.
This cost breakdown above doesn’t include flights because I paid for most of my internal flights on miles, and one of my freelance jobs covered a portion of the other flights. The Star Alliance has the best network in Southern Africa, while Lufthansa’s budget carrier Discover Airlines flies direct to Victoria Falls and Windhoek from Germany. Norse, another budget airline, flies out of London direct to Cape Town.
My focus is on building status on American Airlines, but I had some extra United points that I used for the flights. Flying through Qatar is a cheap option, but there was too much tension in that region—Qatar got hit with an attack when I was booking flights, so I avoided it.
- One-Way Flight from Athens, Greece to Cape Town via London: $1,300 for economy
- Cape Town to Johannesburg: $166.90 economy + $99.50 to upgrade to business class to not have to check my camera gear.
- Johannesburg to Windhoek: $118 economy + $208 to upgrade to business class to not have to check my camera gear.
- Victoria Falls to Windhoek: 12.5K United Airlines miles + $50 for economy
- Windhoek to Cape Town: 25K United Airlines miles + $34.70 for economy
- One-Way Business Class Singapore Airlines flight from Cape Town to Bangkok via Singapore: $1,900
Do NOT fly Singapore Airlines Business Class from Africa! Economy was half the price and business class was not worth the extra cost because it’s a very old plane with a terrible, awkward seating arrangement and cheap amenities. I was very disappointed.
How Can You Travel in Africa on a Budget?
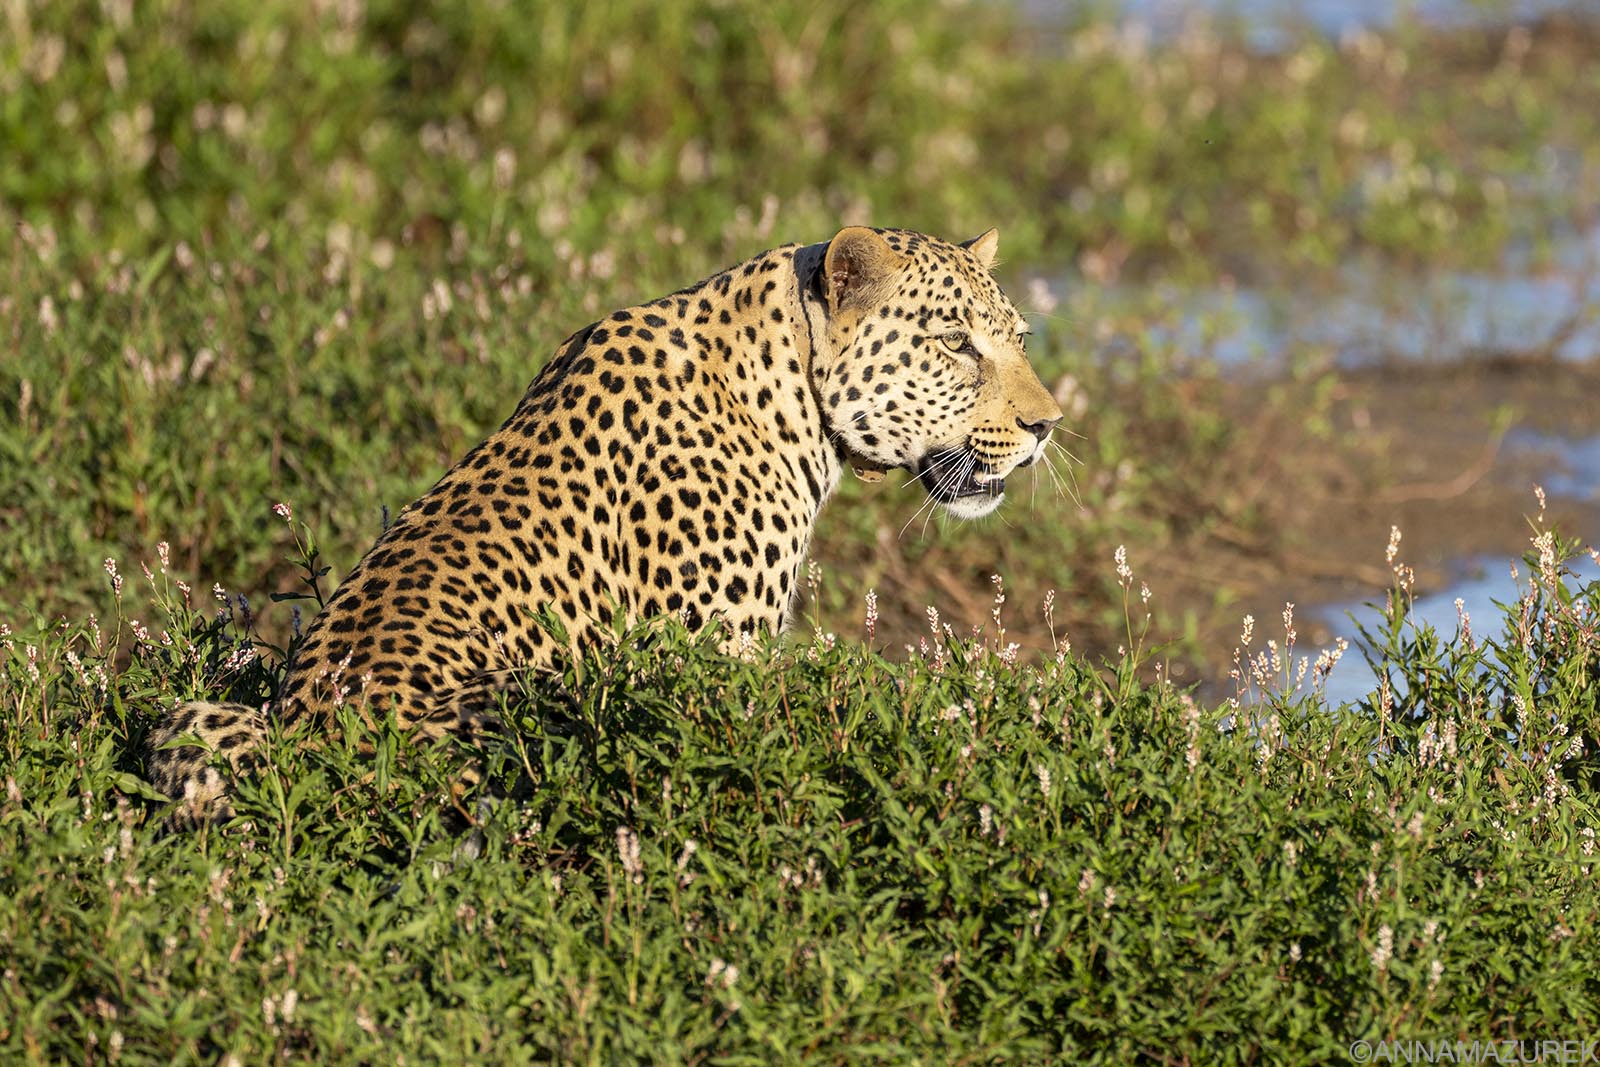 A leopard at Okonjima Nature Reserve in Namibia.
The easiest way to do Africa on a budget is to camp or do a participatory camping safari where you help set up tents and cook. It’s really that simple. You can easily rent 4×4 SUVs and trucks with camping gear, so you don’t have to bring anything really yourself. The rental will cost a bit extra to include the gear.
I’d highly recommend this for self-driving in Namibia. We did two weeks driving on our own and loved it. You’ll need a good GPS and a portable air compressor. You can easily rent these, too, but I highly recommend the travel friendly Hoto portable air compressor that self-calculates in both psi and bar.
For other parts of the region, I’d do your research about the safe areas to drive, especially in South Africa. We rented a car to explore the Cape Town area but didn’t explore on our own past the Western Cape.
I would recommend G Adventures for great budget tours. They have a wide range from classic tours with hotels to the cheaper participatory camping options.
A Guide to Visiting Khao Yai National Park in Thailand
 Park rangers stop traffic for a wild elephant to cross the road at Khao Yai National Park.
If you get tired of Bangkok’s noise and traffic, there’s a quiet nature escape just a few hours away—Khao Yai National Park. This 2,206 square kilometer park is famous for wild elephants, gibbons, hornbills, stunning waterfalls and trekking. With over 280 bird species, avian enthusiasts worldwide flock to the park for prime birdwatching. In 1962, the area became Thailand’s first national park and a UNESCO World Heritage site in 2005.
Even though I’ve lived and worked in Thailand off and on for over a decade, this spot wasn’t on my radar despite being so close to Bangkok. It was such a fantastic wilderness getaway and a wonderful surprise.
If you are short on time, book a day trip from Bangkok. If you have a night or two to spare, I recommend spending a few nights in the area. I booked a tour through Greenleaf Guesthouse & Tours, which I highly recommend. For more details, check out my review of the tours and accommodation below.
Keep reading for all the details about what to do, where to stay and how to get to Khao Yai National Park.
Affiliate links are used in this post. If you make a purchase, I earn a small commission at no cost to you, which goes toward the cost of maintaining this blog.
Plan Your Trip
Why Go: Jungle waterfall treks and epic wildlife sightings, including wild elephants & gibbons
How to Get There: Take a day trip from Bangkok or take the 3.5-hour train to Pak Chong, the gateway to the area, and book a day tour through Greenleaf Tours.
How to Get to Khao Yai National Park from Bangkok
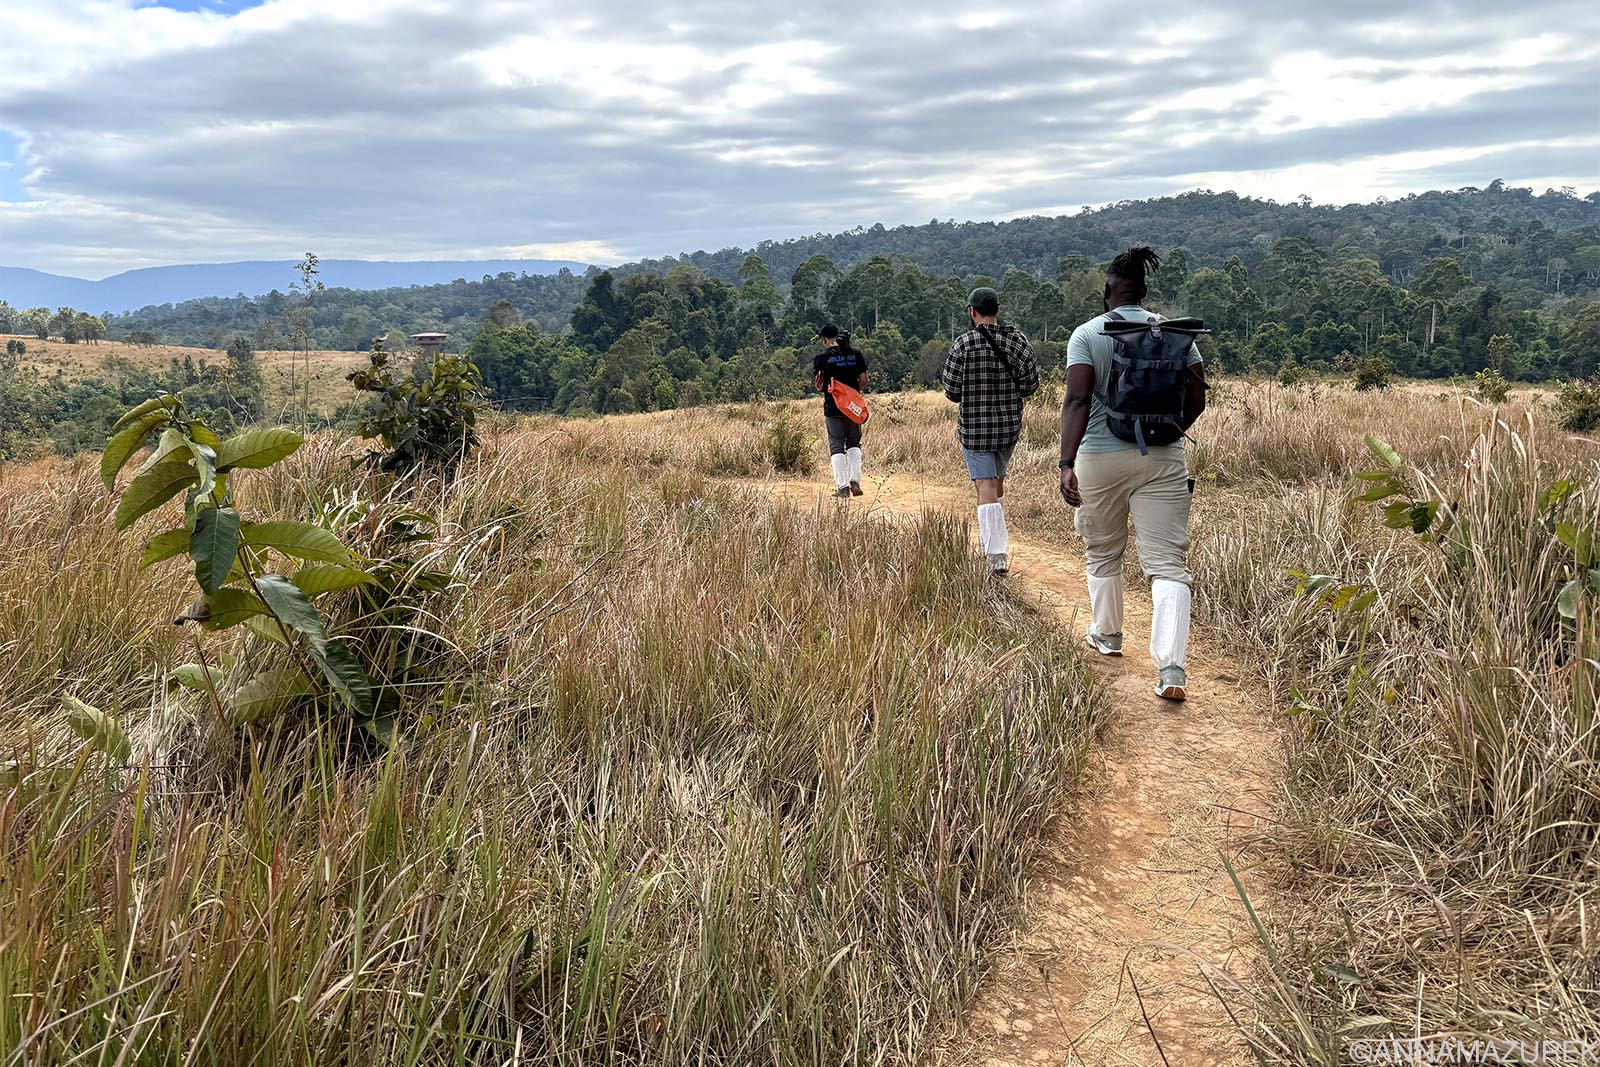 Hikers wearing tick socks trekking along the trails with a guide at Khao Yai National Park.
If you don’t have time to spend the night near Khao Yai, then I recommend a day trip from Bangkok.
If you have more time, you can easily get to the area with public transport, but you will have to spend at least one night if you want to do a full-day tour. It’s a roughly 3.5-hour drive from Bangkok.
To get to Khao Yai National Park via public transport, you’ll need to get to the city of Pak Chong by train, bus or minivan. You can easily arrange for a pickup upon arrival from your accommodation. I took the train, and I recommend it.
The train leaves Bangkok from Krung Thep Aphiwat Central Train Station and stops at Don Mueang and Ayutthaya stations. The cost is $4-5 USD for the roughly 3.5-hour trip. You can book directly through the SRT D-Ticket app (official State Railway of Thailand app) or 12go.asia.
There are five trains from Bangkok to Pak Chong:
- Train #21 (Depart 6:10, arrive 8:43)
- Train #135 (depart 7:10, arrive 10:43)
- Train #71 (Depart 10:35, Arrive 13:17)
- Train #139 (Depart 19:25, Arrive 22:33)
- Train #23 (Depart 21:05, Arrive 23.58)
Trains are always late, so if you plan to do a half-day tour when you arrive, make sure to get one of the earlier trains (#21 or #135). Trains have both air conditioning and cheaper fan sections. (I did air conditioning,
and it was fine.)
If you want to do a full-day tour, you will be back in time to catch the last train for Bangkok.
There are four trains from Pak Chong to Bangkok:
- Train #24 (Depart 1:41, Arrive 4:50)
(This is a 24-hour clock, so very early in the morning) - Train #140 (Depart 3:12, Arrive 6:50)
(This is a 24-hour clock, so very early in the morning) - Train #72 (Depart 11:18, Arrive 14:10)
- Train #22 (Depart 19:48, Arrive 22:15)
Buses from Bangkok (NakhonChai 21) will depart from the Mo Chit Bus Station but will not drop you in the center of Pak Chong. Instead, you’ll be dropped at the Tesco Lotus in Pakchong, seven kilometers away. Mini vans will also leave from the Mo Chit Bus Station for Pak Chong.
When is the best time to visit Khao Yai National Park?
 January is one of the colder months in Khao Yai but not as green since the trees lose their leaves, which you can see in this photo.
The park is open year-round from 6 a.m. to 6 p.m. with an average temperature of 21 degrees Celsius. The hottest part of the year is from March until May, when temperatures range from 26-27 degrees. (The trees make it cooler than other parts of the country.) The rainy season is from June until September, when waterfalls are gushing, and the vegetation is the lushest. Temperatures can drop to 10 degrees during the coolest part of the year, from December to January, with blue skies.
I visited in January, and it was still hot in the day but cold at night. For me, the ideal time to visit would have been in October and November right after the rainy season, when the forest is still lush. You must watch out for ticks in the dry season and leeches during the wet season. Tours will give you socks to wear to help with both. Pack a good bug spray.
Things to do in Khao Yai National Park
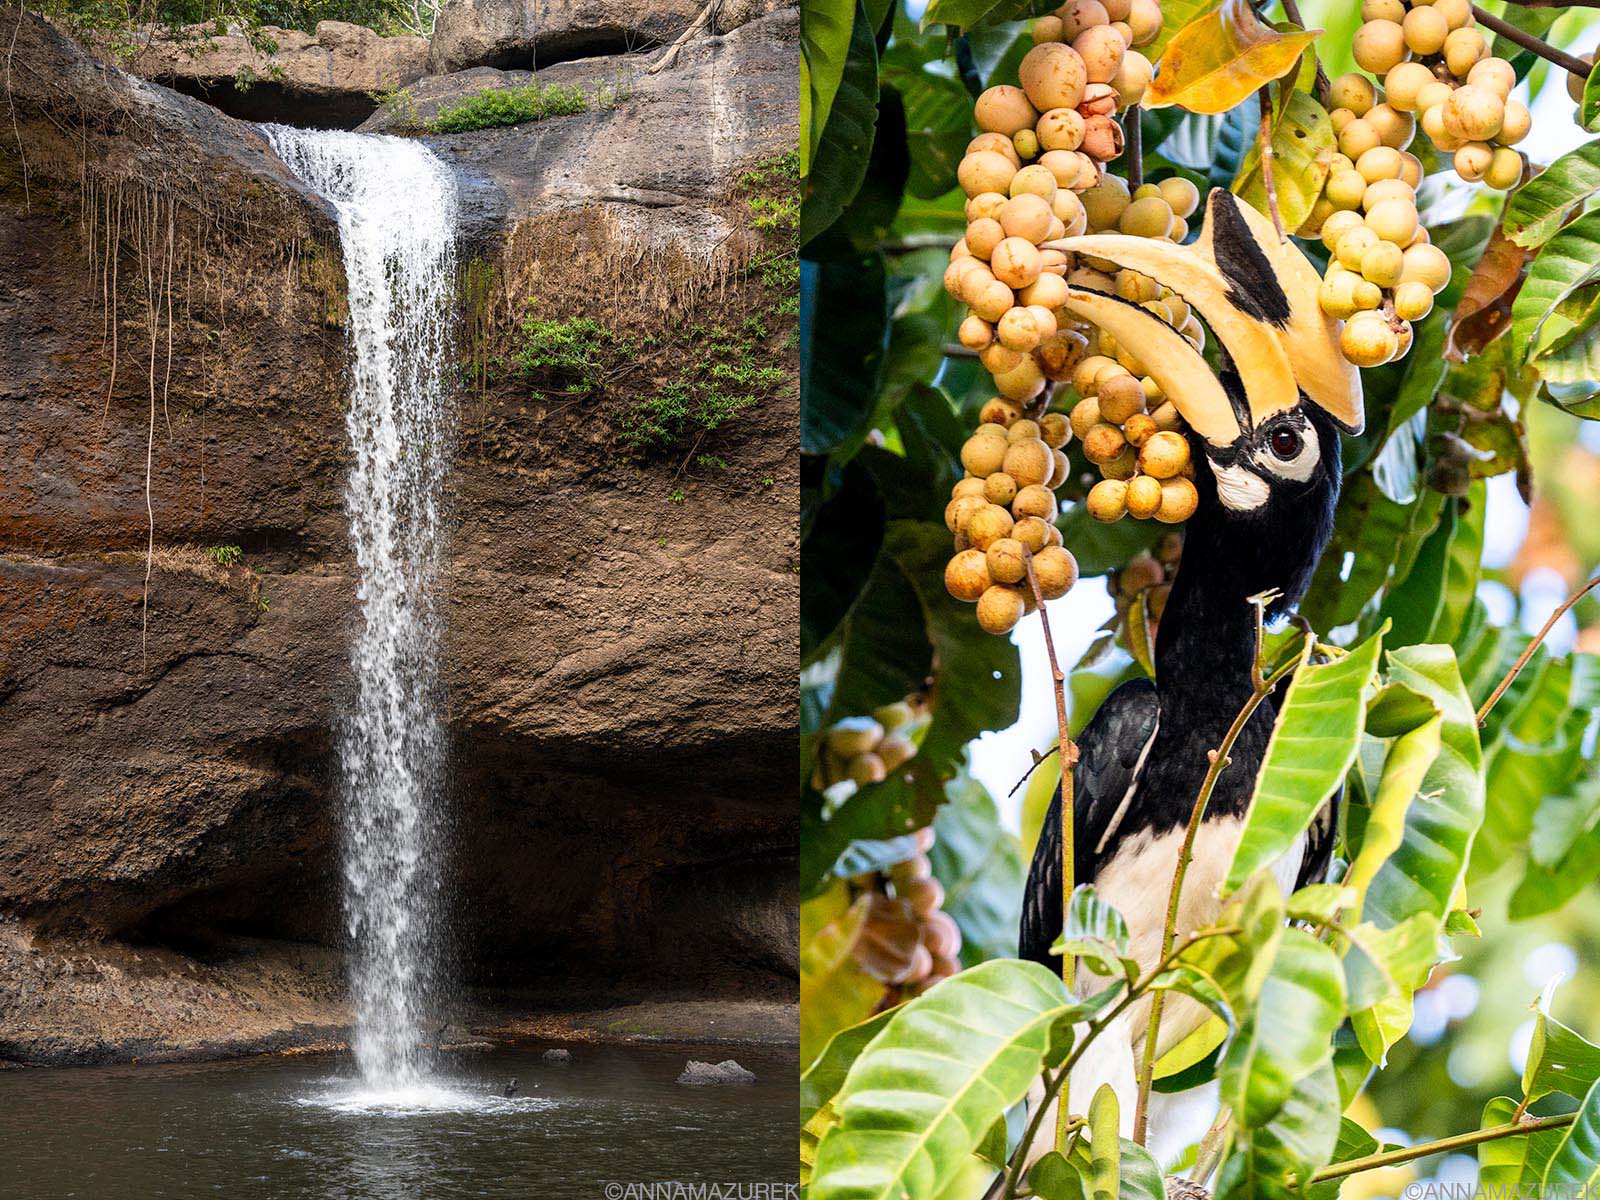 Left: The 25-meter tall Haew Suwat Waterfall Right: A hornbill at Lam Ta Khong Campground.
The park’s daily entrance fee for foreigners is 400 baht for adults and 200 baht for children. Day tours include the park entrance in the tour fee.
Trekking
There are seven nature trails ranging from 1.2 to 8 kilometers with a hiking time from 45 minutes to six hours. The trails are clearly marked with numbers but need to be started early in the day due to the heat. The official website says that Trails 1-5 and 7 can be started from 8 a.m. to 2 p.m., but you must start on Trail 6 no later than 10 a.m. Guides are required for Trails 3 to 6.
Birdwatching
The park is home to 282 species of resident and migratory birds from across the globe. You’ll see some epic camera lenses around the park. I shot with a 70-200mm, and it wasn’t enough for most of the wildlife. A longer lens would have been more helpful.
 Visitors can rent camping equipment in Khao Yai National Park.
Camping
Lam Ta Khong Campground and Khao Rom Viewpoint Campground are the only two campgrounds in Khao Yai National Park. Lam Ta Khong Campground was a great place for wildlife sighting. It’s where I got my best hornbill photos. There were a ton of wildlife photographers camped out there as well. You need to find your own transportation to camp. The park rents camping equipment from tents to sleeping bags. Facilities include showers, electricity, a restaurant and coffee shop.
Stargazing
During the cool season from November to March, the sky is very clear and perfect for stargazing. The campground and other open meadows are excellent locations.
Night Safari
The park offers two timings for a one-hour night safari at 7 and 8 p.m. Book at the visitors center before 6 p.m. The safari is a 10 km drive on a high-bed pickup truck with high-powered flashlights to look for samba deer, Malayn porcupine, large Indian civets, Asian palm civets, wild elephants, owls and nightjars. You will need your own transport or to arrange transport to get to the park to join these tours.
Review of Greenleaf Tour Guesthouse at
Khao Yai National Park
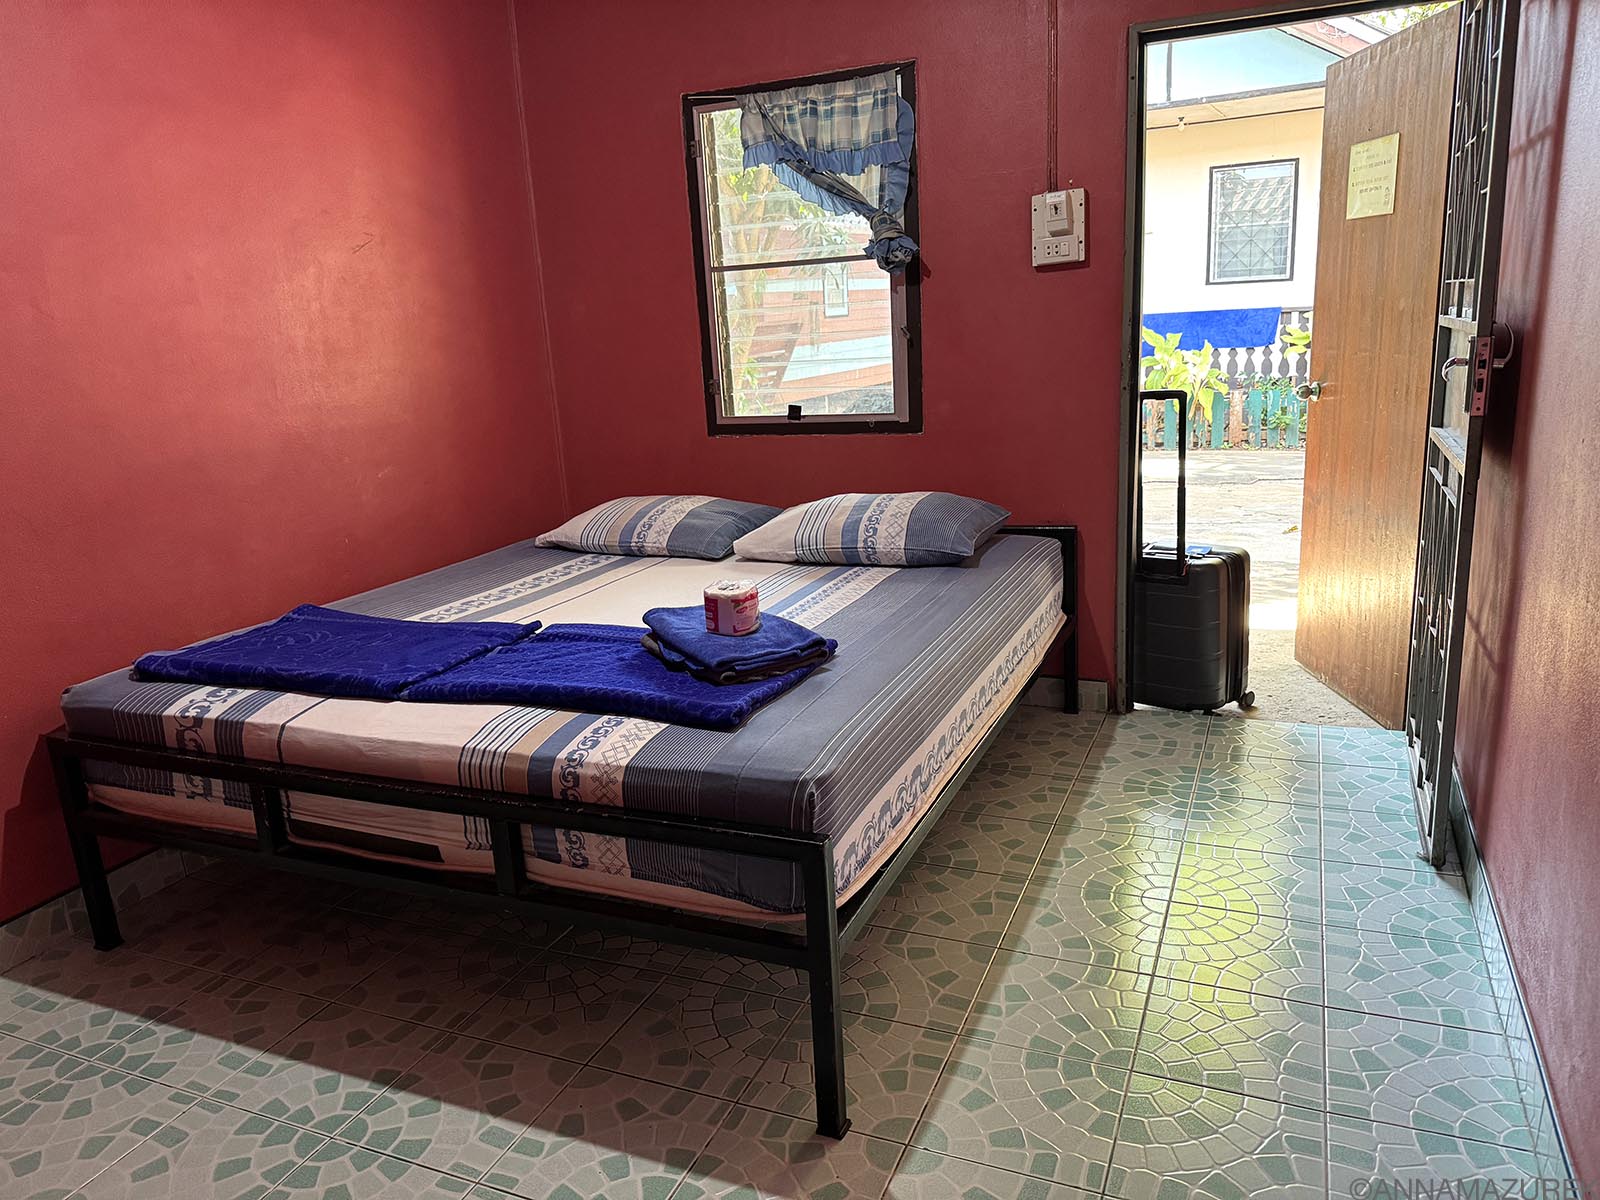 The 300 baht/night rooms at Greenleaf Guesthouse & Tour are simple but clean.
Greenleaf Tour Guesthouse & Food
I absolutely loved Greenleaf Tour and can’t recommend them enough. I was skeptical at first because their website looks like it’s from 1995. (You can’t book through Booking.com or other websites.) I emailed, and they sent an overwhelming amount of helpful information on everything from transport to lodging. You can book both a tour by itself or a tour along with a room at the guesthouse.
For logistical reasons and cost, I booked both through them. I did the 1.5-day tour and spent two nights. I visited in January when the weather was cold. Due to this, I was concerned because the rooms only had cold showers. I tried to find a hotel with hot water nearby, but it was not cost effective since every hotel nearby seems to use them for tours anyway. They seem to be a monopoly in the area or the only tour company.
Greenleaf provided free pickup and drop off at the train station, while other hotels charged for it (minimum 200 baht each way), which was a big plus. It was only a short drive from the station. Free pickup and drop off is only included when you book the full-day tour.
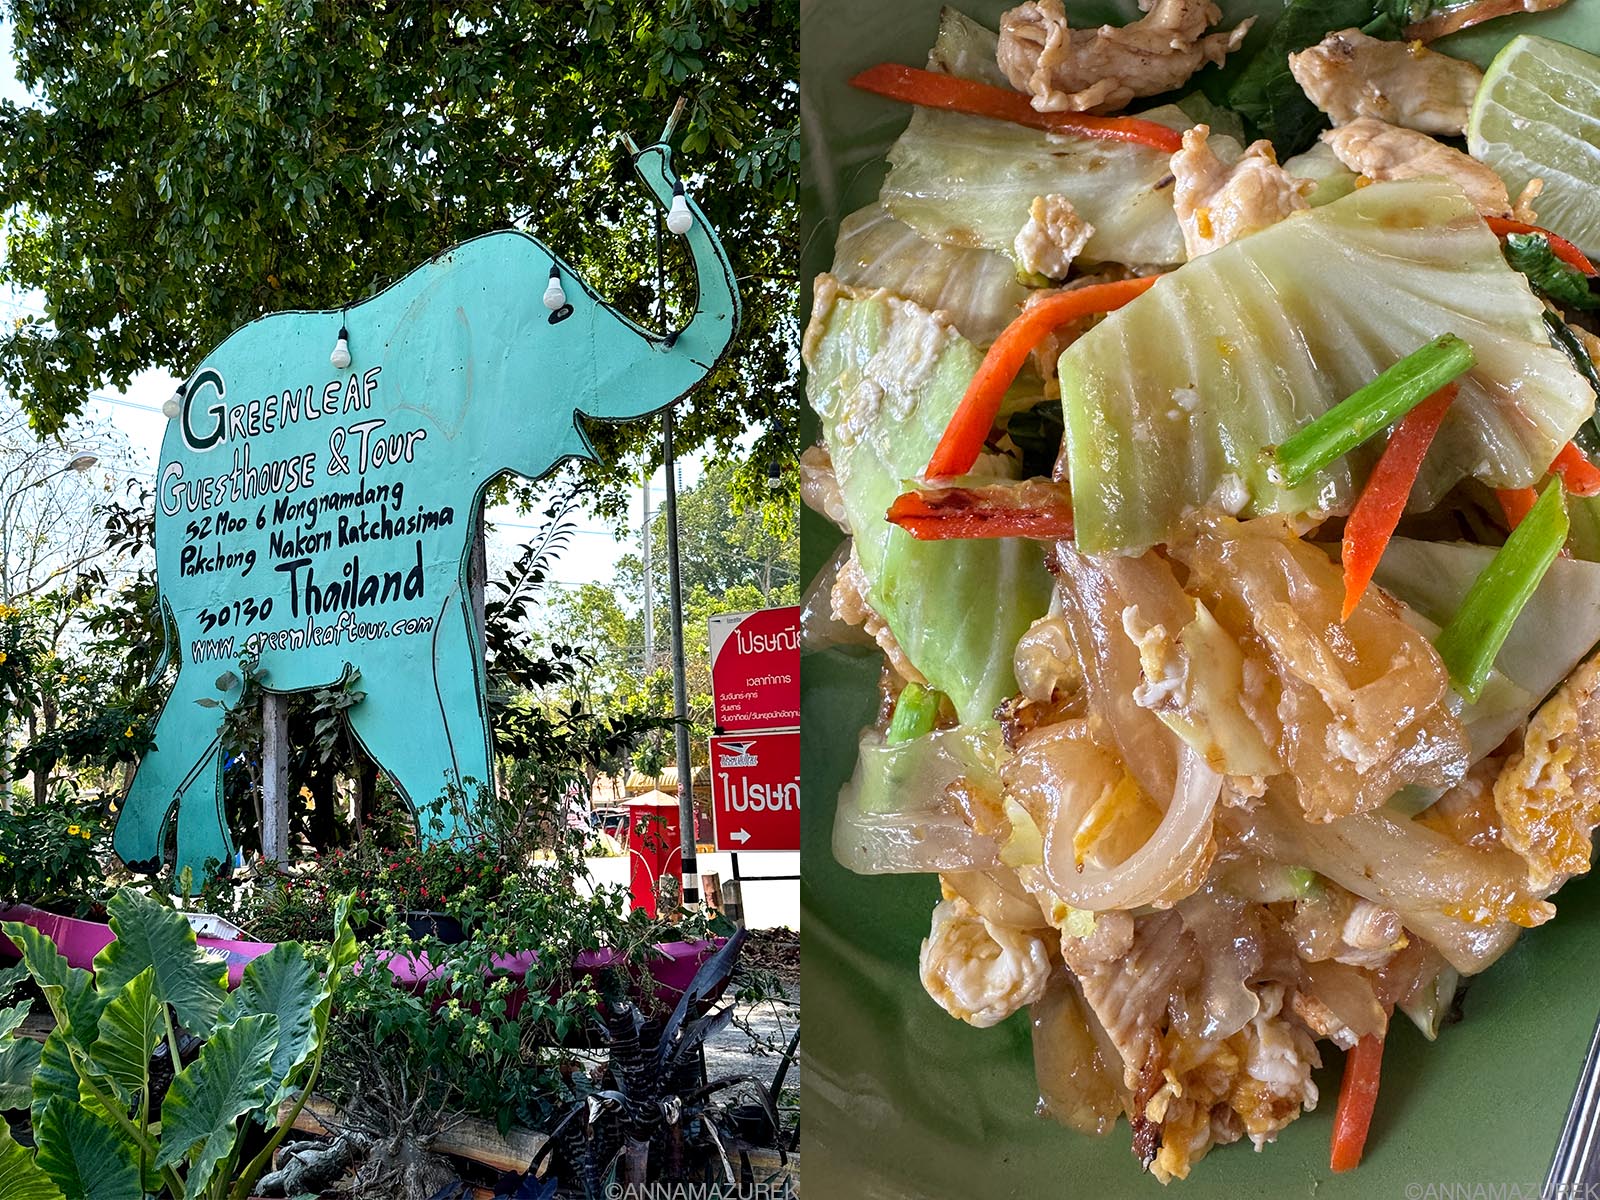 You can’t miss the elephant sign (left) outside Greenleaf Tour and the budget-friendly Thai food.
The property is gigantic—an open-air restaurant with yummy Thai food with great prices (60-80 baht) sits at the front. Breakfast only costs 50 baht. They have 19 rooms with a double bed for 300 baht/night with ensuite bathrooms. The rooms don’t have air conditioning or hot water. Since I visited in January when it was cold, I didn’t care about the air conditioning, but cold water was a concern. There was a fan in the room, so I was fine. Each room had a table outside on the shaded shared porch. The other guests were a wide variety of ages ranging from 20-something backpackers and retirement-age trekkers.
The Thai-style rooms were very basic but spotless. I slept well and enjoyed my time. I think I even had to ask for an extra blanket at night because it was cold!
Khao Yai National Park Tour Options
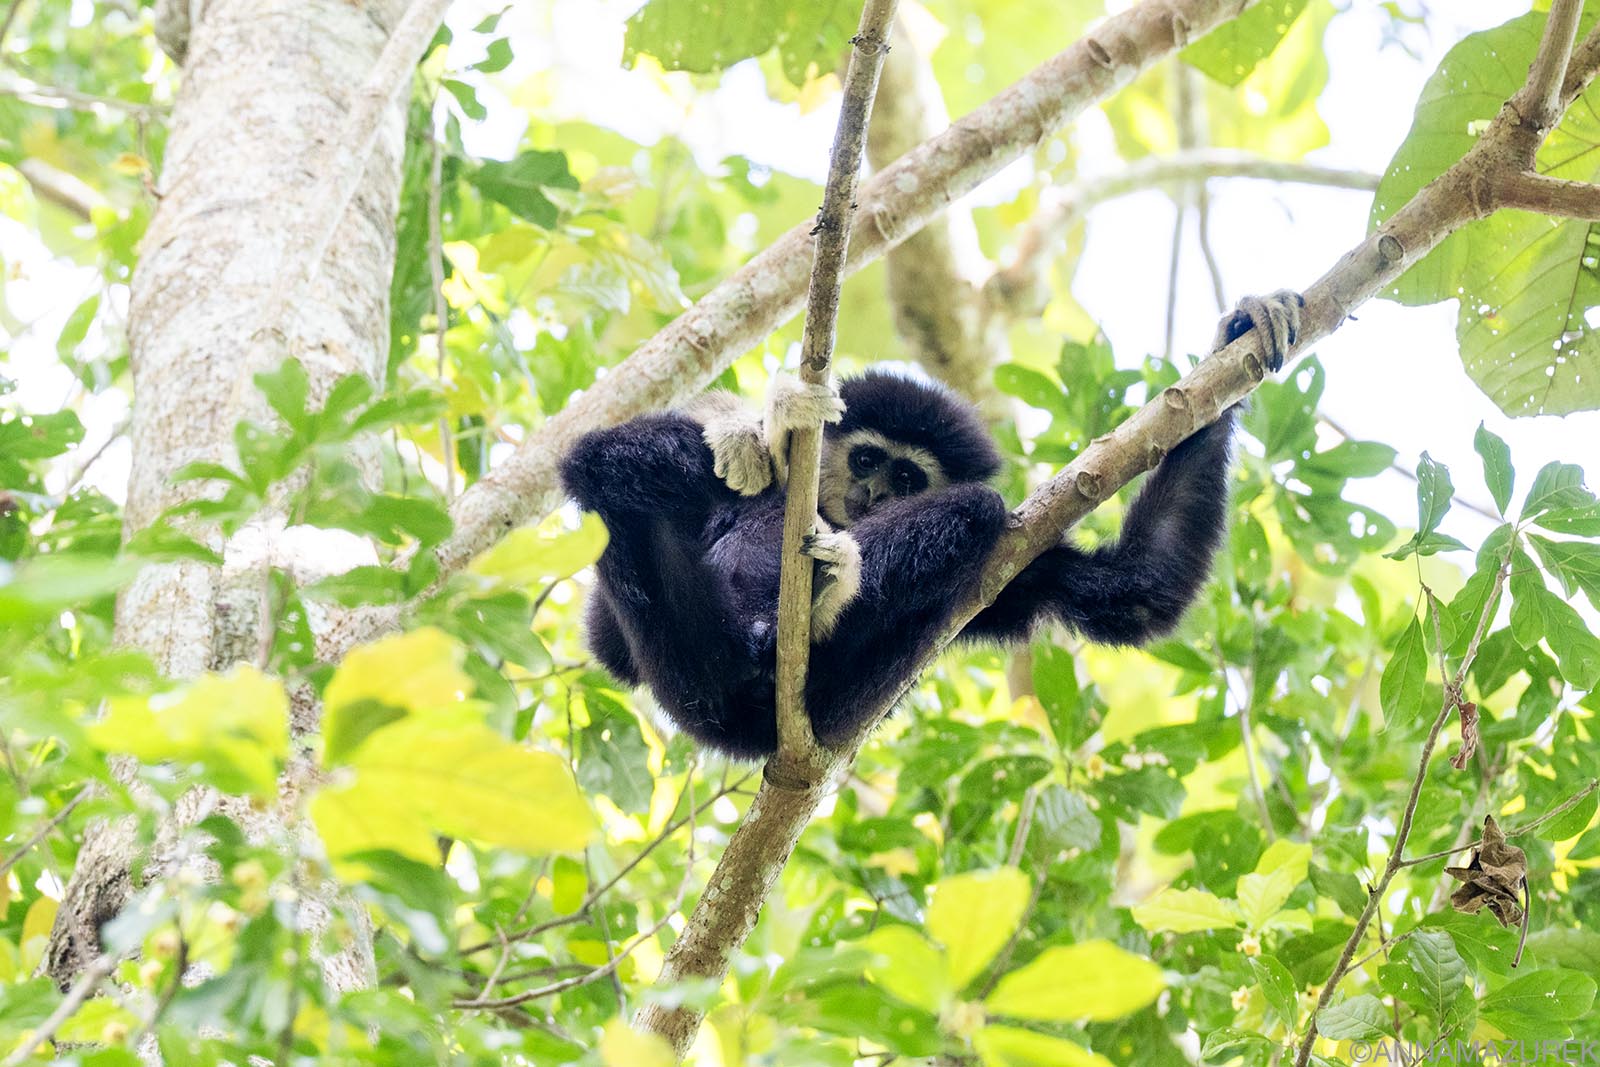 A gibbon along the trails at Khao Yai National Park.
Greenleaf Tour offers a half-day (500 baht) and a full-day tour (1,500 baht). I did both tours in January. Only the full-day tour goes into the national park. Payment is cash only.
The half-day tour (15:00 – 19:30) includes a visit to an underground cave, swimming in a natural spring and watching swarms of bats leave another cave for their nighttime escapades. You can’t swim in the waterfalls inside the park, so I assume that’s why they take you swimming on the half-day tour.
The full-day tour explores Khao Yai National Park and focuses heavily on wildlife. We saw hornbills, macaques, gibbons, wild elephants, vipers in trees,
porcupines and countless other bird species on our forest treks. We had a tasty lunch in the park that we had preordered and visited the 25-meter tall Haew Suwat Waterfall. Wildlife sightings are not guaranteed, but we had two epic wild elephant sightings back-to-back.
On one of the hikes, we saw a 500-year-old Strangler Fig tree. Both tours were in songthaews, a traditional form of transport consisting of pickup trucks with rows of seats in the back. They gave us tick socks to wear for trekking since ticks are common in the cold season. (In the hot season, you need the same socks for the small forest leeches.)
 We spotted some porcupines just as we were leaving Khao Yai National Park.
To be honest, I didn’t care much for the half-day tour because I’ve seen a lot of caves, and it was too cold to swim (for me!). The bats emergence from the cave was pretty cool, though. I had low expectations for the next day for the full-day tour, but it was phenomenal. The amount of wildlife sightings and photo ops inside the park was amazing. The guides were lovely and helpful for both tours. They had spotting scopes that were helpful for wildlife sightings and even took photos of the animals through the scope with our phones for us. This was extremely helpful for the birds.
Private tours are about 5,000 baht. This price was quoted to me by Greenleaf and multiple hotels I reached out to. Night safaris can be arranged through the park before 6 p.m. daily, but you need to find your own transport to the park or stay in the park.
A girl I met on the full-day tour ended up staying in the park and booking tours with rangers the following night. She didn’t have a great experience as the rangers didn’t speak English and walked too quickly. She went back to Greenleaf for a second day tour and said it better than staying in the park!
Where to Stay: Khao Yai National Park Hotels
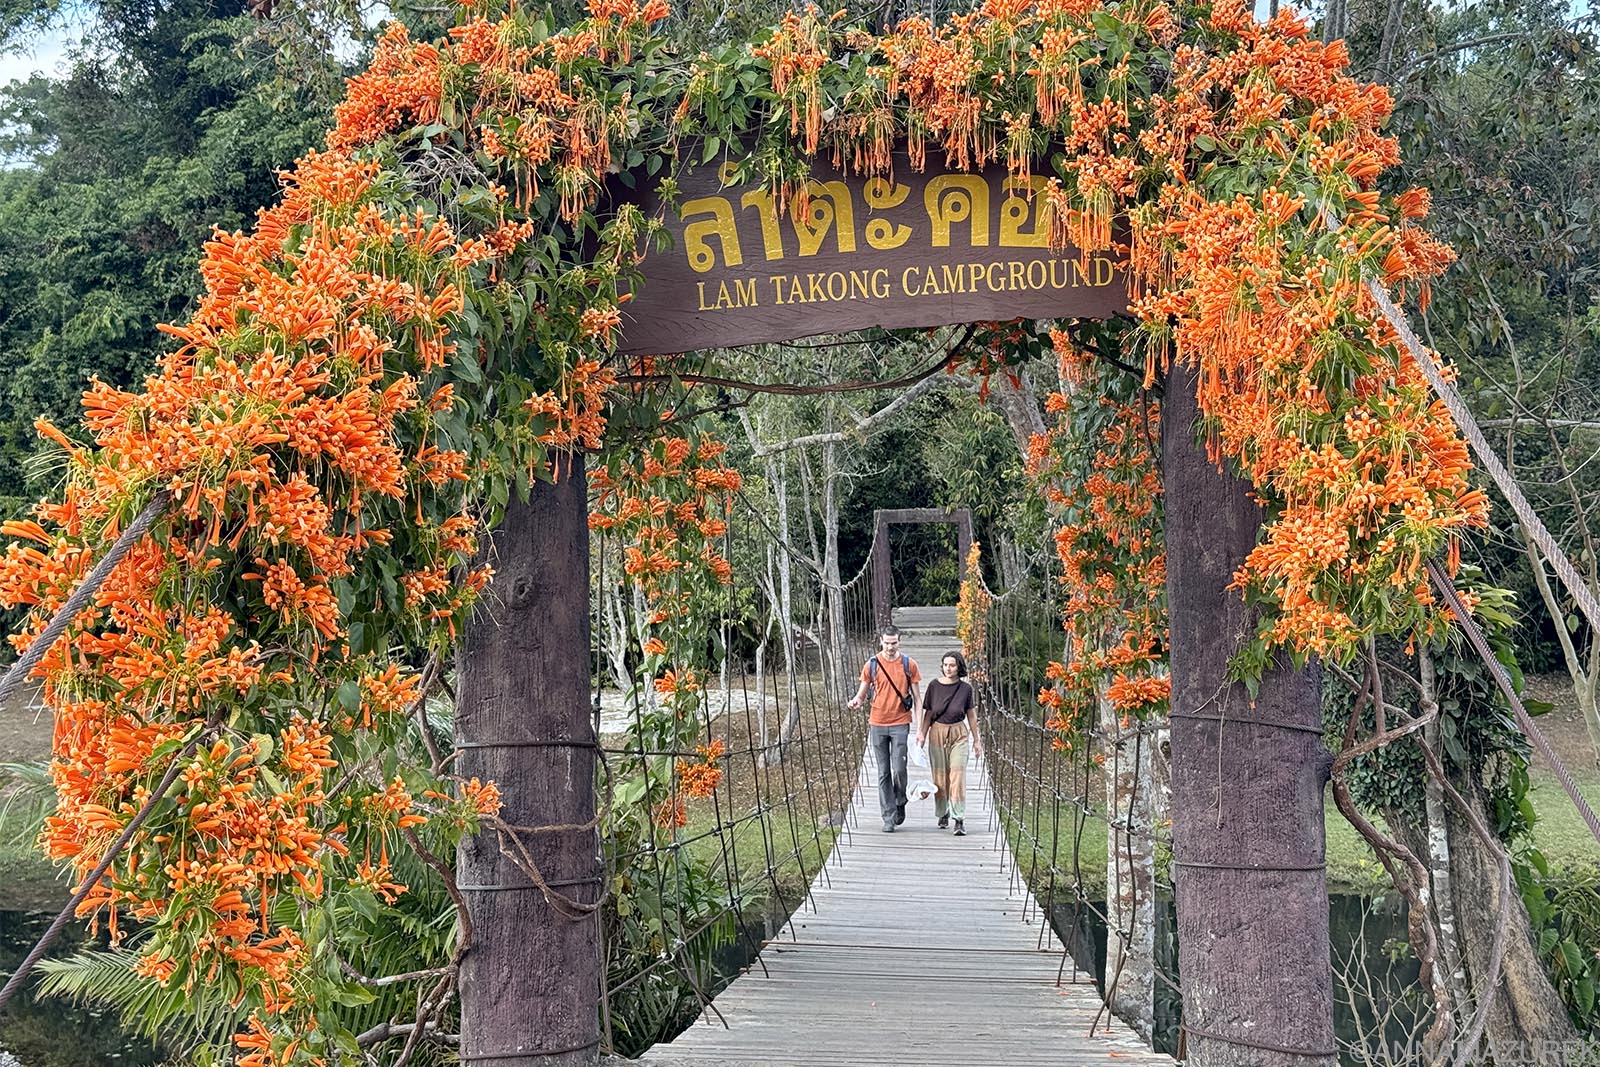 Lam Ta Khong Campground is a great place to stay for birdwatchers.
You can stay inside the park, but you’ll need your own transportation. Contact the park’s office to book one of the two campsites and a series of lodges across four zones. For more details, check out the park’s website.
Budget travelers should stay at Greenleaf Tours Guesthouse if they don’t mind the cold water and lack of air conditioning. If you are looking for nicer hotels outside the park with hot showers and air conditioning, Greenleaf Tour recommends the following. (Read reviews before booking. Prices range from $25 to $200 based on property and season.)
- Moo Si Yard HomeStay (Highly rated)
- Khaoyai Cottage
- Plern Pitch Residence
- Le Monte
- Mont Blanc Basecamp (close to “Ban Tha Chang Natural Spring Water”)
- Mont Blanc Glamping
- Hotel MYS Khao Yai (Fancy & highly rated)
- The Jungle House (jungle atmosphere)
- Lala Mukha Tent Resort (Gorgeous scenery)
- San Guesthouse and Tour KhaoYai (located by park entrance)
- Fortune DPlus
- Hotel Labaris (Stunning property)
- Tressure Inn KhaoYai
- Lacol Khao Yai (Part of Chatrium Collection)
- no.17@KhaoYai