
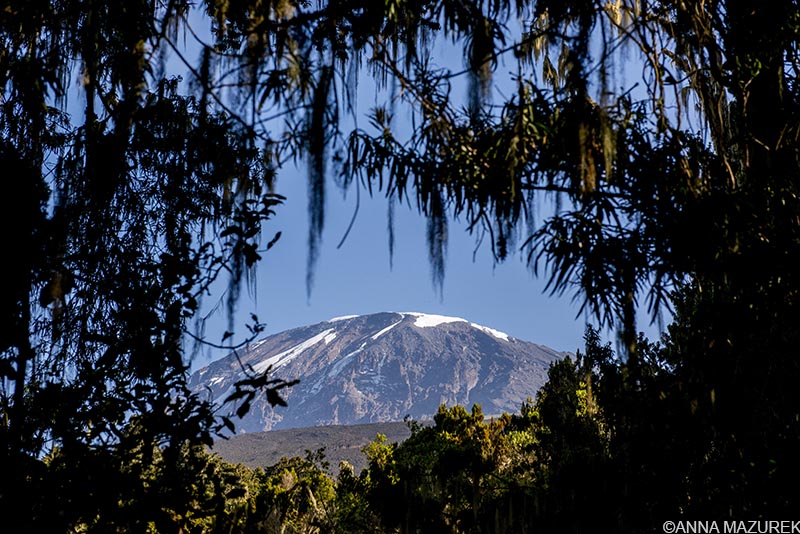
Our last view of Kilimanjaro through the rainforest on the trail to the Mweka Gate on the last day of our trek.
Two weeks ago, I hiked the Lemosho Route to the summit of Kilimanjaro. I’ve compiled all the main questions about the trek including when to go, which route to choose, what to pack and a breakdown of the costs. In my previous post, I provided a day-by-day breakdown of what it’s like to climb Kilimanjaro along with photos.
Best Time to Climb Kilimanjaro
Overall, there are two main trekking seasons: January to March, which is usually colder and quieter, and June to October, which is usually the busiest because of holiday travel in Europe and North America. Snow fall is highest from November to May. December is becoming popular due to holiday season, but it’s very cold. March to May is the rainy season, and the worst time to climb. November is also rainy.
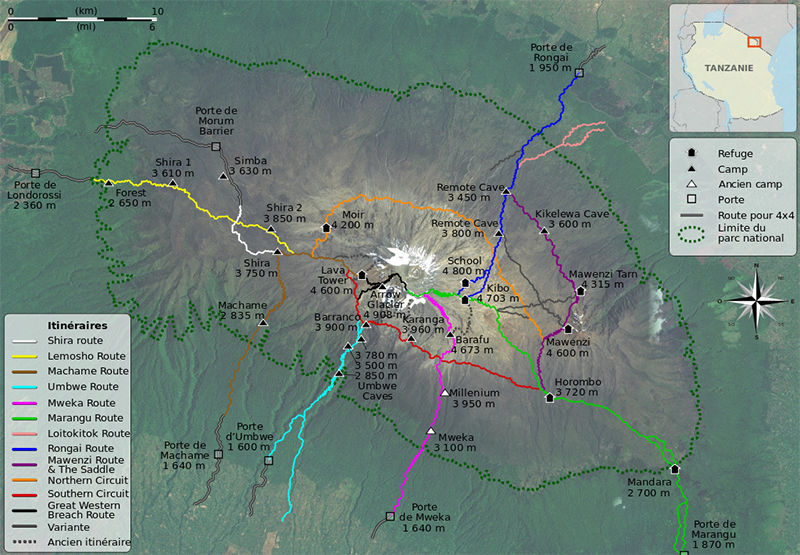
Kilimanjaro Route Map courtesy of WikiMedia Commons
Which Route is Best to Climb Kilimanjaro?
I sat down with my guide and interviewed him one night about hiking the mountain. Here’s everything you need to know from a guide who’s hiked the mountain 150 times.
All of our guides preferred the Lemosho and Macheme routes the best because they have the best weather and scenic views. He says the easiest summit routes are Shira, Lemosho, Macheme and Umbwe, which all summit the same route. Many routes offer an option to add a day to help acclimatize.
The Seven Main Routes to Climb Kilimanjaro
1. Lemosho Route (6-7 days)
Along with Macheme, this has the highest success rate because it’s longer and offers the best opportunity to acclimatize. The hike out of the park on the last day is very easy (3 hours) compared to Macheme.
2. Macheme Route (5-7 days)
Macheme is very similar to Lemosho except the first and last days are longer. It offers the same amount of acclimatization. The last day is a full day of hiking.
3. Shira Route (6-7 days)
This route is easier because you drive directly to Shira I camp and start from there, which personally I think is cheating a bit. The hike to Shira I is steep but nothing compared to summit day.
4. Ubwe Route (5-7 days)
This is the hardest route because it’s very steep especially the first two days. It offers a very picturesque view of Baranco camp, which is why people choose it.
5. Marangu Route (5-6 days)
This route has huts instead of camping. There are bathrooms but no showers. The sinks have cold water, and they give you warm water to wash your face. You can acclimatize well on the six-day route. The weather isn’t the best, and the summit route is more difficult. The route to Keebo Hut is also very dusty. This route is just for people who don’t wan’t to camp.
6. Rongiai Route (5-7 days)
This route is the easiest and is located by the Kenya border. It’s dangerous because of the potential of animals (lion, elephant, water buffalo). It follows the same summit route as Maraugu. It’s only a 2-3 hour walk each day and the hardest day is summit day.
7. Mweka Route – Down Route Only
This route is a down-only route. It starts at Barfu High Camp and has two camps – Mweka Hut Camp and High Camp (Millennium Camp on some maps).
Other options: The Northern Circuit Route is the newest and longest route. It follows the Lemosho Route initially then circles around the quieter northern side of the mountain.
The Western Breech is the most dangerous route and should be avoided. Most high-profile tour operators won’t even offer this route. It runs by Arrow Glacier. The route is steep and there’s a high risk of rock fall. Three people were killed by rocks here in 2006. The Tanzanian government requires you sign a waiver just to climb this specific route. All the guides hate it.
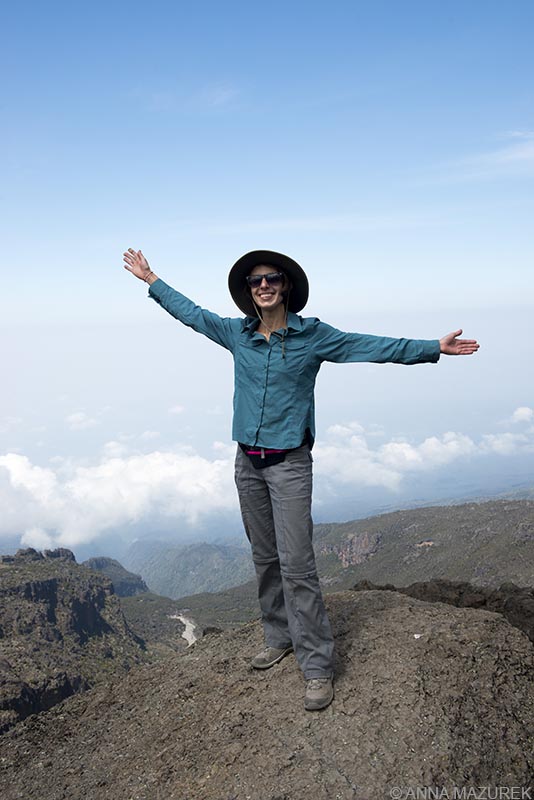
I’m totally rocking my wide brimmed hat, amazing SPF/wicking shirt, Prana pants, Keen hiking boots and the SPIbelt waist belt for my phone at the top of Baranco Wall on day four of the trek.
Kilimanjaro Packing List*
Clothing
- 2 pairs of long sleeve thermal tops (I prefer these zip-neck thermals the best.)
- 2 thermal pants (merino wool or Capilene)
- 1-2 short sleeve shirts OR 1 long-sleeve wicking SPF shirt
- Heavy fleece or down jacket
- Fleece pants
- 2 pairs of trekking pants (These Prana pants are the best.)
- Waterproof jacket/raincoat
- Waterproof pants (Consider getting insulated waterproof pants.)
- Underwear (one for every day of the trek)
Hat & Gloves
- Wide brimmed hat
- Wool hat that covers ears
- Ski mask or balaclava
- Lightweight gloves
- Wool or down mittens to layer over gloves (This pair was the cheapest I could find.)
Footwear
- Hiking books that cover ankle (I loved my Keen Terradoras.)
- Camp shoes (I took my old Nikes.)
- Shoe bag to carry spare shoes
- Hiking Socks (7 pairs)
- Gaiters (These were the most helpful on summit day.)
Sleeping Bag
Most tours provide sleeping bags, but I recommend bringing another to double layer because it gets really cold. I wore almost all my layers every night to sleep. Don’t forget to bring a travel pillow!
On the Trail
- 20- to 30-liter daypack for carrying what you need on the trail (I recommend Osprey Packs for their lifetime warranty.)
- Rain cover for daypack
- 1.5 to 2 liter CamelBak (This will freeze on summit day but amazing the rest of the time.)
- CamelBak bite valve cover (Trust me, it’s worth the extra money.)
- 2 – Nalgene bottles (32 ounces)
- Sunglasses
- Headlamp with extra batteries
- Trekking Poles (rent these in Moshi)
- Snacks
Other items:
- Waist belt for phone (This SPIbelt was the best thing I took on the trip! I always had my phone handy without having to dig it out of daypack.)
- Hand & Foot Warmers
- Electrolytes (These Nuun tablets are the best! Taste great and only 1g sugar! Lemon Lime flavor is my favorite.)
- Moleskin and Band-Aids for blisters
- Journal and pen
- Extra batteries and phone charger
- Packing cubes
- Ibuprofen
- Antibiotics for diarrhea and altitude sickness (Talk to a doctor before your trip.)
- Wet wipes & hand sanitizer
- Basic toiletries
- Hand towel
- Protein powder
- Passport and money (Keep it with you at all times!)
- Dry bags and laundry bag to put dirty clothes
- Sunscreen (I recommend a natural stick SPF like Bare Republic.)
Packing Tips for Kilimanjaro
- The more things you can access without taking off your daypack, the easier the trek will be. That’s why finally investing in a 1.5-liter CamelBak was the best decision I made. I recommend the bite value cover to keep the value clean. I had two 32-ounze Nalgene bottles for summit day since I knew the CamelBak would freeze.
- I managed not to get sunburned thanks to the ridiculous large brimmed hat that I bought and the Columbia Silver Ridge Lite wicking/SPF I wore that shirt everyday almost.
- I recommend using packing cubes to organize your bag. Trekking companies provide a waterproof duffel bag for your things. It makes life so much easier if you have packing cubes organized socks, another for top layers and another for meds, etc. so it’s easy to find things.
- I bought vanilla flavored hemp protein powder to help give me energy on the long days and especially on summit day. It was a huge help.
- Every afternoon, I dissolved the Nuun electrolyte tablets in water to help rehydrate. They were a total lifesaver. One to two tubes were sufficient for trek. There’s 10 tablets in each tube and lemon lime is the best flavor.
- Talk to a doctor about possibly taking antibiotics with you on the trip to help with altitude, nausea and diarrhea. (I got food poisoning 12 hours before my flight home and antibiotics saved me. I also took Diamox for altitude. I took a very, very low dose since I had a bad reaction in India the one year I took it.)
- For easy access to your phone for photos, consider this SPIbelt for your waist. I borrowed one from a friend and it saved me.
- Most tours provide sleeping bags but consider bringing your own if you have one to double layer. It was REALLY cold and I slept in all of my layers most nights.
- Make sure all your thermals are either merino wool or Patagonia’s synthetic Capilene. Your socks should all be merino wool. I just bought whatever socks REI had on clearance regardless of the color.
- Take a trash bag or shoe bag to pack your hiking boots after the trip. You’ll want a shoe bag for your camp shoes during the trek as well. Your shoes will be GROSS especially after the bathrooms.
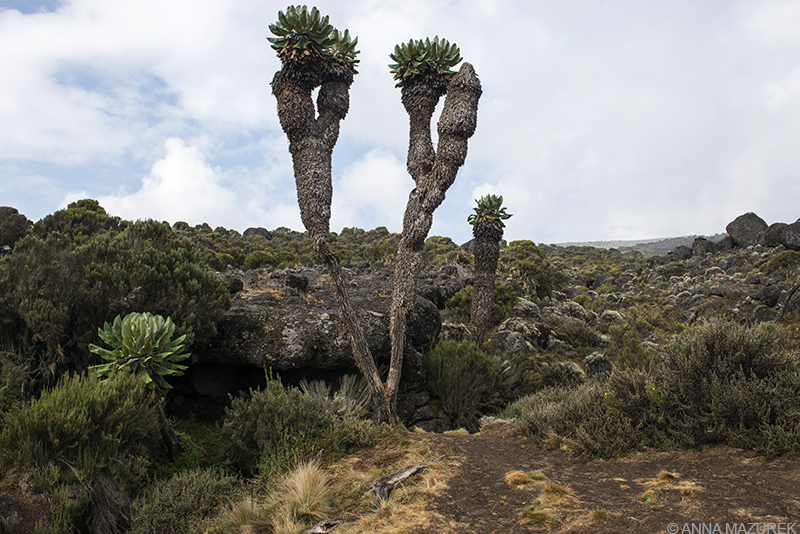
The route to Baranco Camp is covered with these stunning cactus-like trees known as giant groundsel.
How Much Does It Cost to Climb Kilimanjaro?
Trek: $1,850
Tips: $300
Flight: $1,150
Visa: $100
Gear: $284.12
Total Cost of Climbing Kilimanjaro: $3,584.12 USD
- Trek Cost: Most routes start at $1,600 and range to around $2,000. All treks include transport into the park, guides, porters and cooks. You can’t hike the mountain without a guide. Accommodation the night before and after are usually included as well as airport transfers. We paid $1,850 for our Lemosho Route, which is normally advertised for around $2,100. We got a discount because of the number of people in our group and the fact that my friend had used the same company in Nepal.
- TIPS: We were advised to bring $250 to tip our guides, porters and staff. I tipped the porters who carried my camera and the gnome individually a bit extra. I arrange this in advance.
- VISA: It cost a $100 for a Tanzania visa for me because I’m American. Most countries are $50.
- Flight Cost: My flight was $1,150 roundtrip from Houston to Kilimanjaro on Turkish Airlines with a stop in Istanbul. It was the most direct route I could find from Texas that didn’t involve more than one stop. Plus, Turkish Airlines is really nice.
- Gear: I had a lot of gear and borrowed what I could. I bought two pairs of thermals, lots of socks, electrolytes, CamelBak, a wide brimmed hat and a Columbia long sleeve SPF wicking shirt. I took advantage of the back-to-school tax-free holidays and Labor Day sales so I got a great deal. The gear in Moshi is horrible quality so buy things before you leave. The only exception is trekking poles or gaiters.
For more about climbing Kilimanjaro, check out my previous post that provides a day-by-day breakdown of the Lemosho Trek!
____________________________________________________
*P.S. I am not sponsored by any of the brands or products mentioned above. I have used all the products myself and found them extremely helpful. Please note some Amazon affiliate links are included above. If you click on a link and make any type of Amazon purchase, I earn a small commission with no additional cost to you. I hope you found this post helpful and appreciate your support of the blog. Please email me if you have questions.
