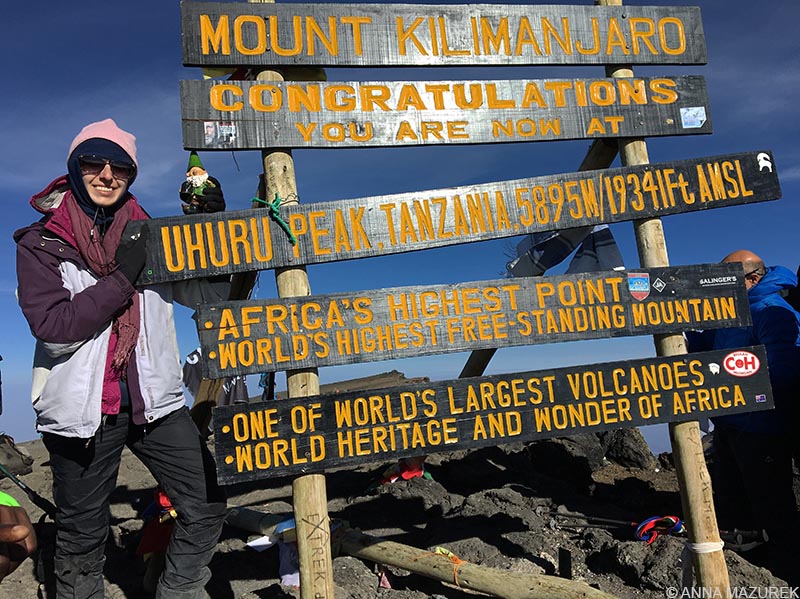
Alfred the Gnome and I made it to the top of Kilimanjaro. Alfred hopes he was the first gnome to the summit.
A Day-by-Day Guide to the Lemosho Route on Kilimanjaro
We are insane.
Those were my initial thoughts when I saw the mountain for the first time. I was in the back of a bus riding down a bumpy road toward the Lemosho Gate to start the trek. Kilimanjaro was looming in the distance over a barren field filled with flat topped trees. The greatest adventure of my life was about to begin.
We are insane.
This would be a reoccurring thought over the next seven days as we attempted to summit Africa’s highest peak and the tallest free standing mountain in the world at 19,341 feet (5,895 meters).

Walking through the moorlands en route to Shira II Camp
Why Kilimanjaro?
I found an old bucket list in my phone from 2014. Kilimanjaro was on the list and had been for years. When I was running photo trips in the Himalayas in India, a few of my co-workers had worked in Tanzania and climbed the mountain. After unsuccessfully trying to work in Tanzania and getting assigned other parts of the world, I put Kilimanjaro aside for a while. A WhatsApp message in June changed everything. One of my best friends half-jokingly invited me to climb Kilimanjaro with her in September. The idea was insane with my current work schedule. I asked the cost assuming it would be absurd. But, it really wasn’t as bad as I thought: roughly $3,250 USD ($1,850 plus $250 tips for the trek itself and a $1,150 roundtrip flight out of Houston). I thought the entire trip would be around $5,000 USD! I rearranged my life and made it work.
I’m 36 and not getting any younger. Plus, I am probably in the best shape of my life. When I was working in India, I spent a lot of time at high altitude both camping at 15,000 feet (the same height as basecamp for Kilimanjaro) and driving up to 18,500 feet to take photos without any major issues. Kilimanjaro is the highest mountain you can climb without the aid of mountaineering gear. It’s just plain uphill hiking; there’s no ice picks, ropes or crampons. All I had to do was walk slowly for six days.
Still, it was the hardest, coldest and most amazing thing I’ve ever done. While exact statistics are hard to find, approximately 30,000 people attempt to climb every year and 75% reach the top. Altitude-related issues are the biggest challenge preventing people from summiting.
I’ve complied a day-by-day breakdown of our trek on the Lemosho route below. For a breakdown of all routes, best times to go and packing lists, check out my Kilimanjaro 101 post. Please note all elevations are from the park signs and hiking times are based on my experience.
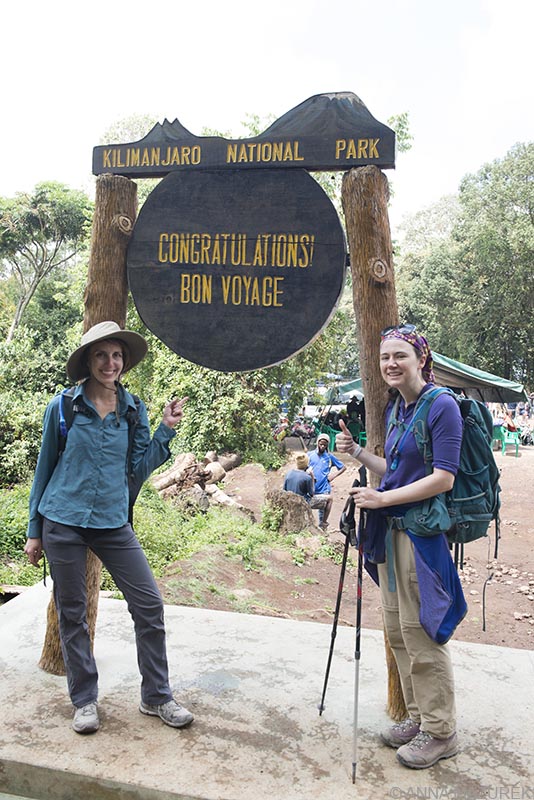
Day 1 – Lemosho Gate to Mkubwa Camp
Altitude: 2650 m/8,694 ft; Distance: 7 km/4 mi; Time: 3 – 4 hours

Our first group photo at the gate before we started our trek!
Our first day was very easy. We left Moshi at 9:30 a.m. to finish gathering supplies for the trek and drove over to the Lemosho Gate. We had to sign in and all the porters’ loads had to be weighed since they are only allowed to carry 20 kg/44 lb.
We hiked through the rainforest for a few hours with several monkey sightings including the blue monkey and colobus monkey that has a fluffy black tail with a white stripe that looks like a skunk. We reached out first camp known as Big Tree Camp or Mkubwa before sunset.
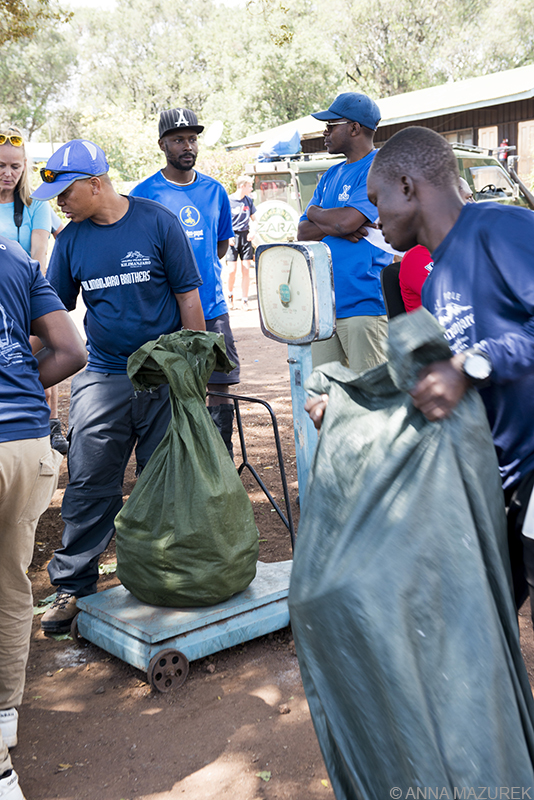
We had to wait at the main gate for the group of ahead of us to weigh all their bags that the porters were carrying. Each porter is supposed to only carry 20 kg/44 lb.
We choose a camping route. All campsites had toilet buildings of some sort, which were normally just squat-style pit toilets. There were no showers during the entire trek. We got hot water to wash our faces and hands every morning and night except at base camp. I wasn’t expecting it to be cold the first night, but it was pretty chilly.
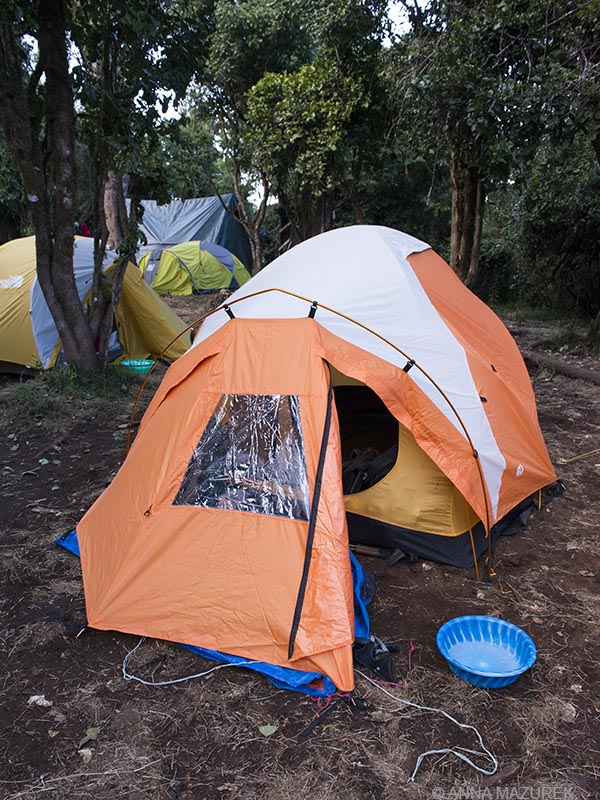
This orange tent was my home for seven days on the trek.
There were five people in our group total including my best friend Becky, a Cincinnati-native living in Tokyo, who organized the whole trek. Two Kiwi girls joined us – Nicci, a diplomat and a friend of Becky’s from Japan, and Polly, a data privacy lawyer based in London who is friends with Nicci. The fifth person in our group was a Canadian accountant named Francois from New Brunswick who decided the best way to celebrate his milestone 40th birthday would be to climb Kilimanjaro, which I think is pretty awesome!
Day 2 – Mkuwbwa Camp to Shira II Camp
Altitude: 3,850 m/12,631 ft; Distance: 17 km/10.5 mi; Time: 6-8 hours
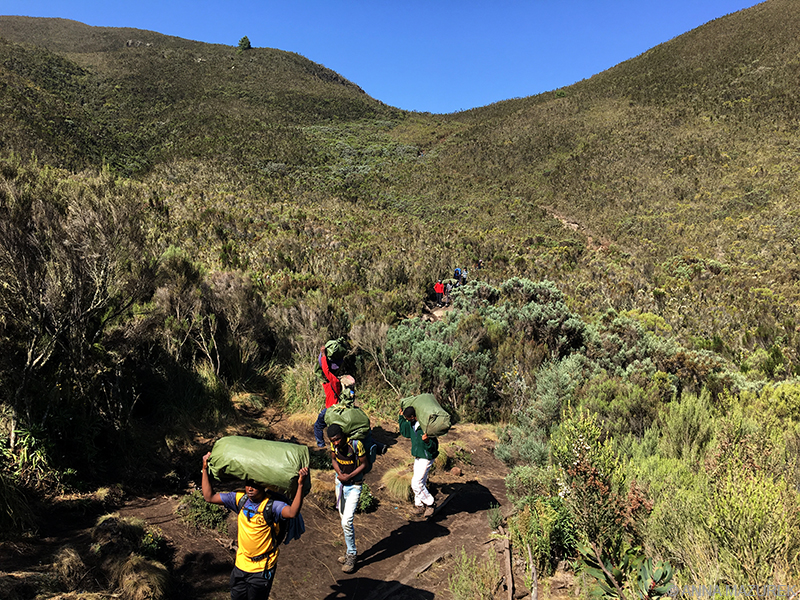
Porter’s carry bags through the moorlands to Shira II camp.
It was a four-hour uphill hike to Shira I from our campsite. The rainforest transitioned into the moorlands with short scrubby trees about my height, which made the last two hours of the hike pretty grueling without the shade from the rainforest trees. I was carrying three liters of water in my backpack, rain gear and not much else. I’d already arranged for one of the assistant guides to carry my camera bag. (My camera body and wide-angle lens weigh about seven pounds and always kills my shoulders during long hikes.)
The main theme of hiking Kilimanjaro is “pole, pole,” which is Swahili for “slowly, slowly.” I learned this lesson a few years ago in Peru when I hiked the Colca Canyon, the second deepest canyon in the world.
I was grateful for the silly wide brimmed hat and the long-sleeve Columbia SPF/wicking button-down shirt I’d reluctantly bought at REI before I left. While I looked silly, they really kept me cool and saved my skin from the sun. You’ll see both in many photos.
After we reached Shira I, we had lunch. It was another few hours to Shira II, which were fairly easy compared to the trek to Shira I. Our guides planned long days in the beginning and shorter trekking days before the summit to help us acclimate and rest.
Day 3 – Shira II Camp to Baranco Camp (via Lava Tower)
Altitude: 3,900 m/ 12,785 ft; Distance: 10 km/ 6.21 mi; Time: 6 hours via Lava Tower
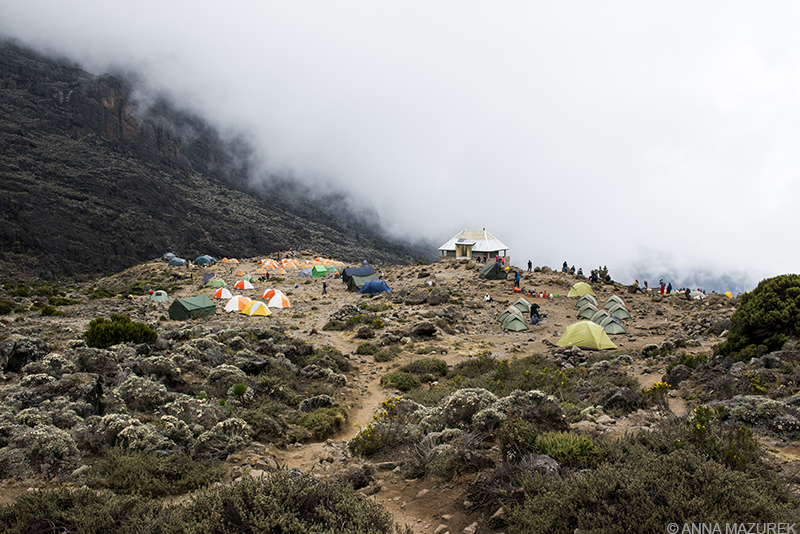
Barranco camp was one of the nicest and most photogenic camps on the trek. The building in the center is the toilets.
We hiked four hours from Shira II to Lava Tower, our highest point thus far (4,600 meters/15,091 feet) to help acclimate. It was a much better hike than the day before. We had lunch there before descending to a lower altitude at Baranco camp, two hours away. It’s one of the biggest and most scenic camps because four routes (Lemosho, Machame, Umbwe and Shira) all stay in Baranco. Since this is an acclimatization day, some people can be affected by the altitude. No one on our group had any issues. Our guide had an oxygen meter. All of our readings were in the high 80s to 90s.
The trek from Lava Tower to Baranco was beautiful! It was filled with stunning cactus-like trees known as giant groundsel (Dendrosenecio kilimanjari) and even a tiny waterfall. We arrived at camp around 3 p.m., which is a few hours earlier than the two previous days when we arrived at 5 p.m. Sunset is around 6 p.m. It’s crazy to think we are only 200 miles south of the equator!
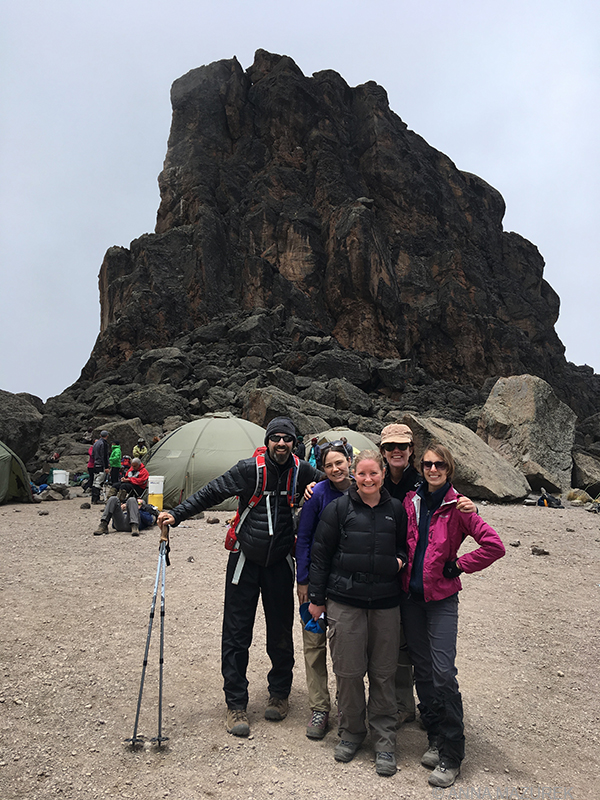
All five of us made it to Lava Tower with no altitude sickness issues!
I haven’t slept well the entire trip due to jet lag. I’ve never had jet lag as bad as I have this trip. I regret not flying in two days early to adjust a bit better. The jet lag combined with the altitude meant that most of us were only sleeping from 9 p.m. to 1 a.m. and just laying there in the cold wide awake. Due to all the water we drank and the Diamox (altitude medicine), we kept having to pee in the middle of the night. I started drinking a lot of water in the late afternoon and not drinking any at dinner to avoid midnight bathroom runs. I drank electrolyte mixes every afternoon as well to rehydrate.
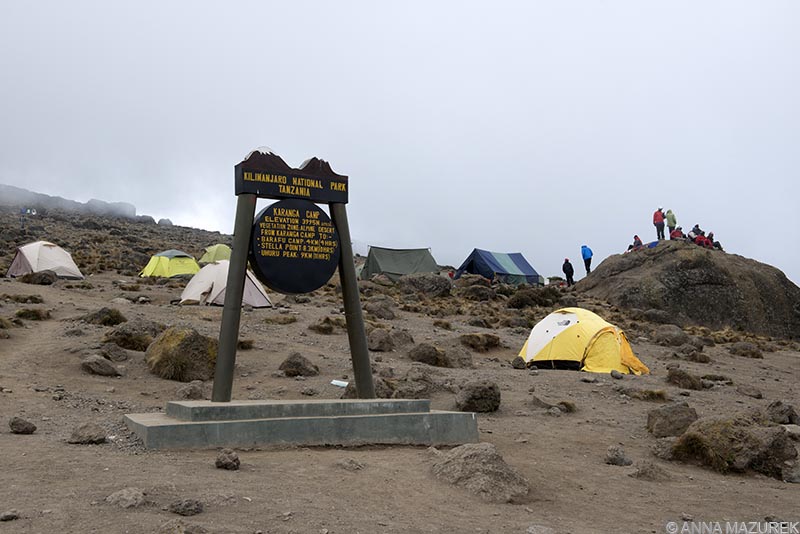
Day 4 – Baranco Camp to Karanga Camp
Altitude: 3,995 m/ 13,106 ft; Distance: 6km/ 3.7 mi; Time: 4 hours
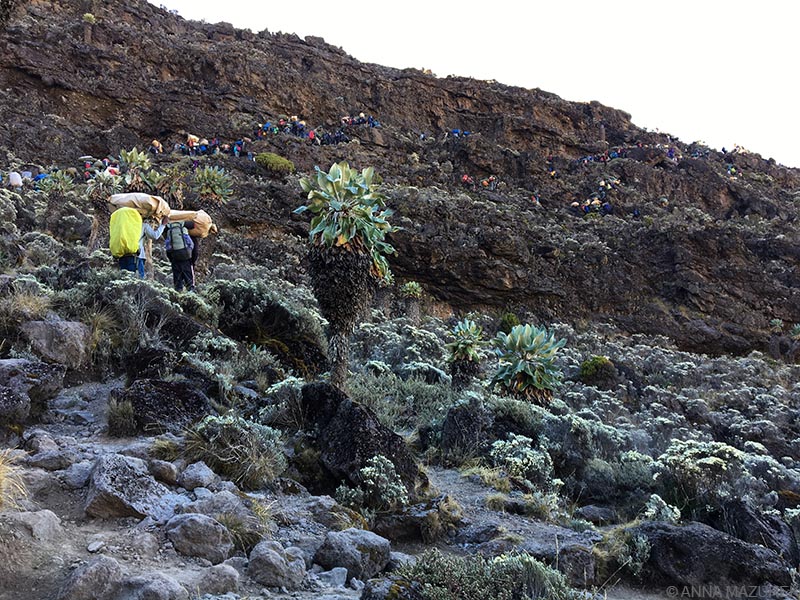
The line of trekkers and porters climbing Baranco Wall was insane. Due to the crowds, it took a good while to get to the top.
Our first task was to climb the Baranco Wall, which looms ominously overhead but actually requires no technical climbing skills. It involves climbing over a few rocks but mostly waiting in line behind the other climbers and porters. We paused at the top of the wall (4,200 meters/13,779 feet) for photos before descending to Karanga Camp. The camp is smaller than the previous and all the toilets are outhouse style. It’s super foggy and almost difficult to find the tent on the way back from the bathroom. Karanga is also the last water point before base camp. The porters have to collect water from here to bring to base camp for us.
Guides and porters gather on the highest point of the camp on the right to get cell reception. All camps have cell reception.
At every campsite, there’s always a group of porters and guides standing on rocks on one of the highest points. Turns out, there’s cell phone reception at every camp at high points. I choose to stay unplugged during the whole trip and wasn’t even sure if my phone would work anyways.
Day 5 – Karanga Camp to Barfu High Camp
Altitude: 4,673 m/15,331 ft; Distance: 4km/2.4 mi; Time: 4 hours
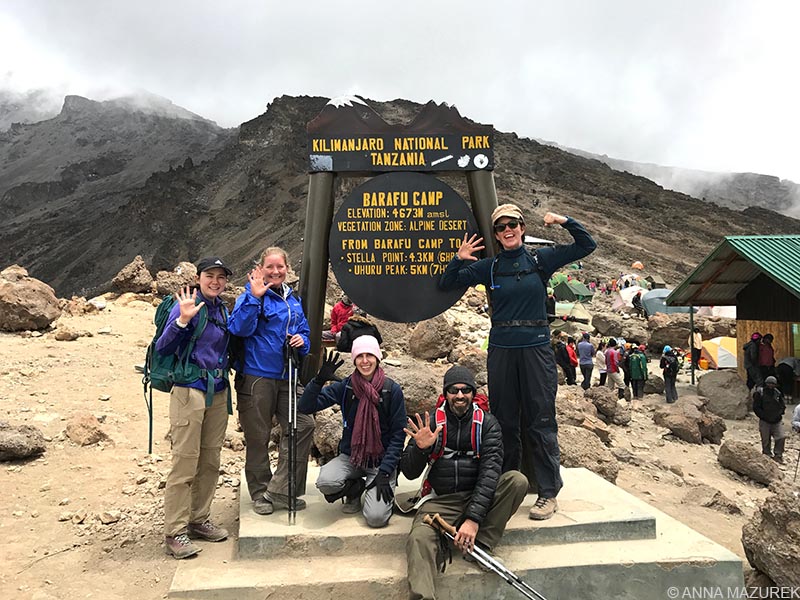
Celebrating day five of our trek with an early arrival to our basecamp – Barafu Camp!
We had a short hike to Barfu this morning and arrived around lunchtime. We had to wait a few minutes for people returning from the summit to pack up their camps so we could set up ours. We had lunch then napped for a couple hours from 2 p.m. to 5 p.m. when we had dinner. Then, our guide gave us our plan for the night. We would sleep until 11 p.m. then get ready to leave for the summit by midnight. I slept well before dinner but due to nerves and the cold, I barely slept at all before the summit. It was freezing and the wind was pummeling our tent nonstop.
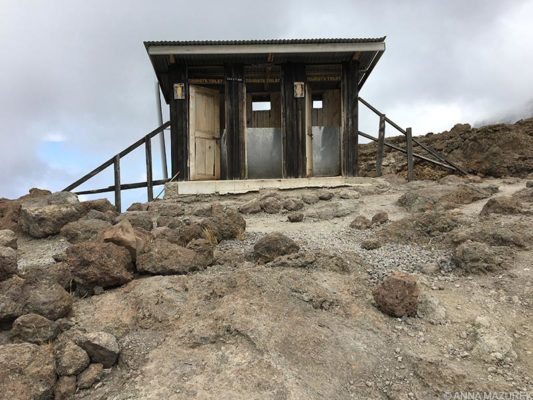
The bathrooms at Barafu High Camp
The photo above is for those of you that wondered about the bathrooms. They were all better than most of the bathrooms in the mountains in India.
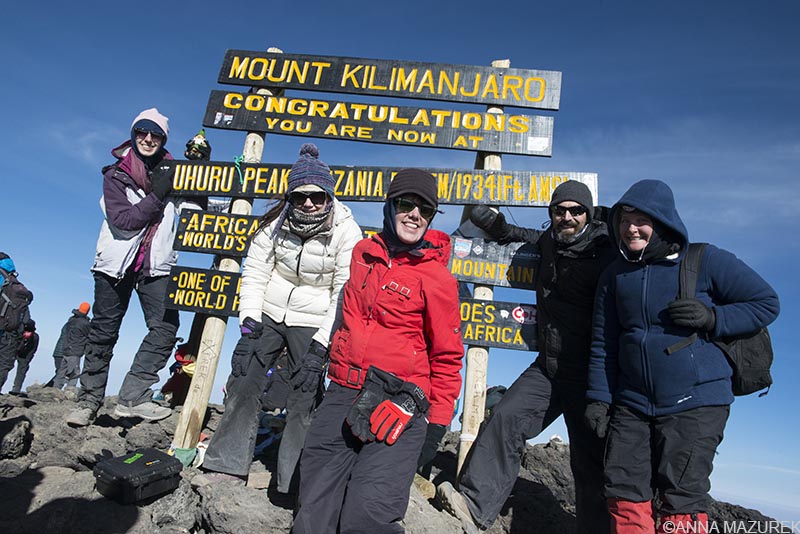
Day 6 – Barfu High Camp to Uhuru Point (the summit)
Altitude: 5,895 m/19,341 ft; Distance: 5km/3.1 mi, Time: 7 hours
The entire group and the gnome made it to the top! Getting a photo was tricky due to the massive crowd around the sign!
Our alarm went off at 10:30 p.m. for us to get ready. My nerves had prevented me from sleeping. I put on five layers of pants – two Patagonia mid-weight thermals, my Prana hiking pants, a pair of old fleece sweatpants from Target and a pair of $20 rain pants I bought last summer for my Iceland trip. I could barely move in all the layers. My top layers consisted of two long sleeve thermals (one lightweight crew neck and a mid-weight zip neck), a Columbia fleece I’d stolen from my nephew who’d grown it, a Marmot raincoat and an old fleece-lined LL Bean winter jacket I’ve had since grad school. I wore two pairs of merino wool hiking socks, a pair of gloves with a pair of wool mittens on top of them and a balaclava layered under a wool hat along with both my raincoat and winter jacket hood. Oh, and a ski mask on top of that. My foot and hand warmers really saved me!
Our guides gave us tea and cookies before we left. I brought protein powder so everyone had a few scoops mixed with water. We left the campsite at 12:15 a.m. and started the seemingly-never ending series of steep switchbacks that lead to the first summit, Stella Point. The path was crowded with everyone walking single-file upwards. Headlamps bobbed in the distance as a constant reminder of how far we had to go.
My 1.5 liter CamelBak froze after the first two hours of the trek, which I expected. I had two 32-ounce plastic Nalgene bottles filled with water and stuffed in socks to keep them from freezing. We stopped only a few times to quickly eat a handful of nuts or drink water. I kept switching to new hand warmers. Due to our constant movement, I didn’t feel the cold as much as I thought. (It was -11°C /12°F with the wind chill!)
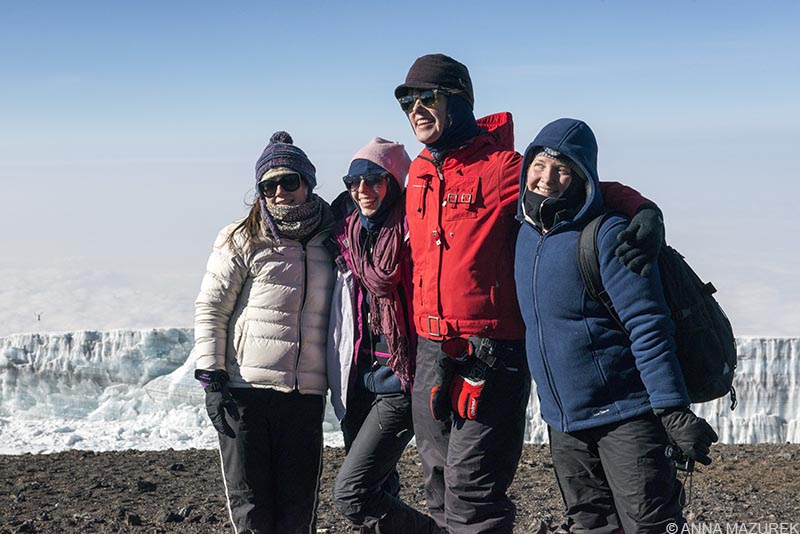
A photo of the girls with Furtwangler Glacier in the background
We slowly trudged through the cold for six hours up the steep, sandy switchbacks. Occasionally, we saw a few people being helped down the mountain, but the majority were going upwards. My stomach started to growl because I was hungry. (I’m the type of person who gets “hangry” fairly easily and needs to eats every few hours.) I felt a little weak and tiny bit nauseous but never got sick. All of these symptoms are typical “hangry” behavior for me. Since I ran photo trips in the Himalayas for five years without any issues, I wasn’t very concerned about the altitude. At this point, I was determined to make it to the top no matter what. There was no way I was walking back down all those horrid switchbacks without having been to the top! (Our guide said he had a 76-year-old women make it to the top a few weeks prior so that was my motivation as well!)
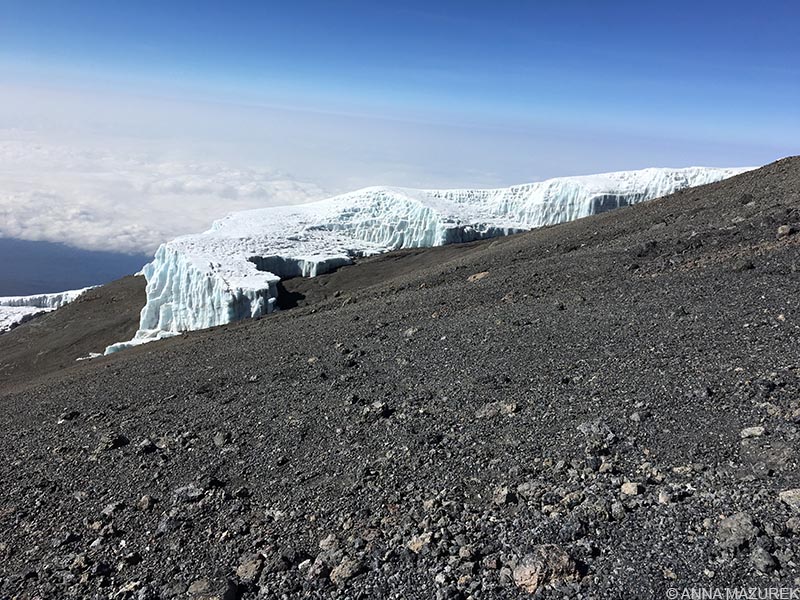
A view of Furtwangler Glacier from the summit. According to a 2012 report by NASA, the glaciers on top of Kilimanjaro are expected to disappear by 2060.
The horizon started to brighten to our right. It was stunning, but I refused to stop to take a photo because we were so close to the top. We reached Stella Point (18,885 feet/5,756 meters) and of course, I had to go to the bathroom. Let me just say that getting those five layers of pants down was literally exhausting at that altitude. (Make sure all your layers aren’t as skin tight as mine!) Our guides wasted no time getting us moving to the second and final peak, Uhuru. While it was only 700 meters away, it took us an hour to walk the mostly flat path. I was the second one to reach the iconic brown sign announcing that we’d made it to the top of Kilimanjaro (19,341 feet/5,895 meters)! The one thing that surprised me the most was the mob of people pushing and jumping in front of each other just to get a photo at the sign. I had expected an orderly line, but I assume the rush was to get people to lower altitude quickly. I was still able to get a photo of myself with Alfred at the top and a group photo. (I later learned there was a second sign 10 minutes down the path.)
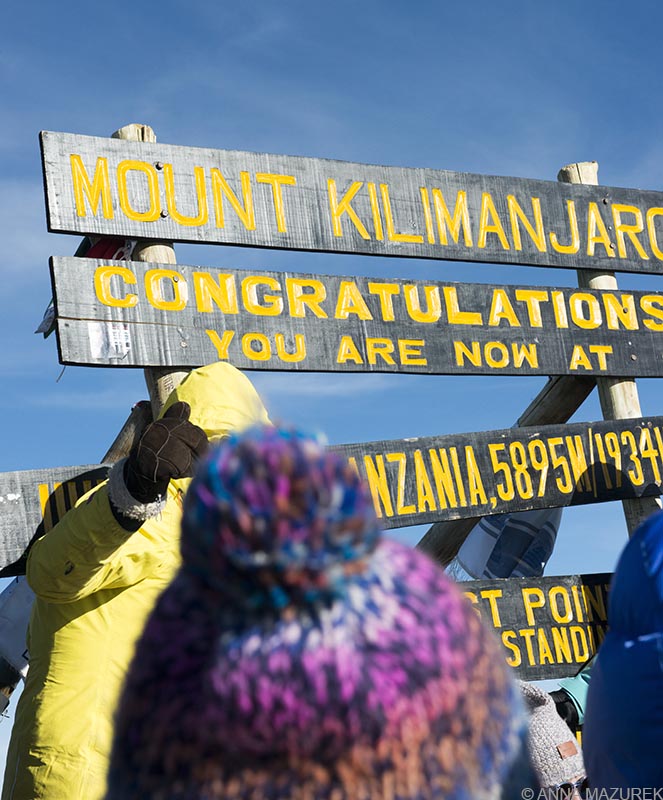
It’s difficult to get a photo at the sign at top due to all the crowds.
Everyone in our group made it to the top! (Our route, Lemosho, has one of the highest success rates.) We went back to Stella Peak and took a few photos before heading down the dreaded gauntlet of steep sandy switchbacks. It took me a little less than three hours to get back to camp. I stopped several times to shed layers of clothing. My CamelBak defrosted and started working again. This downhill stretch was probably the worst part because I was exhausted and the hangriest I’ve ever been in my life. I went back to the tent and passed out for an hour nap then we ate lunch. I felt so much better after napping and eating.
After lunch, we had to trek another four hours to Mweka Camp at 3,100 meters/10,170 feet for our final night on the mountain. By descending in altitude so much, we avoided any issues with altitude sickness. We were all weak and slept amazing that night.
Day 7 – Mweka Camp to Mweka Gate (End of Trek)
Altitude: 3,100 meters/10,170 feet; Distance: 10km/6.21 miles; Time: 3 hours
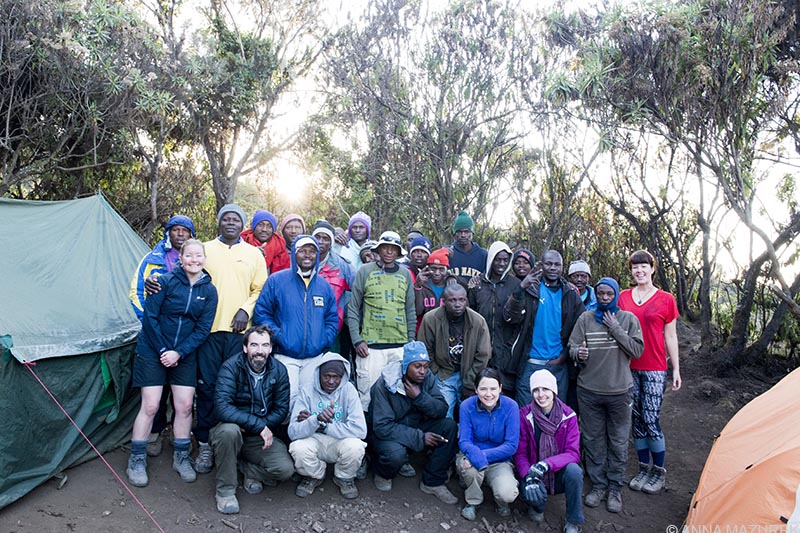
We never would have made it to the summit without our amazing guides and porters. It took 21 people to get the five of us to the top of the mountain!
We woke up at sunrise to sad news. An older European hiker had died of asthma issues on the mountain that morning. All the porters were gathering to help carry the body down the mountain. (There’s a series of wheeled carts that resemble stretchers for getting injured people down the mountain.) I tried to find a news story after we got back but can’t find anything online about the hiker.

These carts are scattered around the Mweka Route and are used to transport injured people down the mountain.
Our hike to the gate and the end of our trek was only about three hours through the rainforest. At the gate, we took photos with the sign, signed the book to say we’d left the mountain and waited to get our official certificates. We were stuck there for over an hour and finally made it back to Moshi that afternoon. They were out of certificates so our guide brought them to us at dinner. (You always have a big dinner with your guides the night you finish
your trek.)
Becky, right, and I celebrate our success. I’m so grateful she invited me to join the trek!
Of course, the water was cold when I went to take a shower the first time so I decided to grab a beer and a snack instead. Afterwards, the water was hot. That beer and shower were probably the best in my life.
In the end, the hardest part was summit day. The rest of the trek wasn’t so bad. It’s not something I would do twice. I might do Everest Basecamp. Although, it’s lower, it involves steeper climbs but allows you to acclimate to the altitude better so it’s not as rough.
It took a crew of roughly 20 people to get us up the mountain including 16 porters for our luggage and supplies. We had one main guide, three assistant guides and a cook. These guys are some of the strongest and most amazing people I’ve ever met. They would totally survive a zombie apocalypse. I trusted them with my life the same way I trusted my guides and drivers in India. They know the mountain better than anyone and earned my respect.
__________________________________________
COMING UP NEXT
Kilimanjaro 101: Cost, Routes & Packing Lists
In my second Kilimanjaro post, I breakdown all the details about the trek including the cost of my trip, when to go and a list of the main routes. I also provide a detailed packing list based on my experience and offer suggestions of what to buy.
__________________________________________
P.S. I am not sponsored by any of the brands or products I mention in posts. I only recommend products that I love. Please note some Amazon affiliate links are included above. If you click on a link and make any type of Amazon purchase, I earn a small commission with no additional cost to you.