
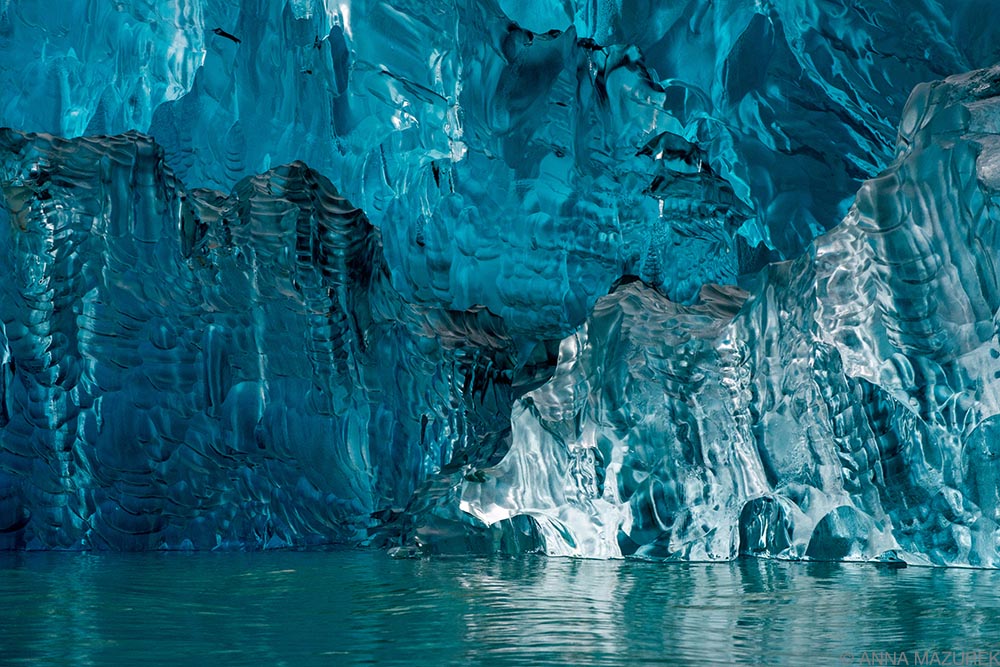
10 Best Photo Spots in Southeast Alaska
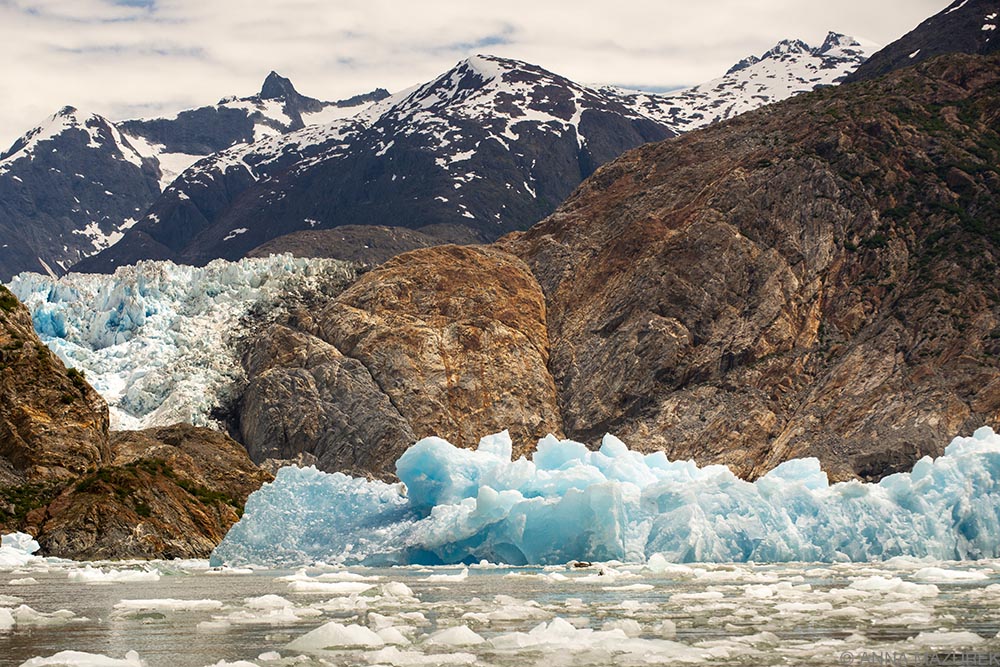
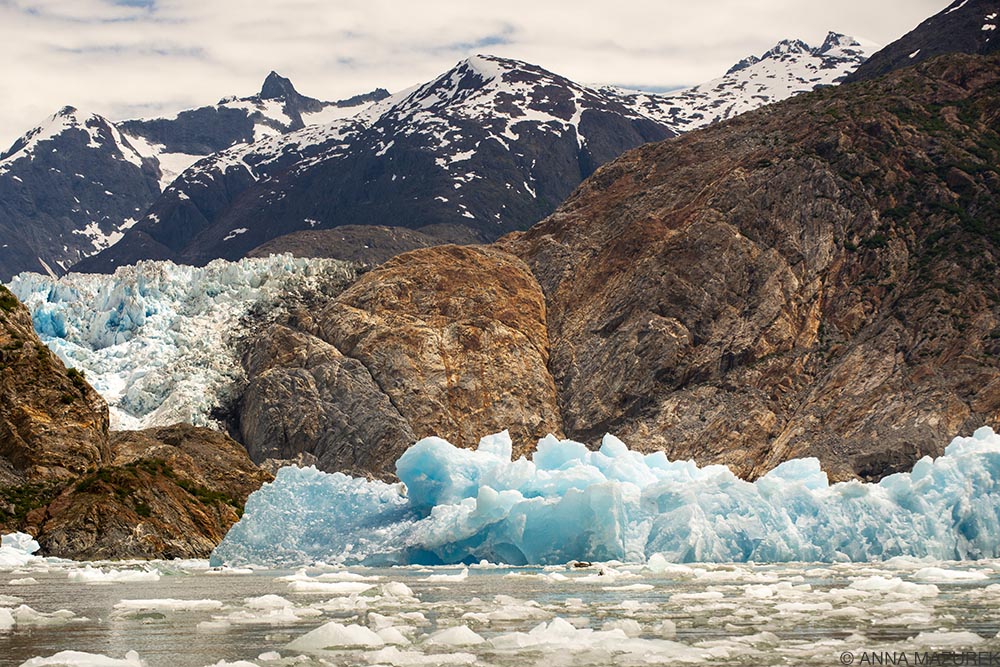 It is entirely possible to have a favorite glacier and this one — South Sawyer Glacier in Tracy Arm — is my favorite due to the surrounding landscape.
In June, I got on my first flight in nearly 15 months and headed to Alaska. Over the next three weeks, I shot more images that I had in the previous year—breaching humpback whales, baby seals on icebergs and black bears grazing in meadows. (One of my freelance jobs is working as a photography instructor for a travel company in Southeast Alaska.) Even though I’ve been to 52 countries, the wildlife and scenery in Alaska rival any place I’ve been. While I’m far from an expert on all things Alaska, I want to share my favorite photo spots in the Inside Passage. If you’re vaccinated and itching to travel this summer or fall, Alaska is the place to go. Flights will be packed – they are everywhere but it’s totally worth it!
Here are my favorite 10 photographs and locations from Southeast Alaska: (There were all shot in 2019 or 2021)
Misty Fjords National Monument
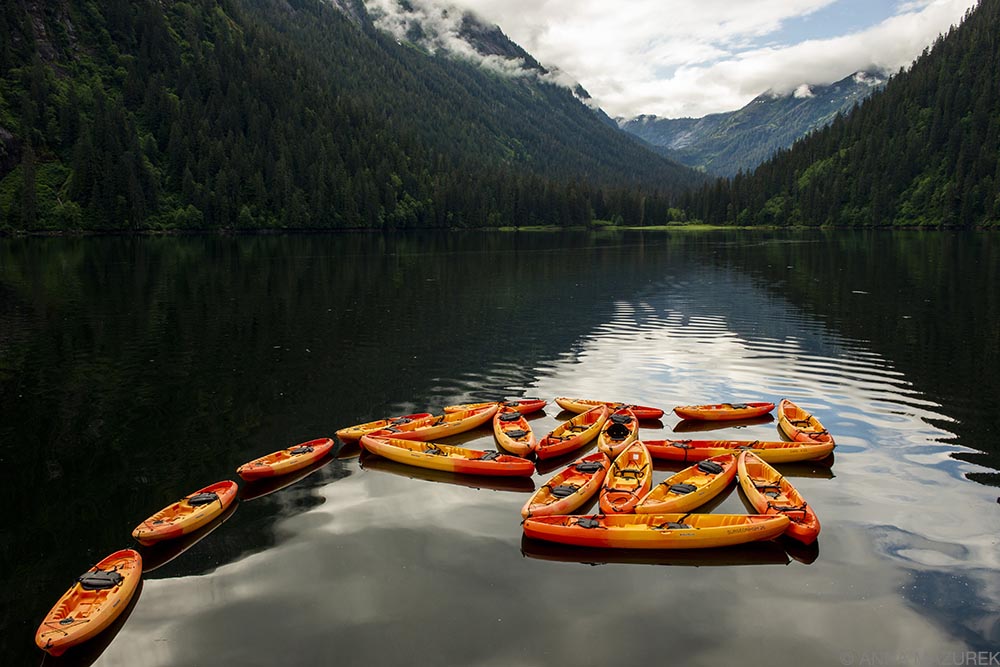 Misty Fjords National Monument in Southeast Alaska spans over 2.3 million acres.
The second-largest wilderness in the U.S.—Misty Fjords National Monument—lies 22 miles east of Ketchikan. A temperate rainforest covers these steep fjords, which stretch 3,000 feet high along the Behm Canal. There are 20 miles of hiking trails with 13 public recreation cabins and five three-sided shelters. This national monument is part of the Tongass National Forest, the largest national forest in the U.S., and normally receives over 200 inches of rain a year. Although, there was more sun than rain both this year and in 2019 than normal on my trips.
Nearest City: Ketchikan. Day trips by boat or floatplanes are the best transit options.
John Hopkins Glacier – Glacier Bay National Park
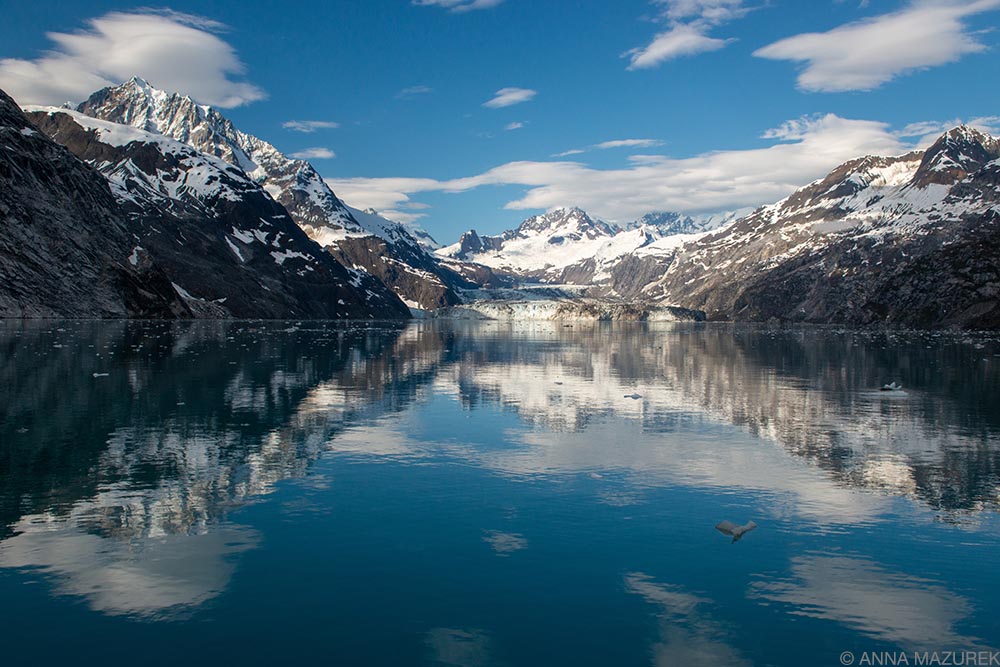 The approach to John Hopkin’s Glacier, located in the center of the photo, is one of the most scenic in Glacier Bay National Park. The glacier itself extends for 12 miles.
Glacier Bay National Park is a must-see for any visit to Southeast Alaska. A single tidewater glacier covered the entirety of Glacier Bay over 250 years ago. It started retreating in 1750 and now has retreated 60 miles to the head of the bay. While the park has over 1,045 glaciers, John Hopkins Glacier is one of the seven active tidewater glaciers that calve into the bay. The glacier stretches 250 above the water and is one mile wide.
The park is only accessible by boat and permits are restricted during the summer months. Kayak trips are also an option with rentals and guided tours available from the visitor’s center. There is an option to camp by the glaciers.
A 10-mile road connects the town of Gustavus with Bartlett Cove where the visitor’s center is located. The visitor’s center has a really short but pretty walking trail along a boardwalk. Be sure to visit Snow, the skeleton of a humpback whale hit by a ship near the park. (The park is now a sanctuary for these whales with some of the strongest protections in the world. Outside of the park, 100 yards is the distance set by NOAA for safe whale watching for humpbacks. )
For history, be sure to read John Muir and the Ice that Started a Fire by Kim Heacox. It’s a great biography of John Muir.
Nearest City: Gustavus
South Marble Island, Glacier Bay National Park
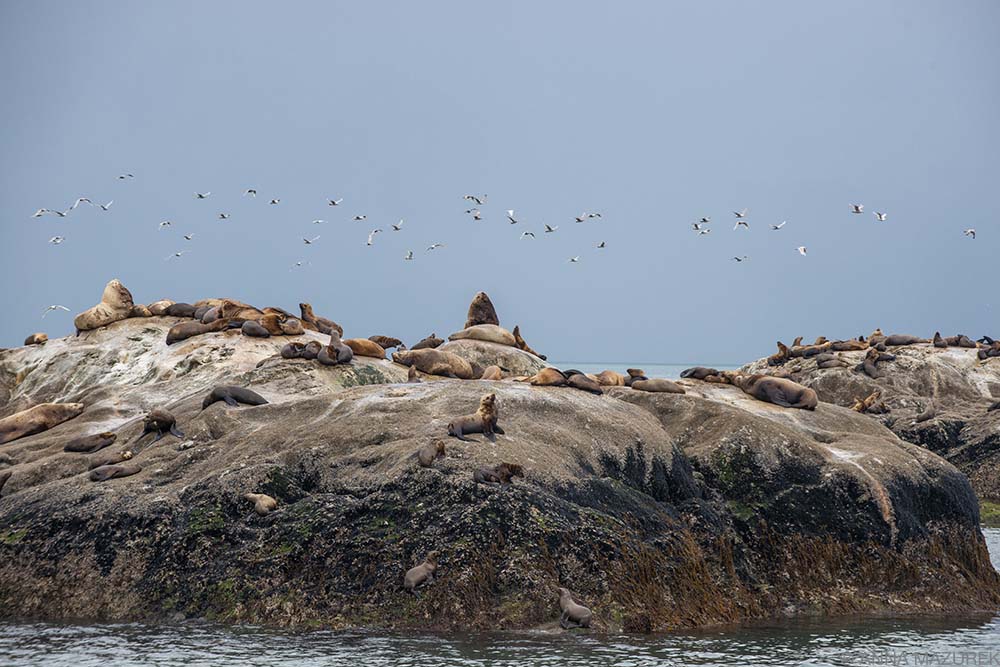 A group of stellar sea lions haul out on rocks in front of South Marble Island at low tide.
South Marble Island lies at the entrance of Glacier Bay surrounded by nutrient-rich waters that are optimal feeding grounds for wildlife. It’s the nesting area for many sea birds that spend most of the year on the open ocean. I almost always see a few puffins here! It’s also a haul out of sea lions, especially the bachelors who did not succeed at challenging the other males at breeding islands outside the park.
Nearest City: Gustavus
Petersburg
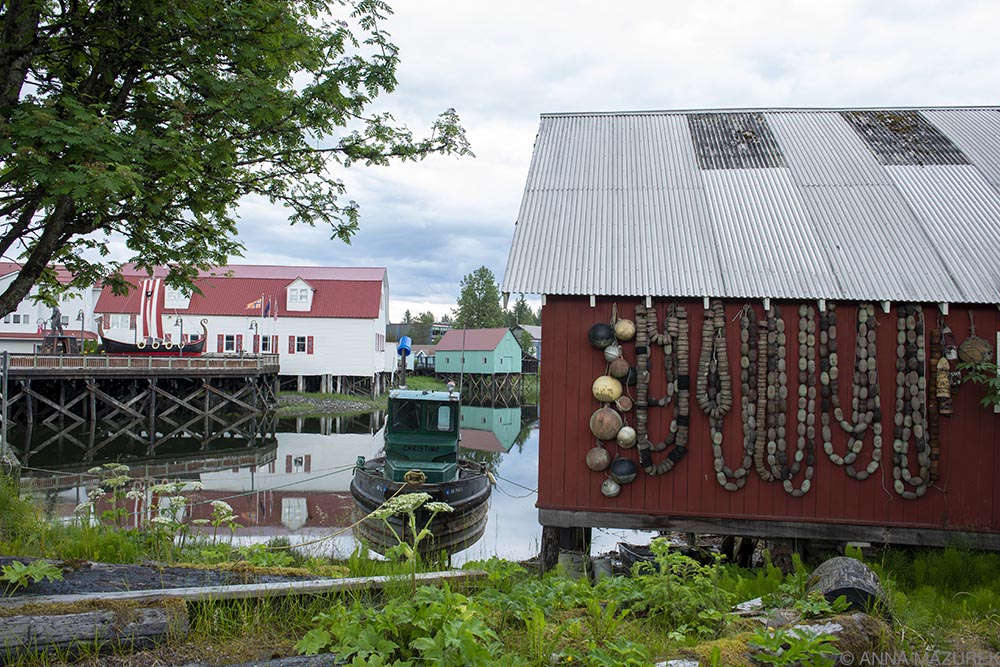
A view of the Sons of Norway Hall reflects in the water at high tide in Petersburg, Alaska.
Petersburg is a tiny photogenic Norwegian Fishing Village and my favorite town in Southeast Alaska. (I also like Sitka.) Across the water on Kupreanof Island, there’s a great hiking trail (Petersburg Lake Trail) on a wooden path through a muskeg, a bog with very acidic soil that’s home to some unique plants like the carnivorous sundew. The coastal bike path around town is gorgeous. Be sure to stop at Sandy Beach, a cute spot for photos with a raised wooden walkway through the forest. (Bears have been spotted here so have your bear spray!) The wildflowers are lovely along the coast during the summer. Another photogenic spot is Birch Street, a dead-end road that’s lined with stilt houses. It’s best photographed at high tide from South Nordic Drive.
Tracy Arm-Fords Terror Wilderness
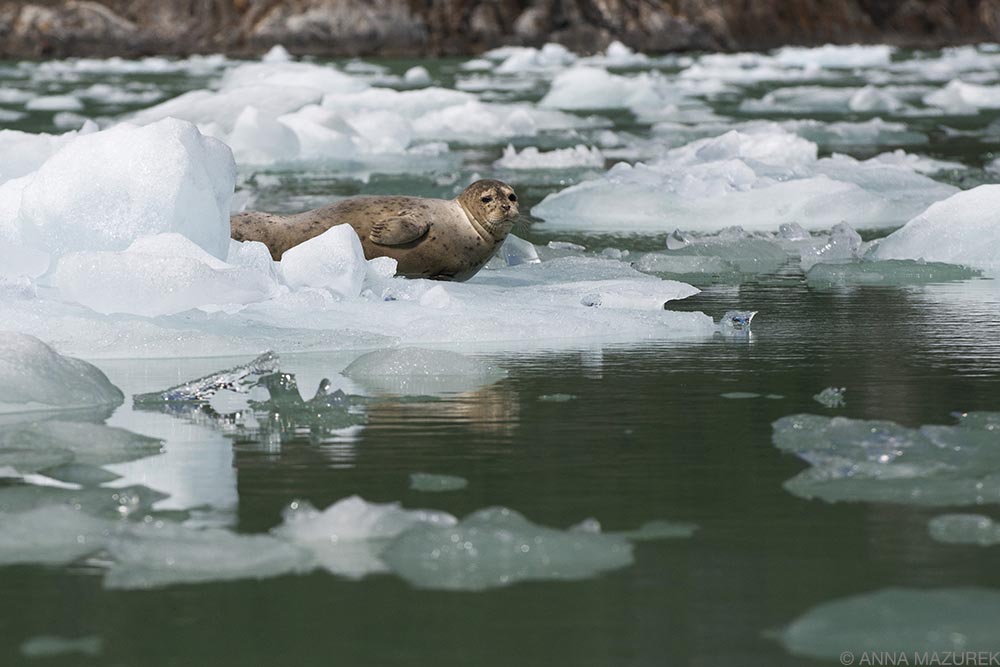 The ice floating near tidewater glaciers is a safe haul out for harbor seals because the ice floats regardless of the tide cycle eliminating the threat of terrestrial predators. (South Sawyer Glacier, Tracy Arm-Fords Terror Wilderness)
While all of Southeast Alaska is gorgeous, this is one of my favorite spots. The Tracy Arm-Fords Terror Wilderness consists of two narrow, deep fjords that are roughly 30 miles long – Tracy and Endicott Arm that each dead-end at tidewater glaciers. I’ve been to both but prefer Tracy Arm because it’s home to my favorite glacier—the South Sawyer Glacier. (Yes, it’s totally possible to have a favorite glacier!) I’ve been here probably 10 times, and it never gets old. My favorite time to visit is June when the harbor seals are pupping. The seals hang out on the icebergs for safety. Due to frequent (every six hours) and drastic (22 feet!) tide changes, the icebergs provide safety for the harbor seals since they keep floating regardless of the tide in the deep fjord. The seals also hang out near the glaciers in Glacier Bay, but I find Tracy Arm to be more photogenic for the seals. I recommend being in a Zodiac or smaller boat for the best photos. Taller ships don’t allow you to get as good of a photo angle.
Nearest City: Juneau
Inian Islands
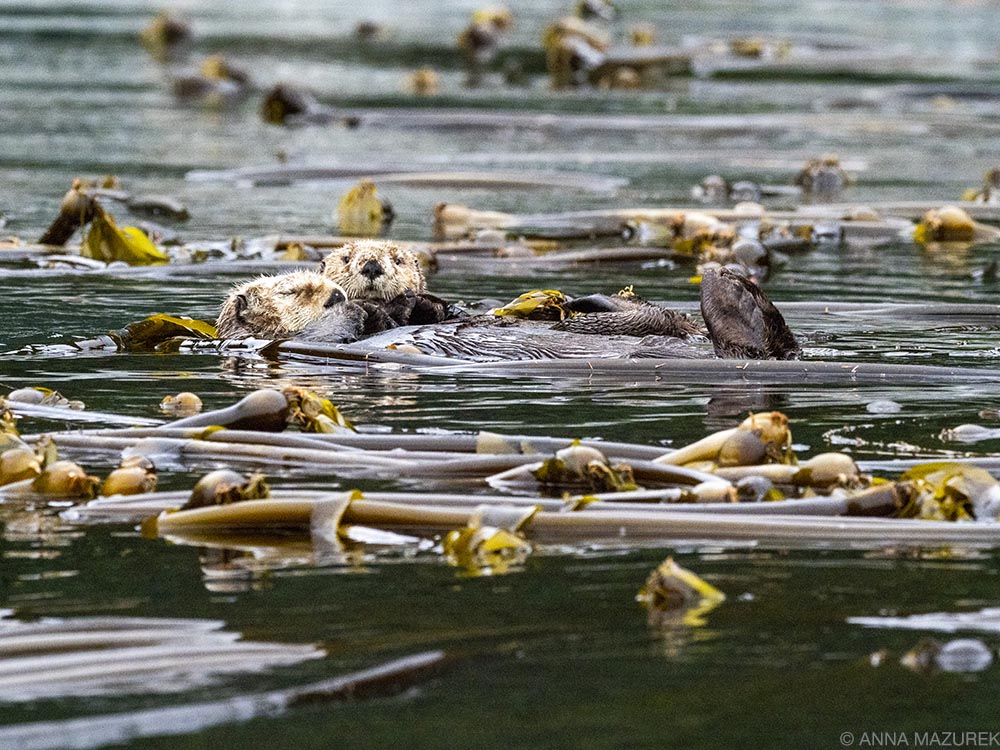 Two sea otters float in a bed of bull kelp in the Inian Islands. The otters tie themselves to the bull kelp, an annual seaweed, when they sleep and often do the same for their babies when they go hunting for food.
The Inian Islands is one of the best wildlife photo spots in Southeast Alaska. The islands are located at the intersection of Icy Strait and the ocean—one of the few places where the Inside Passage meets the Pacific. Due to the tides, there’s a lot of upwelling sending nutrients and fish to the surface. It’s a delicious buffet for many animals including sea otters, stellar sea lions and bald eagles. There’s also a wide variety of sea birds. The area was a summer fishing camp for the local Hoonah Tlingit people and became a wilderness area in 1990.
Nearest city: Gustavus or Hoonah. (Elfin Cove Fish Camp is also close.)
Chatham Strait
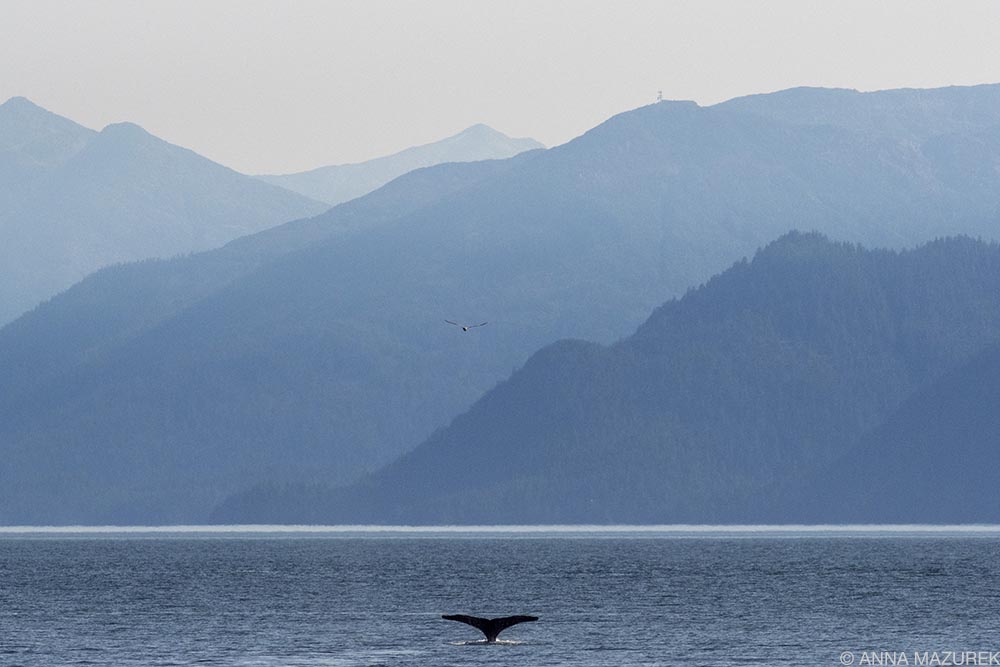 A humpback whale tail photographed along the Chatham Strait. Often, it’s difficult to get a tight shot of a whale so I try my best to make it park of the larger landscape to provide a sense of place.
Another great spot for whale activity is Chatham Strait, a narrow passage that extends for 150 miles from the junction of Icy Strait and Lynn Canal south to Coronation Island and the ocean. It forms part of the Inside Passage between Alaska and Washington State and the width varies from three to ten miles wide. This summer we saw 50+ whales near Tebenkof Bay including multiple groups bubble-net feeding. (I’d seen bubble-net feeding twice before this.) They were all a bit too far for my camera to get any good tight shots but witnessing that scene was impressive enough!
Alaska Raptor Center, Sitka
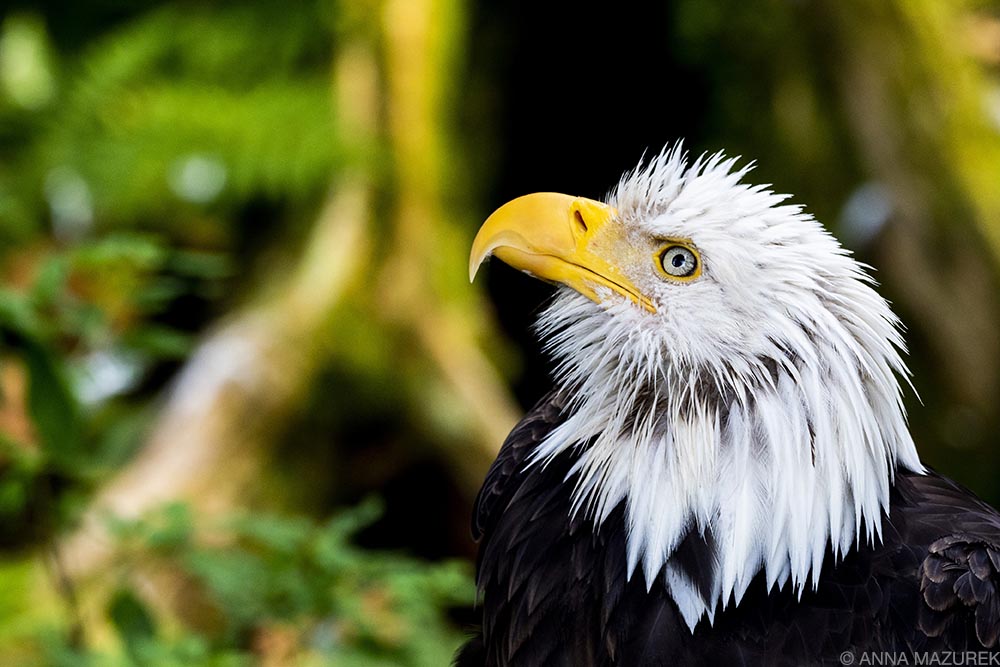 This tight portrait of a bald eagle was shot with a 600mm lens at the Alaska Raptor Center with a wide aperture (f/5) to blur the background.
This non-profit was started by two locals in 1980 tending to a single injured bald eagle. Now, the rehabilitation center offers treatment to over 200 injured birds each year. While they strive to rehabilitate and release birds, some are unable to be released due to the severity of their injuries and become part of their education program called Raptors-In-Residence. This bald eagle was photographed outside the center—many wild eagles also hang around this area. It’s a great place to see these birds up-close and get detailed shots of various types of birds. Also, Sitka is a cute town with only 14 miles of paved roads. I highly recommend the Stika National Historical Park.
Eldred Rock Lighthouse, Haines
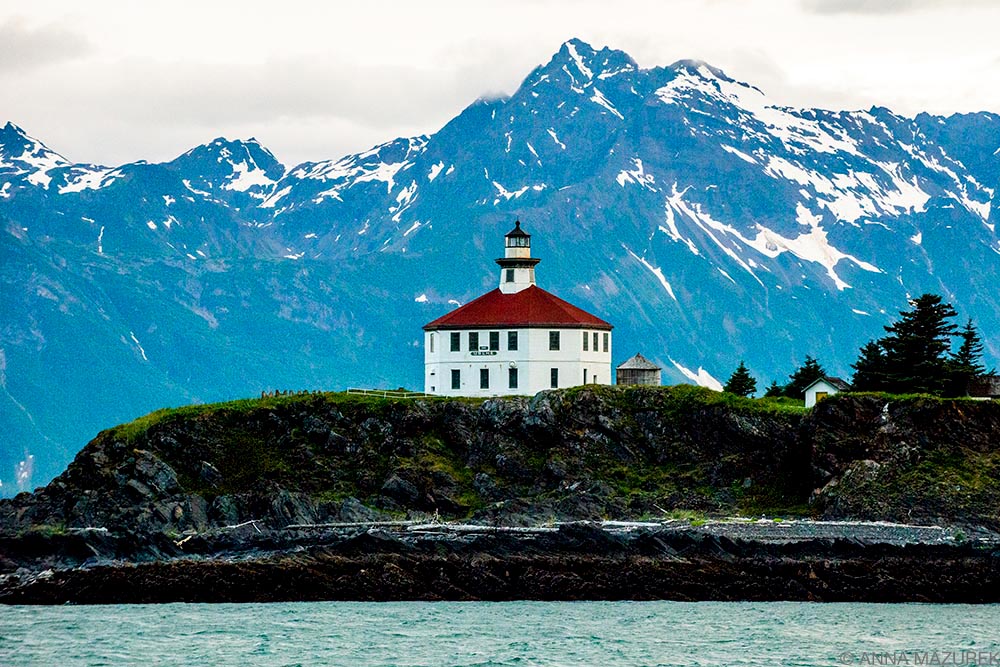
The Eldred Rock Lighthouse in the Lynn Canal was built in 1905 and was listed on the National Register of Historic Places in 1975.
I saw this octagonal lighthouse on a map and convinced my expedition leader to come here at sunset and circle the lighthouse for a photo opp. Thankfully, they said yes! I later found out that this lighthouse is the oldest original Alaskan lighthouse building. It’s located on an island in the Lynn Canal on the route to Haines, the adventure capital of Alaska, and is not accessible to public. Haines is another cute town that’s known for adventure activities. One of my favorite sites is the Hammer Museum, a white-walled house filled with hammers from across the world and history. There’s also a brewery that makes spruce-tip beer, a distillery and other cute shops.
Nearest City: Haines. The lighthouse is visible from the ferry.
Port Adolphus
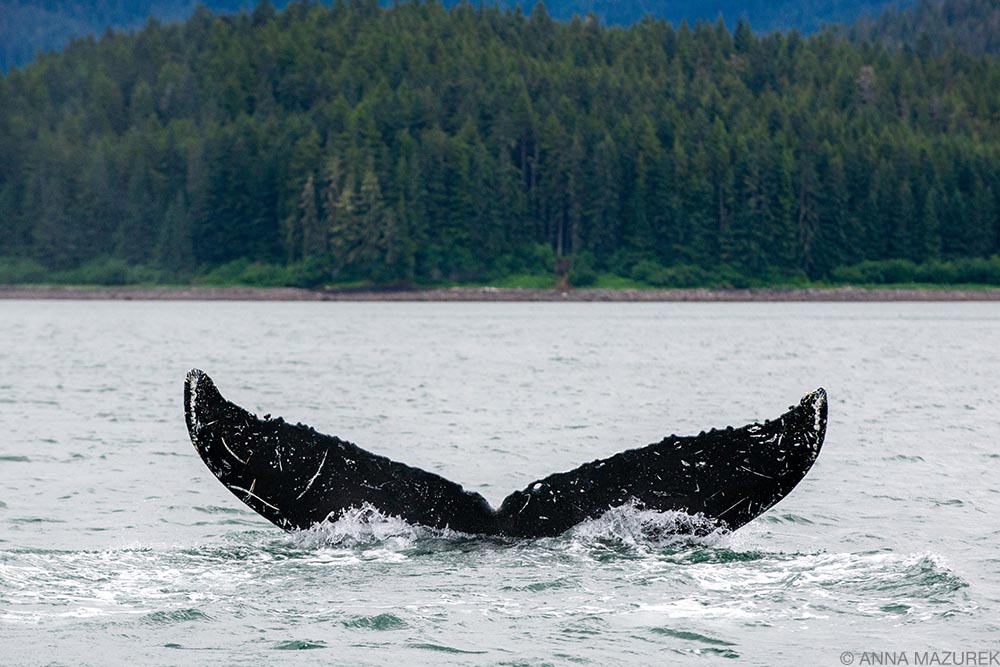 Every humpback whale has a unique tail design that serves as its fingerprint. You can upload images of whales to Happywhale.com to identify the whale and track sightings.
Located at the northern tip of Chichagof Island and the southern side of Icy Strait, Port Adolphus is a great spot for watching humpback whales and birds. We had some up-close encounters a few weeks ago while cruising in Zodiac boats. The whales literally came up right beside us! This image was shot with a 70-200mm lens.
How To Get Here
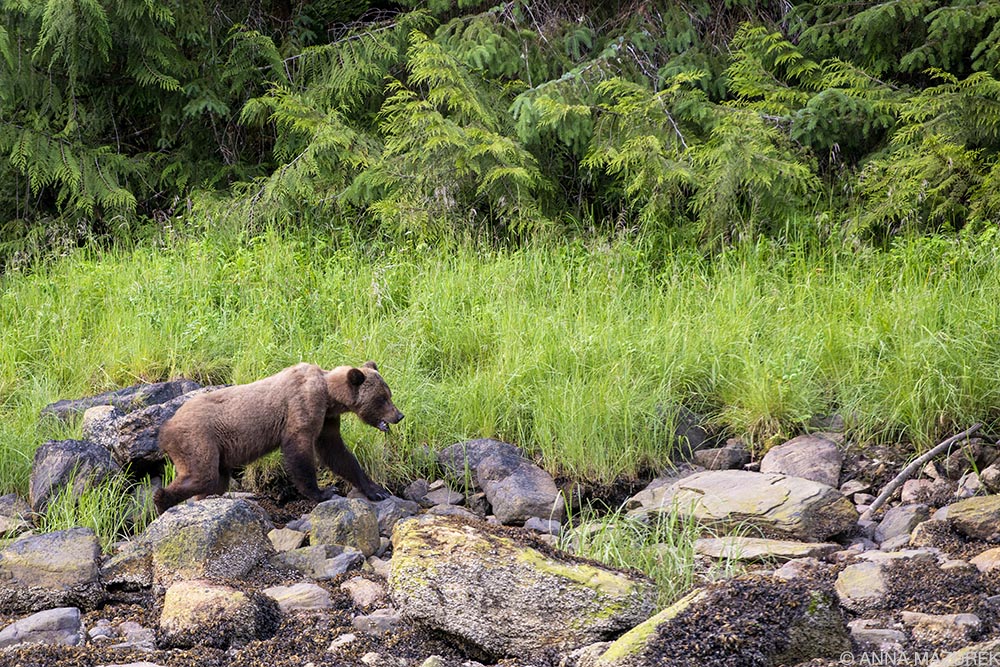
A black bear walks along the shore in Misty Fjords National Monument. (Black bears aren’t always black and have a more pronunced face and ears than brown bears.) Most of my bear sightings are along the shore in Alaska. This was shot from a Zodiac boat.
Sitka, Juneau and Ketchikan are the biggest cities in Southeast Alaska and the best place to start your trip. (I personally love Sitka the best of all three.) There’s direct flight from Seattle to all three. After that, you’ll need to get around by boat (day tours or charter boats) mostly or fly to other cities. The Alaska Ferry System is another transit option.
What Camera Gear to Pack for Alaska
Tracy Arm, Alaska // The underside of an iceberg that’s flipped is one of my favorite things to photograph because it’s so pristine. Only 10% of an iceberg is visible above the surface of the water.
Packing camera gear for Alaska is tricky because you need to be prepared for all situations and weather. I recommend a wide-angle lens (24-70 mm) and a zoom (at least a 400mm). A 200mm zoom is not enough—you’ll need at least a 400 mm or even a 600mm would be helpful with animals shots especially whales. There’s also a great chance for macro photography in the forest and tidal zone.
During the summer, the weather is either bright and sunny, or overcast with light rain, which is the norm. Be sure to bring rain covers and dry bags for your gear even if it’s only to protect from the spray on boat rides.
If you’re shooting wildlife from a boat, remember to use fast shutter speed to freeze the motion. I recommend at least a 1/1600 but 1/2500 is ideal. I also recommend lenses with vibration reduction and a circular polarizer for sunny days.
Also, try to visit glaciers on overcast days—the blue really stands out more when the sun isn’t out.
Ten Essentials to Pack For Summer in Alaska
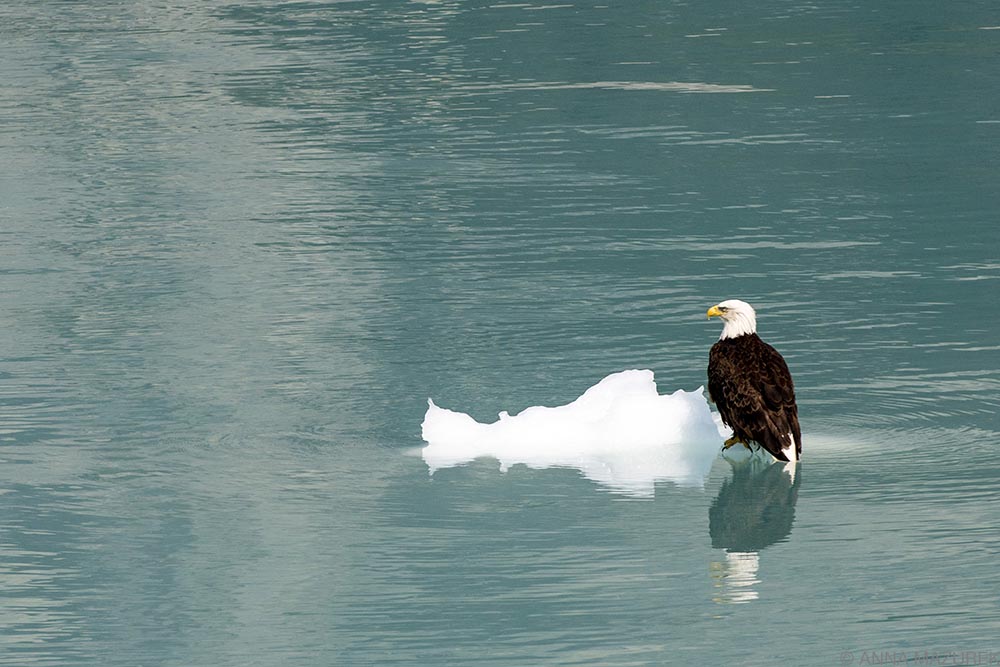
A bald eagle floating on an iceberg in Glacier Bay National Park.
After working two summers in Alaska, I’ve listed the essentials I always pack and links to my favorite things!
-
Gortex Rain Coat & Rain Pants (I recommend full-zip rain pants like these.)
-
Tall waterproof boots (XtraTuff’s are the cowboy boots of Alaska. Literally, everyone has them. I’ve loved mine and hike in them.)
- Waterproof baseball hat (This keeps the rain off my face on boat rides and when I’m shooting. I put an ear warmer headband over this so it won’t blow off in the boats.)
- Waterproof socks and gloves (I layer the Dexshell waterproof socks over my regular socks in case I top my boots and use Glacier Gloves.)
- SPF shirts for hot days (I love these Columbia long sleeve ones!)
- Dry bag for camera gear and camera rain cover (I always have this 13L lightweight dry bag with me.)
- Durable Hiking pants (The PrAna Halle pants are my go-to, and I layer them under my waterproof pants.)
- Thermal tops and bottoms (It’s freezing near those glaciers!)
- Buff (I always have one around my neck most days. Scarfs get in the way too much here.)
- A hiking backpack with waist straps (This will save your back. I love my Osprey one that’s similar to this!)
- Bear spray (You can’t take this on a plane so you’ll have to buy it when you arrive.)
- John Muir and the Ice that Started a Fire by Kim Heacox (This biography of John Muir is a must-read for any Alaska trip and adds great background context!)
*Please note that some affiliate links are used in this post. If you make a purchase, I earn a small commission at no cost to you, which goes toward the cost of maintaining this blog. If you would like to support this blog and are ready to make a purchase, these links are one way to show your support. I only recommend products and companies I truly love and use. Please email me with any questions.
A Guide to Budget & Eco-friendly Travel Clothing
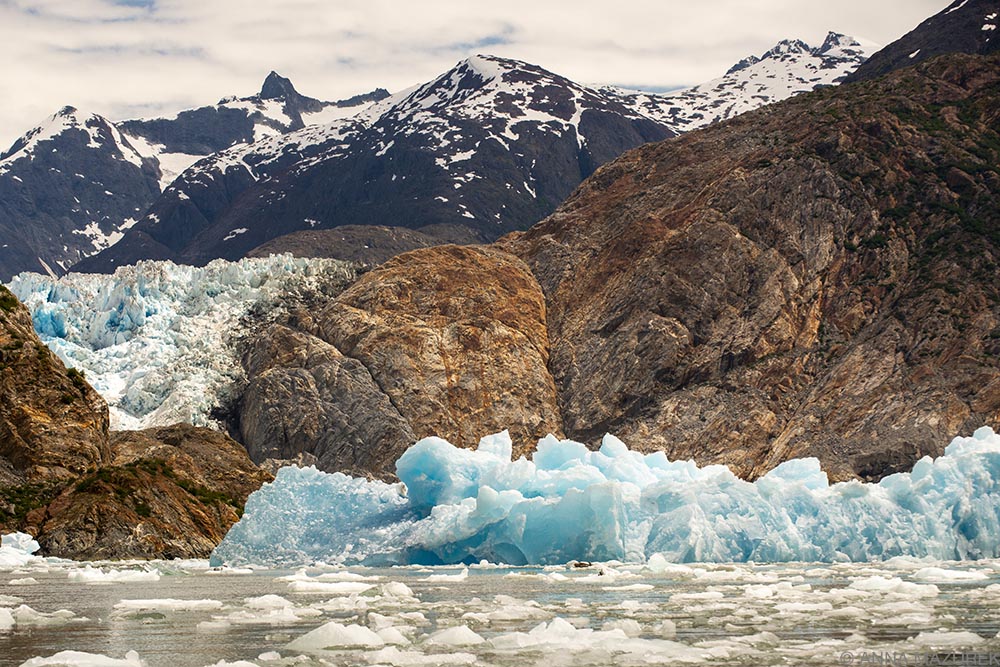
South Sawyer Glacier, Alaska, June 2019 // According to the U.S. Geological Survey, Alaska’s glaciers are losing 75 billion tons of ice annually and contributing the global sea level rise.
To celebrate Earth Day, I wanted to share some tips for how to buy eco-friendly travel gear that’s good for the planet and doesn’t break the bank. In 2018, there were 17 tons of textile waste generated in the U.S. and nearly 66% of it ended up in a landfill! Here’s five tips to make eco-friendly purchasing choices and reduce waste sent to landfills:
1. Buy Used Gear
Last October, REI launched their used gear program. They sell used gear online at a significant discount and their co-op members get store credit for trading in items. (An REI lifetime membership is just $20, and you get annual dividends on your purchases. It’s a great investment.) All items are labeled by condition from excellent, lightly worn and well worn.
Patagonia has a similar program called Worn Wear where you can purchase used gear or trade in for credit for both new or used gear. Both programs keep clothes out of landfills and save you 50% off the retail price. Plus, excellent condition items are often just brand new items!
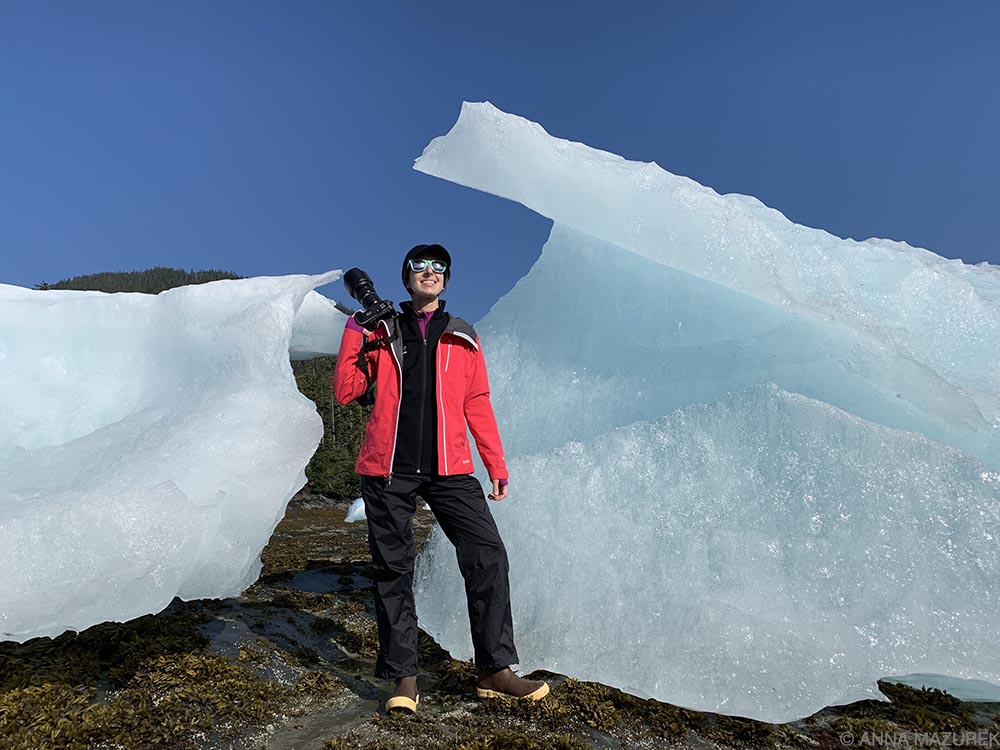
Near LeConte Glacier, Southeast Alaska // When I’m running photo trips in Alaska (for a carbon neutral company), I wear Marmot’s rain gear. They make quality gear and earned my loyalty after replacing a jacket I’d worn around the world for years under warranty. (FYI: This is not an ad.)
2. Repair Programs and Lifetime Warranties
One of the biggest mistakes I made when I first started traveling was not investing in quality travel clothing and gear. The high cost scared me away. It took me years to learn that investing in quality items from companies that offer lifetime warranties to either fix or replace an item was a better long-term investment for my bank account.
Repairing items extends their life and keeps them out of the dumpster. Plus, the combination of both repairing and replacing items under warranty saves you money. Here are a few of my favorite brands and the items they replaced: Osprey Packs has fixed two of my backpacks and replaced one. Marmot replaced my PreCip rain jacket when the lining started to rip. (For the 20th anniversary of this jacket, Marmot released the PreCip Eco Jacket made with 100% recycled nylon!) Patagonia replaced a pair of thermals that were unraveling at a seam the day before a big trip! Keen replaced my hiking boots when they started to come apart at the toe. All of these brands have earned my loyalty for life for standing by their products. Plus, I’m pretty tough on gear since I travel nonstop.
3. Recycled Clothing
Outdoor companies including The North Face, Patagonia and Copotaxi have programs that allow you to buy gear made from recycled materials. This ranges from jackets to bags. Each item has a unique color scheme so no two items will be identical! Each company accepts their items for recycling as well to be included in the program.
Clothing brands like Levi’s, Madewell, Zara & H&M offer clothing recycling options usually in exchange for a coupon. (You bring in a bag of clothes to recycle and get a coupon.) A large percentage of donated items to places like Goodwill end up in landfills so recycling can be a better option in some cases. This NPR story digs into the details.
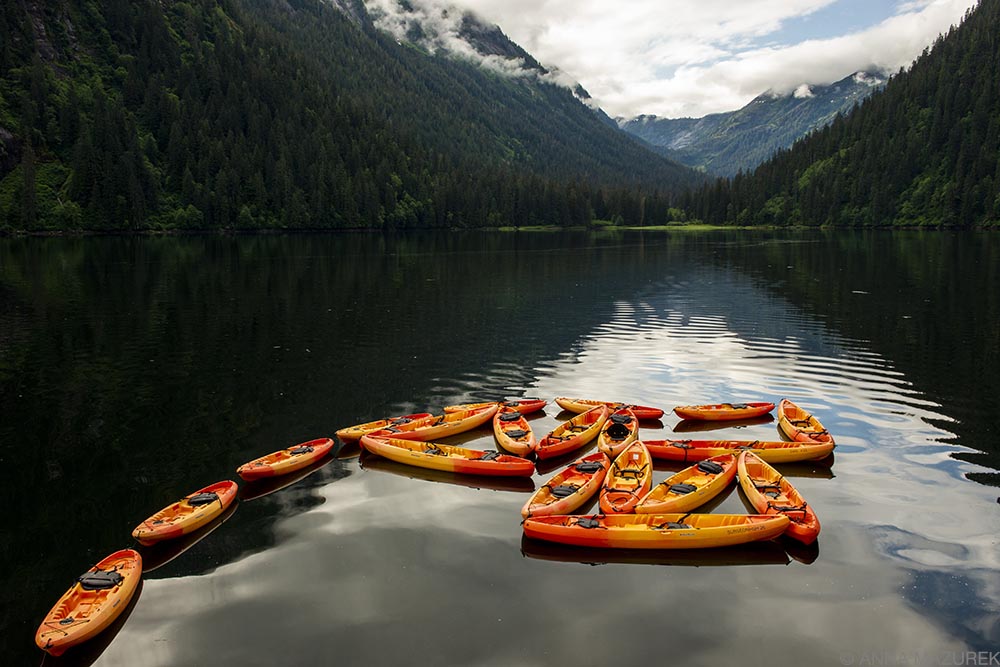
Misty Fjord, Southeast Alaska
4. Research Sustainability Practices
The best place to start researching a company’s environmental practices is their website! Almost every single outdoor clothing manufacturer has a sustainability section on their site that digs into their practices ranging from sourcing materials to labor to packaging. Another great tool is the brand dictionary by a non-profit called Remake that rates companies by their environmental impact.
Also, check to see if companies contribute to initiatives like 1% For the Planet, where members donate at least one percent of their sales to environmental causes. Focus on supporting companies that care about the planet.
5. Product Packaging
The packaging is just as important as the product itself. PrAna makes my favorite hiking pants and has one of the best responsible packaging movements. Starting in the fall of 2021, their packaging will be 100% plastic free. They use roll packaging with recyclable raffia ties. Their mailing envelopes are all brown paper. Patagonia also uses brown paper mailing envelopes.
Be sure to recycle all packaging material. Plastic mailing bags can be recycled at many stores including Target and supermarkets like Publix or Food Lion. I haven’t bought a mailing envelope in years because I just reuse ones I’ve gotten in the mail. I suggest you do the same.
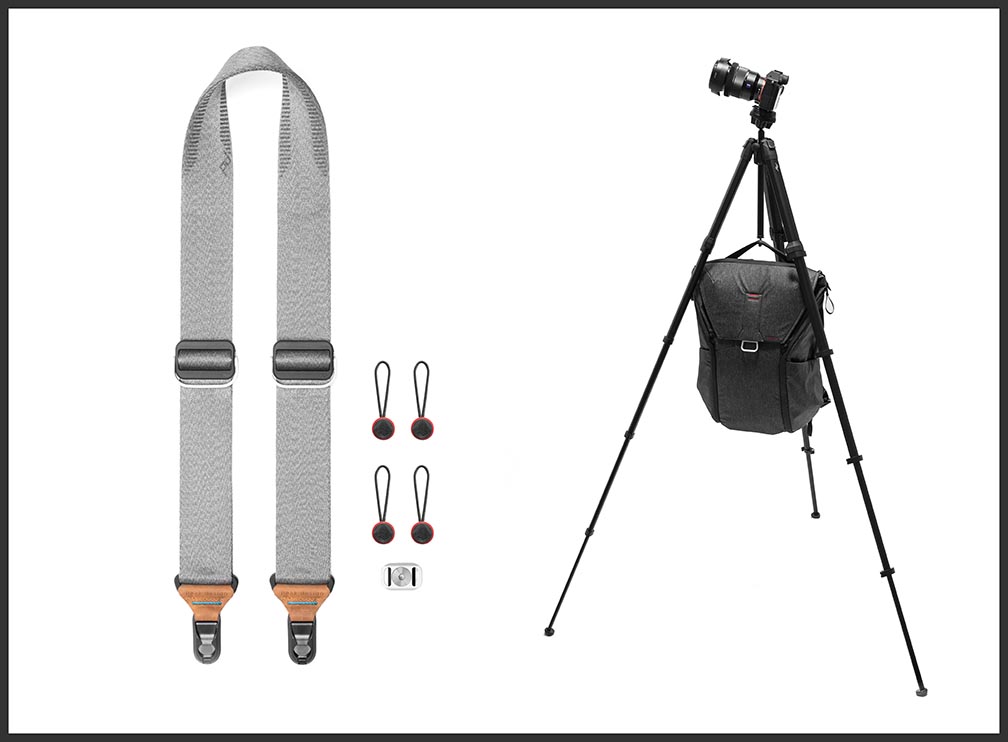 I use Peak Design’s quick connecting slide camera strap and the aluminum lightweight travel tripod that folds up to a the size of a water bottle! (They also make a carbon fiber one!)
Eco-Friendly Camera Bags, Tripods & Straps
This month, Peak Design, my favorite camera bag and accessory company, just launched their new Peak Design Marketplace to allow people to both buy and sell used Peak Design gear easily. The site allows you to sell directly to the owner with no middle men, and all sales are 100% carbon neutral. The company’s lifetime guarantee covers both new and used products! They make my favorite camera strap and lightweight travel tripod! There’s no better way to buy quality camera accessories on a budget!
How to Get the Best Deals
Since both quality and sustainably made clothing aren’t cheap, there are ways to find good deals on gear. End of season sales are the best time to get deals. Winter items on clearance right now (during the month of April). I got a Marmot raincoat for half price ($50) on a clearance rack at REI one spring! I always plan ahead for what I need so I can buy it during holiday sales like Memorial Day, July 4th, Labor Day or Thanksgiving/Christmas.
Cashback apps and websites like Rakuten also help. Rakuten is a website and browser plug-in that offers cash back when you shop at over 2,500 websites from stores to hotels! Every three months your cash back is deposited to your PayPal. Get a $25 bonus for joining and spending $25 using one of their links!
For more ways to be an eco-friendly traveler, check out this previous blog post!
*Please note that some affiliate links are used in this post. If you make a purchase, I earn a small commission at no cost to you, which goes toward the cost of maintaining this blog. If you would like to support this blog and are ready to make a purchase, these links are one way to show your support. I only recommend products and companies I truly love and use. Please email me with any questions.

9 Ways to Save Money NOW for Travel*
Stock photo credit: Pexels.com
One day we will all travel again. Until then, let’s focus on saving money for the epic adventures ahead. Let’s be honest – when I can hit the road, I’ll be traveling hard core! I have literally done 90% of the things mentioned below in the past year to save money. It’s been a tough year for a lot of people financially (myself included) so travel might not be an option for everyone. Regardless of your situation, these tips will help you save money for your priorities!
1. Trim Existing Bills
In all of my travels, the sloooowest internet I’ve found isn’t in Burma, India or Mongolia. It’s actually in my hometown in South Carolina where I’ve spent a good portion of the last year riding out the pandemic. When it became clear I wasn’t getting back on the road anytime soon, I glanced at my parent’s phone/internet bill and noticed they were paying $15/month for a static IP address they didn’t need. After a short call to AT&T, I reduced their bill by $40/month, which is $480/year. (Sadly, our internet speed remains painfully slow because we already had the fastest option, which has upload speeds that rival a carrier pigeon.)
It’s a good idea every two to five years to audit your normal monthly bills to ensure you aren’t paying for options you don’t need and check for a cheaper or better value plan since options change often. Call up the company and ask for ways to reduce your bills. ALWAYS be nice and you’ll be surprised how much you save! I saved $20/month on my cell phone bill by switching to Verizon’s pre-paid plan. To combat the slow WIFI, I upgraded my plan for a $3/month increase for seven times the data.
2. Use Rakuten!
Rakuten is a website and browser plug-in that offers cash back when you shop at over 2,500 stores ranging from Sephora to Lowes to Target. You simply click on the link on Rakuten’s site, phone app or use the browser plug-in like I do, which alerts you to the cash back amount. (Stores pay Rakuten a commission for sending you their way.) Cash back ranges from 1-12% but is sometimes higher. Often, it’s higher at holidays or peak shopping periods. Every three months the money is deposited in my PayPal. (I got $44.68 in February!) Since everyone is shopping online more than normal due to the pandemic, Rakuten is a must. Plus, you get $30 just for joining and spending $30 using one of their links! Use this link to get your $30!
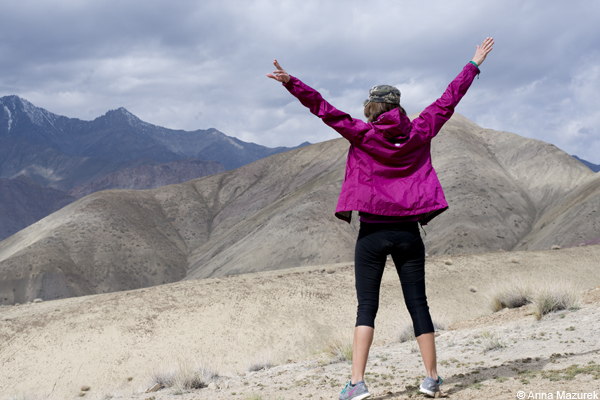
I bought this $100 Marmot raincoat on sale at REI for $50. When the lining started ripping, Marmot replaced it for FREE. They’ve got my loyalty for rain gear for life. (Photo location: Ladakh, India)
3. Warranties
In my book, I talked about the importance of investing in quality products with lifetime or long-term warranties. This goes beyond just travel gear and electronics. One of the bathroom faucets at my parent’s house started dripping last summer. After a call to faucet manufacture (Moen), they shipped us a $150 part for free as part of their lifetime warranty, which covers the product as long as the original owner owns the home. For a company, this builds loyalty. I will always support Osprey Packs, Patagonia, Apple and Marmot for their quality gear and excellent warranties. They have all fixed or replaced my gear and electronics at no cost.
Next time something breaks or stops working properly, do a quick Google search on the warranty to check the terms. Then, send a nice email with a photo of the issue to ask if your product is eligible. Since proof of purchase is often required, consider adding a folder in your email to organize receipts.
4. Cancel Subscriptions
The subscription payment method is a great business model for company, but it can easily drain your bank account as a consumer. When auditing your monthly bills as I mentioned above, check your bank statement for reoccurring charges. It’s time to cancel that gym membership you didn’t use even before the pandemic. I’m honestly surprised at how many people are aware of paying for things they don’t use but won’t take the time to cancel them! I heard this constantly from friends when I released my book! I only pay for three subscriptions—Apple Music and two newspapers. That’s it.
P.S. Libraries still exist and offer ebooks and audiobooks for FREE with apps like Hoopla, Libby and Overdrive. Some movies are also included!
5. Sell Things
For the first time in over a decade, I fully unpacked and all of my things were in the same place. I used the time to declutter and clean out everything in my old room at my parent’s house. I donated the junk and sold the rest on eBay or Poshmark, a website for selling clothing, jewelry and new makeup. In the past six months, I’ve made roughly $478.99 selling everything from my old Hard Rock Café shot glass collection to jewelry I wore in high school. If you haven’t used the pandemic as an excuse to declutter, start now and make some extra cash!
Peak Design makes the BEST camera strap (left) on the planet. I just bought their lightweight travel tripod, which folds up to the size of a water bottle, with their education discount. They are one of the best camera accessory brands out there. Photo credit: Peak Design
6. Student, Teacher, Military & First Responder Discounts
My dad and I spent a good chunk of the last year remodeling my parent’s house ourselves—ripping out old carpet, reflooring almost the entire house (hardwood for bedrooms/hall and vinyl planks for the bathrooms/kitchen), repainting and moving toilets. (At one point, I had to crawl under the house on my stomach to cut a toilet pipe with a three-foot long saw to avoid calling a plumber on a Sunday during lockdown.) We saved a fortune by doing it all ourselves and using my dad’s military discount at Lowes, which is 10%! (We combined this with the Rakuten cash back by buying online for curbside pickup!)
There are countless places that offer discounts for students, teachers, military and first responders/medical professionals. If anyone in your household qualifies for these discounts, then take advantage! Most places will have them listed on their website, and you usually have to verify your eligibility with an email address, proof of employment or military service by filing out a form. It’s so simple!
Since I teach for a university part-time, I get slew of discounts from newspaper subscriptions, Apple Music, clothing (Banana Republic, J. Crew, H&M) and even camera gear! (I literally just realized a few months ago that B&H Photo AND Peak Design, who makes my favorite camera straps and lightweight travel tripod, offer education discounts!) I’m sure most K-12 teachers know that Michael’s craft stores offer a teacher discount. Even Amazon Prime offers a discounted student version! Websites like ID.me and myunidays.com provide access to a slew of discounts so give them a scroll.
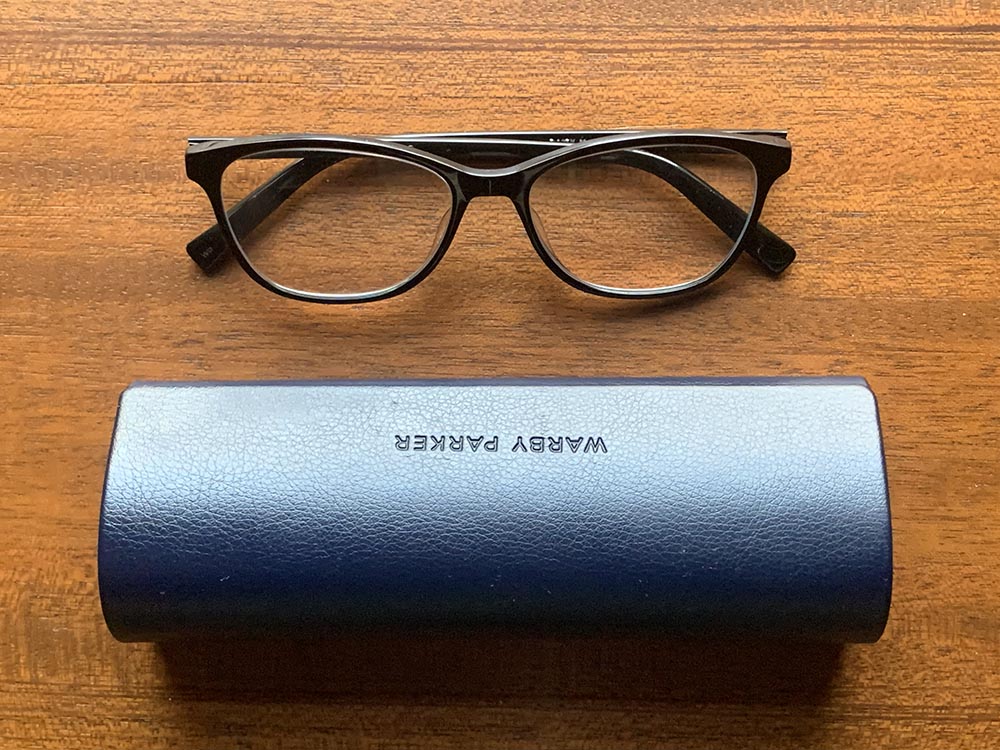
Warby Parker changed my life last year with their $125 frames with lenses. (I have a high prescription so I’ve never been able to find affordable glasses until now!) I love the Daisy frame model, which I photographed above on my nightstand.
7. Warby Parker
If you have perfect vision, skip this part. I’ve worn glasses since kindergarten. The prescription in my right eye is so strong that the lens is so thick that it sticks out of the glasses frame. This got me picked on like hell in school. I started wearing contacts in high school and was so traumatized that I rarely wore glasses in public again. Year later, I realized it was possible to buy thin lenses that didn’t stick out past the frame, but they were expensive so I only bought glasses every 5-10 years since I mostly wore contacts. When the pandemic hit, I needed new glasses and my prescription was expiring. Since I didn’t feel safe shopping in person due to COVID, I decided to try Warby Parker, an online glasses retailer. While Target charges $350 ($250 for thin lenses and $100 for the cheapest frames), Warby Parker only charged $125 for the thin lenses AND stylish frames (Daisy model). For the first time in my entire life, I actually feel attractive in glasses and it saved me $225! Warby Parker is the greatest thing I’ve discovered in the past decade. I can’t recommend them enough. (This is not an affiliate link. I just honestly love them.) If you have a lower prescription that does result in a thick lens, there are cheaper places like Zenni.
8. Buy Nothing Project
There is NOTHING I hate more than clutter and being wasteful. Travel has made me a minimalist. I’m all about borrowing things or giving things away to help others, which is what I did during my declutter last year. While I haven’t used it, I’m intrigued by the idea of the Buy Nothing Project, which is a series of local Facebook groups where people post what they need/don’t want. It’s worth checking out.
9. REI Used Gear Program
I also had no idea this existed until recently. Last October, REI launched their used gear program. If you pick “excellent condition,” chances are you will get a brand new item that someone just tried out and returned, for 50% off the original price. REI members can also trade in old gear for store credit to avoid things going to landfills! If you need gear to hit the road, this is a great place to start looking!
*Please note that some affiliate links are used in this post. If you make a purchase, I earn a small commission at no cost to you, which goes toward the cost of maintaining this blog. If you would like to support this blog and are ready to make a purchase, these links are one way to show your support. I only recommend products and companies I truly love and use. Please email me with any questions.
Want more budget tips?

In my book Good With Money, I share all the financial lessons I learned during the recession in 2008, which helped me survive the economic downfall from the pandemic when I lost 80% of my work. (Turns out, pandemics along with global recessions aren’t good for travel photographers! haha!) These same lessons are relevant today during our current crisis and can help you be prepared for any inevitable financial downturns in the future. Your savings will save you. Don’t wait to get your finances in order!
Fall Guide to Blue Ridge Parkway & Shenandoah National Park
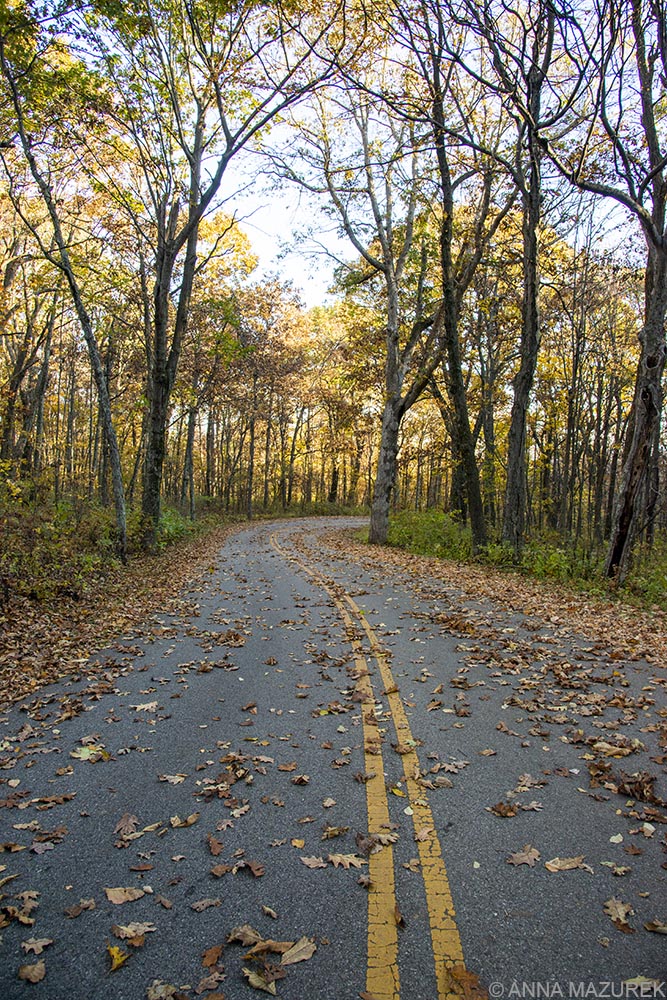
In mid-October, I did a solo road trip to photograph the fall leaves in Virginia and North Carolina. This trip was inspired by a story I wrote for the Washington Post about how to travel safely and ethically to national parks. Normally, I’m already in Asia by the fall so I always miss the leaves so it was exciting to get to see them. In this post, I share some of my photographs, logistics and travel tips for this region. I also have a section focused on travel safety where I dig into my safety protocol. [Please note COVID rates were much lower than current levels when I did this trip and both states had mask mandates. Cases have more than doubled since then so I would not do this trip now.]
Free Apps to Help With Planning
Both the Blue Ridge Parkway and Shenandoah National Park have free apps that help with planning. Bathrooms are few and far between so these apps were really helpful. Download both and offline maps (Maps.me is good for hiking trails!) beforehand since service is spotty in both locations.
How to Predict When The Leaves Change
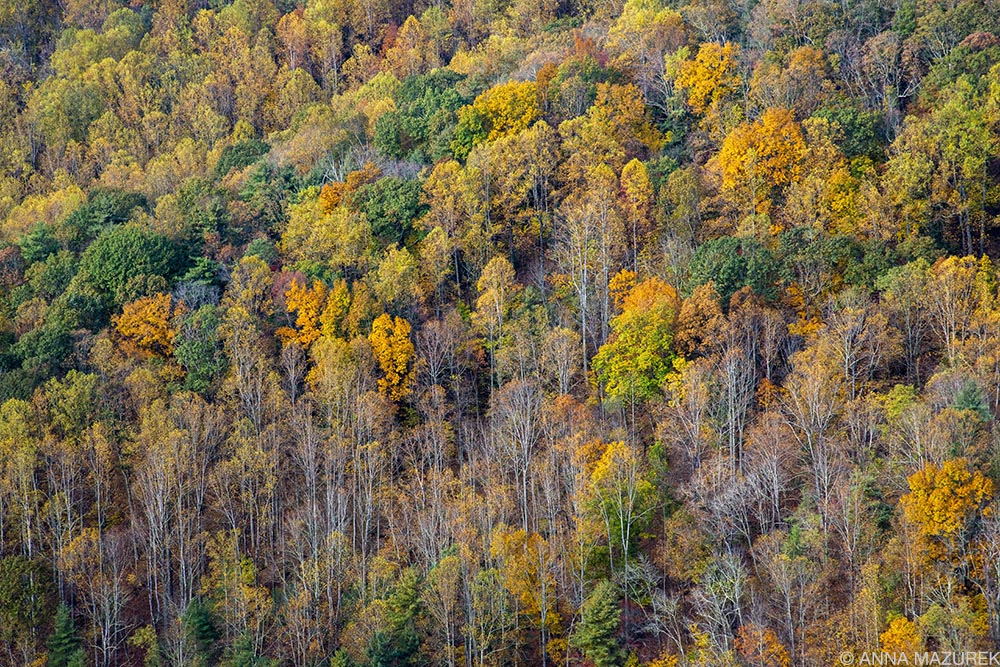
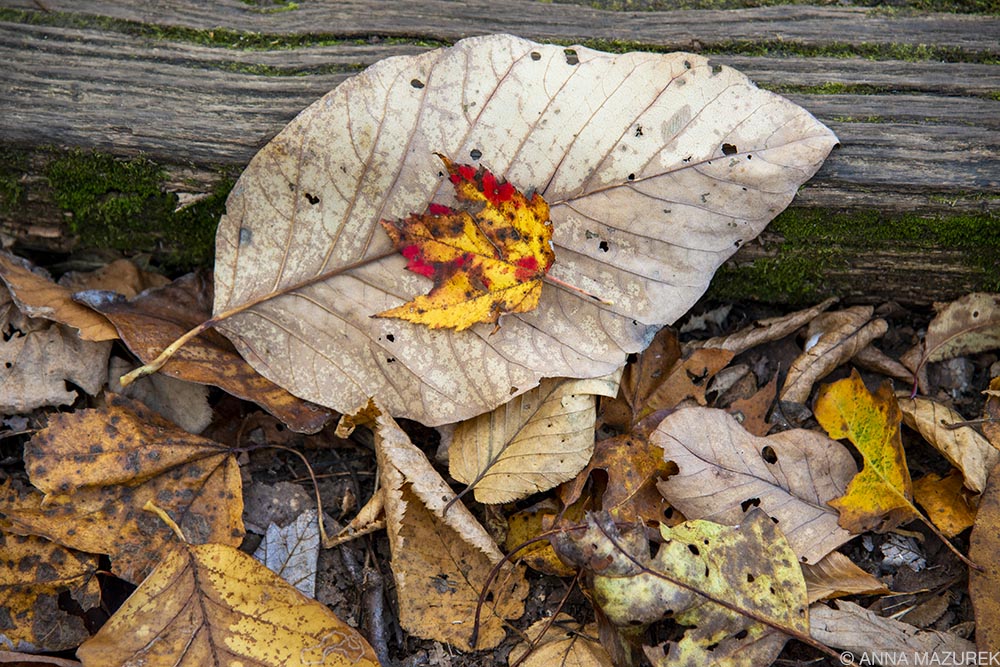
There are a lot of factors that determine when the leaves start to change color ranging from elevation to weather. Shenandoah National Park usually peaks about the second or third week of October. They have a YouTube channel where they release a new video every Thursday at 2 p.m. with updates, which is how I determined my trip dates. The leaves probably peaked a few days before I arrived (over the weekend), but I only wanted to travel during the week to avoid crowds. (I also called visitor centers to ask about the status of leaves to help with planning.) The higher elevations of the Blue Ridge Parkway like Boone and Grandfather Mountain probably peaked about five days or so before I arrived but were still beautiful. You can’t visit multiple elevations on the same trip and expect the leaves to all be peak at the same time. Overall, my trip was beautiful even if I missed the peak in a few areas.
My Five-Day Road Trip Itinerary
Day 1: Shenandoah National Park (Central)
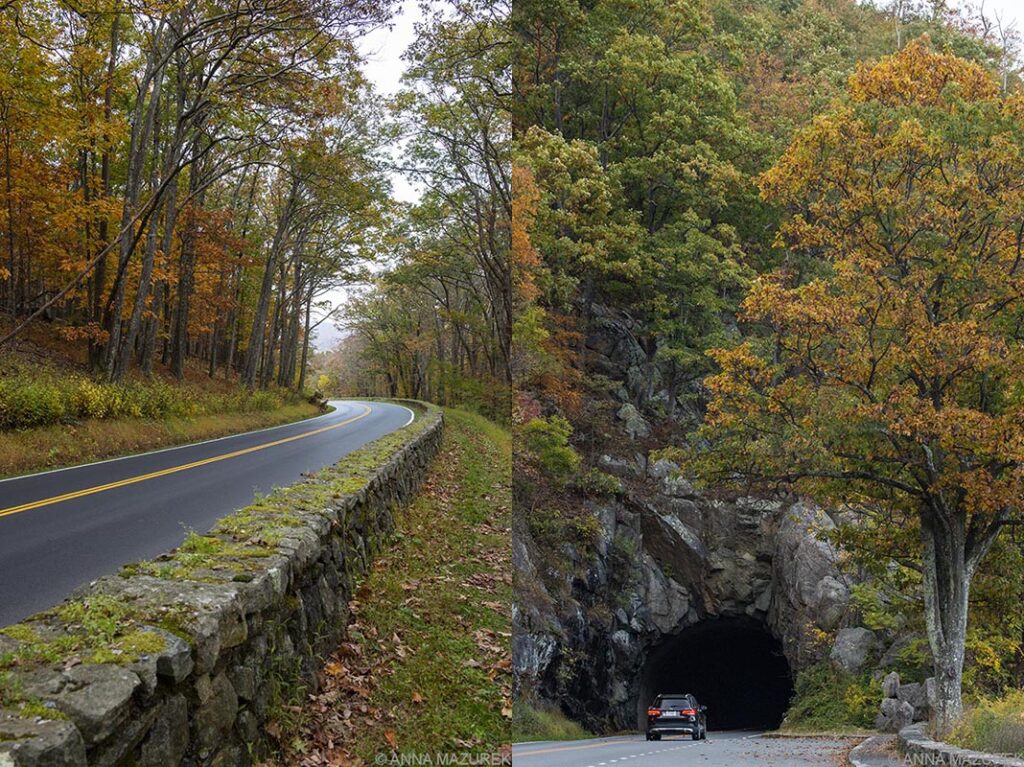
To avoid crowds, I traveled during the week (Monday to Friday) for this five day trip. I started my trip from South Carolina and drove 6.5 hours up to Harrisonburg, Virginia where I stayed the first two nights. I got to the park around 3 p.m. at the Swift Run Gap entrance station then drove north to the Thornton Gap entrance station on Skyline Drive, the main scenic road that runs 105.5 miles through the entire park. This part of the park is the most crowded since it’s closer to the big cities of Baltimore and Washington D.C. I avoided popular spots like the Dark Hollow Falls Trail (the parking lot was overflowing). I drove about half a mile, and the scenery was stunning on a series of curves lined by a rock fence. I turned around went back and parked along the side of the road. There was a path by the side of the rock wall away from traffic. The view was stunning of Skyline Drive and the trees! I literally had the place to myself and only passed three people on the trail. The entire park is beautiful so I learned to skip the busy spots and stop at the deserted ones! This trail along with the tunnel near the Thornton Gap Entrance were my favorite spots to stop.
Day 2: Shenandoah National Park (South)
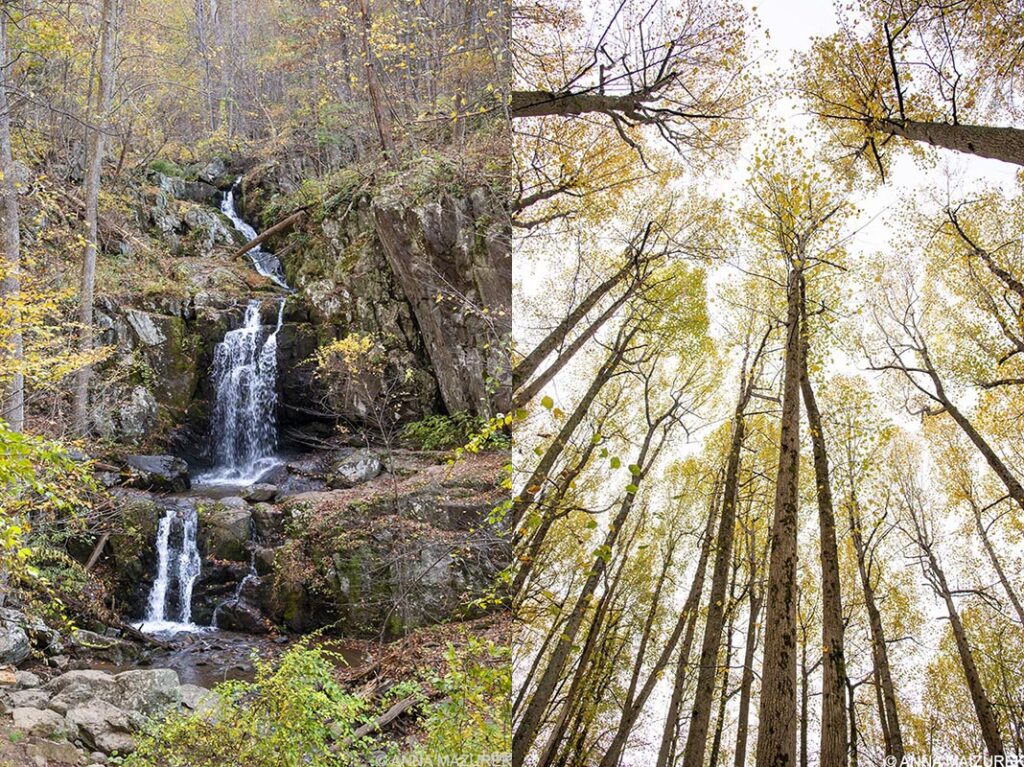
The southern portion of the park is the least crowded since there’s no accommodation options except one campground. I got up at sunrise to hike the Doyle’s River Falls Trail (3 miles). There were only five cars in the parking lot when I arrived to start the hike at 8:30 a.m. and 20 cars in the lot when I finished around 10:30. (I stopped a lot for photos, which is why it took me so long.) I had the trail to myself the entire way to the falls—it was glorious! The leaves were STUNNING. The trail was downhill the entire way to the falls and a 1,189 foot elevation gain on the way out. There are two viewpoints for the upper and lower falls, which is where I turned around. (The trail continues to Jones Run Falls, which his another waterfall.) When I left the falls to hike out, I started to pass other people. The trail was wide so it was easy to socially distance but I still put on a mask when I passed others, which is what the park service recommends. Only a fourth of the people I passed did the same. Overall, I felt safe.
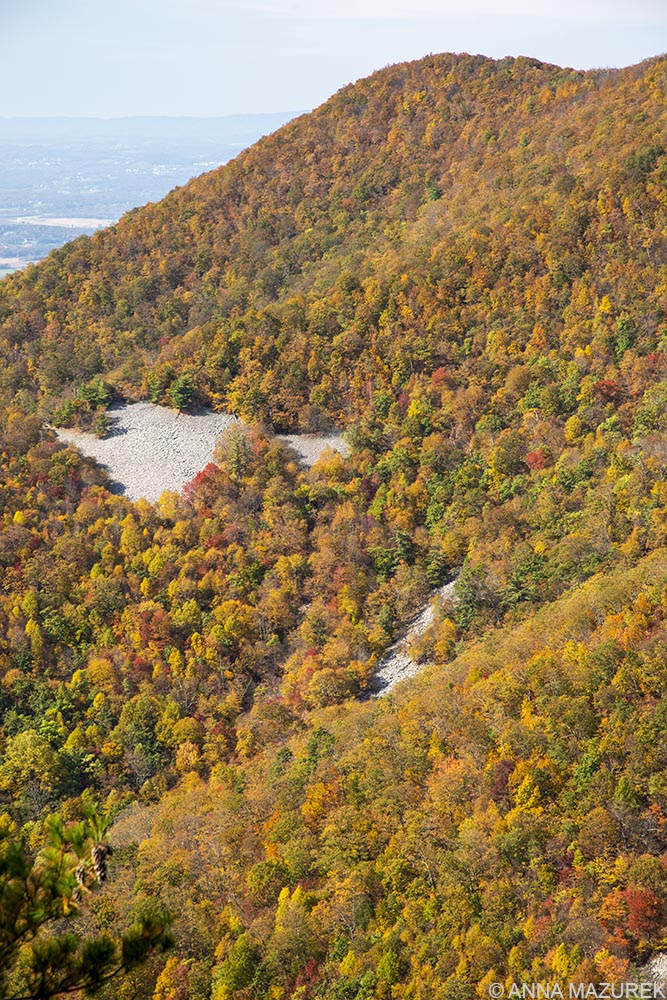
My next stop was Black Rock Summit, a short one-mile loop facing the west with a rock outcrop at the end of the trail. There were more people on this trail at the viewpoints at the end, but there was plenty of space to distance myself. The trail back to the parking lot was different that the one you take out so that made it really easy to avoid people. The view was really nice , and the rocks made for great scenery for photos.
My next and final hike of the day was Turk Mountain (2.2 miles). The trail was very narrow and steep, which made it feel a lot more crowded than it actually was. This was the only trail I didn’t feel safe on because it was hard to socially distance. (It’s a totally safe trail to hike in non-COVID times.) The end of the trail was a bunch of large steep rocks with a western facing view. It was beautiful but again, not the safest to distance during COVID. You needed both hands to climb the rocks at the end so take hand sanitizer if you do this trail! I spent the rest of the day driving Skyline Drive and stopping at viewpoints. Honestly, the leaves were so lovely that I just enjoyed driving! I went back to Harrisonburg again for the night.
Day 3: Blue Ridge Parkway – Afton to Fancy Gap
(Milepost 0 to 199)
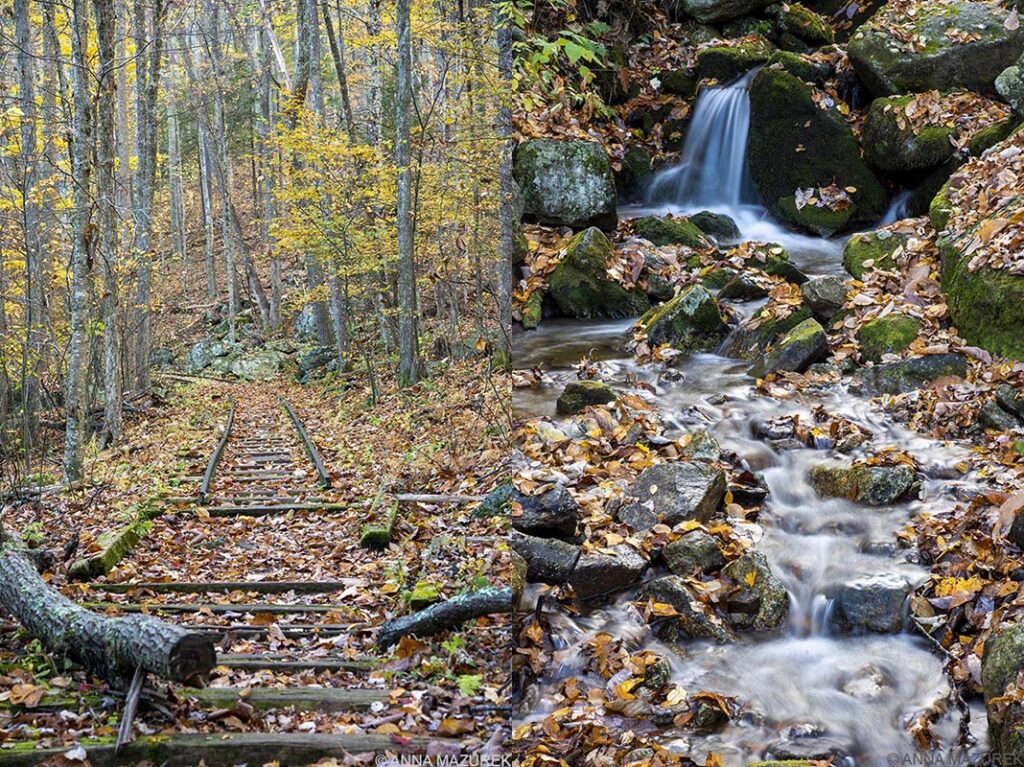
The Blue Ridge Parkway covers 469 miles through 29 counties in North Carolina and Virginia. The parkway begins at the end of Skyline Drive at the southern edge of Shenandoah National Park. The parkway attractions are labeled by mileposts, which is what I’ll use to lable my favorite stops. I had a lot of ground to cover so I couldn’t stop to do any long hikes. I wanted to stop at Humpback Rocks (MP 5-8) but didn’t have time to do the hike, which looked pretty crowded based on the parking lot. My first stop was one of my favorites of the entire trip—Yankee Horse Ridge and Wigwam Falls (MP 34.4). The waterfall was small but gorgeous. There is also a small set of reconstructed logging railroad tracks that once covered 50 miles of this area in the early 1900s. The leaves were stunning here. It’s a very small stop right of the side of the road. I had the place to myself for the first 30 minutes. I stayed here for ages taking photos. I even got out my tripod to do a long exposure of the waterfall!
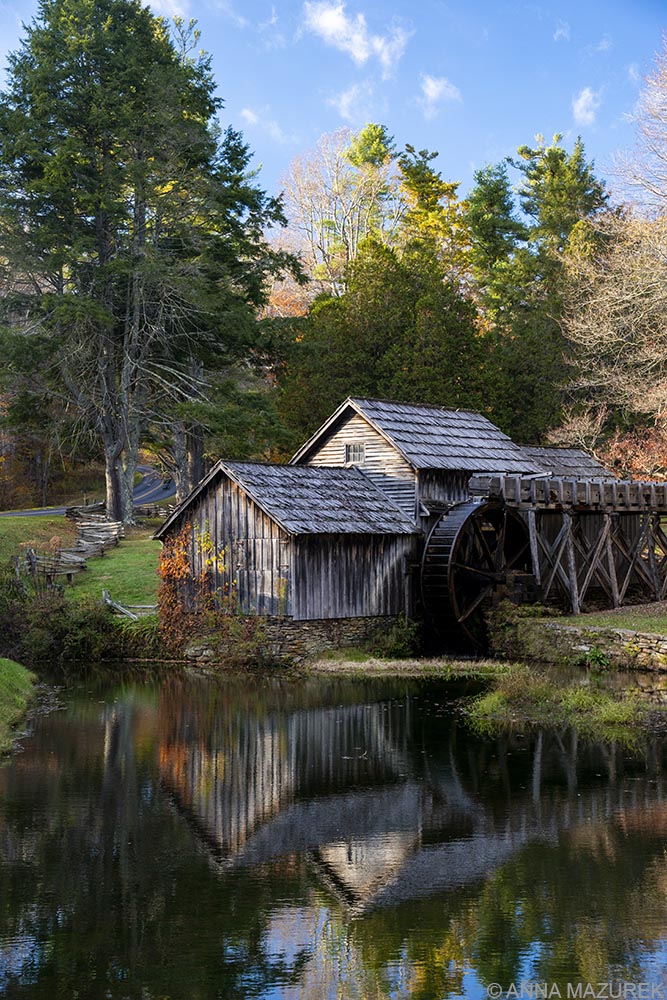
I stopped briefly at the Peaks of Otter area, which was gorgeous but a bit crowded. I considered doing the short one-mile loop around Abbott Lake but decided to just hit the road so I could stop in Roanoke for lunch. (I highly recommend Mac & Bobs, a great local spot!) Part of the parkway was closed near Roanoke so I had to take a short detour. I had a lot of ground to cover so I didn’t stop for any long breaks until I got to my final destination and one of the main places I wanted to photograph—Mabry Mill (MP 176). The gristmill was built around 1905 by Ed and Lizzie Mabry who later built a sawmill and blacksmith shop, which were all acquired by National Park Service in 1938. There is a restaurant named after the mill by the parking lot and the buildings are open for exhibits. My goal was to photograph the mill, but I wasn’t sure if the light would be best in the morning or at sunset. Now, I can officially say the best time to photograph Mabry Mill is an hour before sunset when the light hits the mill just enough so it reflected in the pond with the blue sky overhead. The restaurant was closed, but there were still a good amount of people around but enough space that I felt safe. I wore my mask the entire time and was shocked by how many people were standing closely and talking to strangers with NO masks. They were taking photos of each other with their phones! (Once upon a time, I worked at the Apple Store so I know how gross phones are so there’s no way I’m touching a strangers phone to take a photo during COVID!) To be clear, Virginia and North Carolina both have statewide mask mandates in place for public areas. I stayed in Hillsville, Virginia for the night.
Day 4: Blue Ridge Parkway – Fancy Gap to Blowing Rock
(Milepost 199 to 293)
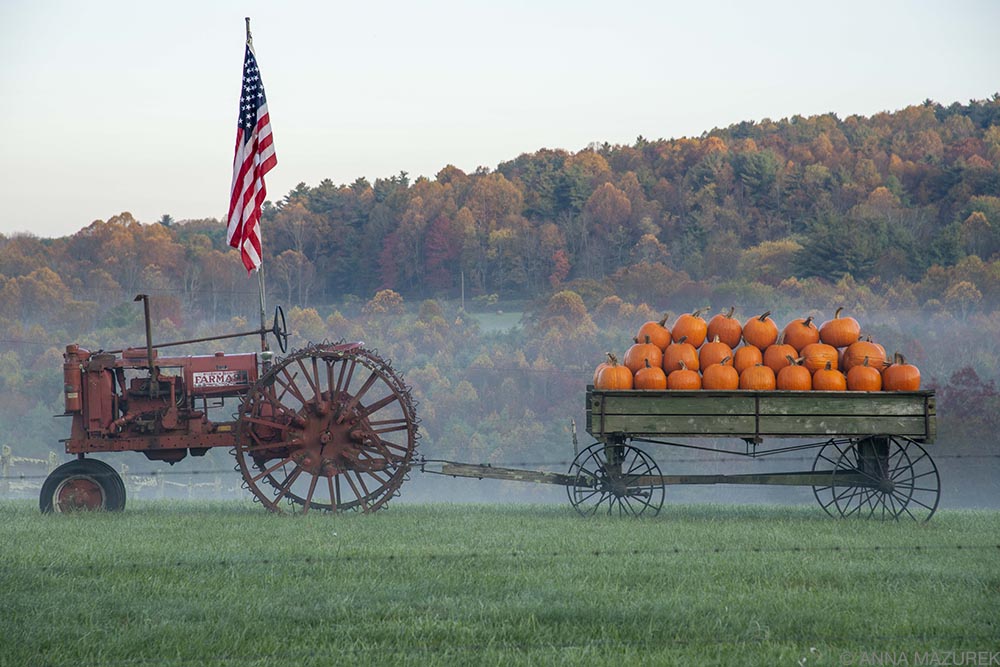
Since I’d gotten the photo I wanted of Mabry Mill the day before, I hit the road early. Shortly after I got on the parkway, I passed a farm with an old red tractor with an American flag parked in the field with a trailer filled with pumpkins (photo above!). It was one of the most Americana images I’ve ever seen. I did a quick U-turn and went back to shoot it. The fog was still lingering, and the colorful trees in the background were perfect. The road was lower than the field so I had to shoot through the fence using my aperture to blur the barbed wire, which you can just barely see in the photo.
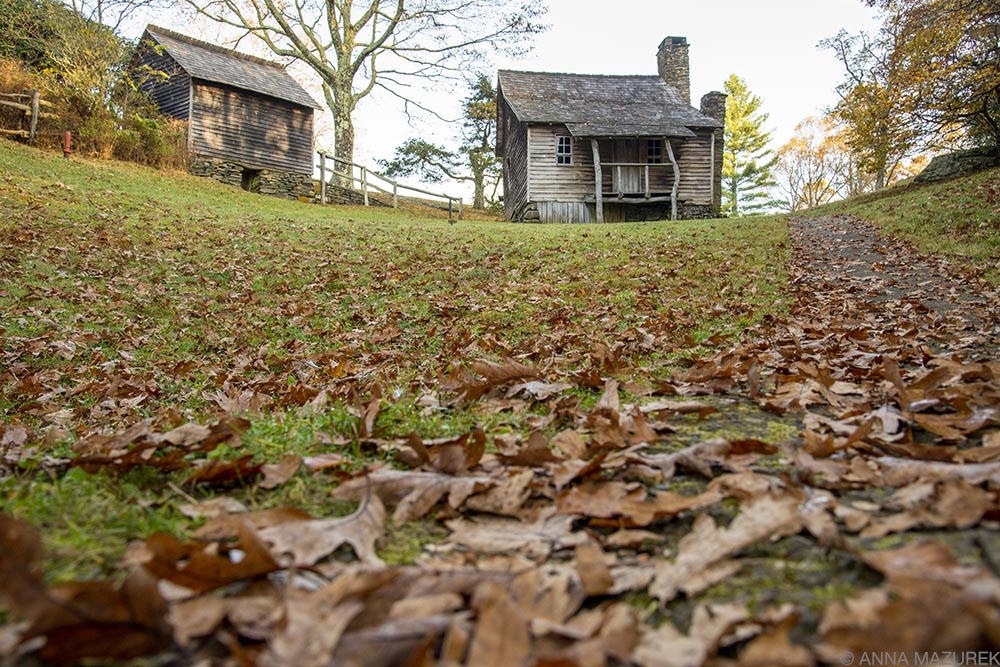
My next stop was Doughton Park (MP 238) to see Brinegar Cabin, built in late 1800s. I loved all the log cabins so I stopped at many of them. There are some pretty extensive and photogenic picnic areas along the parkway, which were my best stops for finding a bathroom. The picnic areas were HUGE with enough spots for hundreds of people to park and eat. It felt like a maze driving through them. Everyone I stopped at was totally empty, but the bathrooms were nice.
My next planned stop was Cascade Falls (MP 271.9), but there were too many people so I skipped it. I drove half a mile down the road to a cute old cabin. The parking lot was empty so I parked and walked the short trail to the cabin. Then, found another trail in the woods that lead to the Cascade Falls parking. It was short but beautiful. And, I had the entire place to myself! This was a common theme for my entire trip. The places I liked the most were the ones I had to myself!
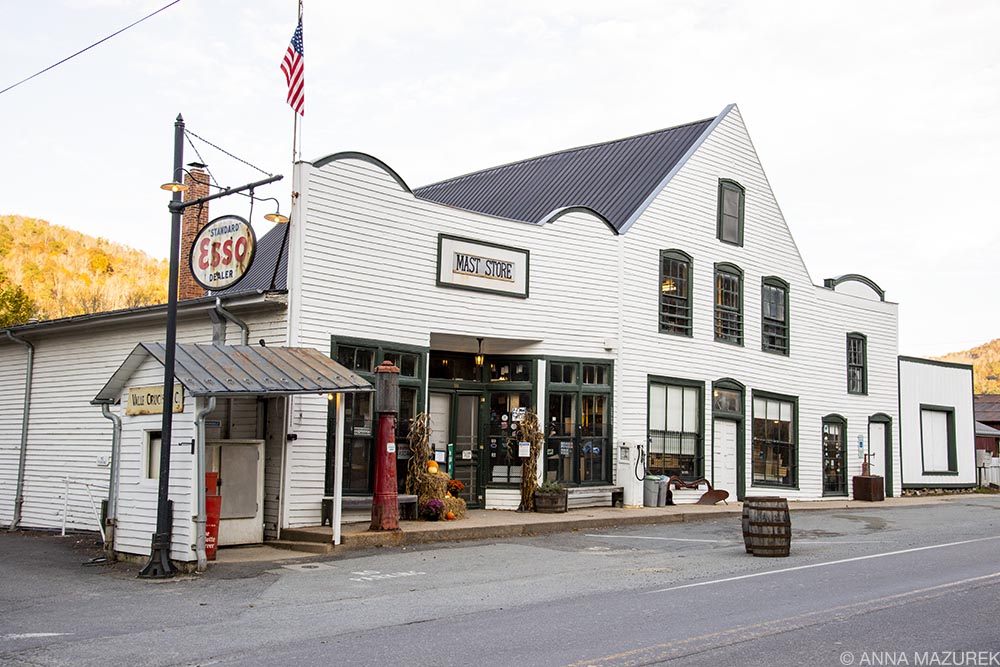
Next, I drove into Boone and had lunch at Booneshine Brewing, which I totally recommend. It’s by a lovely little park with a walking trail. I was basically killing time in Boone so I could go do a sunset shoot at the original Mast General Store in Valle Crucis built in 1883. The light wasn’t as good as I’d hoped so the building was a bit in the shadows so I’d recommend going before sunset to photograph it. It was still a lovely area with lots of cool barns nearby. The store itself was really interesting. The annex is about half a mile down the road.
The hotels in Boone were very pricey so I stayed in Wilkesboro, NC for the night for about half the price.
Day 5: Blue Ridge Parkway – Blowing Rock to Asheville
(Milepost 293-382)
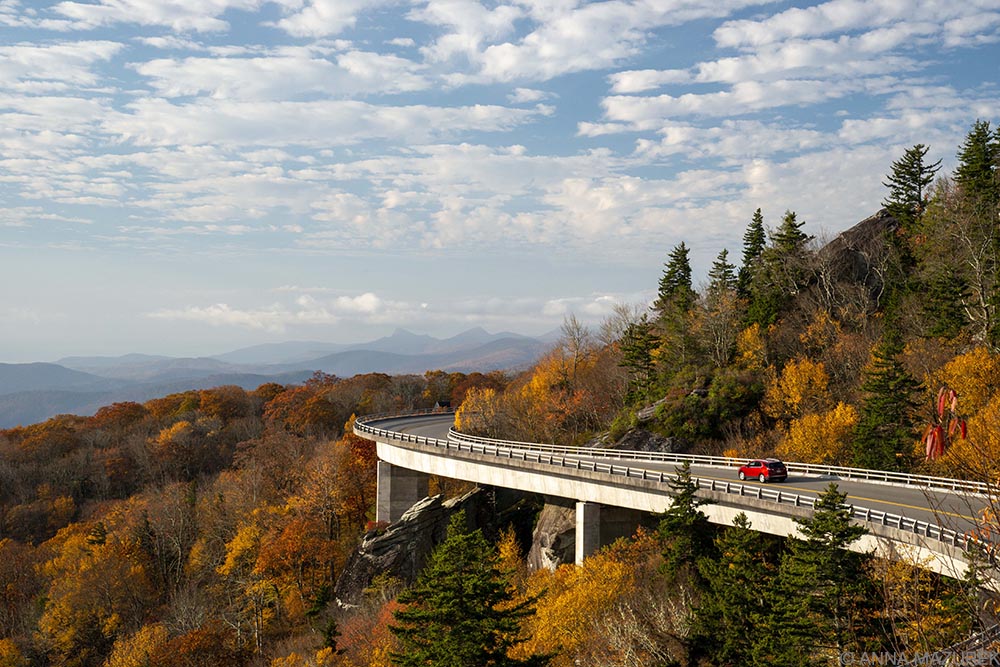
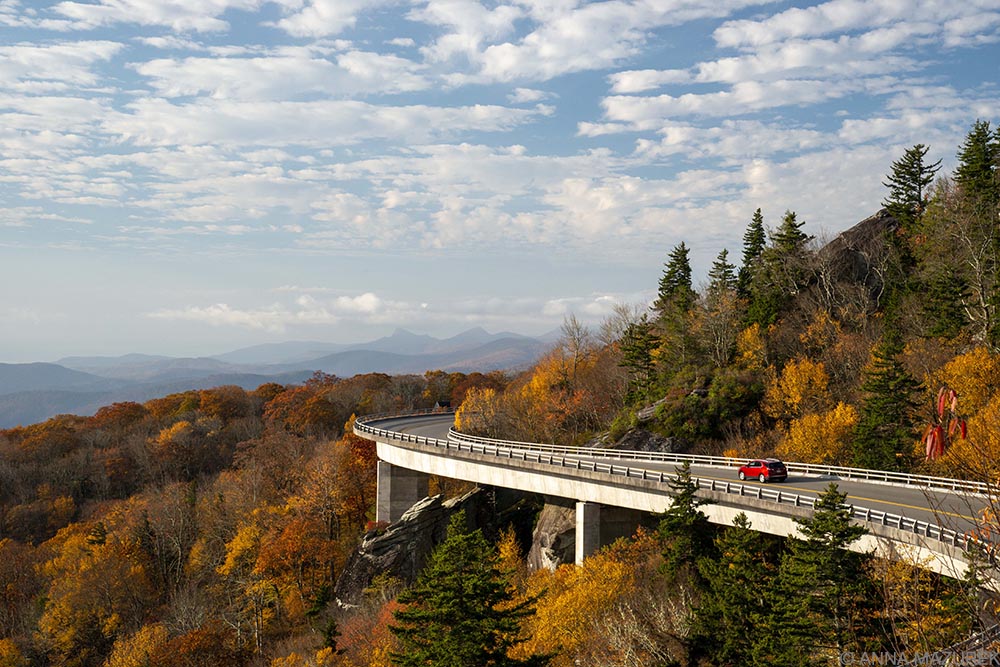
I got up at 5:50 a.m. to drive to the spot where I got my favorite photos of the ENTIRE trip! I made it to Linn Cove Viaduct by 7:30 a.m., which was just after sunrise an excellent time for photography. (The 1,243-foot viaduct is an engineering feat built with 153 segments at 4,100 feet to protect the environment of Grandfather Mountain) The viaduct is best shot in the morning when the light is hitting it. I parked at a small lot in parking area on the left (when heading south toward the viaduct) near mile 303.9. Then, I walked on a path along the edge of the road on the opposite side of guardrail from traffic. There were a handful of people around (mostly photographers like me with tripods) and almost everyone was wearing a mask.
The best spot for photography is directly across the road on top of a few big rocks. There’s a short climb to the top but only room for one person really to shoot at a time. I waited my turn and got a great shot of a red car going around the curves as the sun highlighted the edges of viaduct. (There were two people on the rocks when I arrived so I waited until one left to go get my place in line.) Once the sun came out, I didn’t really need the tripod so I’d advise not bringing one if it’s pretty bright. By 8 a.m, I didn’t need the tripod.
It’s dangerous to stop on the viaduct to take photos so please make sure you park in the lot and walk back along the path. There was a very rude old couple who literally parked in the road (partially blocking it) to climb up the rocks. Then, they had the nerve to try to get in front of me to take a photo. Despite the tight space, they weren’t wearing masks because “they’d left them in the car.” Even in non-COVID times, it’s best that only two people be near the top of the rocks and other people just wait at the bottom for people to come down. (It’s a very short climb.)
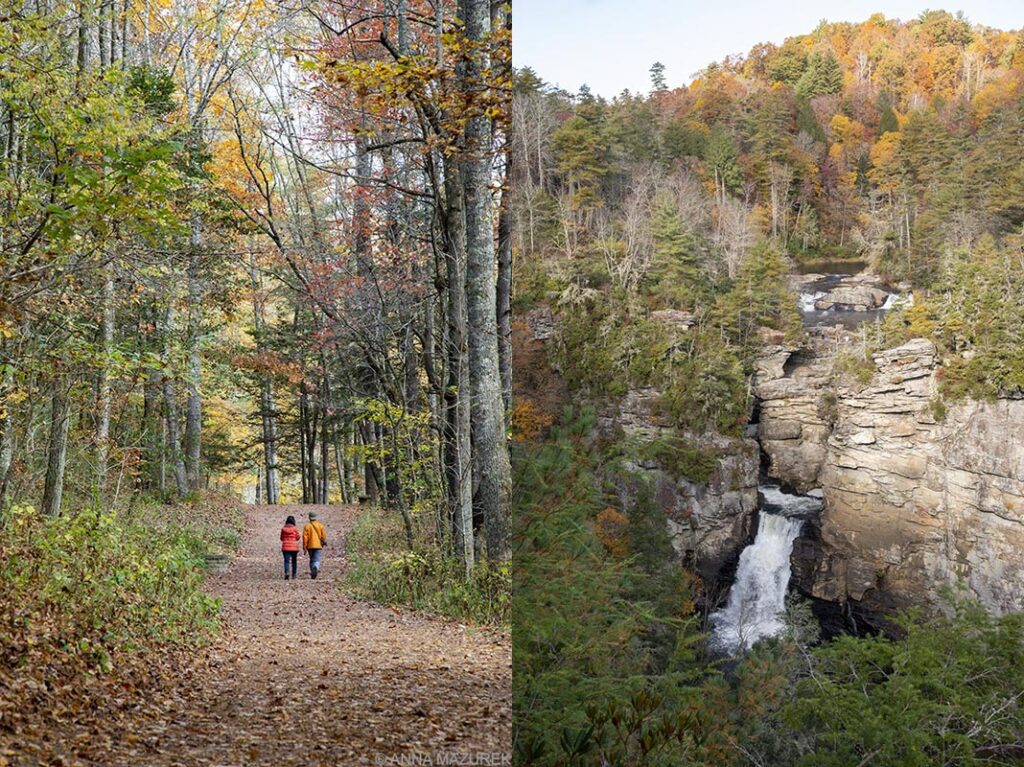
My next stop was Linville Falls, a three-tiered waterfall called the “Grand Canyon of the Southern Appalachians.” The parking lot was only a third full when I arrived around 9:30 a.m. but when I left around 11, people were waiting for parking spaces! It’s one of the most popular spots on the parkway. I hiked to all the viewpoints skipping the closest one to the parking lot that was packed. It was a wide trail so easy to distance from others. Most people had masks they put on when they were near others.
This is a tricky spot to shoot due to the angles of the viewpoints and the deep gorge. Mid-day might be best to get light on the falls and walls of the gorge. A cloudy day is also a good to avoid any harsh shadows or glare.
I stopped at Mount Mitchel next, the highest peak (6,684 feet) in Appalachian Mountains. It’s a few miles off the parkway. When I got to the top, I was shocked by how packed the parking areas was! There’s also a large picnic area near the top that also draws crowds. I took a photo of a sign at the end of the parking lot with the elevation on it but didn’t walk to the main viewpoint because there were over a 100 people! It just didn’t feel safe so I got in my car and left.
The parkway got more and more crowded as I got towards Asheville. Honestly, it was pretty busy from Boone to Asheville, which was the most crowded part. It was also a Friday so that could be part of the reason so many people were out. My initial plan was to drive all the way to the end of the parkway in Cherokee, NC, but my car started to have some problems near Ashville so I headed to my parent’s farm in South Carolina. (Turns out the blower motor went out in my car, which was an inexpensive repair thankfully!) I’ll have to go back and finish the parkway at another time – perhaps mid-week to avoid the crowds.
Travel Safety
This solo road trip was my first trip since March. I went during the week to avoid crowds as much as possible. These places are always busy during the fall, and visitor numbers are still increasing despite the pandemic. I got up at sunrise and tried to be at the most popular spots as early as possible. In my experience, if you get to a place before 9 a.m. then it’s usually not bad at all. (Sunrise was a 7:30 a.m. so I did my best to get to places as close to then as possible. I also didn’t want to be driving on the remote roads too early because wildlife is a concern in the dark so timing was tricky.) Even when I ran a photo trip in Yellowstone a few years ago during peak season, the most famous spots were empty before 9 a.m. and after 6 p.m. I also skipped a lot of places due to the crowds because of COVID fears so I’d like to go back to those another time.
Normally, I would stay with friends or camp during a road trip, but neither feels safe now. The idea of camping and sharing communal bathrooms just felt gross so I stayed in hotels, which wasn’t cheap. Initially, I was looking into renting houses or whole apartments on Airbnb so I could have a space completely to myself. Hotels had a much more flexible cancelation policy, which is why I ultimately went that route. (Since the leaves don’t exactly give advance notice when they are changing, I booked hotels for three weeks straight just to be safe then canceled what I didn’t need.) Hotels were also slightly cheaper ($80-100/night) for a nice hotel while Airbnb’s were over a $100 unless you rented a room in a shared space. One of the ways COVID is changing the way I travel is that I’ll be spending more on nicer accommodation and avoiding shared spaces like hostels, which I used to love for the social component. I’ll book a place based on whether or not I could stand to quarantine there.
I stayed at Hampton Inns for four nights – two nights in Harrisonburg, Va., one night in Hillsville, Va. and Wilkesboro, N.C. I felt really safe in the hotel rooms – they felt very clean, but I still Lysol-bombed the place when I arrived just to be safe! I picked hotels that offered digital keys so I could check-in and unlock my room with my phone, which I recommend everyone do! They required masks in the hotel and I didn’t really see too many people in the common areas. (Both states had mask mandates in public areas.) I took the stairs when I could to avoid people in elevators. There was hand sanitizer by all the elevators. The gyms were either closed or by appointment. (I’m not sure when I’ll ever feel safe in a gym again so I skipped these.) Breakfast was a to-go bag, which I also skipped. I brought my own food for the trip but tried to eat out (to-go only) at local restaurants to help support small businesses. Since ventilation has been a concern, I avoided turning on the heat or air conditioning. Plus, the weather was really nice so I never felt like I needed it. The hotel windows didn’t open. Otherwise, I would have aired out the room.
The least safe I felt the entire trip was on bathroom stops so I tried to pick the least crowded rest areas or gas stations. Again, the Turk Mountain hike didn’t feel safe due to the narrowness of the trail and the amount of people I passed. Otherwise, I felt completely safe on the trip. I kept a mask and hand sanitizer with me at all times as well.
The only thing that bothered me about these hotels was that the smoking area seemed to be right outside the front door so the smoke filled the lobby and stairs by the lobby entrance. It just felt gross to be smelling smoke or walking through smoke that someone without a mask was blowing into the air. (This was an issue in Wilkesboro but an even bigger issue a few weeks later when I had to stay in a hotel last minute while driving back to Texas for a work project. I had to outrun Hurricane Zeta and got stuck in Monroe, Louisiana for the night. I booked another Hampton Inn on my phone when I arrived but picked a terrible one. Over half the guests weren’t wearing masks and the hotel staff was only wearing them half of the time. This hotel was crowded and felt really unsafe. Again, people including the hotel staff were smoking right by the front entrance, which was just gross during a pandemic to have to walk through that smoke. When the hotel sent me a survey, I let them know all these details. )
Please note that COVID rates have doubled across the U.S. since I took this trip. I was planning to take a month-long hiking trip with a friend in the Southwest this winter. We had a very safe trip planned – we were both getting tested before/after, renting entire houses on Airbnb and literally avoiding all people by hiking early or cooking/ordering food to-go. Based on our planning, our biggest risk was gas stations and grocery stores. With the massive increase in rates, ICUs filling up across the country and seven of my family members testing positive with COVID this week (mostly mild cases), my friend and I are planning to cancel our trip.
For more photos of my trip, please check out my Instagram story highlight for my Fall Trip. Email me with any questions.
A Note on Travel Insurance
It’s more important that ever to have travel insurance when you travel. Companies like Safety Wing and World Nomads both cover COVID so please make sure you have proper coverage when you travel. Both companies also include travel in the U.S. usually as long it’s 100 miles from where you live. (Please note I earn a small commission if you book through these links, which helps cover operating costs for this blog.)
The Story Behind My Favorite Travel Photos
I’ve been pounded by waves of nostalgia over the last several months of sitting still. I’m filled with gratitude for all my adventures—both the good and not so good. I wanted to share a few of my favorite travel photographs from the last decade including the backstory and camera settings. One of the hardest parts of being a travel photographer is separating the quality of the moment from the quality of the image. Both of those align in these five images. The story behind these images follow one of two common themes—a quick reaction to a fleeting moment captured with a handful of frames or multiple visits to same spot. I also include some tips on travel photography and my current gear setup at the end.
Torres del Paine, Chile
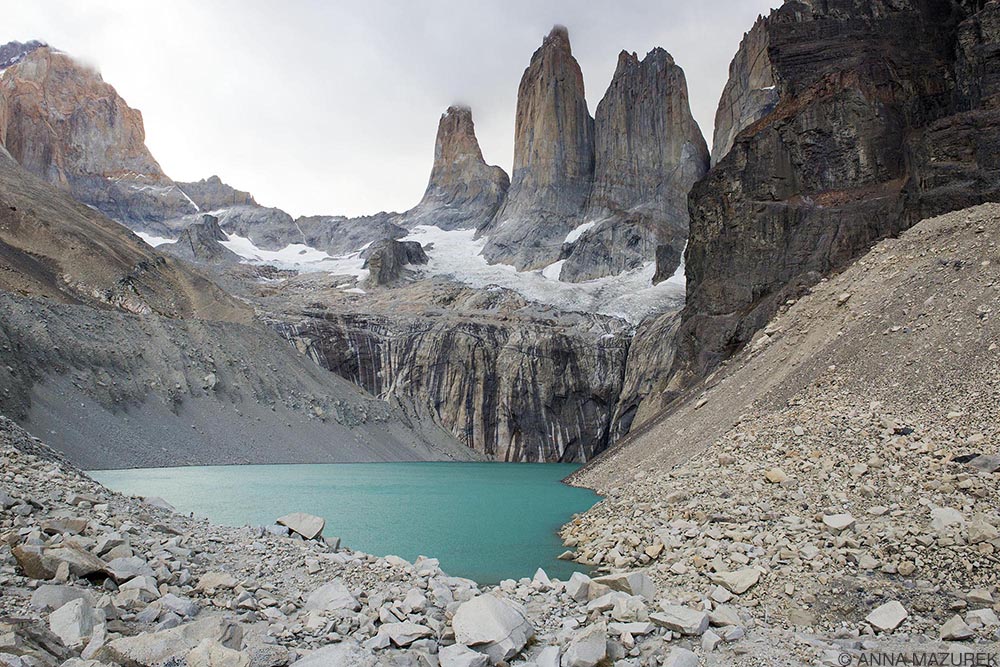
Exposure: f/9 at 1/160 second; ISO 800; 24-70mm lens (shot at 26mm)
The Story: During my seven-month South America trip in 2015, I hiked the roughly 40-mile W Trek at Torres del Paine National Park in the Patagonia region of Chile, which took five days. The jewel of the hike is this view of these three stone towers.
Pull up a chair and let me share the series of unfortunate events that preceded this photo. (It’s even funnier if you pretend that Morgan Freeman is narrating.)
This was my first multi-day hike and the first time I ever had to carry ALL of my supplies (food, tent, etc.). (Thankfully, the water from the streams was drinkable so I didn’t have to carry excess water!) The elevation range varied daily and ranged from 200 to 2,800 feet (the towers), which isn’t too bad. The W Trek is probably a moderate level of difficulty since it doesn’t require any technical climbing skills. The hardest part is the stamina to walk for five days carrying all of your stuff through four seasons of weather.
Since I wasn’t traveling with any proper hiking gear, I had to rent everything even my backpack in the base town of Puerto Natales. Since there were no hiking shoes to rent in my size, I decided to hike in my Nikes. (Cue Morgan Freeman: “This was a terrible decision.”) The minute I got to the trail, the strap on my rented backpack ripped on the top right shoulder – the padding was ripped and only the rope part was still attached to the backpack. I was already inside the park and three hours from the rental shop so there was no going back.
Naturally, I had overpacked. I wish I had weighed the pack, but it was probably close to 30 pounds, which is a lot for someone who weights 115. (Morgan Freeman is currently shaking his head in dismay.) Due to the broken strap and the weight of the pack, I could not get the backpack on unless I had someone help me or I found a high spot to put the pack on so I could easily slip it on while squatting or standing. I literally could not stand from a sitting position with this pack on my back due to weight nor could I pick it up with one arm to sling it on my back due to the broken strap.
The trail was rocky and covered in gravel in a many areas, and my Nikes didn’t have the best traction. I was constantly slipping or falling with this 30-pound pack on my back. (Morgan Freeman: “This happened A LOT. It was embarrassing.”)
Shortly after starting the trail, I noticed an Australian guy pick up a tree limb to use for a walking stick. Since I commented that it was a good idea, he found one for me. I quickly found another so I had a pair of natural walking sticks, which I named Gertruda and Rodolfo. They literally saved my knees and my life, which I’ll get to in a minute.
About two hours into the trek, I was struggling with the weight of my pack and the traction of my shoes. I started crying at some point due to the combined pain from the weight of my pack and the rope from the broken strap cutting into my right shoulder. (Morgan Freeman: “The lack of sleep from the staying up until 3 a.m. packing the night before was also to blame.”) When I reached the camp, I wanted to quit and even considered paying to have a donkey carry out my pack to the starting point. (Morgan Freeman: “This was not her proudest moment.”)
A good night’s sleep changed everything—I woke up and realized how silly it would be to quit now. I accepted the pain and focused on forward motion. I only allowed myself to stop every two hours. Every step was a step closer to my camp. Again, I only stopped in strategic places where I could easily slide my pack back on.
The wind is notorious for being so fierce in the park that it would rip a rain cover right off your pack so I wrapped my clothes in garbage bags based on advice from the rental shops. The gusts were so powerful at one curve that people were literally falling to the ground. I felt the wind try to lift my pack and push me toward a steep drop-off by the trail. I immediately dug my walking sticks into the ground and used the weight of my pack to throw myself into a rock wall on the opposite side of the trail to stabilize myself to avoid being thrown or knocked off balance near the precariously steep drop. Gertruda and Rodolfo saved me!
I camped at the base of the towers on the fourth night and hiked 45 minutes to the iconic viewpoint at sunset and again at sunrise the next morning—the most popular time to go. The trail started in the forest then led to open rocks. I lost the trail coming out of the forest at one point and ended up scrambling up the steep sandy side of a cliff because I saw foot prints and assumed it was the trail. (Cue Morgan Freeman: “It was not the trail.”) I backtracked and found the trail. Next thing I know, I’m scrambling and jumping across large rocks following ropes and arrow signs. I came around a curve and looked up. All of my exhaustion had melted away at the stunning sight.
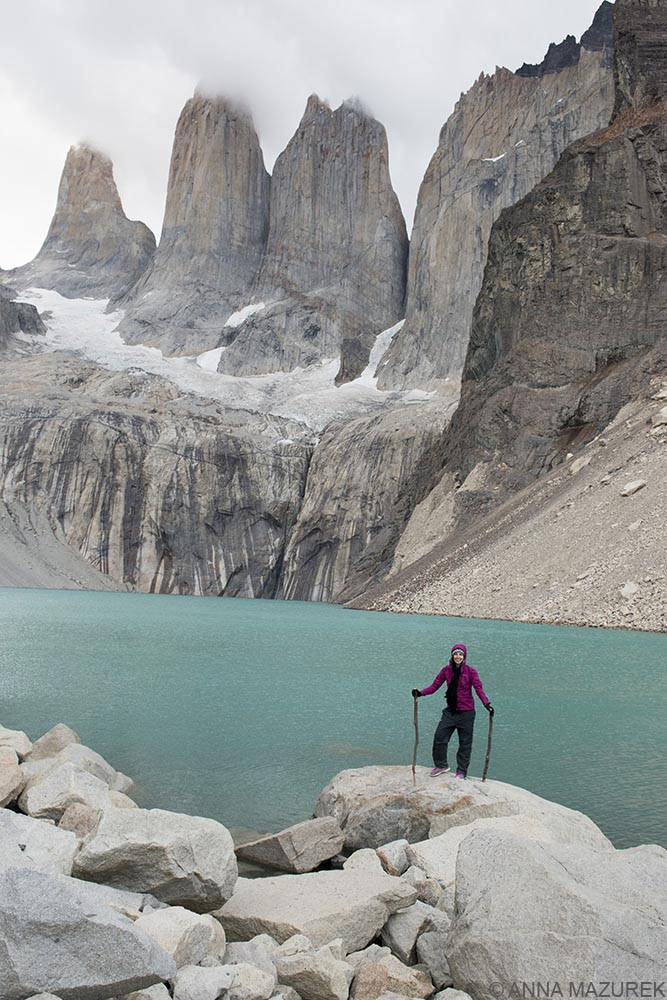
There were only a few other people so the place was fairly deserted at sunset. The light was perfect – diffused enough to eliminate any glare from the water or sky yet bright enough to showcase the three majestic stone towers and variety of colors in the rocks in the foreground. Many people want a blue sky behind the towers, which is rare since it’s often engulfed in clouds and fog as I learned when I went up for sunrise the next morning. Sunrise was freezing and the clouds never lifted enough for a clear shot. Of course, it started to snow. I was instantly grateful for the Antartica jacket a one-armed man I met at a hostel had given me when he heard I was doing the trek. (Morgan Freeman shaking his head again: “All she had besides that jacket was a $20 H&M hoodie and a raincoat.”)
After I shot this image, I ran down to the water to take more photos and had someone take one of me by the water with my lucky walking sticks. All of the pain was worth it for this moment.
Naivete is a wonderful teacher. This trek turned me into a true hiker. (Morgan Freeman: “She bought hiking boots, proper thermal layers and learned to pack lighter.”) Two and a half years later, I hiked Kilimanjaro.
(Morgan Freeman: The trail for this hike is in the shape of a W, and this spot is on the top of the far right side of the W. She started hiking on the other side of the trek (by Paine Grande) to finish the five-day hike here. This spot can be reached in roughly nine-hours hiking straight uphill on steep terrain from the trail entrance by Refugio Las Torres. If you saw how steep it was, then you’d start on the other side, too.)
I left Gertruda and Rodolfo, my trusty life-saving walking sticks, at the end of the trail for someone else to use.
Photo Notes: Ideally, I’d have shot this at a slightly smaller aperture like f/11 to get more depth of field. I was really trying to keep the ISO as low as possible.
India Train Station
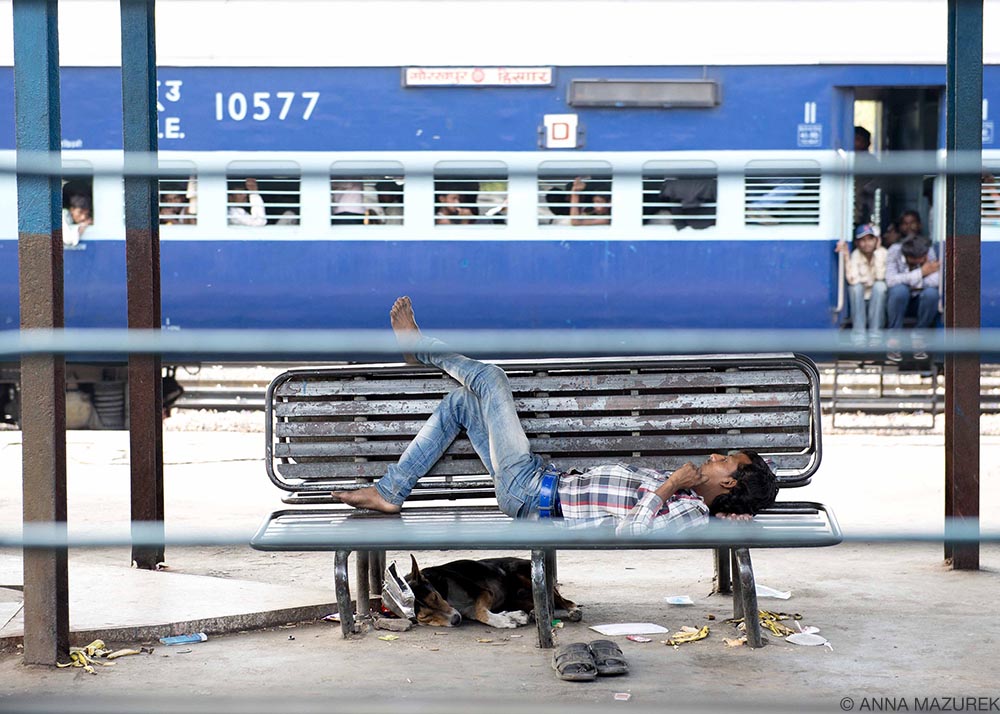
Exposure: f/4 at 1/250 at ISO 640; 24-70 mm lens (shot at 70mm)
The Story: I worked in India for five summers running photo trips for high school students. The staff would always fly in a week or two early for training and meetings before the students arrived. We would meet in steamy hot Delhi then travel north to the cooler temperatures of McLeod Ganj, which is located at the foothills of the Himalayas and is home to His Holiness the Dalai Lama. Normally, we rented a few jeeps with drivers for 10-12 hour journey. (Flying wasn’t an option since the only airline that flies there cancels flights too often to be reliable.) Our new director decided we should take the overnight train to the nearest station then take a taxi the remaining 90 kilometers. Since there were not enough air-conditioned sleeper car beds available, my boss booked us all in the open-air sleeper cars with three beds on each wall. (Cue Morgan Freeman: “It’s 100 degrees at midnight in Delhi in June. She was thrilled by this news.”)
I was suffering from my usual jet-lag induced headache and felt miserable. I used my silk sleeping bag liner as a makeshift bottom sheet on the slightly padded canvas slab and curled up with my inflatable airplane neck pillow. I was facing the wall and spooning my camera bag to keep it safe. I woke up at the destination station covered in dust (from the open window) that clung to our sweaty bodies like wet grass on bare feet. It rained on the return journey so we shivered all night.
When we got close to Delhi, my coworkers woke me and I started to gather my things. The train pulled up into a station as I was getting out of my bunk. I glanced out the window, which perfectly framed the most classic India photograph—a man sleeping on bench with a dog sleeping on the ground beneath him surrounded by trash and banana peels. The man’s shoes were neatly placed together beside the bench. Both the man and dog were unphased by the trains on either sides of them.
I instantly fumbled to grab my camera out my bag and adjust the exposure. I focused on composing the scene. I shot five frames before the train moved.
This photo embodies the charm and chaos of India. I’m always in awe and secretly jealous of how the locals can sleep soundly literally anywhere—on the tops of cars, concrete doorways or a grassy spot in the median of a large busy highway in the Texas-like heat.
Photo Notes: Ideally, I’d have shot this at a smaller aperture like f/7.1 or 8 but again, I only had a few minutes to shoot. Hindsight is 20/20.
Masaya Volcano, Nicaragua
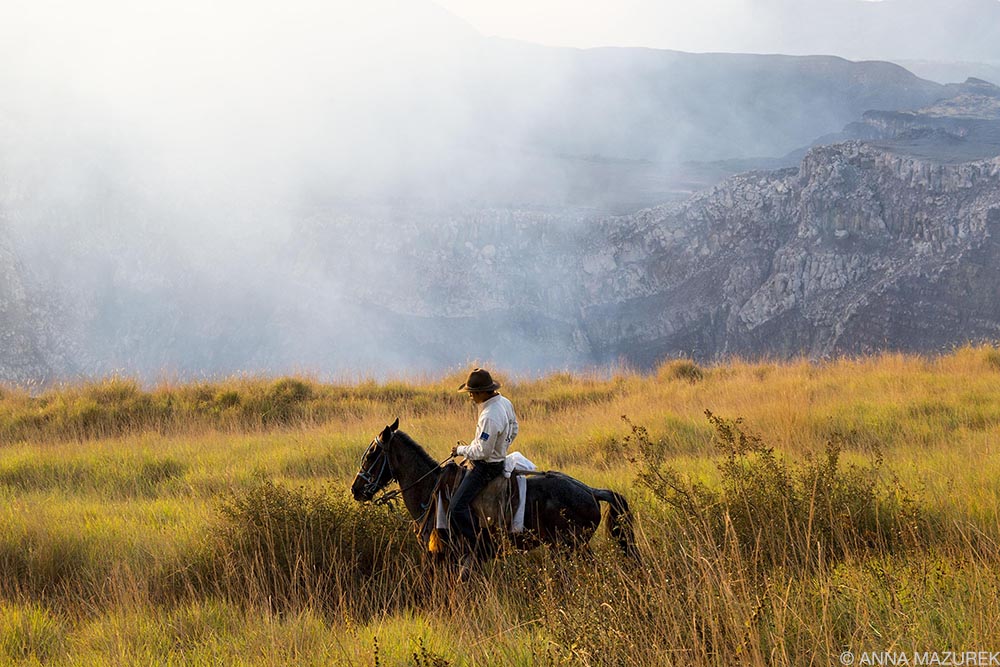
Exposure: f/6.3 at 1/400 at ISO 800; 24-70 mm lens (shot at 48mm)
The Story: I had a day to kill in Granada, Nicaragua and decided to do a day tour to the Masaya Volcano crater. (I’d spend too much time in Granada during this trip due to the logistics of meeting up with different friends. I’d exhausted most options and wanted to see most sites to make the most of my time.) I loathe day tours but didn’t have much choice due to the distance.
The smoking crater was gigantic and you could walk right up to what felt like the edge. (They would make you sign a release to do this in the U.S.!) It was a tricky place to shoot since the smoke looked like clouds or fog with no stunning foreground or background to add context to the location. I was a bit bummed by the lack of photo options.
After exploring some caves, we were walking back to the crater when I saw three men on horses riding along the edge of the crater. I literally ran down a set of stairs and across a road just in time to snap 12 frames – four of each of the three separate riders. This shot was the second rider. To me, the image was unscripted perfection due to the details of the scene— the sun highlighting the rider’s face, the bit of grass framing the top edges of his hat and the rocks peeking out from the smoke in the background on the right edge of the frame. It was my favorite shot from the entire trip to Nicaragua.
Photo Notes: Ideally, I’d have shot this at a slight smaller aperture but didn’t have a ton of time to adjust the settings when I saw the horses ride up. My ISO should have been 400, but I had just come out of a cave so my ISO was set for that.
Fushimi Inari Kyoto (September 2013)
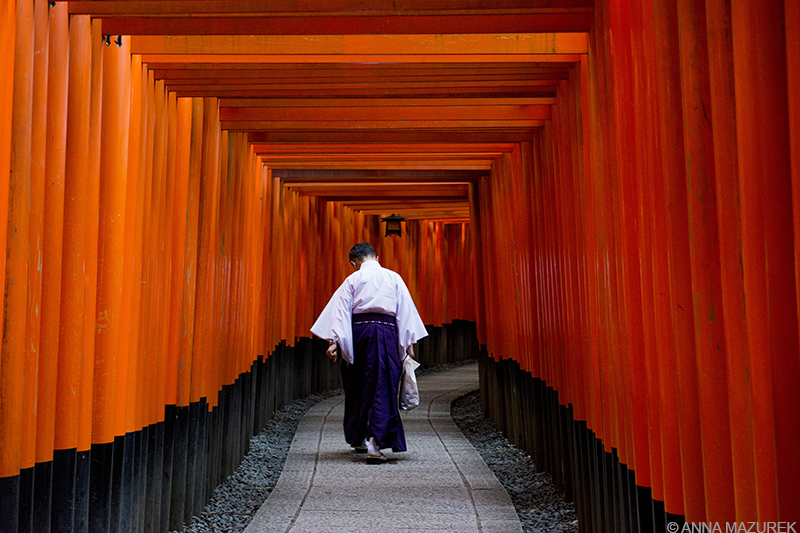
Exposure: f/6.3 at 1/60 at ISO 2500; 24-700mm lens (shot at 70mm)
The Story: One of my favorite days in Japan was my sunrise trip to the Fushimi Inari Shrine outside of Kyoto. Since it’s a popular tourist spot, I made sure to get the first train and had the place to myself for two and half glorious hours aside from a few locals. I was shooting my gnome when this man in traditional clothing rushed past me. I instantly put down the gnome and shot a few frames of him before he vanished. I could not have even posed an image this well. (For a detailed account of this trip and my 300 mosquito bites, check out this post!)
Photo Notes: Due the lack of light early in the morning and the shaded nature of the scene, I was trying my best to keep my ISO low. I was using my old D300 to shoot this, which isn’t the best camera when it comes to noise. I try to keep the shutter speed faster than 1/30 or 1/60 to avoid camera shake while I take the photo.
Easter Island, Chile (March 2018)
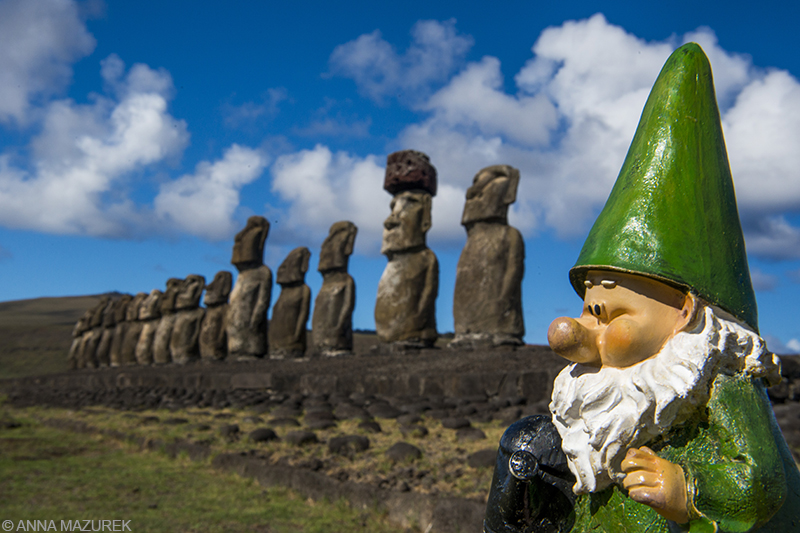
Exposure: f/22 at 1/125; ISO 400; 24-70 mm lens (shot at 36mm)
Gnome photos are complicated. While I’ve been photographing Alfred for over a decade across the world, the light has to be fairly even throughout the whole frame. It can’t be too bright or it will make his cheeks shiny, which he hates. Usually, sunrise, sunset or an overcast day is best.
In order for both Alfred and the background to be in focus, the image must be shot at a small aperture (f/16-22) for larger depth of field. This combined with the subdued lighting means I need a fairly high ISO at times. But, I can’t go too high or Alfred will look grainy.
I also have to time the shot and composition to avoid any distraction elements (i.e. people especially the ones wearing annoyingly bright colors or those who spend 45 minutes taking selfies).
The sun light only hits the faces of the statues at Ahu Tongaraki on Easter Island in the afternoon. The site also closes before sunset so I had no choice to but to shoot it in bright light. I went back three times and waited until most people had left to take the shot. I always take test shots with Alfred to get the overall background perfect. Then, I wait for the distracting elements to move. Once the background is clean, I shoot a few frames. It took a bit to get the perspective correct to line up Alfred with the statues. I was literally one of the last people leaving the site that day. This is one of my favorite gnome photos of all time. For the rest of Alfred’s travels, check out this gallery or read his biography here.
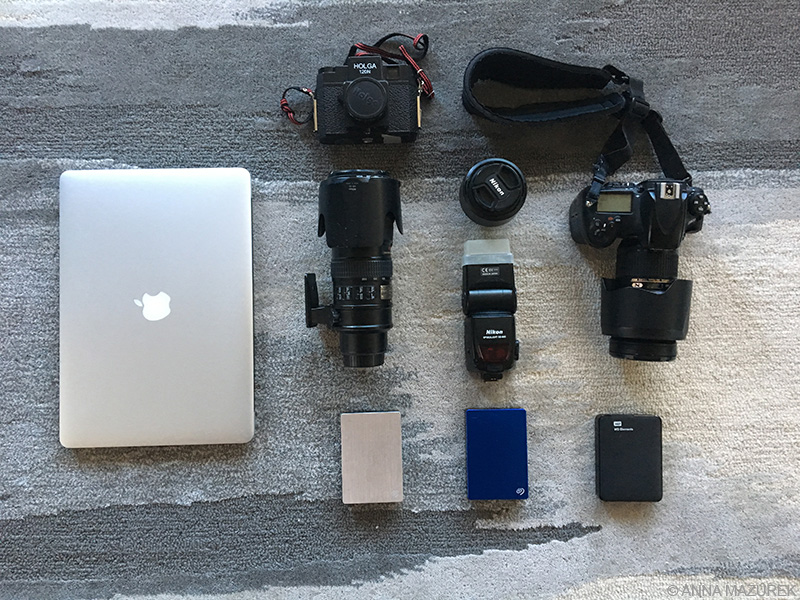
Let’s Talk Camera Gear
I want to break down the camera gear I use and take traveling and my thoughts on upgrading, which was my plan pre-COVID. And, I share my thoughts on switching to mirrorless.
I’ve always shot Nikon for digital images. (I shot film on a Minolta before I was forced to switch to digital in graduate school.) These images were all shot on either my old Nikon D300 or my current Nikon D800, a full-frame DSLR (36.3 megapixels). All of my lenses are Nikon f/2.8 including my 24-70mm, 70-200mm VR and 50 mm, which is actually a f/1.8. I also have a 24-105mm f/4 that I was forced to buy in November 2019 when the zoom on my 24-70mm jammed in Thailand. A friend was coming to visit so I bought a used Nikon 24-105mm f/4 for $600 from B&H for her to bring and sent her back with my 24-70mm (a $1,500 lens) to send to the Nikon repair place in Atlanta that I use. My goal was to sell it when I got back to America in late February but I’ve held off selling it until the economy improves. (And, I honestly like the zoom range so I don’t have to change lenses as much. But, it has a longer minimum focusing distance than my 24-70mm, which is super annoying.)
My D800 is old and I’ve been procrastinating getting a new camera body for years because I’ve been paralyzed by indecisiveness. Plus, the D800 works fine. I want a lighter-weight camera so I looked at mirrorless (Sony) but a full-frame body is only half a pound lighter. The lenses are the same weight as my current ones – you can’t make the glass lighter. I’m not a fan of the digital viewfinder on the mirrorless cameras I’ve used. It takes a while to focus, and I’ve missed shots. I also don’t like the short battery life and hate carrying around multiple batteries. (On my seven-day Kilimanjaro trek, I only needed one battery in my Nikon. Charging multiple batteries daily would be a nightmare for a lot of rural trips I take especially hikes with limited or no electricity.) Plus, if I buy Sony, I have to buy all their lenses then sell all my Nikon gear. I’m not traveling the world with two camera kits nor am I just going to leave $10K of gear in storage for most of the year. I did the math, and it would cost a good $8K to buy an equivalent Sony kit so I’d have to sell some of my current gear to justify the switch.
The other feature I want in a new camera body is better ISO range for low light. In February, I had decided to get the Nikon D850, which does better in low-light than my D800 and is compatible with all my Nikon lenses. (I rented a D850 last year and liked it.) I made this decision based on my photo work contracts for the year. Then, COVID happened, and I lost 80% of my work so I’ve held off on buying a new camera because I’m not sure what my work will look like on the other side of this. Once I get a better idea of the type of photo work I’ll be doing, then I’ll make a decision based on that. (I had been doing a lot of interior photography aside from travel so that was a big part of the consideration.) I’m planning to rent a Sony kit for a week this fall/winter to help with my decision. (I normally rent gear locally in Austin at Precision Camera or through LensRentals.com for big shoots like SXSW.)
For more photo tips, check out this post.
Got any photo questions?
Do you have any photography questions or photography topics you would like me to discuss in a future blog post? If so, then please drop me an email here!
Best of 2019
In December 2010, I was dreaming about traveling and working two jobs—waiting tables and folding clothes at the mall making roughly $20K/year. I was dreaming about the life I currently live a decade later—freelancing and basically traveling full-time. I’m typing this from Chiang Mai, Thailand, my home for the winter. (I’ll never understand people who like the cold.)
People often say I’m “lucky” to travel so much but I always disagree. My life has more to do with relentless persistence, hard work and timing. The last two years were even more proof of this because they were far from easy despite how it looks on Instagram.
While 2018 was a year of growth, chaos and food poisoning, 2019 was—thankfully—more stable.
The year didn’t look too promising when it started off in cold and wet Da Nang, Vietnam waiting for the remnants of a late-season typhoon from the Philippines to pass through. (Ironically, my trip to the Philippines was just canceled a few weeks ago due to another late-season typhoon.) When the rain cleared in Vietnam, life improved overall aside from some hilarious chaos in Bali a month later.
After Vietnam, I went back to Australia—my first trip back since I lived there in 2008-9. That trip was the catalyst for my current globetrotting life. Other highlights of the year included hiking in Utah, photographing whales in Southeast Alaska for most of the summer for work and eating my weight in egg tarts in Portugal. I also spent a month visiting my parents, building furniture with my dad and remodeling a bathroom at their house. Another huge life milestone was getting to interview one of my heroes—travel writer Pico Iyer—for a story I wrote for AFAR.
My first self-published book, Good With Money, has been out for exactly a year! I’m very humbled (and honestly, shocked) by all the amazing press that has come out recently featuring the book and myself as a travel expert including these stories in Forbes, The Washington Post and my interview on the Extra Pack of Peanuts podcast! I would like to sincerely thank you for the support! (I’d love any feedback on the book so please email me: Anna (at) TravelLikeAnna.com)
2018 drained me physically, mentally and financially. It was my first full year of freelancing full-time in a decade and required a relentless amount of work and persistence. Due to work projects falling through last minute, I only made $15K last year but I’m proud to say that I’ve tripled my income in 2019 and replenished the savings that I used last year! (I believe in full transparency, which is why I’m so honest about money.)
Enough about money—here’s a recap of my 2019 adventures and some of my favorite photos of the year!
Portugal
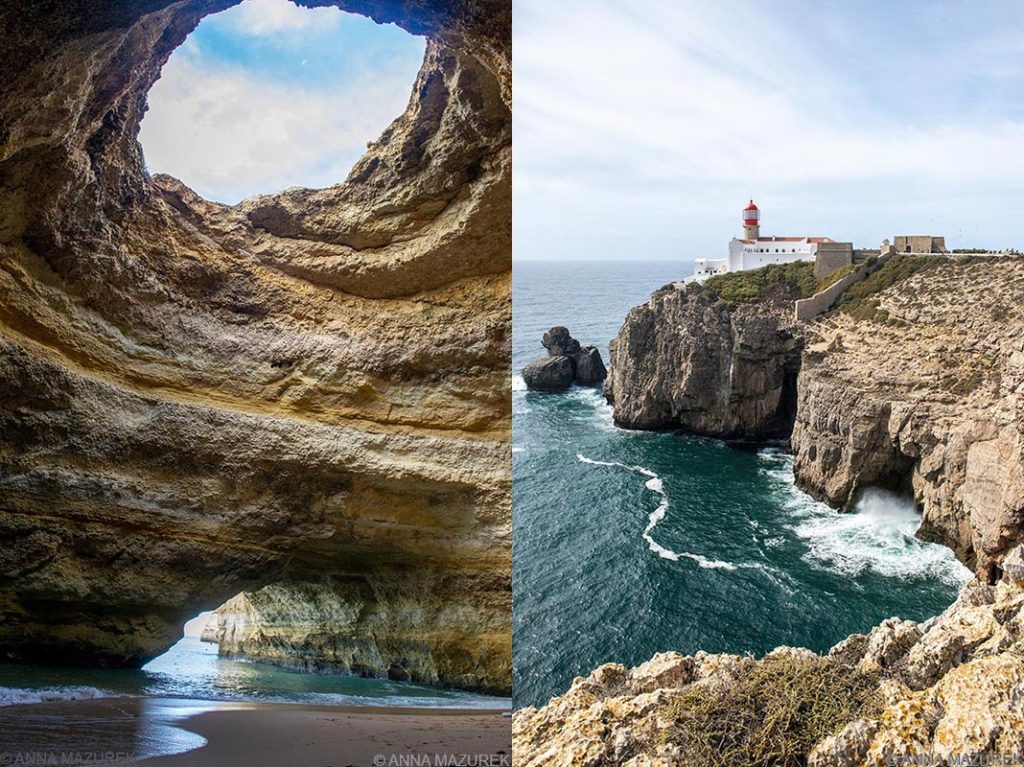
Portugal has been on my travel list for YEARS. I flat out turned down work projects just to be able to spend a month exploring the country this fall while the weather was nice. (Again, I do NOT do winter.) The goal was to visit friends in Lisbon that I’d met in Colombia the year before and travel with two of my best friends who flew out to meet me.
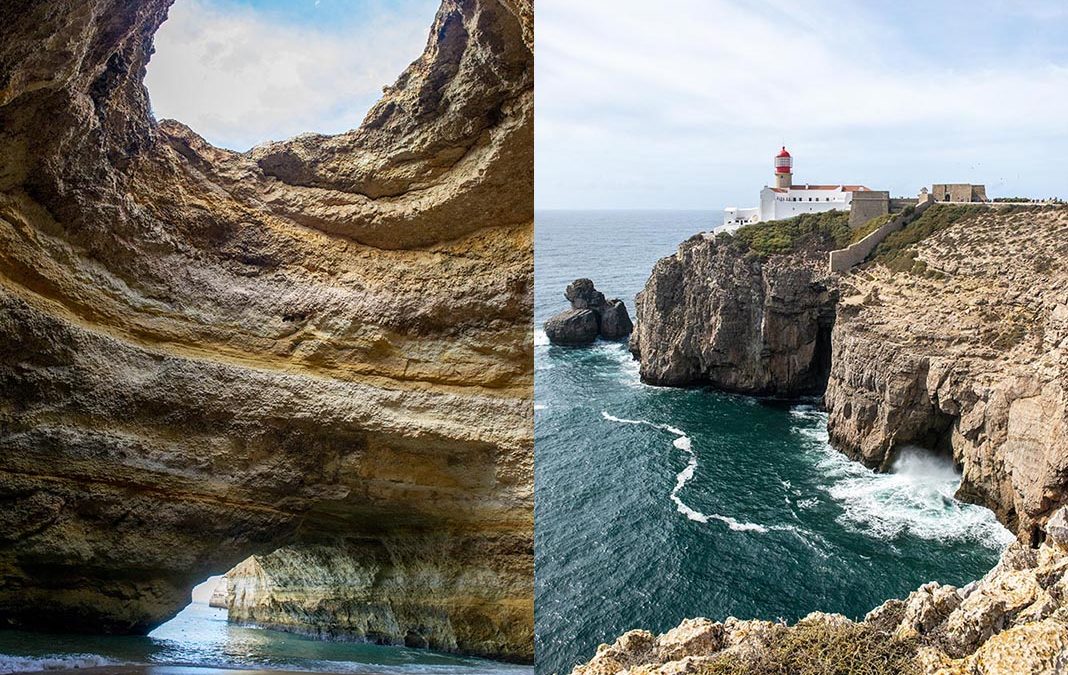
My two favorite memories from the trip were hiking a stunningly beautiful and uncrowded trail on Madeira island, an autonomous region that’s roughly a 90-minute flight from the mainland, with two of my best friends – Rolando and Becky. The majority of the island’s hiking trails follow levadas, a series of irrigation canals developed in the 16th century. The second was paddle boarding to the famous Benagil Cave (photographed above) in rough seas with Rolando who managed to stay dry (along with my camera) while I got toppled by waves multiple times! I literally fell in love with every aspect of Portugal – the egg tarts, the green wine, the castles and picturesque lighthouses on rugged cliffs. (Portugal Guide coming soon!)
Vietnam
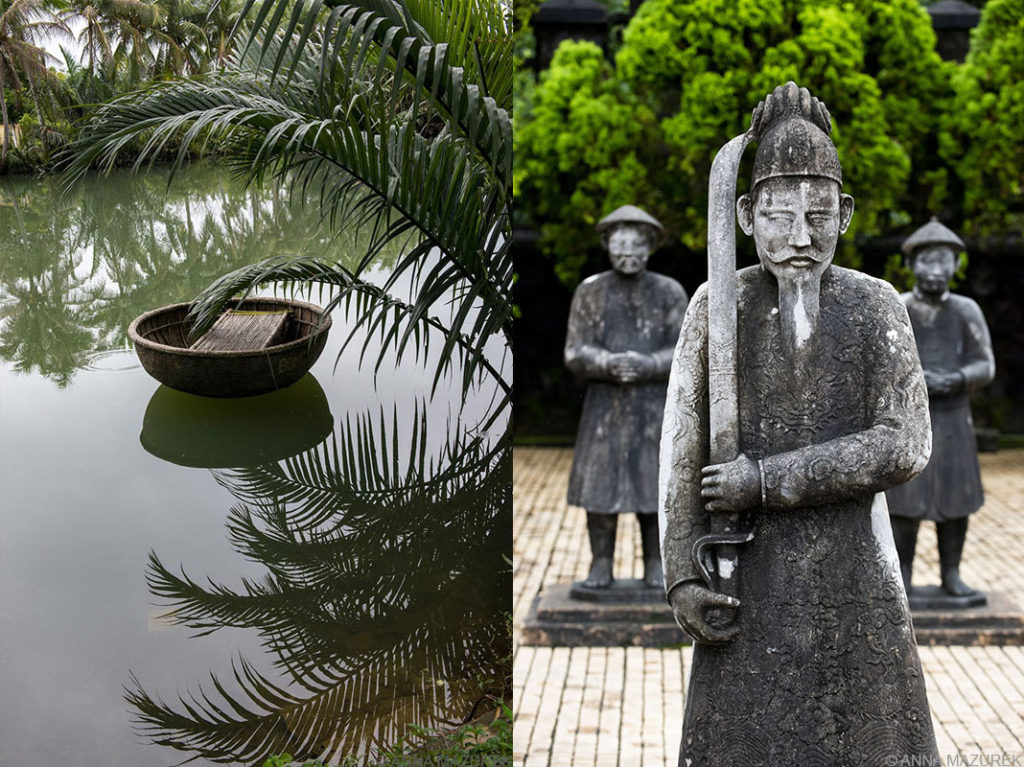
My goal in Vietnam was simple – to travel slowly from centrally-located Da Nang to the beaches in the south over the course of a month. (I’d already done the north on a prior trip.) I spent the first week freezing and waiting for the remnants of a late-season typhoon from the Philippines to pass by. (Ironically, my trip to the Philippines a few weeks ago was foiled by another unseasonably late typhoon. Thanks again to climate change.) One of the highlights was all the amazing people I met during the trip! Hoi An and Mui Ne were probably my places aside from the fantastic craft beer scene in Ho Chi Minh. For more from my trip, check out my photo guide to Vietnam and my guide how to get to the Cu Chi Tunnels by public bus.
Bali
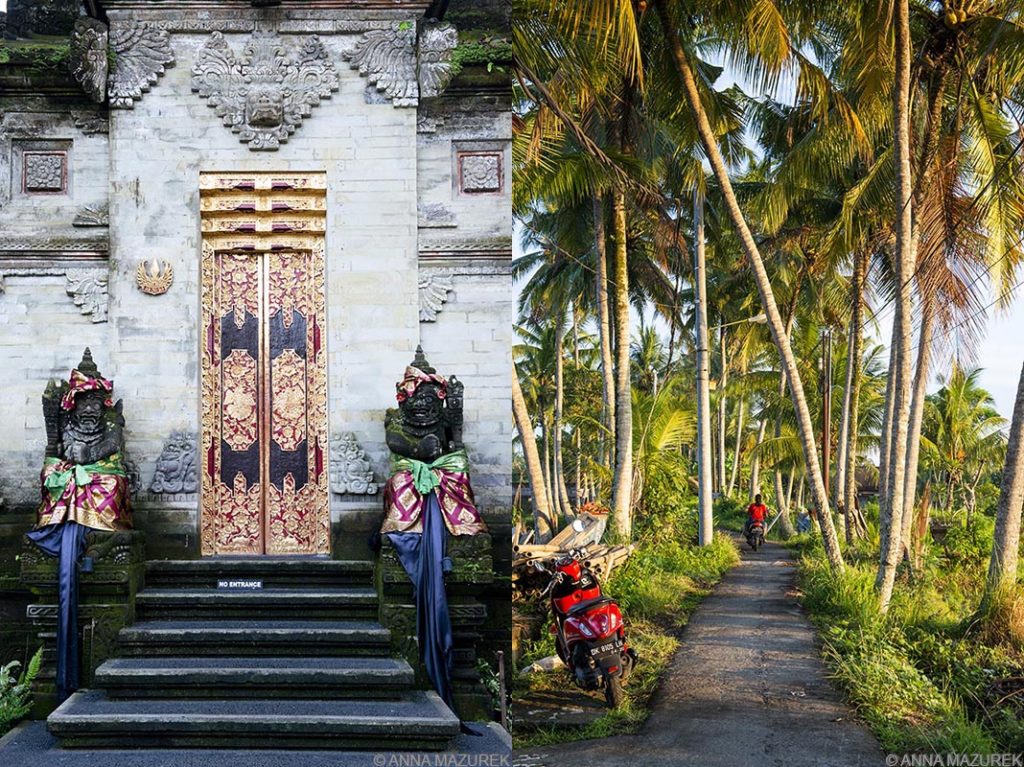
While in Bali, I had an epiphany: my life is a Wes Anderson movie filled with awkwardly hilarious moments in beautiful and perfectly symmetrical settings. My week in Bali was so insanely random that there’s no way you could make them up. First, there were bed bugs (my worst nightmare!), then I stepped in a knee-deep hole and almost broke my leg. For the full details, check out this post: Misadventures in Bali. Overall, Bali was stunning though – an interesting mix of Angkor-style temples and Hinduism that were visually different from the temples I remember from my summers working in India.
Alaska
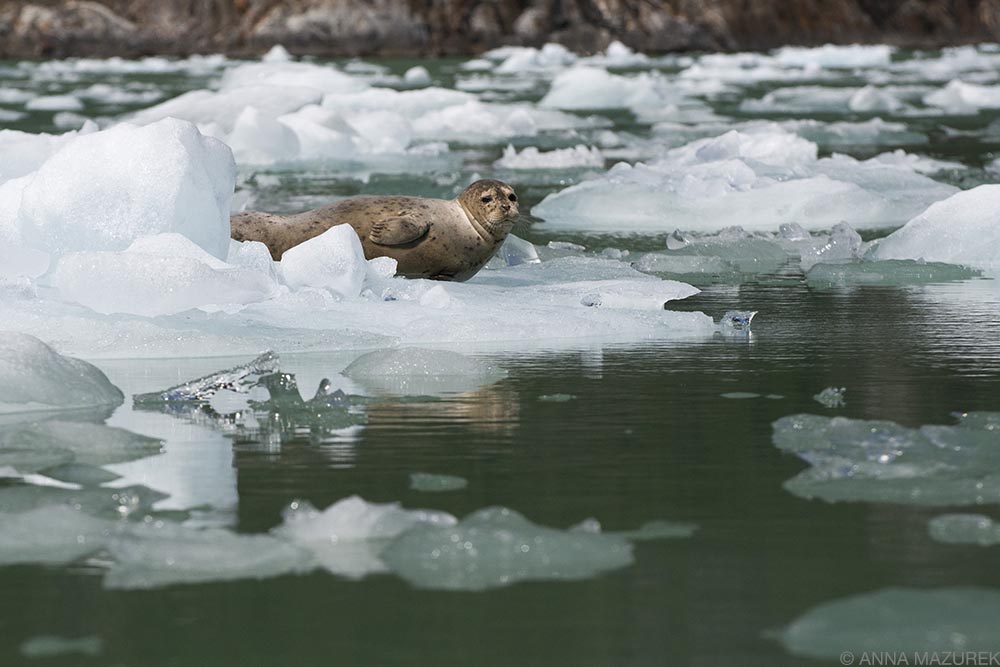
Alaska was haven for wildlife – orcas, humpbacks, sea otters and bears just to name a few. I spent roughly seven weeks in Southeast Alaska working as a photo instructor for Lindblad/National Geographic Expeditions. Tracy Arm, a fjord with twin glaciers, and the iceburg-filled LeConte Bay were my two favorite spots. It was really hard to narrow down my favorite photos for this post since I literally shot thousands of frames.
Alaska was hit by a heatwave this summer—a stark reminder of the terrible effect of climate change on the environment. The typical summer weather is usually rainy and in the 50s, but this summer, it was mostly sunny and in the 70-80s. All of this was bad news for Alaska’s temperate rainforests that rely on usually wet climate to thrive.
Olympic National Park
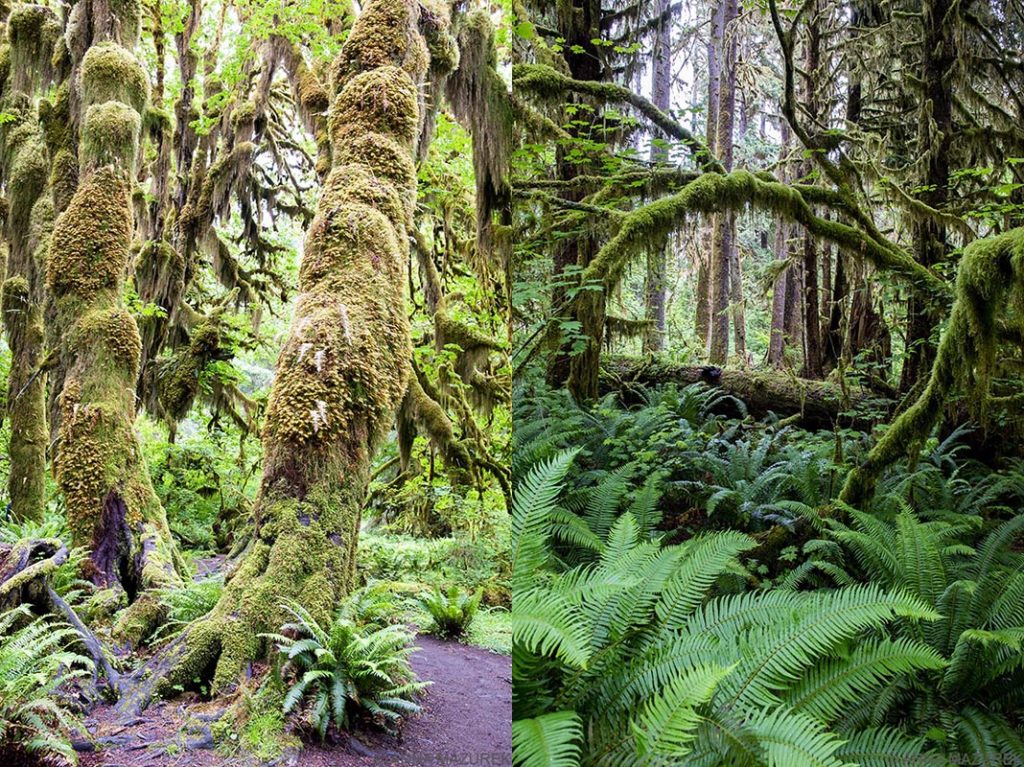
Since I had to connect in Seattle to get to Alaska, I decided to fly in a week early to visit friends and explore the greater Seattle area a bit more. I borrowed my friend Trevor’s car and got up a 5 a.m. to drive out to Olympic National Park for the day to explore the Hoh Rainforest, which is part of one of the largest temperate rainforests in the U.S. Every shade of green was on display – which I’m sure is what inspired the many shades of green in a deluxe set of crayons.
Chiang Mai & Lantern Festival
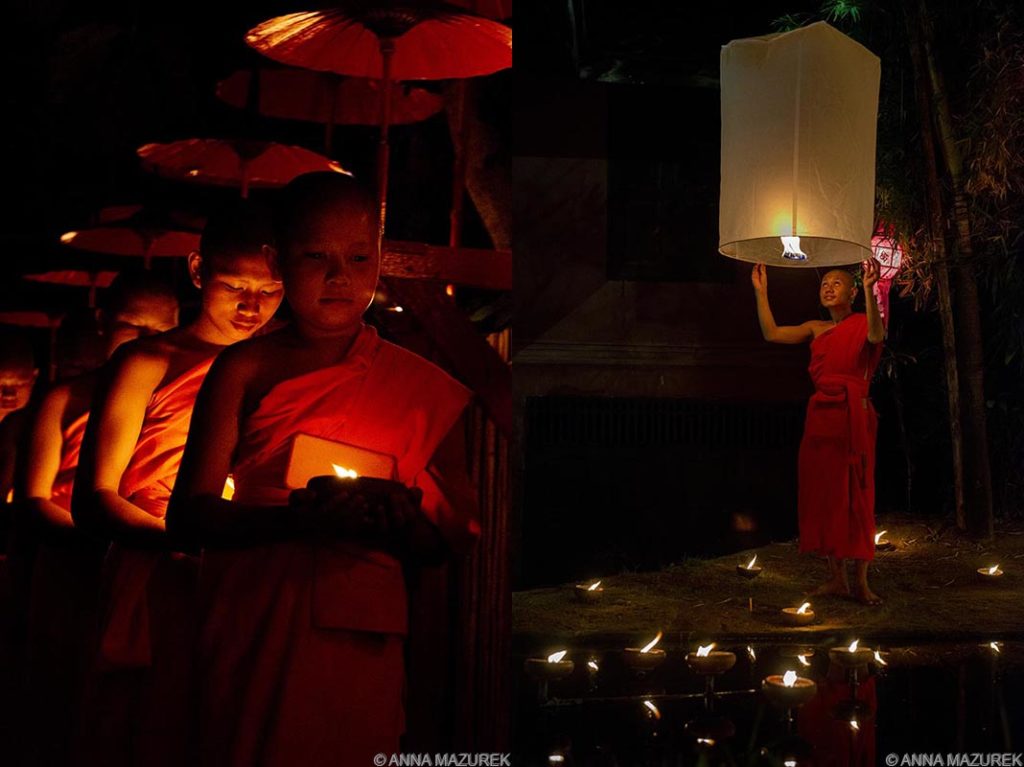
Winter is a choice. For the past two years, I’ve chosen wisely and rented an apartment in Chiang Mai, Thailand. Thailand feels like home to me now – I worked here running photo trips and even teaching English during 2009-2013. Last year, I missed the famous lantern festival – the Yee Peng Festival that’s held during the full moon of the twelfth lunar month every year (usually in November). This year I made it a point to be here for it! It was a little chaotic but totally worth it!
Utah Hiking Trip
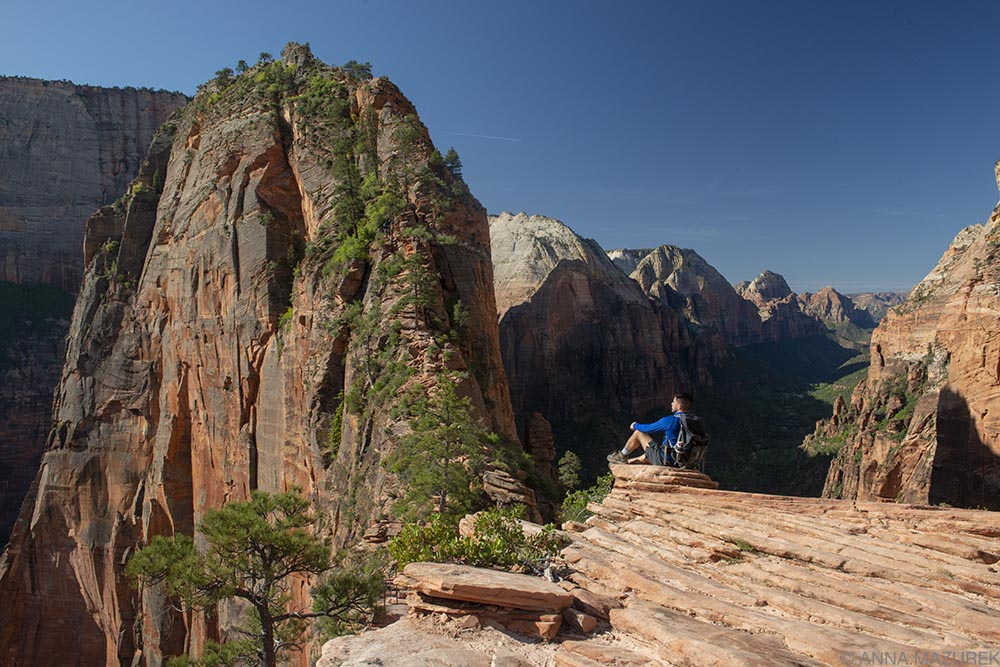
For the past three years, I’ve been taking annual hiking trips with a group of friends to the Southwestern U.S. Each year, we tackle a different place – last year was Havasu Falls and this year was Zion, Capital Reef and Bryce Canyon. Climate change foiled our plans to hike most of the trails in Zion that were closed due to landslides or flooding from snowmelt when we visited in May. (Snowfall the previous winter was absurdly higher than normal.) While we’ll have to go back to hike the trails we missed, we got to hike the most iconic trail of them all – Angel’s Landing where I shot this epic image of Rolando!
Tasmania
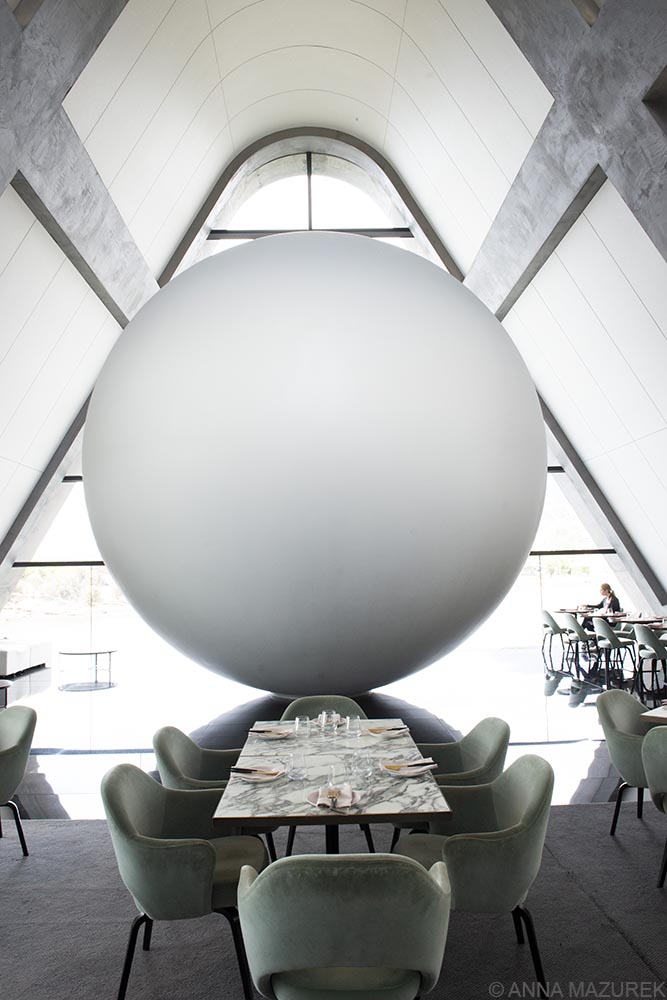
Even though I lived in Australia for a year, I still haven’t seen all of the country. This year, I went back for a nostalgic look at a beautiful place that was one of the hardest years of my life. (More on that in this post!) After visiting friends in Sydney and Melbourne, I hopped over to Tasmania for my first visit. I rented a car for a few days to explore – my first time driving on the other side of the road! One of the highlights was the art-centric MONA Museum – the largest privately-funded museum in the Southern Hemisphere. To be brutally honest, I normally skip museums except for the world-class ones like Mexico City’s National Museum of Anthropology or the Musée d’Orsay (my favorite) in Paris—because 95% of the time I’m disappointed and annoyed I wasted my money. MONA was different – it was quirky, amusing and entertaining. I literally ran back to my rental car to grab my camera just to shoot this installation in one of the cafes!
Cornwall, England
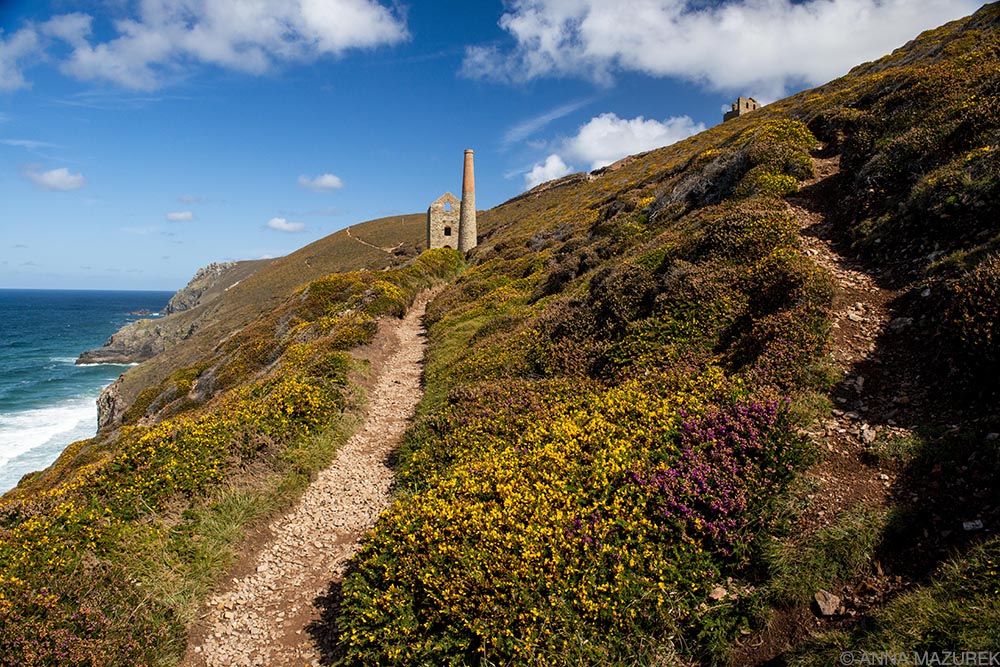
I decided to extend my two-hour layover in England to a week on my route to Portugal. Even though I was just there in 2018, I couldn’t resist another trip. After all, studying abroad in England during college was the start of my vagabond life! My former housemate, Rosey, invited me to Cornwall, the rugged Southwestern tip of the country. It was my first trip to Cornwall, which has quickly become one of my favorite parts of England.
Texas
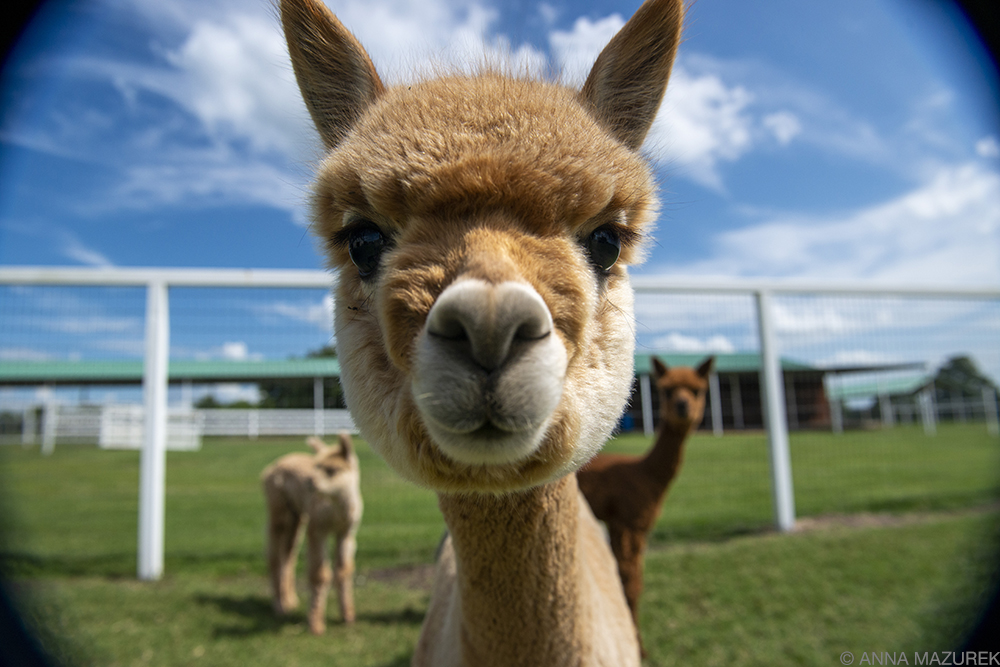
I spent about three months of the year in Texas for work projects. No matter if I’m in a new place or somewhere I’ve lived for years, I always try to explore. I explored some new towns – Llano, Brenham and Elgin to name a few— and some fantastic barbecue joints. One of the highlights was Snow’s BBQ, which made Texas Monthly’s list of best barbecue joints in the state and their 80-year-old pit master named Tootsie. And, of course, my visit to Peeka Ranch, an alpaca farm in Brenham, Texas. If I ever quit traveling, I’m starting my own alpaca farm.
The Adventures of Alfred the Gnome
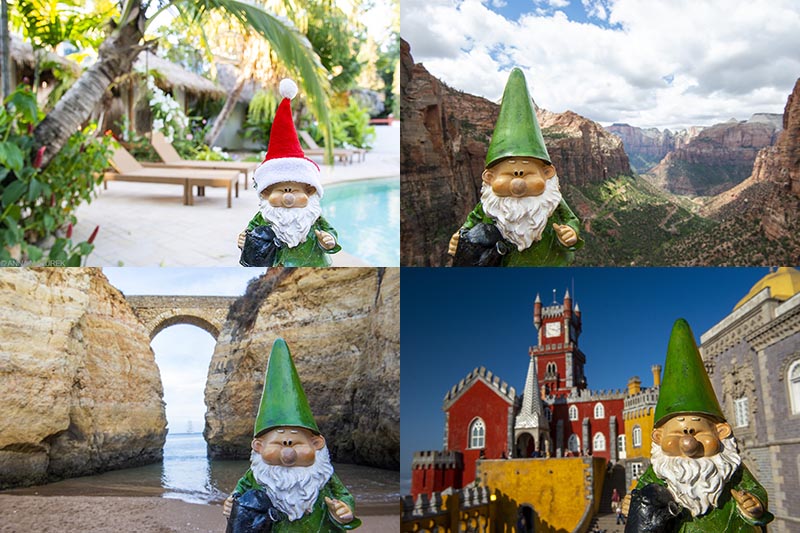
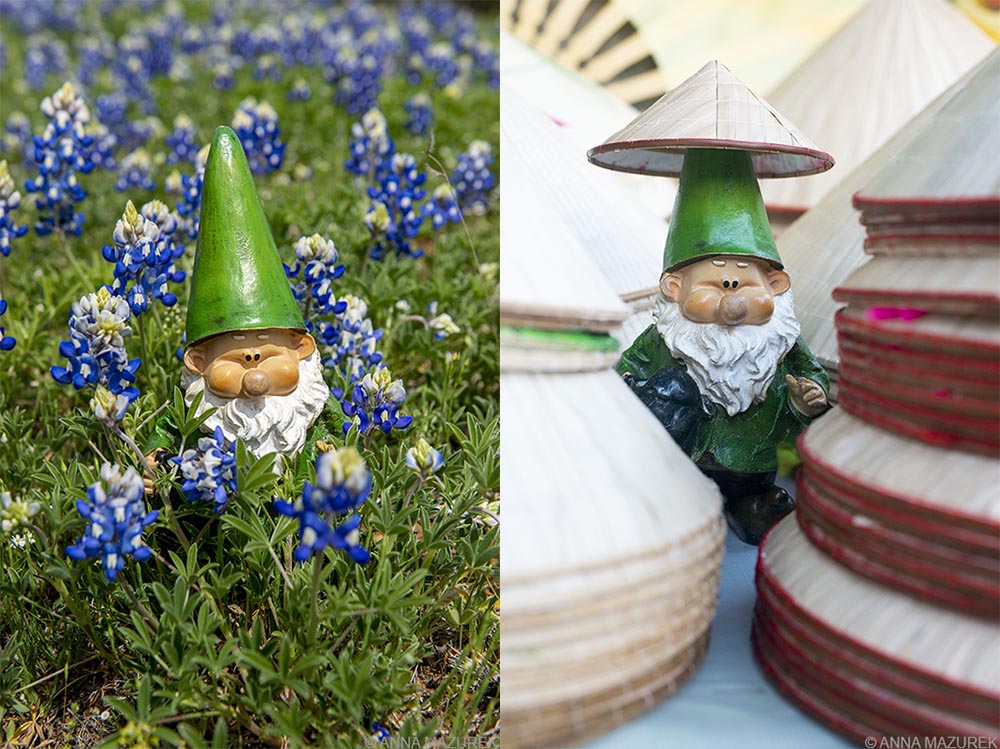
If you’ve been following me for a while, then you know about Alfred, my globetrotting gnome. He’s been to six continents with me in the past 11 years. Here’s a recap of Alfred, the globe-trotting gnomes, best shots of 2019! (You can see all of his adventures here!)
Can I pick your brain?
What type of content do you want to see more of on the blog? I’ve got a lot of great stuff planned for 2020 but want to hear from YOU. Tell me what you like about the blog and how it can be better! I appreciate your support and wish you a wonderful 2020!
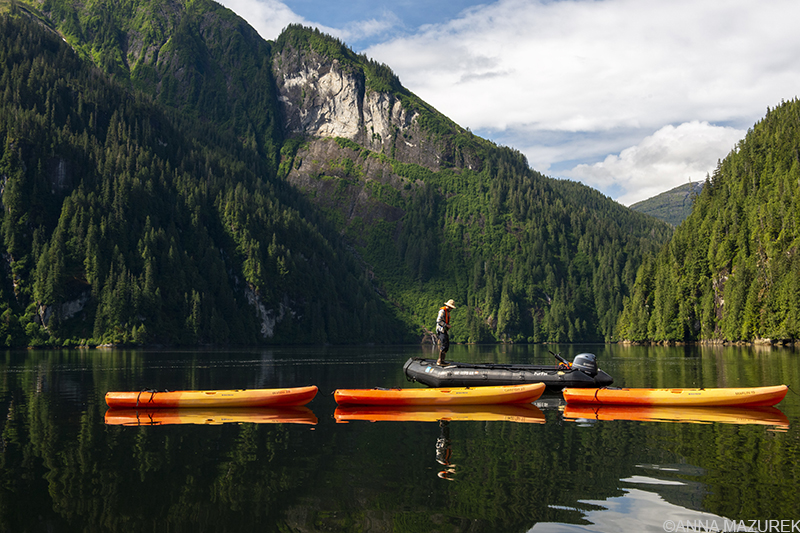
8 Ways to Make Money While Traveling
Whether you’re looking to move abroad completely or go for a short stint, there are multiple ways to make money while traveling.
Here’s eight of awesome ways to make money while traveling – I’ve done six of the ones listed below! (This is an excerpt from my book, Good With Money. )
1. Work Remotely at Your Current Job
This is the easiest option: keep your current job and work remotely! Give it some thought, make a list of concerns and find solutions to each. Approach your boss and discuss options. Start with smaller trips – a few weeks. Then, offer to come back a few times a year if needed for big events and meetings. Consider joining a program like Remote Year (remoteyear.com) and Wifi Tribe (wifitribe.co) that brings together professionals who work remotely into a community that travels together. These aren’t cheap but have big perks. (To be honest, they aren’t in my price range but might be in yours!)
I currently teach online for Texas State University, where I used to teach on campus. I pitched and built my own course called Freelancing for Media Professionals, which has been one of the most rewarding courses I’ve taught because of how much I care about the subject matter and making sure the students are prepared for life after graduation! This course is a lot of work but the results are worth it!
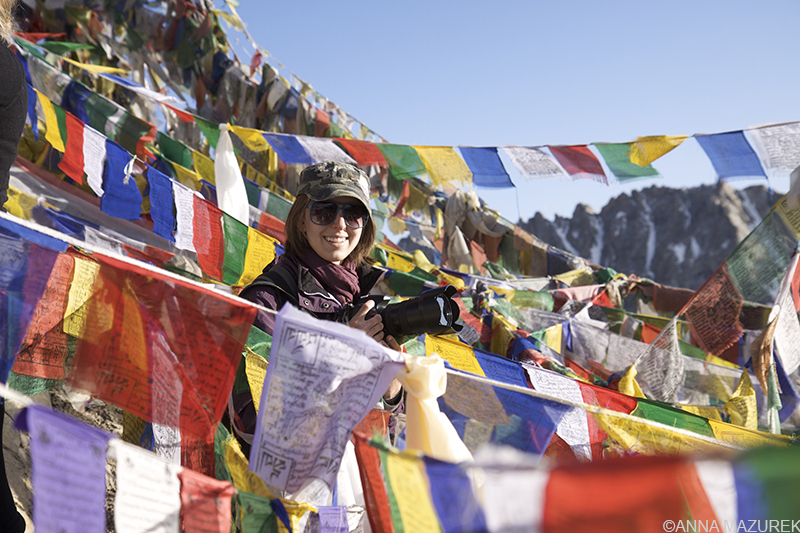
2. Be a Tour Guide
I ran photo trips for high school students in Asia for five summers, which was one of the most amazing jobs I’ve ever had. I ran a similar trips in Yellowstone National Park and Prague over the past two summers for National Geographic Student Expeditions. I love teaching people about traveling and photography.
If you are interested in similar positions, research companies that offer trips that cater to your area of interest or expertise: yoga, hiking, marine biology, etc. If you relocate to another place, you can even start running your own specialty tours on Airbnb Experiences. (My friends just did a coffee tour in Buenos Aires last week!)
These types of jobs usually cover all of your travel expenses, which significantly decreases your cost of living since food and accommodation are provided. This is part of how I traveled for so long on such a small budget.
3. Apply for a Working Holiday Visa
If you are under 30, Working Holiday visas are a great way to live and work abroad! I lived in Australia for almost a year on a Working Holiday Visa, which I talk about here. These types of visas allow 18- to 30-year-olds to work while they travel. I worked a few random bar jobs and also photographed bands for Rolling Stone magazine. Pretty random, I know, but the options are endless.
Australia and New Zealand offer one-year visas for Americans and many other nationalities aged 18-30, which allow you to work anywhere. They cost roughly $320 and $165 respectively for the visas depending on exchange rate when you book.
For students or recent graduates, there are similar visa programs in South Korea ($45USD fee), Canada ($200 USD), Singapore ($150 USD fee) and Ireland ($300 USD fee). You must do these programs within 12 months of graduating. The website GoOverseas.com has a great guide for Working Holiday programs for Americans.Check out my Working Abroad post for more details!

4. Teach English
Teaching English is a great way to live abroad and fund your travels. I taught English in Thailand briefly and seriously considered similar opportunities in Korea and Japan. A Bachelor’s degree is required or preferred by many programs. Most programs prefer that you don’t speak the native language. A TEFL (Teaching English as a Foreign Language) or TESOL (Teaching English as a Second Language) certificate is not required for the programs listed below but can increase your salary. (FYI: I don’t have either certification. Private schools usually require it.) The highest paid programs are in Japan and Korea. Visas are almost always provided by employers.
The most established and highest-paid programs provide the most training. Otherwise, be prepared to improvise. Be aware that many programs do not follow the traditional American or British school calendars for holidays (i.e., no Christmas break). For more information, check out my Working Abroad and my interview with an English teacher in Korea.
5. Travel Nursing & Healthcare Providers
If you are a nurse, doctor or another type of medical professional, you can work across the U.S. and abroad in a variety of short-term positions that range from weeks to years depending on the location. The more remote the location, the higher the pay (specialty units also usually command higher rates, e.g., ICUs, Pediatric ICU, etc.). For example, positions in the Middle East can pay two or three times normal salaries and are often tax free.
For U.S.-based positions, the real money is in the housing and food stipends. Both are tax free as long as you are a certain distance from your actual “home.” The travel nurses that I’ve met recommend finding your own housing and taking advantage of both stipends instead of using the housing provided by the travel agency. This ties in with making the most of your work benefits, which I also discuss in my book. Advanced planning is a must for travel nursing since paperwork can take a while. For more information, check out nursing blogs or seek out colleagues with experience. (I’ll be doing an interview with a travel nurse in the Middle East in my next post!)
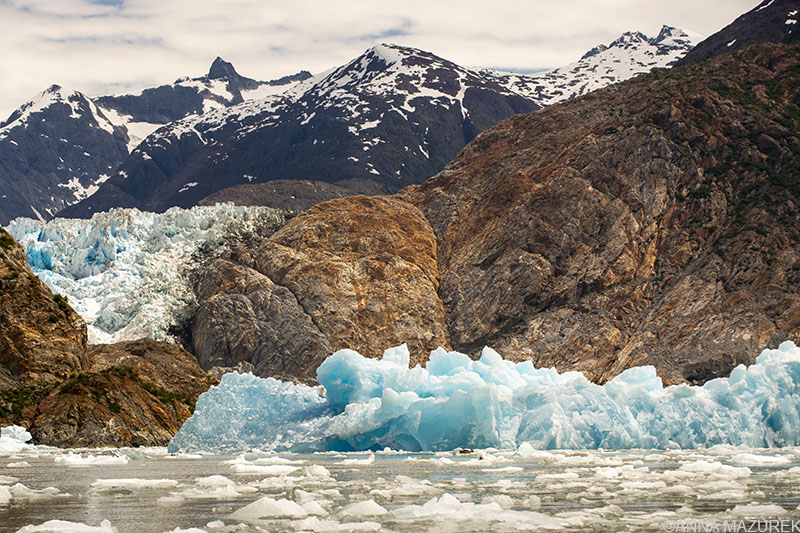
6. Work on Cruise Ships
I have several friends who work as photography instructors on cruise ships. It’s a great way for them to travel for free and still be paid. Even if you aren’t a photographer, you can find a job on a ship that matches your skill set. Even my doctor once confided in me that she regrets not taking a job as doctor on a cruise ship! Check out AllCruiseJobs.com for postings or apply with individual companies. I recently started working as a photo instructor for Lindblad/National Geographic Expeditions this year! The best thing is that you don’t have very few expenses while you are working since your food is provided!
7. Rent Out Your House OR House/Pet Sit
If you plan on being on the road for a while, rent out your place to cover travel costs and increase your savings. (I don’t believe in paying rent for a place I’m not living in!) Get a friend or family member to manage it while you are away. It’s easier than you think! Sites like HomeAway or Airbnb are great options. I’ve also met people who manage investment properties for a living but spent most of the year abroad since they only need internet access to work!
Another great option is to house and pet sit. While some of these opportunities pay, others simply offer free accommodation. There are several websites that match homeowners with sitters. Most charge an annual fee to access the site: TrustedHousesitters.com and MindMyHouse.com.
8. Work Exchange Programs
Work Exchange programs are a great way to volunteer your time in exchange for room and board. Many companies link hosts with volunteers. The time frame can range from days to months. There is no age requirement, and it’s also possible to volunteer as a family with children. I’ve met many people during my travels who have used the programs below to either fund their travels or subsidize the cost.
- WorkAway offers a variety of options including positions in schools, cafes, hostels and farms. Membership costs $38 USD per year. (I stayed at many amazing hostels run by WorkAway staff in Argentina!) (workaway.info)
- HelpXis an alternative to WorkAway that provides positions at hostels, ranches, and many other options. It’s free to sign up but costs 20 Euros for the two-year premier membership. (helpx.net)
Why isn’t photographer or travel writer listed?
While a good chunk of my income comes from both photography and travel writing, I don’t see these as a short-term way to produce income since it’s a time-consuming process. I spent YEARS making contacts at the publications I work for regularly. It requires relentless self-promotion and a lot of hard work. First, you must research publications and find the ones that are the right fit for you. Then, contact them to see how they use photographers and writers. Then, you submit pitches accordingly. Very few publications nowadays will fly you across the world and cover your expenses. Those days are gone. After a pitch is submitted, it can take months for publication and payment. If this interests you, start reaching out to publications months before your trip. Be sure to ask their rates. It’s not worth anyone’s time to write a 600-word story for $50!
Now, I’ve given you a huge number of options, so I fully expect you all to go out and start exploring the world! You no longer have any excuses!
For my full list of 22 Ways to Make Money While Traveling and an in-depth guide to teaching English, check out my book, Good With Money: A Guide to Prioritizing Spending, Maximizing Savings, and Traveling More, which is available on Amazon. For more about Working Abroad, check out this blog post!
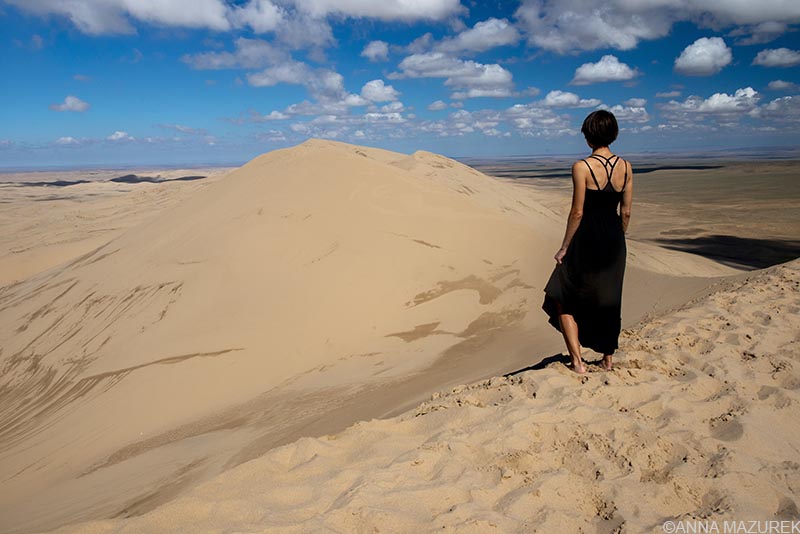
A Photo Guide to Mongolia
I’m THAT friend. The one that texts you on a random Thursday in April with a travel proposition you can’t turn down.
“How do you feel about a trip to Mongolia in August?”
My text to my friend Nick was prompted by a note I’d found in my phone from 2014—a bucket list. Riding a camel in the Gobi desert was number six on the list. Mongolia has been in the back of my head for ages. Like Kilimanjaro, I tried unsuccessfully to get hired to run photo trips in Mongolia so I could go for free. There was always some excuse not to go, which rotated between the distance, time and money. When I went freelance full-time, Mongolia moved to the top of my list because I finally had the time.
Nick lived in Japan so it wasn’t too far him. We had traveled to Burma together five years prior so I knew he was up for the adventure in a remote corner of the world. Plus, he is also a photographer and loves to eat as much as I do. (Plus, he always packs the BEST snacks!) He agreed instantly and we set off to plan an epic adventure that was my highlight of 2018. Here is a breakdown of our trip and where to go in Mongolia.
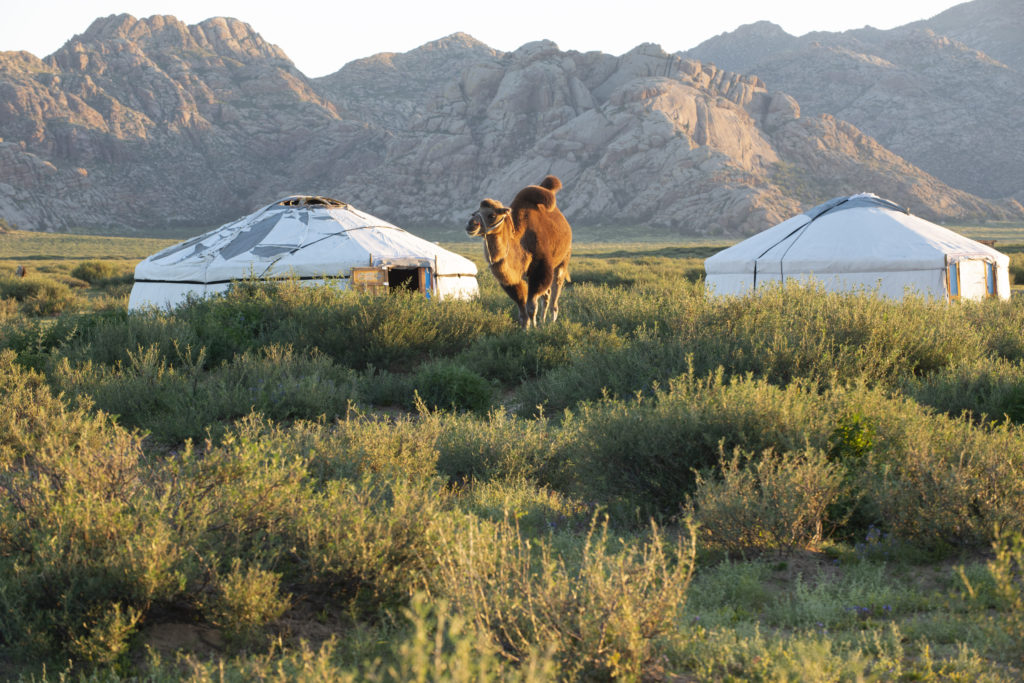
Everything You Need to Know About Central Mongolia & the Gobi Desert
In this post, I include all of the logistics, costs and details about Mongolia. I’ve also included a breakdown of our trip by day with observations about the route and life on the road. (Scroll down to the bottom for the packing list!)
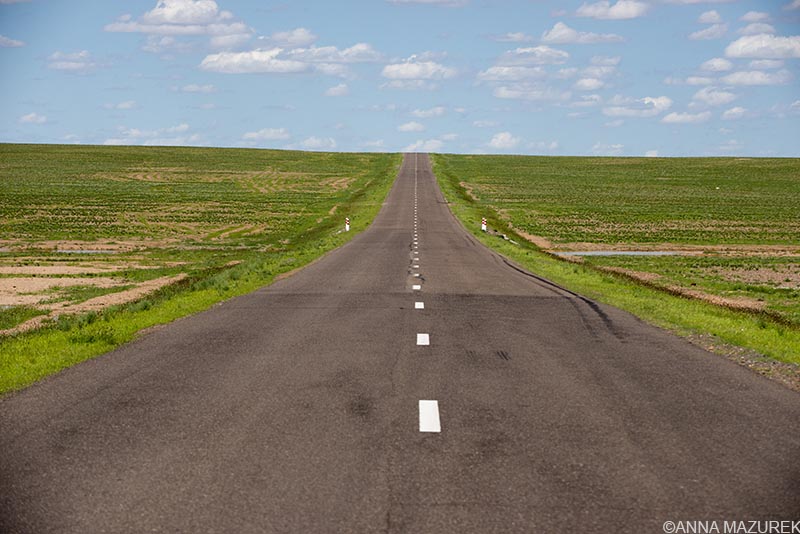
Do you have to take a guided tour in Mongolia?
The only way to do Mongolia is to book a tour. (And, I HATE tours, but there’s no way to drive yourself because there’s only a few main paved roads. Eighty percent of our trip was driving off-road through random fields with no signage.) We did our tour through the Vast Mongolia Guest House, which you can find on Booking.com, and loved it. A friend recommended a guide who organized the tour for us and found other people to join the trip to cut down the costs, which is a common practice. We ended up with five people on our trip including myself and Nick – Jorge, a Spanish chemist; Lisa, a British archeologist and Peter, a Canadian travel nurse based in Doha, Qatar.
Mongolia is so large that you can’t do the entire country in one trip unless you have a few months to spare. We opted for the 12-day Gobi Desert and Central Mongolia tour since Nick had limited vacation days. And, I had to be back in Texas for a big freelance project.
Food was included in the trip. Our guide and driver cooked really great meals every day!
Accommodation & Toilets
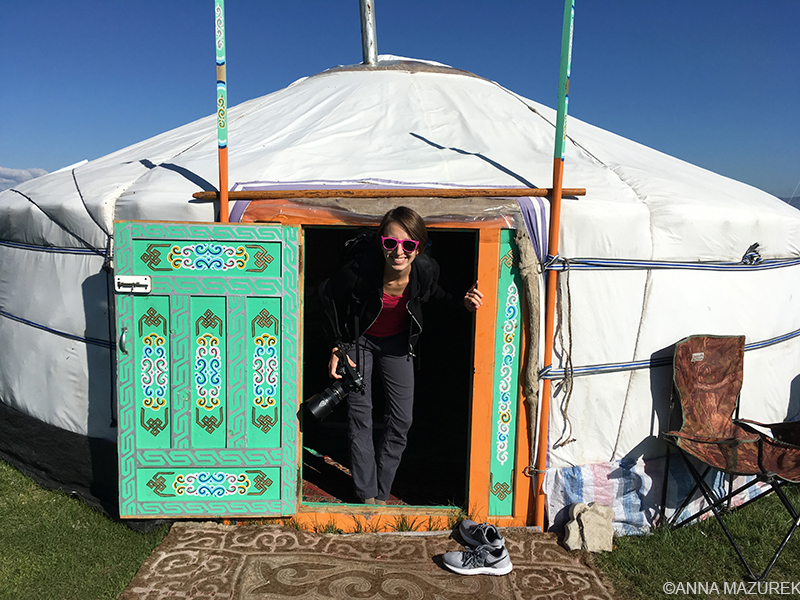
We stayed in ger (large round tents) camps every night except in Ulaanbaatar when we were in a guesthouse. A few of the camps were homestays where there was a family living in the camp with animals. We had individual single beds each night except for one night when we slept in sleeping bags on the floor at a homestay. Other camps were more geared to tourists so they didn’t have livestock nearby. Only three camps had showers for the entire 12-day trip. Bathrooms were always pit toilets or outhouses even when we stopped in cities. There was no running water outside of Ulaanbaatar.
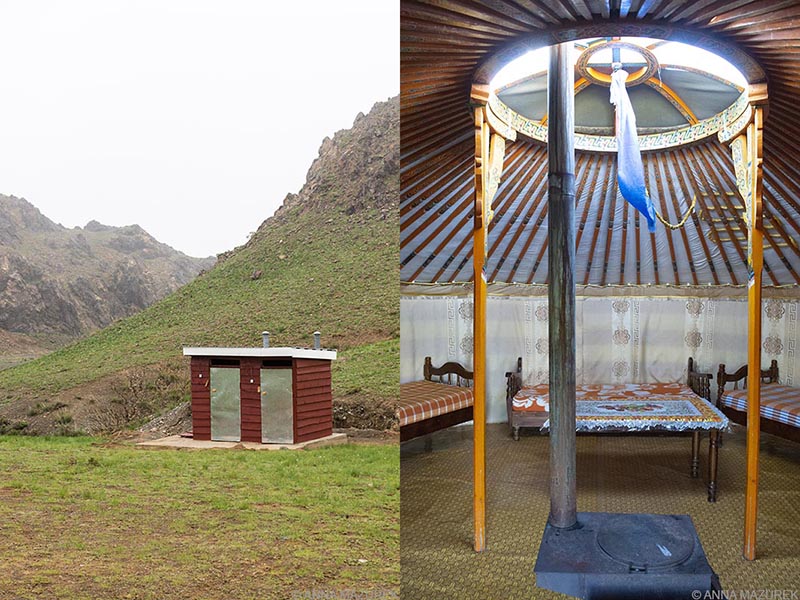
Most of the gers had wood stoves with vents to keep us warm at night. There was only one night was I was really cold. Most have power for a few hours each night to charge your devices. We could also charge our phones in the van.
Day 1: Chingis Khaan Horse statue & Terelj National Park
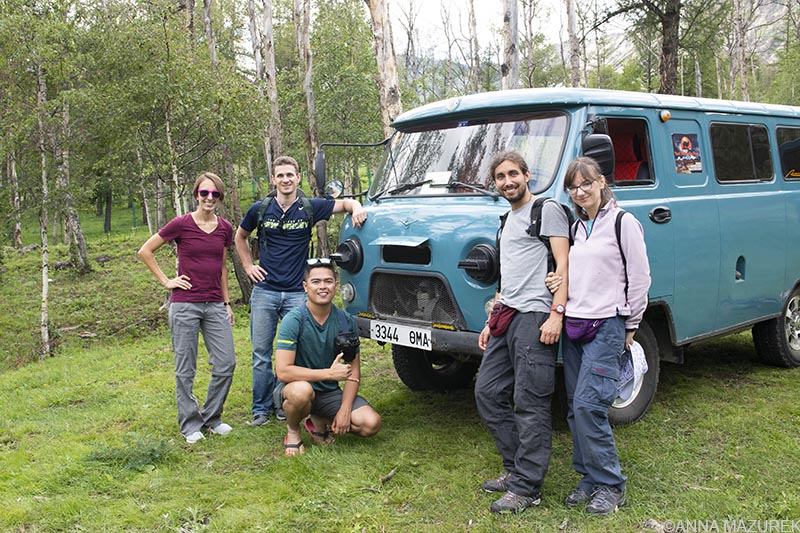
The minute I saw Boris, it was love at first sight. Boris was our home for the next 12 days—a dark blue teal Russian van with pink interior. He was always the coolest van in the parking lot. (FYI: We named him Boris ourselves. He clearly looks like a Boris.)
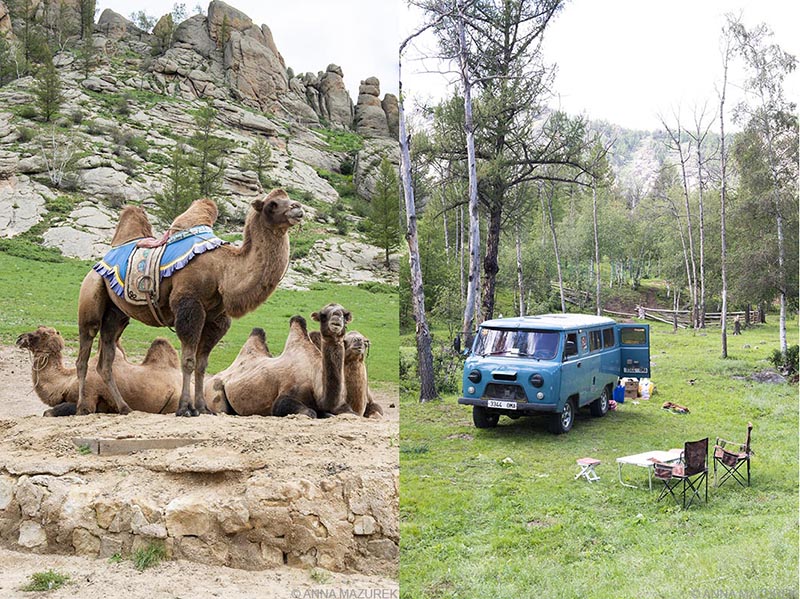
Our driver, Otgoo, was the Mongolian version of MacGyver and Chuck Norris. He was the nicest guy, worked hard and could fix anything. He knew everyone and the younger drivers all said he was their role model. He could take the entire tire off the van in just a few short minutes. It was unreal. (Let’s just say if the zombie apocalypse ever arrives, I want to be on Otgoo’s team!)
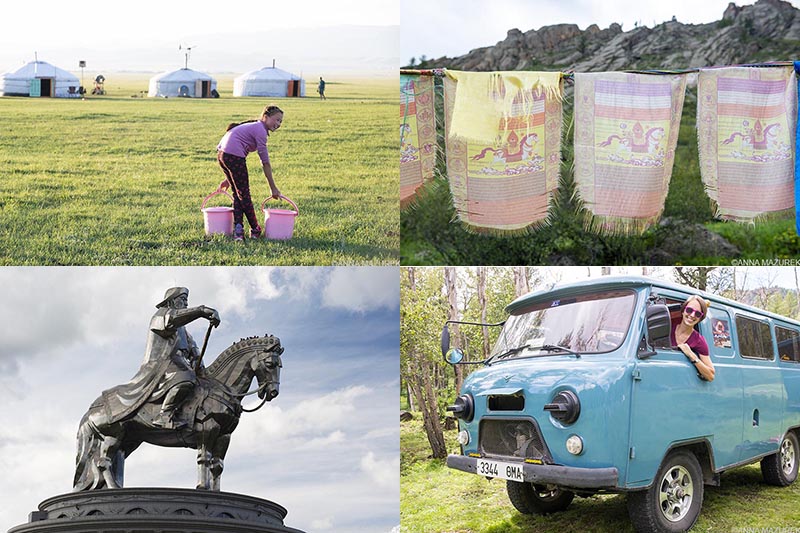
Our first stop was Terelj National Park, which is close to Ulaanbaatar. We rode horses to Aryapala Temple Meditation Center, a Buddhist temple that reminded me a bit of India. My horse decided to go rouge and ran under some tree branches. I almost fell backwards off the horse like a scene from a Bugs Bunny cartoon. My shoulder and hand got scraped up, but I survived with a good story. The next stop was super touristy but a must-see—the giant Chinggis Khaan horse statue. It’s 131-feet tall and points east to his birth place. Oh, it’s Chinggis (pronounced “Ching+ gus”), not Genghis.
Day 2: Baga Gazriin Chuluu
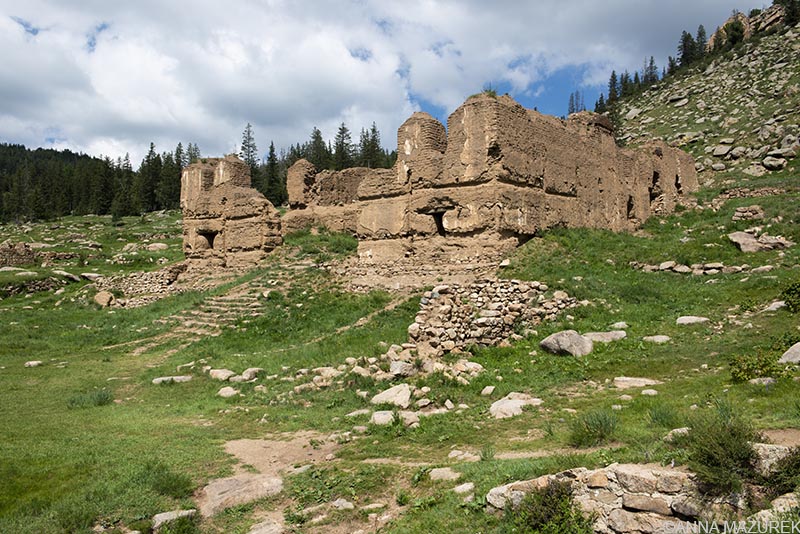
Our first stop was the ruins of Manjusri Monastery, one of the many monasteries destroyed by the communists during the 1940s. The monks were either killed or forced to renounce their faith. Travel is always an excellent lesson in world history and a stark reminder of the reach and wrath of WWII. Above all, I hope it is a lesson for younger generations to not repeat the sins of the past.
We drove for ages and the driver turned off the paved road onto an unmarked dirt road—tire tracks through a field. There were no signs indicating where we were or where we were going. The driver just knew where to turn and sped across the field. This one of many moments of awe on this trip. We would spend a majority of the next few days driving through fields covered in a spiderweb of tire tracks going in all directions. The ride was always bumpy and inside of the van was padded a bit to absorb the shock a bit. Nick and I couldn’t understand how Otgoo knew where to go when everything looked a like, and there were no signs!
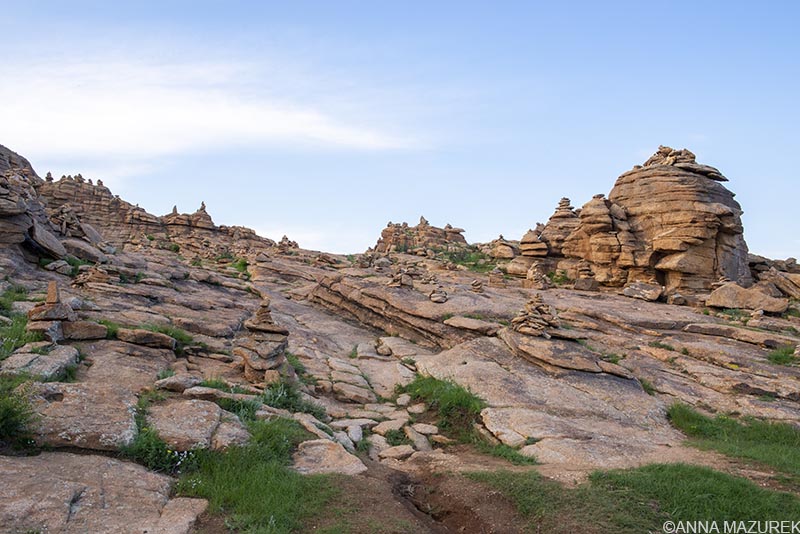
We ended up at Baggu Garzriin Chuluu, a set of crazy rock formations that reminded me of northern New Mexico. There was also a small cave and tons of rock piles scattered about.
One of the highlights of the day was when we stopped to pee. We pulled over on the side of the road in the middle of nowhere by an abandoned building with a pen for herding animals. No one else was in sight. The minute one of the girls had her pants down to pee, two boys on a motorcycle appeared around the corner to round up horses in a pen beside building where she was squatting down!
Day 3: Middle Gobi & Tsagaan Suvaga
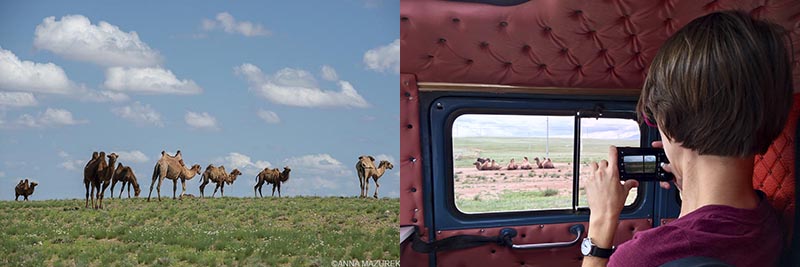
The highlight of the Middle Gobi was the drive. The scenery was flat, filled with green grass and patches of sand. At one point, I saw a herd of animals in the distance—too big to be sheep and not quite the right shape for horses. As we got closer, I saw the humps—a herd of two-hump camels! There is nothing that I love more than camels (except for breakfast tacos). I insisted that we stop for a road-side photo shoot!
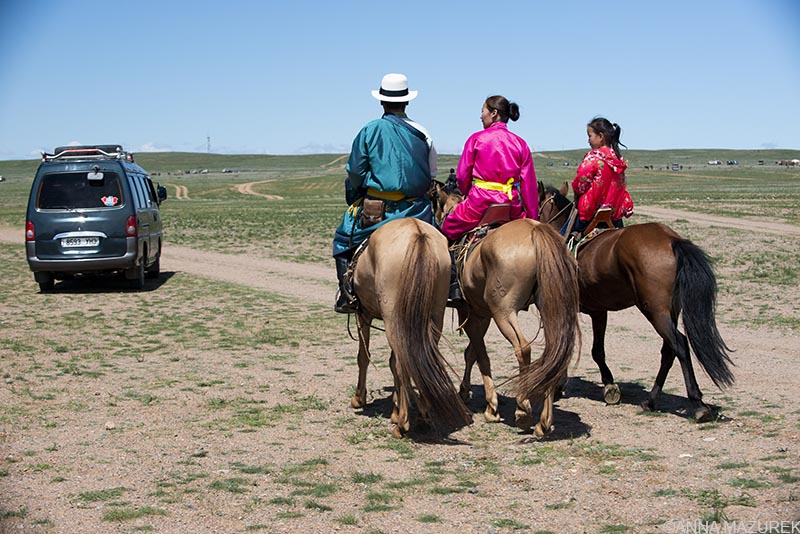
Our next stop was a town called Luus for a local village Naadam, a traditional festival in Mongolia. It’s held in July every year across the country but a few villages in the Gobi have a mini-Naadam in August. There were horse races and wrestling. We tried fermented horse milk, which tastes about as good as it sounds.
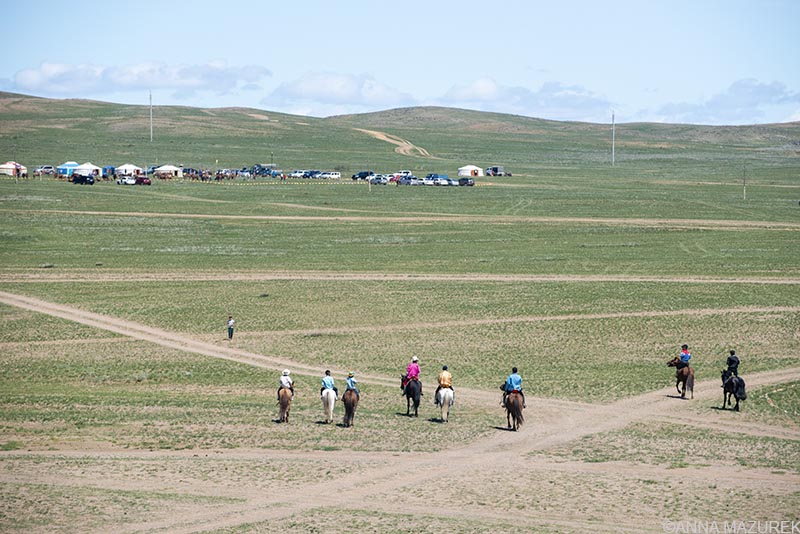
Mongolians all appear to be as addicted to their phones like the rest of the world. There were more towns than I imagined and cell service was quite frequent outside of the Gobi. People use motorcycles to herd animals instead of horses. It was much more modern than I expected. (I bought a SIM card that worked almost everywhere except a few spots in the Gobi.)
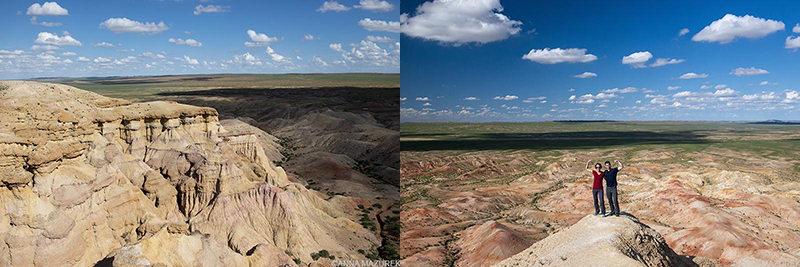
We stopped by Tsagaan Suvarga, a viewpoint over a series of rock dome formations and red sand cliffs that resembled parts of Argentina.
Day 4: Yoliin Am & Southern Gobi
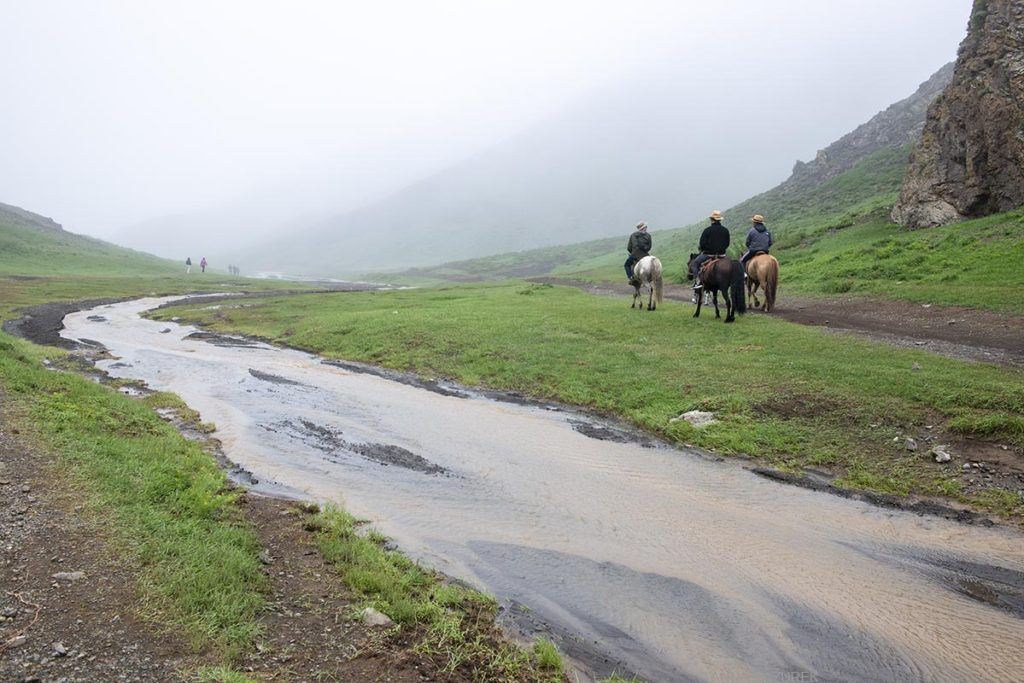
Rain during the night made the roads a bit messy and slowed down our progress. The weather was dreary, foggy and overcast as we drove to Yoliin Am, a range of high, narrow canyons split by a river that supposedly remains froze until July. (We were there in August, and it was flowing especially after the rain.) We hiked about 10 kilometers into the canyon in drizzly rain. It was a bit slippery at times on the rocks. The weather really set the mood and made for better photos than sunny weather, I thought.
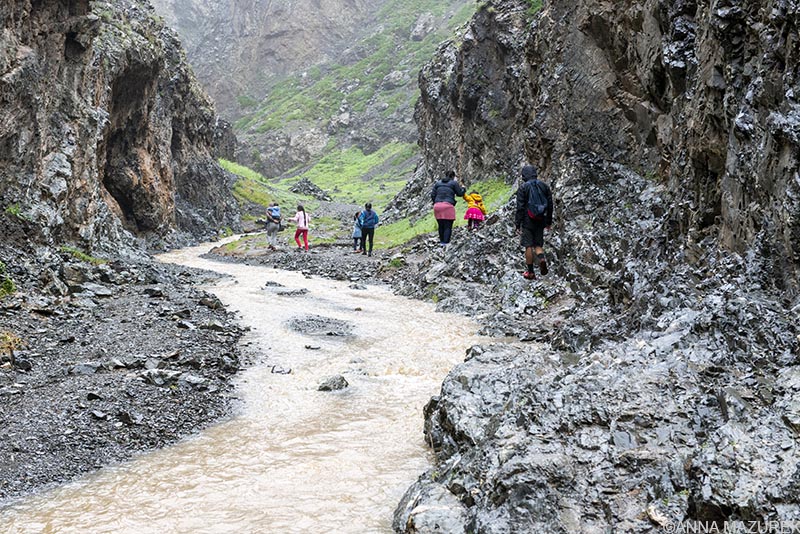
The museum at Yoliin Am had the most horrible taxidermy animals that I’ve ever seen. All of the Mongolian museums were this way. My favorite had an eagle with marbles for eyes—terrible, scary and hilarious.
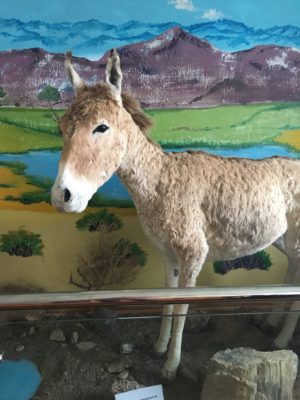
After we made it back to the van, the rain started to pour and the road washed out in places leaving regular cars stranded. Boris—our badass Russian van—made it out okay. Otgoo is seriously the best driver ever!
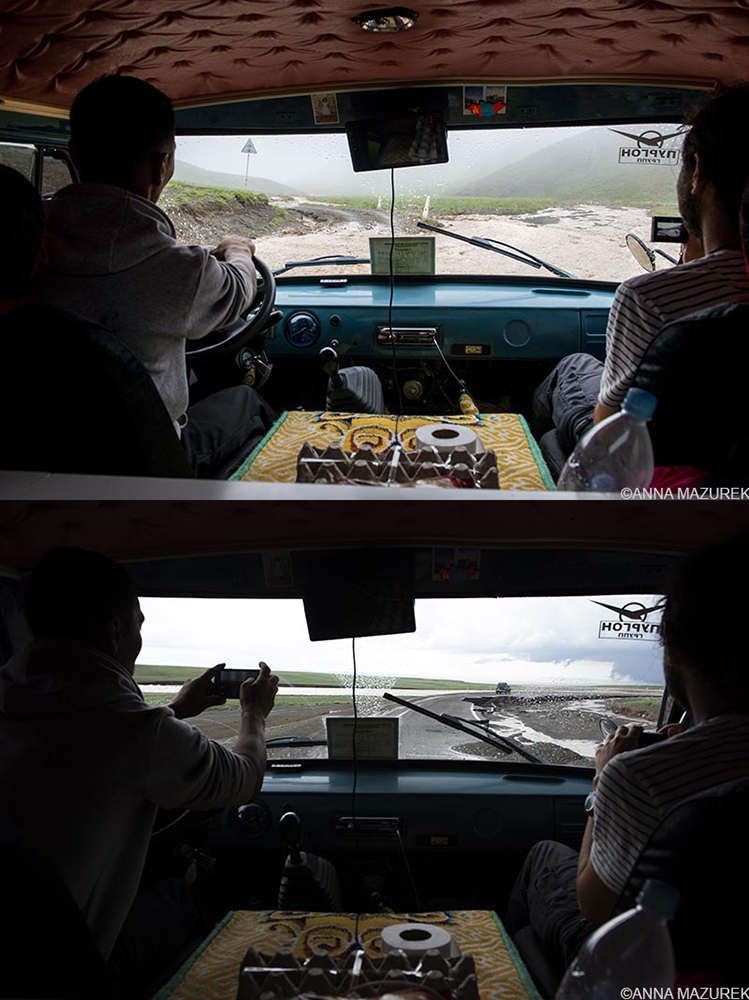
The main paved road nearby was washed out and collapsed in places due to the rain. We made it to the Gobi desert that night to Khongoryn Els, the main attraction in the Southern Gobi—the largest sand dune in a 180-kilometer long field of dunes. THIS is exactly why I’d flown across the world.
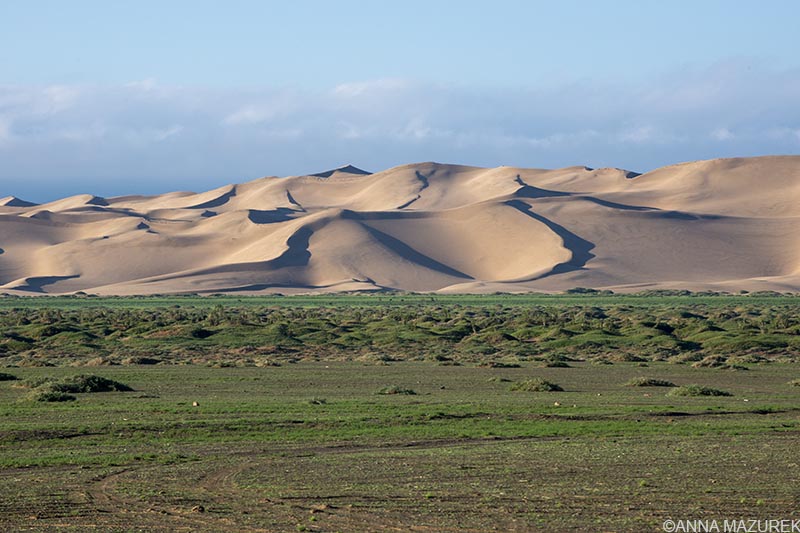
There was a set of two-hump camels outside the ger camp when we arrived. I immediately started taking photos since the light was fading as sunset approached.
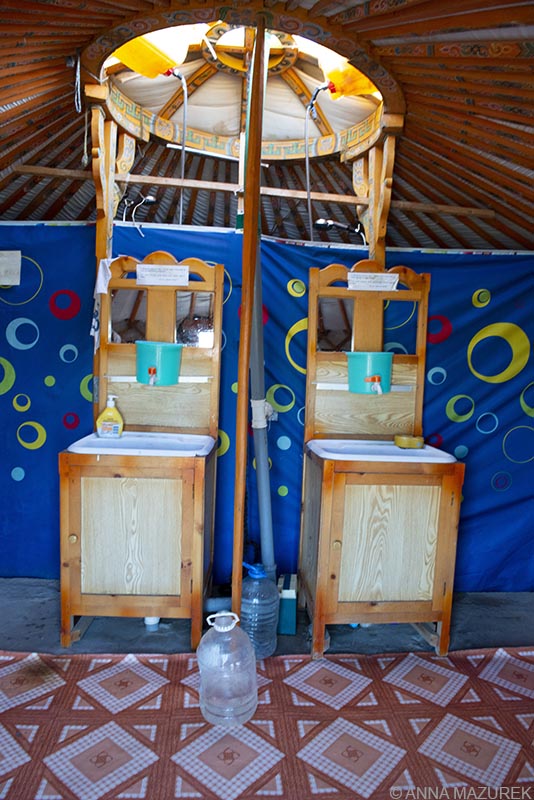
By far, this was the nicest ger camp of the trip because it had a proper shower ger! I got my first shower of the trip, which was so exciting! (The water pressure was terrible, and the water was REALLY cold. Still it felt great to be clean!!) The dining room also had tall table and regular height chairs, the first time we didn’t have to sit on the floor or short stools.
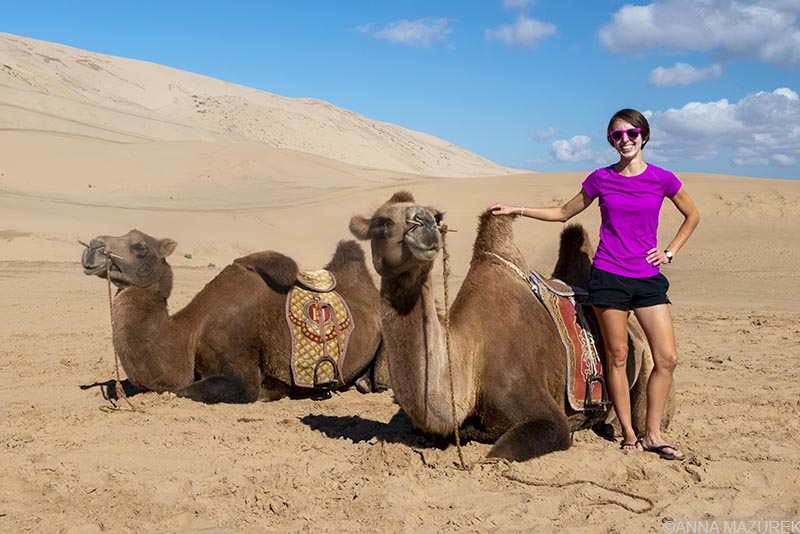
We took a sunset camel ride, which was lovely. The stars at night were amazing. Our visit aligned perfectly with the Perseids meteor shower. The Milky Way was on full display. We spent a good amount of time each night staring up at the sky watching for meteors.
Day 5: Gobi Desert & Flaming Cliffs
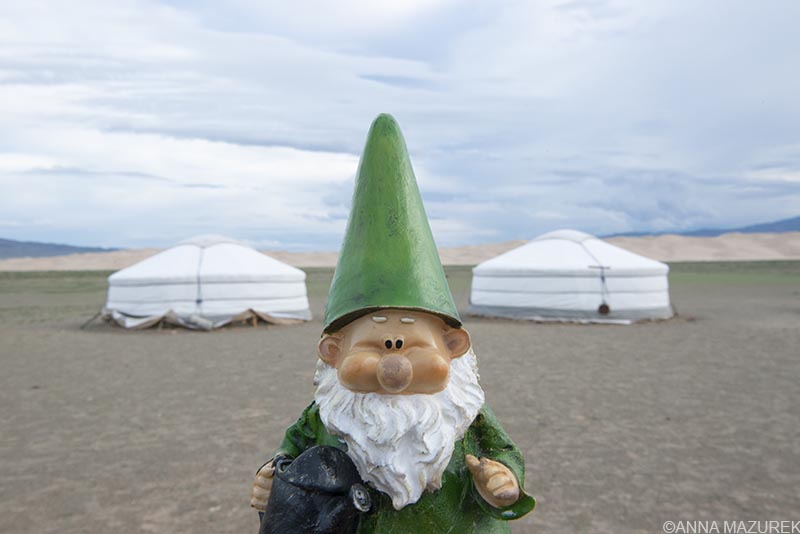
I got up at 6:30 a.m. to shower and take photos. I’d brought one dress to wear in photos so I wasn’t wearing my dirty hiking clothes in every shot. We drove out to the base of the sand dunes just as a man walking with two camels arrived. I was like a kid on Christmas morning taking photos of the camels with the dunes.
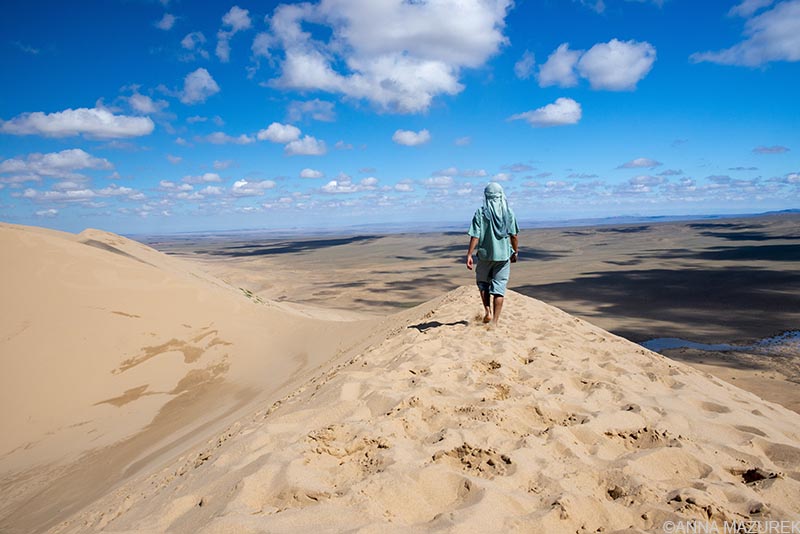
We started to climb the sand dunes at 9 a.m. It took 30-40 minutes just to get to the top! Climbing sand dunes is much HARDER than it looks! The view was amazing. We took silly photos, which is my favorite thing to do when I travel.
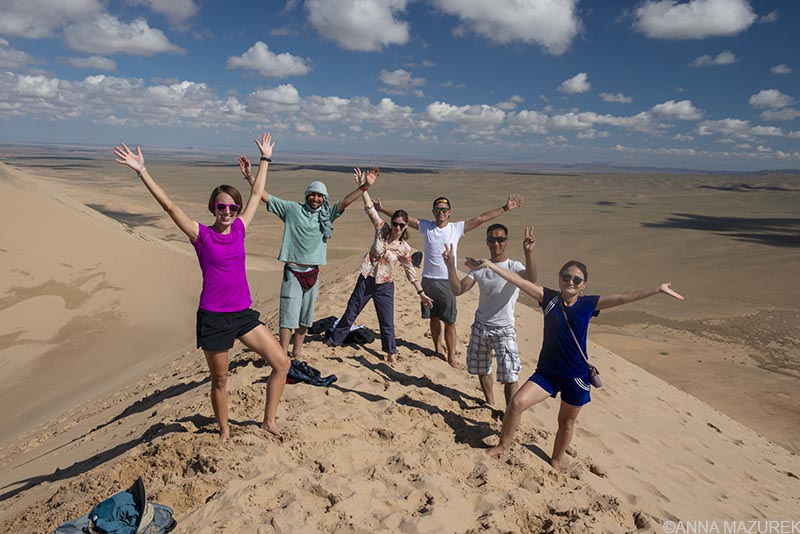
Today was the most amazing day of the trip. It was totally worth flying across the world for this. I’ve been obsessed with remote corners of the world for the past 10 years. It started with my first trip to India. This area is one of the most remote. It’s peak tourist season yet it doesn’t feel touristy. We had the dunes to ourselves except for a handful of people at the base!
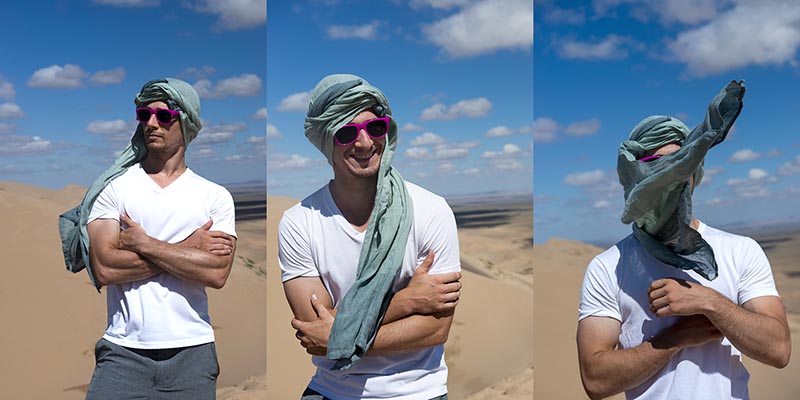
We are only five days into our trip, and it feels like months.
Nick made a profound statement in the van, “I feel like this has become my life, and I’ve forgotten everything else.” That’s my common mindset on the road—it feels like my current situation is all I know.
Today, the inevitable happened – we had some tire problems and spent a good hour on the side of the road. Otgoo literally took the wheel apart and greased the barring in the amount of time it would have taken me to jack up the van. He has a stash of tools under the backseat that he keeps in an old women’s purse. I’m impressed by his resourcefulness. The tire repair put us a bit behind schedule.
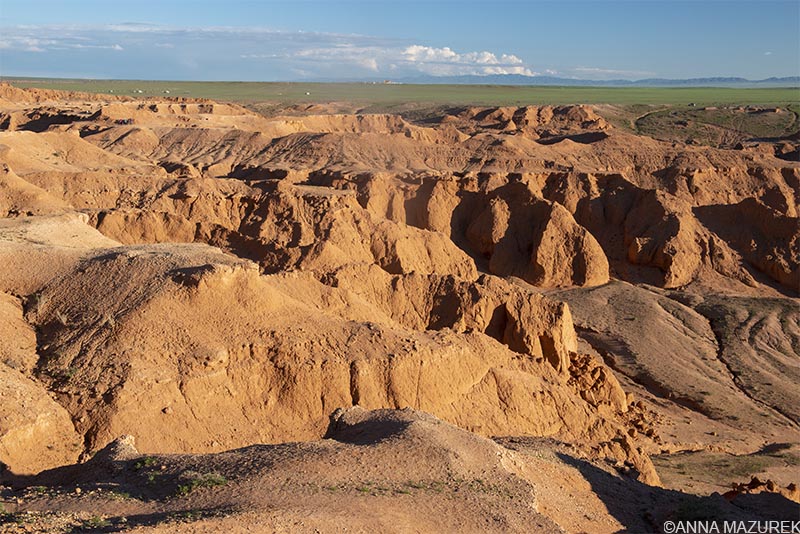
Our final stop of the day was the Flaming Cliffs, known as Bayanzag. The red cliffs are a haven for dinosaur bones including the first dinosaur eggs discovered. Velociraptor bones were also found here. I wish we’d had more time here but that’s how I felt about almost every place except for the spider ger, which I’ll get to in a bit.
Day 6: Local Nomadic Family
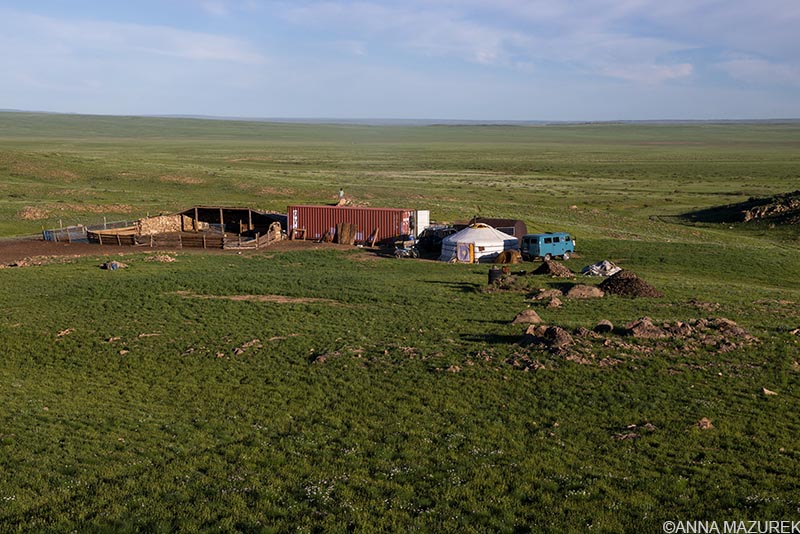
We dropped off Peter in a nearby town so he could take the bus back to Ulaanbaatar to catch his train. We spent the afternoon and the next morning visiting the family of the guesthouse owner in Ulaanbaatar. They lived in traditional gers and had a herd of goats. We got to milk the goats and try traditional food. Overall, it was a very chill but amazing day!
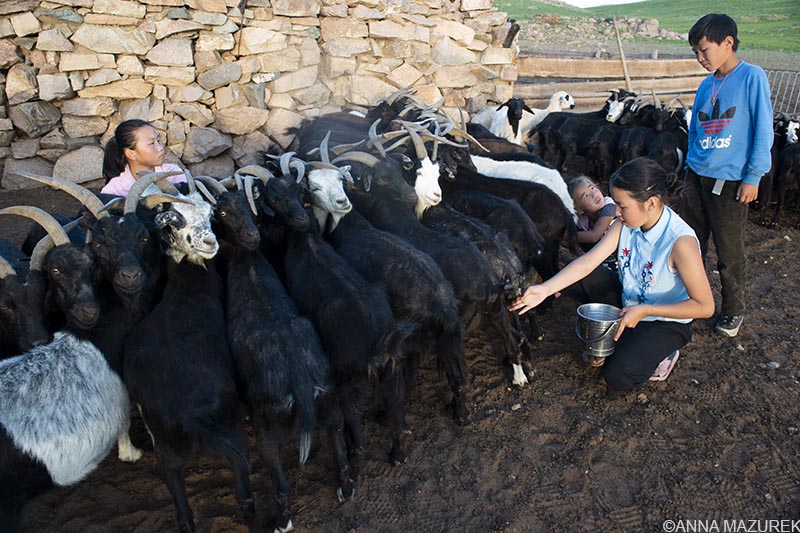
The meteor shower was amazing that night. Nick and I sat outside on tiny stools staring at the sky until our necks hurt. (I highly suggest planning a Mongolia trip around a meteor shower if you can!)
Day 7: Ongi Monastery
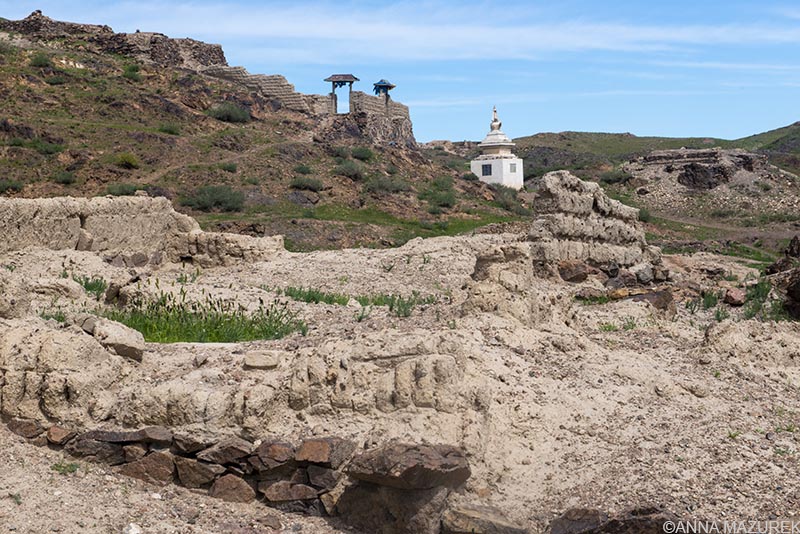
We drove until 1 p.m. when we reached the ruins of Ongi Monastery, one of my favorite places we visited on the trip. It was built in 1660 with 11 buildings. A new complex with 17 buildings was built in the 1800s. All were destroyed in 1939 by the communist anti-religious purges. The complex was huge and stunning!
We stayed in a nice ger camp by the river – the only river that runs through the Gobi. The camp has two luxuries we haven’t seen yet on the trip – cold beer and hot showers. It’s our third shower of the trip!
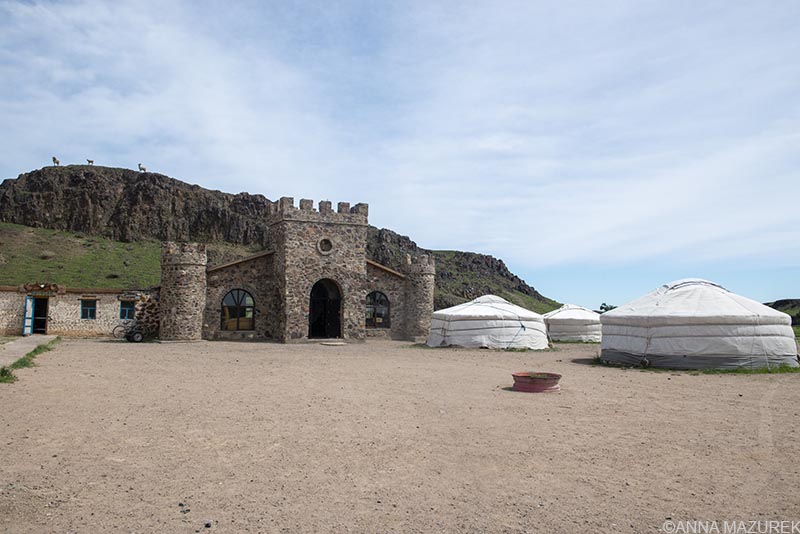
We’ve had to drink out of plastic water bottles supplied by our guide/driver because there’s been very little ground water in the Gobi. I hate plastic and brought a water filter but it’s been useless.
There are times Mongolia reminds of me of India except it’s cleaner, nicer. It doesn’t have the overpopulation issues that plague India. There’s a luxury camp next to our camp. It’s the only luxury accommodation we’ve seen since the Flaming Cliffs. People still have to take a van here. There’s no glamourous alternate route or airport. The environment is pristine with a bit of litter near cities.
The people are genuinely friendly in Mongolia because it hasn’t been overrun with tourism. (I don’t feel like I’m being scammed 20 times a day like I did in Vietnam.) Mongolia is still off the beaten path but has an infrastructure for tourism but hasn’t been poisoned by it. It’s refreshing and rare to visit a place that feels this way! I hope it never changes.
Day 8: Ulaan Tsutgalan Waterfall & Dance Party
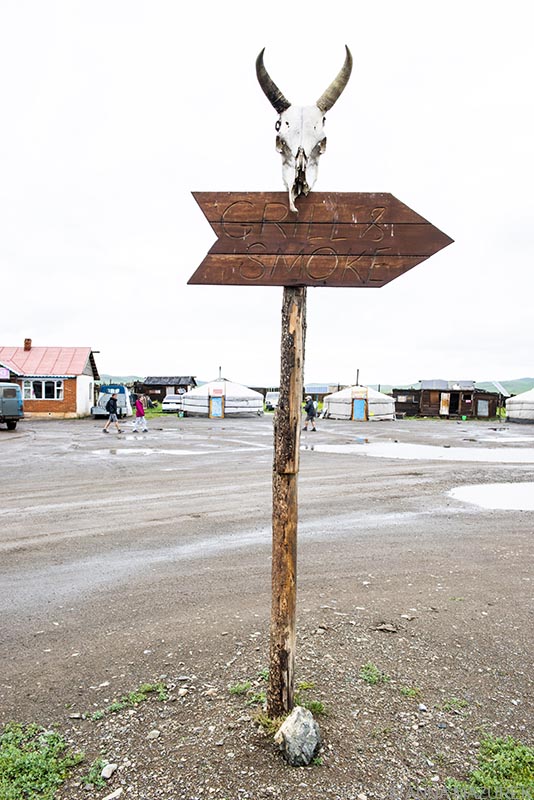
The weather was cold and rainy so I was grateful we spent the entire day driving even though it was all dirt roads. We stopped for lunch at a small roadside rest stop that looked like a scene from a zombie movie. An animal skull was hanging over a sign that said “Grill & Smokes” in front of a few haphazard buildings.
We stopped at an overlook at the Ulaan River, the longest river in Mongolia and reached the waterfall by 6 p.m. The falls were unimpressive, but the walk to the falls was through lush green valley filled with yaks grazing.
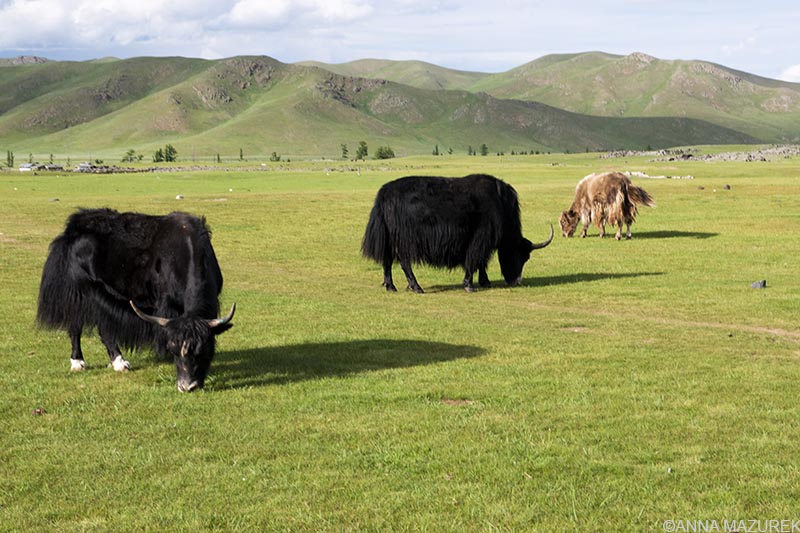
We couldn’t find our driver when we got back. Nick joked that he was probably killing our dinner. We found our driver a few minutes later. He’d literally just helped two guys slaughter a sheep!
We are closer to the capital now. There’s a lot more people and more ger camps. There was a lot of trash near the parking lot of the waterfall, which was gross and disturbing. It was the largest amount of trash we’d seen on the trip. I had flashbacks to India for a moment.
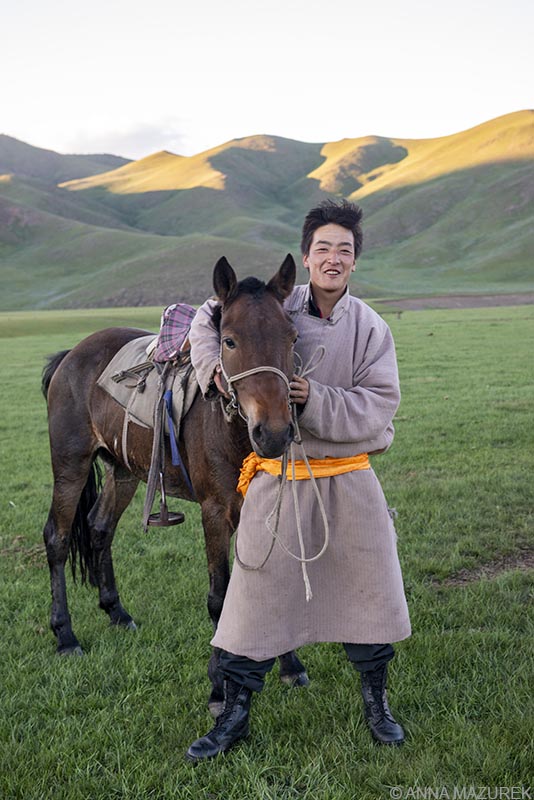
We had a huge bonfire at our ger camp to say farewell to Lisa and Jorge who were leaving the next day. Otgoo pulled Boris up to the bonfire so we’d have music. There were a few locals and other travelers—an Australian and some French girls. There we were in the middle of the Mongolia under the Milky Way singing along to Beyonce’s “Single Ladies” followed by some Maroon 5 and Backstreet Boys. We went through a couple bottles of vodka and a bottle of red wine between us, the drivers and the locals. It turned into a dance party and was one of the best nights of the trip!
Day 9: Tsenkher Hot Springs
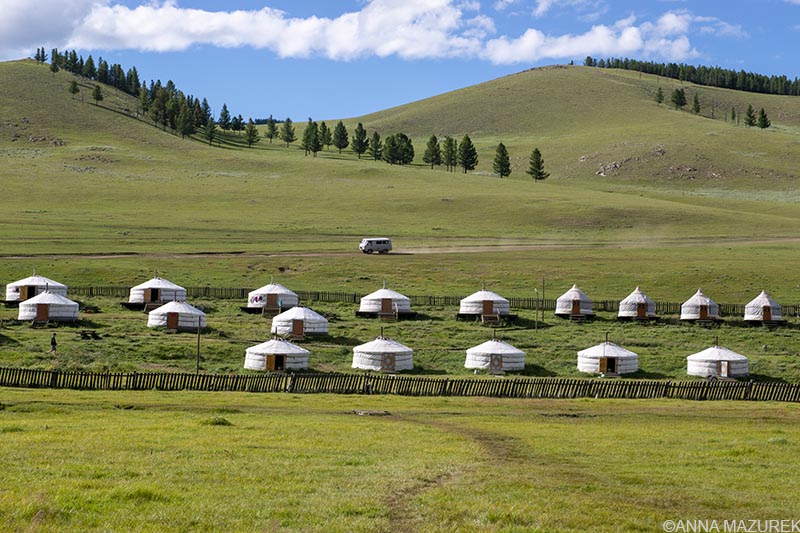
Nick and I said goodbye to Lisa and Jorge in the morning. Our next stop was the most touristy place of the trip—hot springs. (Why are people so enamored with hot springs? I’ve never understood it and never really enjoy them.) The water was piped into a series of thermal pools that varied temperatures. Our ger camp by the springs was one of the most photogenic place of the trip!
It’s crazy how much the landscape has changed as we drove. Yesterday, it was lush green grass with yaks. Today, the mountains appeared with a single row of tall trees along the rim that resembled spikes on a dragon’s tail. Marmots were running around everywhere.
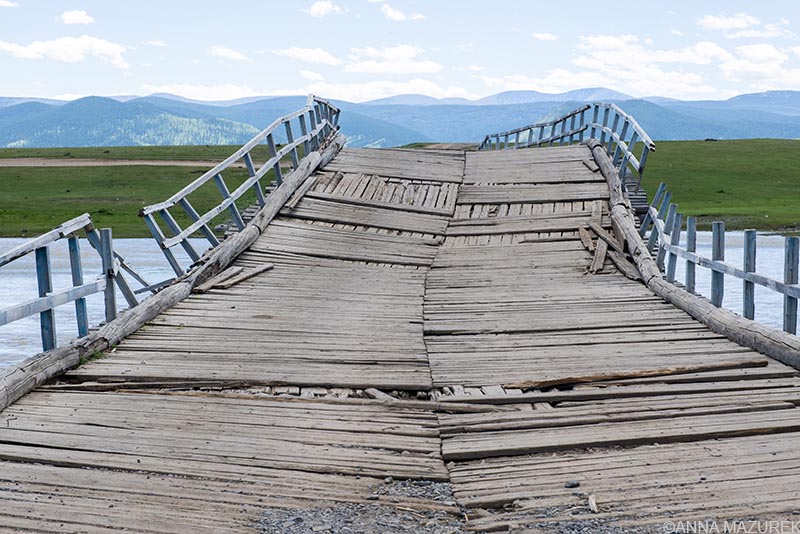
The road has been the worst today. I’ve been saying that to myself every day, but today, it’s true. Boris shakes nonstop. We crossed a sketchiest bridge today that was literally falling apart. It looked like it was made with toothpicks. Otgoo made us get out and walk across on foot. Then, he drove the van across. (Check out the photo above!!!)
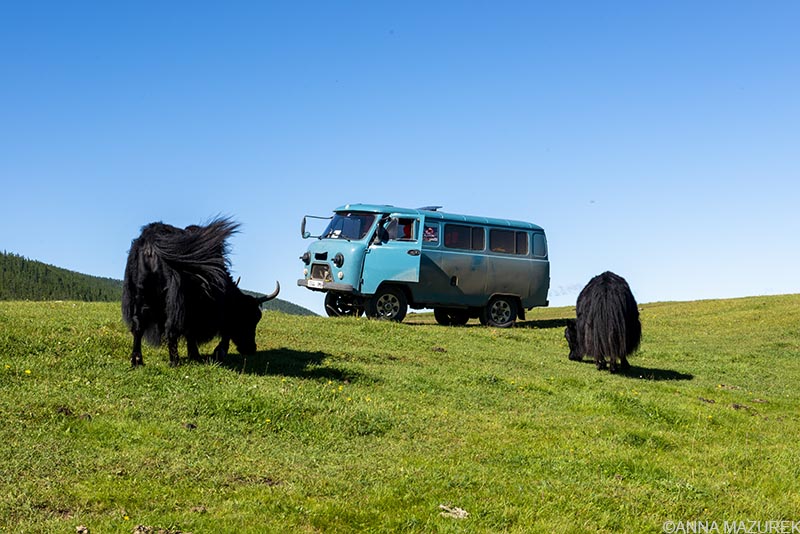
The nights have gotten colder as we’ve gone north. I can see my breath at night. It seems like most of the other travelers we meet are on the Trans-Siberian Railway and only have five days or so in between trains so they can’t see much of the country. I can’t wait to come back to spend more time in Mongolia to explore the North and other regions. The train is also on my list. (If you are taking the train, give yourself a few WEEKS, not days to explore.)
Day 10: Kherogo, Terkh & Crater Lake
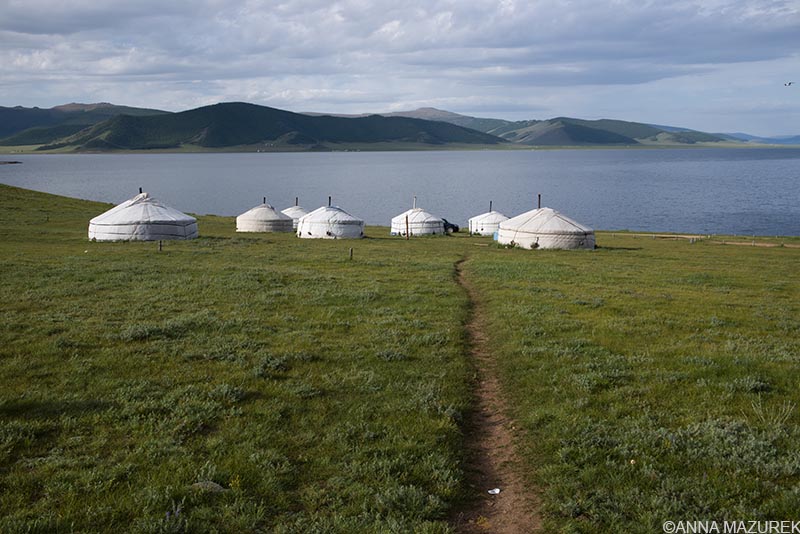
We stopped for lunch by a small scenic stream. Otgoo took off the front right wheel of the van then walked into town. Four hours later, he came back with new brake pads. He’d basically hitchhiked to another town to get them! Due to the daily, we arrived at the lake after sunset.
Day 11: Khorgo Crater, Terkh National Park & Karakorum
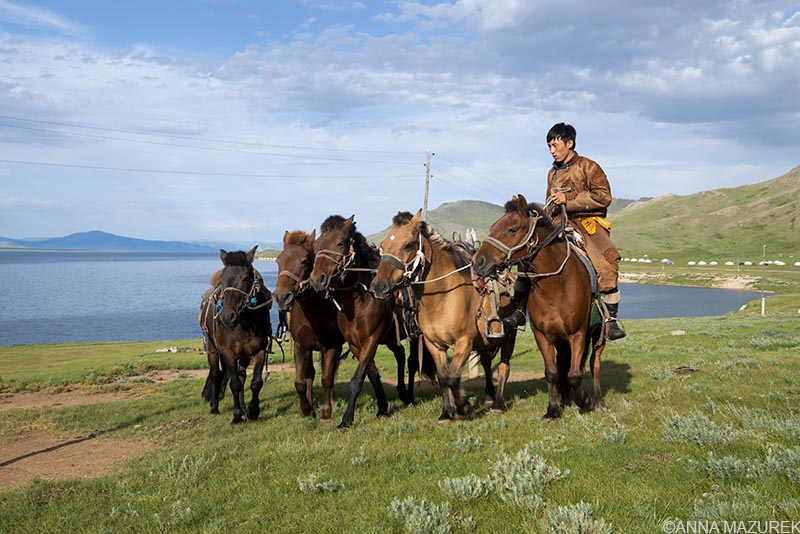
I woke up at sunrise to take photos. The ger camp and lake were stunning. We hiked up the Khorgo Vul Volcano carter and walked along the rim. We were above 6,000 feet in elevation so I could feel the altitude a bit. Apparently, we spent too much time on the top, and our driver called our guide to tell us to walk down the opposite edge of the crater to meet him on another road on the other side. We literally hiked down the backside of the crater, which was filled with little rocks. We kept sliding and falling the entire way. It was a nightmare, but we made it back to Boris!
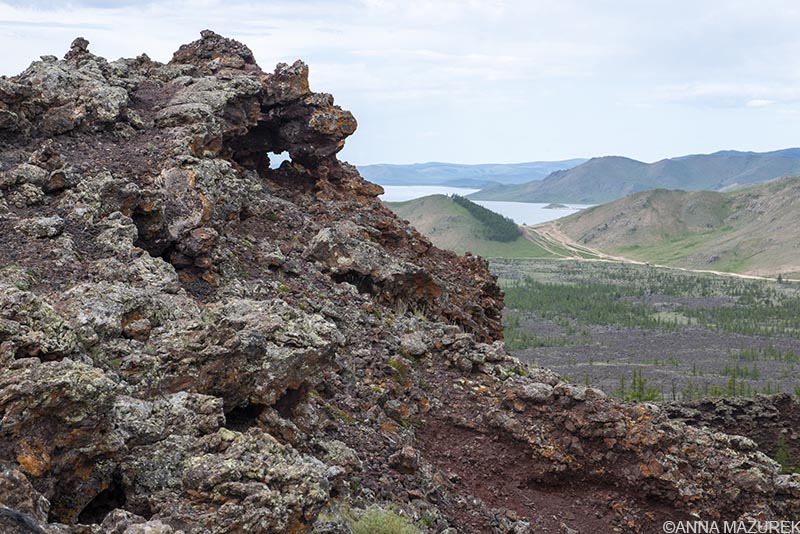
Our ger was covered in spiders. I tried to catch a few and take them outside. I hate to kill them, but there was just too many. We ended up killing more than 10! It was like a horror movie. Nick even found one in his sleeping bag!!! We were both ready to get back to showers and clean beds.
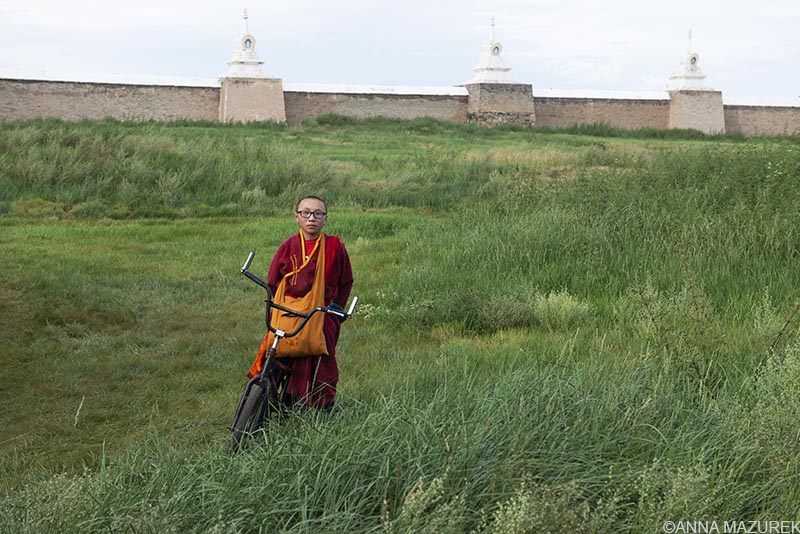
It was just before 6 p.m. when we reached Karakorum, a supply base established by Chinggis Khan in the 1300s. It’s a huge walled complex lined with stupas. There’s a large temple complex and monastery with monks. We arrived right before it closed so we rushed around trying to go inside before the buildings closed. It was my favorite monastery in Mongolia.
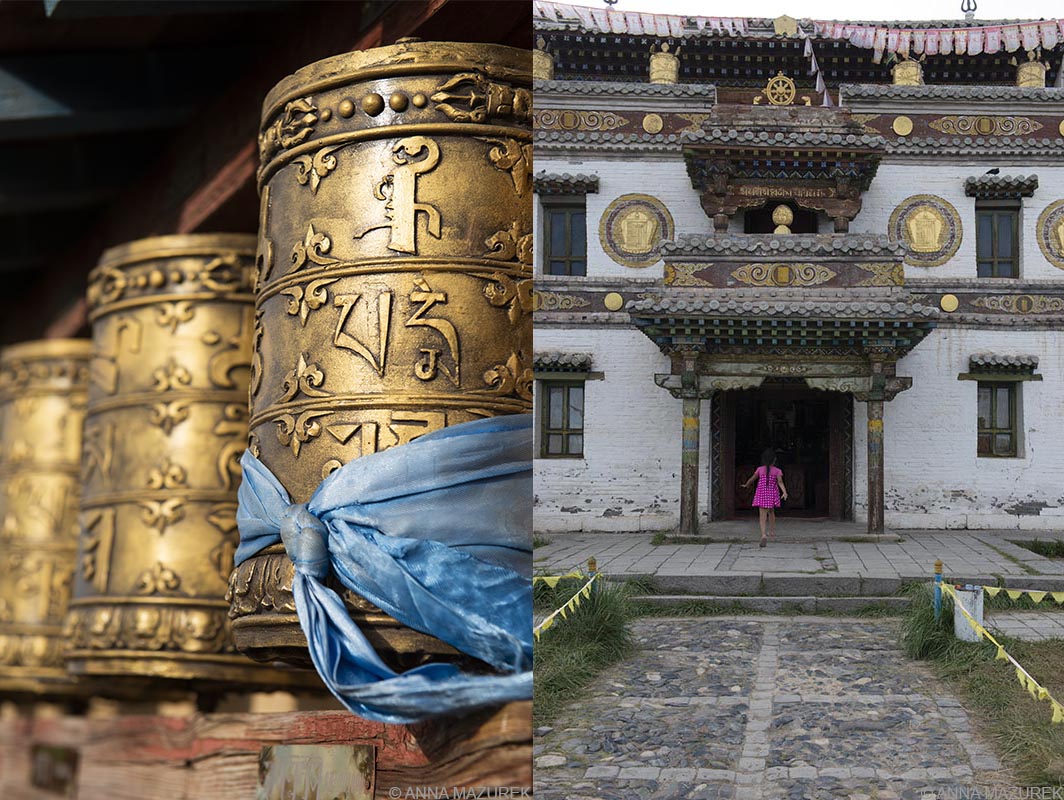
 Left: Prayer wheels in the monastery inside the Karakorum complex. Right: A little girl walks inside a temple
Nick and I had Otgoo stop the van so we could take portraits of him with Boris in a field outside of town.
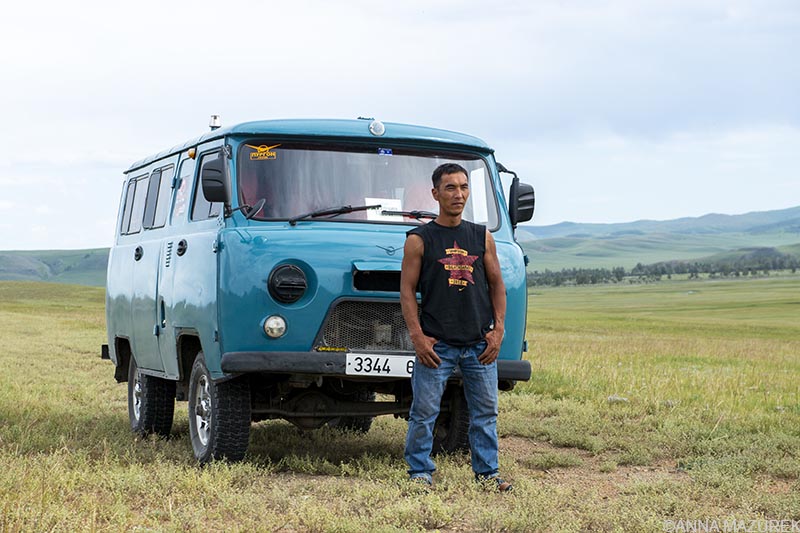
We spend the night at a ger camp near 30 kilometers of small sand dunes reffered to at the mini-Gobi. (It’s close to Ulaanbaatar so people will often go here if they don’t have time to go to the actual Gobi.) When we arrived, there was a lone horse tied to a pole and no other animals around the camp.
Right before bed, Nick was outside the ger brushing his teeth in the dark. He yells “Anna, come look at this!” I walk out with my headlamp but can’t see anything. He tells me to come closer. All of a sudden I see three pairs of eyes that belong to three two-hump camels tied up to the same pole the lone horse had been tied to before. I literally squealed—camels lived in our camp!
Day 12: Khustai National Park & Ulaanbaatar
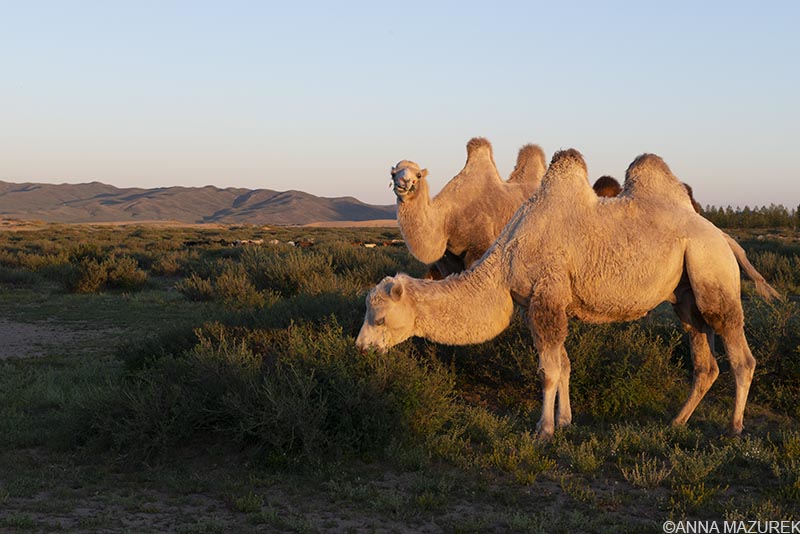
I got up at sunrise to photograph the camels. I’d set my alarm for 6:30 a.m. but woke up at 6:15 a.m. when I heard people outside. I opened the door, and the camels were gone. Heartbroken, I grabbed my camera and walked around the side of ger. I found the camels – they were munching on the grass nearby! The best part was that they’d multiplied overnight—there were five now! I photographed the camels and the local family for over an hour. I’m pretty sure the family thought I was crazy chasing the camels with my camera!
The food has been surprisingly amazing. For dinner last night, our guide made fried dumplings. For breakfast, they made us pizza – perfectly pan-fried crust with cucumber, potatoes, cherry tomatoes and eggs with pasta sauce. It was phenomenal.
We arrived at Khustai National Park in the afternoon, which is known for wild horses. (The horses were extinct in the wild, but a few were in zoos. They were bred in zoos and released again successfully in the wild.) We saw the horses right way on the rim of a nearby hill. We walked closer to get photos but couldn’t get too close due to park regulations.
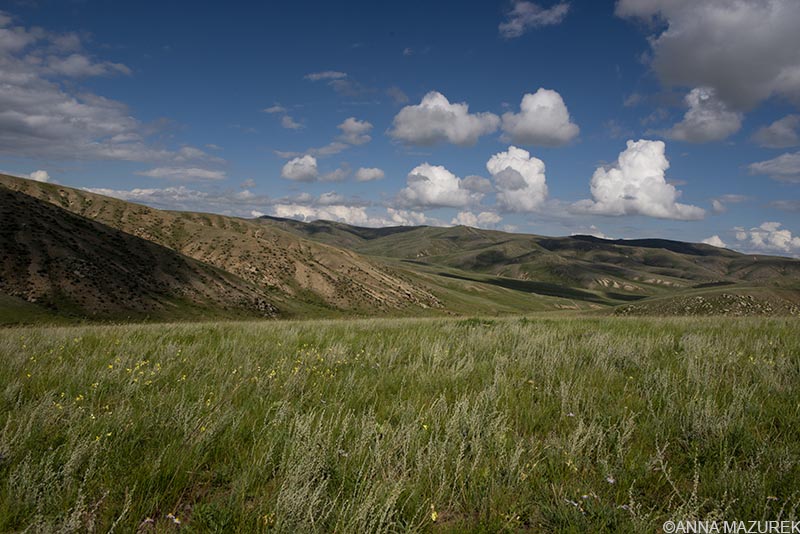
We were sad to see our tour end because we couldn’t imagine our life without Boris. We arranged a post-tour dinner with our driver, guide and Peace, the guide who put our tour together. We went to a brewery and ended up in a karaoke bar. Nick was great at karaoke because he has lived in Japan — the land of karaoke — for 10 years. Of course, Otgoo was amazing. He’d been a drummer in a band and was amazing at singing the Mongolian songs. I couldn’t think of a better way to end the trip! It was well after midnight when we got back to the guesthouse.
_____________________
The Best Time to Go to Mongolia
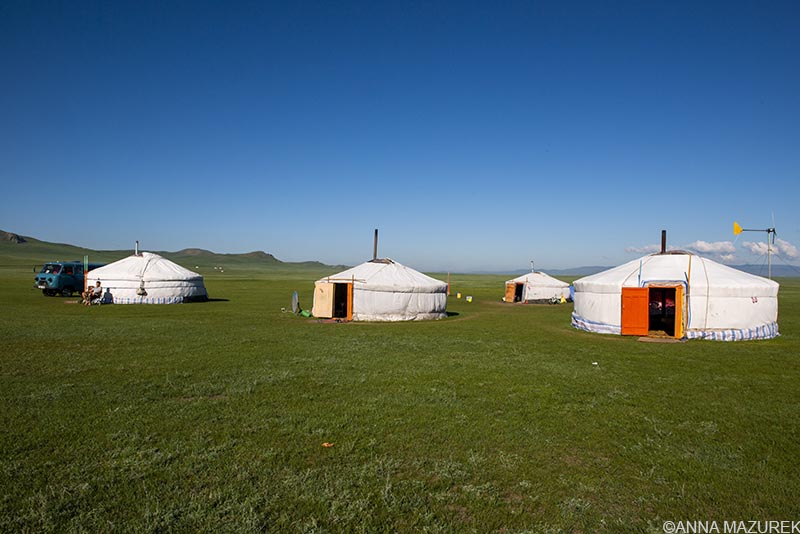
High-Season: June to August
Warm and mostly dry weather are the norm in June and July. Cooler temperatures and rain move in during late August. Book everything in advance around Naadam in mid-July. (2019 dates are July 11-15th.)
The eagle festivals are held in September and October in Olgii and Bayan-Olgii. Some ger camps and guesthouses close in the shoulder and low season. It’s frigid in December/January and air pollution is terrible in Ulaanbaatar from all the smoke from the wood stoves. Winds and dust storms are bad in March and April.
If you want to visit the reindeer people in the north, it involves a three-day horse ride in the summer months after driving for days. In May, it only involves a one-day horse ride but still in involves a few days of driving.
How much does it cost to go to Mongolia?
Our tour cost about $1,200 each for Nick and I. The cost varied per day on our trip since the amount of people on tour fluctuated. (The average is $30-50 per day per person for a budget tour.) I booked my flight in May for my August trip. It paid a little less than $1,300 roundtrip from Charlotte on United Airlines. I had a layover in JFK and Beijing. On the way back, I opted for a 12-hour layover in San Francisco to visit a friend. Then, flew back via DC to Charlotte. (This long route back saved me $500 on the airfare.) Overall, I spent about $2,800 for the trip. The additional $300 was driver/guide tips, airport taxis and food/accommodation for two days in the capital after the tour ended. It was one of the most expensive trips I’ve ever taken but totally worth it!
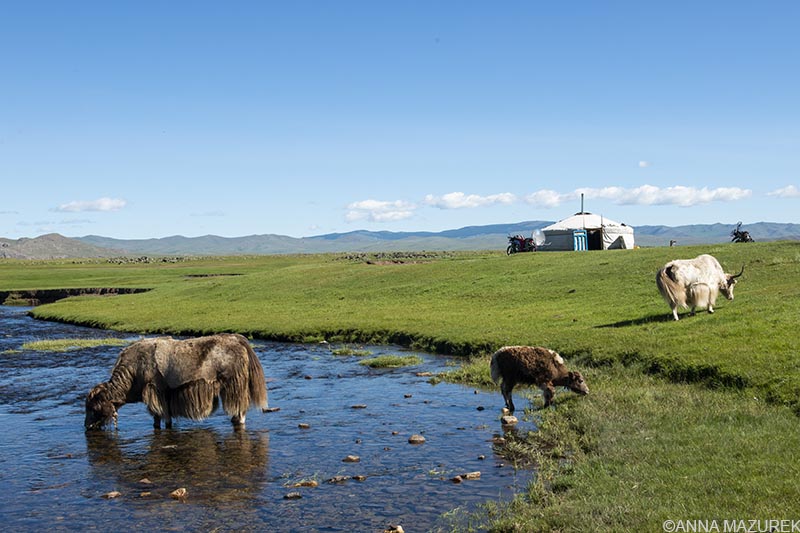
Packing List for Summer in Mongolia (June-August)
- Headlamp
- Wet Wipes & biodegradable soap
- Hiking boots
- Flip flops for communal showers, walking around the ger sites & the Gobi (A pair of black Haviana’s are my personal favorites for traveling!)
- 2 pairs of hiking pants & 1 pair of jeans for Ulaanbaatar
- 1 pair of long pants for sleeping
- 1- cotton tank for layering
- 5-7 shirts
- 1- long sleeve thermal shirt
- 1- long sleeve sun shirt for Gobi
- 1- wide brimmed travel hat
- 1-pair of shorts for the Gobi desert
- Scarf
- Hoodie and a zip-up fleece
- Raincoat to layover hoodie or fleece
- Snacks (peanut butter packs, nuts, granola bars)
- USB-cable for charging phones in the car
- Sunscreen (I recommend the natural chemical-free kind.)
- Sleeping bag liner (Sleeping bags are often provided so this liner is critical!)
- Undies and socks (I tend to pack one-pair per day for trips where laundry is difficult like this. I recommend 5-7 pairs of hiking socks for hiking and keeping warm at night.)
- Extra camera batteries (I had two for my DSLR and only had to charge once. If you have a mirrorless camera that eats through batteries, I’d have six at least!)
- Toilet paper (a 4-pack lasted me and Nick the entire trip)
- Kleenex
- Dramamine (I recommend the natural non-drowsy ginger kind!)
- Gloves
- Travel towel
- Small tripod for night photography
- Camera clip for easy camera access (Peter had this for his mirrorless DSLR & I was super jealous!)
- Inflatable neck pillow
- Journal (This is a good way to use spare time & remember the trip!)
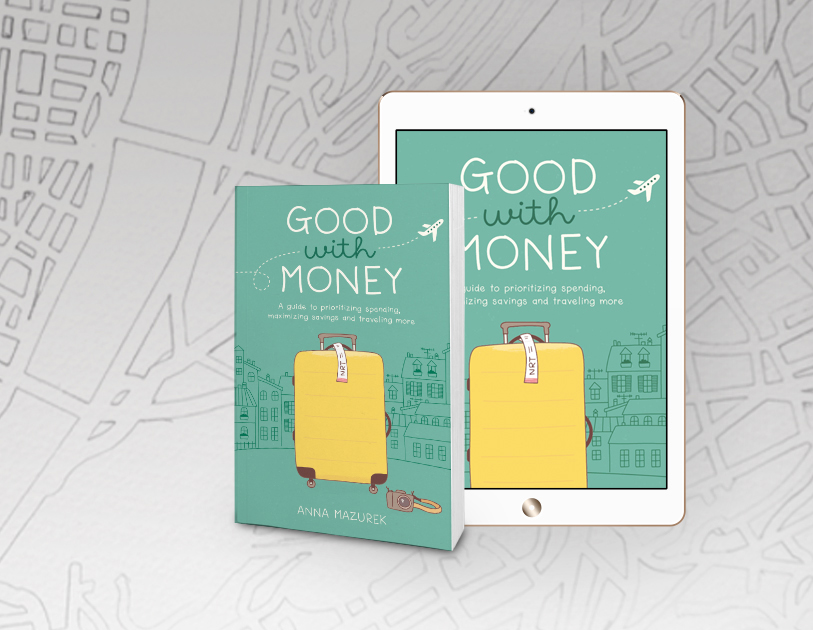
Book Launch: How to Be Good With Money
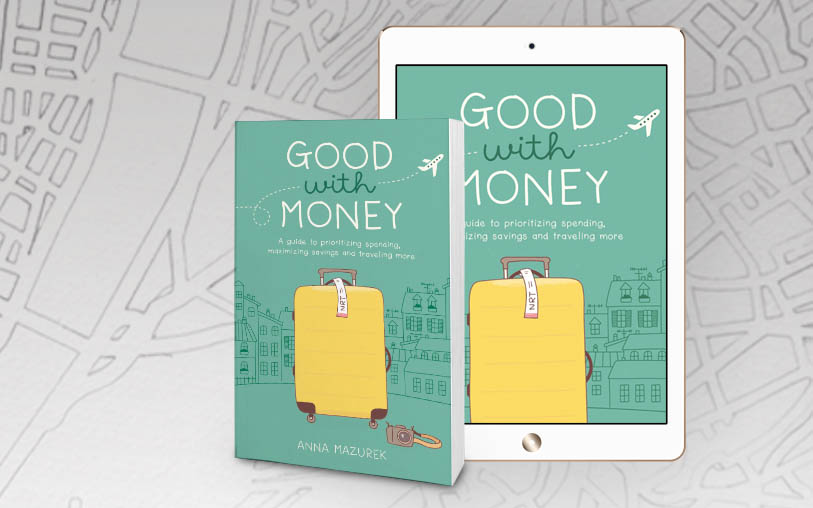
I am super excited to announce that my first book Good With Money launches today!
The book answers the most common question I get asked: “How do you afford to travel so much?” Good With Money shares my story and documents the financial habits that allowed me to travel nonstop for almost 10 years with no debt, all on an average income of $30,000.
I started this blog in 2014 to help other travelers and share my experiences. But, I can only cover so much in a blog post. I figured it was time to hunker down and build a bigger tool to help others, which is why I devoted this year to the book. I’ve had the idea in my head for years but didn’t sit down to write it down until January. Since I’ve been on the road all year, the book was written across many locations from Buenos Aires to Easter Island to the Galapagos with references throughout the text.
In three parts, the book focuses on redefining priorities, maximizing savings, and slashing travel expenses. The first section focuses on my overall financial philosophy and savings techniques. The second section on top money hacks that digs into normal life expenses, including how to save on medical costs, paying for college without debt, making coupons worth your while and selling the stuff you don’t need. In the third and final section, I share my best travel hacks.
For more about the project, check out this page to read an excerpt or email me (Anna@TravelLikeAnna.com).
HOW TO GRAB YOUR COPY:
It’s available in BOTH paperback and eBook formats on Amazon! Click here!
____________________________________________________
COMING UP NEXT
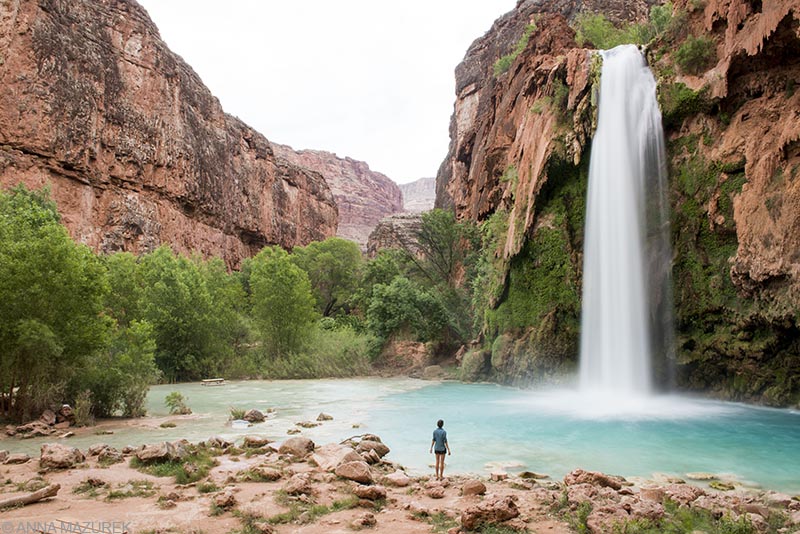
Best of 2018
In my next post, I’ll wrap up 2018 with a recap of the most popular posts and adventures from the year to inspire your 2019 New Year’s travel resolutions!
Interview with Travel Hacking Expert Travis Sherry

In the latest Travel Tuesday Interview series, I chat with Travis Sherry, host of the #1 travel podcast on iTunes, Extra Pack of Peanuts. Travis and his wife, Heather, are the ultimate travel hacking experts. He shares his travel stories and top hacking tips in this interview.
Travel hacking expert Travis Sherry is the host of the #1 travel podcast on iTunes, Extra Pack of Peanuts. He’s been on the road almost full-time since 2010. (Photo courtesy of Travis Sherry)
Name: Travis Sherry
Age:35
Hometown: Philly
Country count: My best guess is 51.
Website: ExtraPackofPeanuts.com
1. How did you start traveling?
There are three distinct points. The first was when I was 18, I took a road trip to Florida. That was the first time I’d traveled without my family. It was me and buddy. We took a road trip from Philly to Florida to move sister into college. That was the first point where I experienced freedom. I still count it as one of the best trips I’ve had.
The second turning point was when I was 26. I traveled a bit before that. I lived for four months in Switzerland for an internship. That was the first time I lived abroad. That was a whole other experience. I was living abroad and making a life abroad. That was a distinctive moment.
The third point when I was 27. After returning home from Switzerland in 2010, Heather and I decided to move to Japan seven months later. That was the beginning of the third stage of my travel life. Travel became the main part of our life. That really opened up international travel for us a bit and this idea that this isn’t just a thing we are doing for vacation. More of our life than not is going to be spent traveling.
Travis often works from the road and makes the most of layovers by recording podcasts like in this photo from the Amsterdam airport. (Photo courtesy of Travis Sherry)
2. What does the average work day look like for you?
I’ve tried to make it more systematic and more normal. I’ll start working at 10 a.m. I might go to the gym and have an easy breakfast in the morning. The bulk of my work is done between 10 a.m. and 3 p.m. What that involves depends on the day. Some days are podcast recordings. Usually on Tuesdays we do weekly workshops. That’s my day to focus on the community we run.
Recently, it’s been a lot of big picture planning and then, organizing the team to get things done. Depending on the day, I try to do different things. Mondays are calls. Tuesdays are podcast recording. Wednesday and Thursday are more creative days—shooting videos, writing and getting into that flow. Thursday or Friday are housekeeping days like doing taxes or bookkeeping. Batch responding to emails on one day. I don’t kill the creative flow to respond to emails. I’m trying to get better at working in those zones. It’s become more systematic as it goes.
The more organized it became, the more I enjoyed it and allowed myself spontaneity. Then, the rest of the day is open after 3 p.m. Trying to batch by day has been a big thing for us. You stay in the zone.
3. Share one of your travel highlights.
My favorite trip I’ve ever taken was to the Republic of Georgia. Every time anyone would mention Georgia, they were the biggest fan of it. It had raving fans. I had very high expectations going in. Finally, Heather and I went. I was a little worried it wouldn’t live up to the lofty expectations. Fortunately, it not only lived up to it but was better than I thought. That’s the best way to describe it. Essentially, we were in Georgia and we got on this bus, and it was the wrong bus. Then, we had a feast in this women’s house and the whole town came!
It’s the only place I’ve been that’s as naturally beautiful as Switzerland. It’s more rugged and 1/10 price of Switzerland. Great food. Incredible scenery. The food was fantastic. The people were super nice. We spent 12 days there in July of 2016. It just blew me away. It was everything I wanted out of it. It’s not super touristy. Everyone was excited to have you there.
We drove the third most dangerous road in the world. We had a driver. We got to this town with a village of 50 people. It’s only open five months of year due to snowfall. You feel like you’ve gone back in time. There’s a castle up over the hill and wild horses. I asked a guy, “Whose horses are those?” He was looking at me like I was crazy. He goes, “Those are just wild horses.” I guess I never thought of that before. Out there, it’s just this awesome, neat experience that lived up to every expectation I had.
Travis’ wife, Heather, took this shot of him at Ballycarbery Castle in Ireland last year. They have been using airline miles mostly from credit cards to pay for their flights. (Photo courtesy of Travis Sherry)
4. What is the biggest myth about travel hacking?
I’ll give you two. One is the myth I believed when I started—that frequent flyer miles were only for people who traveled a lot. You don’t have to fly a lot to earn a ton of frequent flyer miles. You can do it through credit card sign ups and shopping. That’s the reason a lot of people don’t get into it. They don’t think they can earn enough to get a free flight. They think they have to be getting on planes all the time to earn the miles. You can sign up for a credit card and get a free flight to Europe with the signup bonus from the card!
The second myth is that when you earn points that it’s super hard to redeem your points. It’s hard at first but with a little bit of knowledge, you pull the veil back, and it can become something that’s easy to do.
Usually, it’s just me saying, “You aren’t looking in the right place.” It’s easier than people think if they spend time learning the right stuff.
What credit card does he recommend? Chase Sapphire Reserve for people who travel several times a year, Chase Preferred for people who travel one or two times a year.
5. Name three things you always pack for a trip.
- I always pack headphone splitters to watch a movie on the computer with Heather on flights.
- Mack’s earplugs
- Eye mask
- For guys, Bluffworks. They make men’s travel chinos, blazers and suits. All stretch and wrinkle free. I have five pairs, one in every color of the chinos. It’s the best travel clothing.
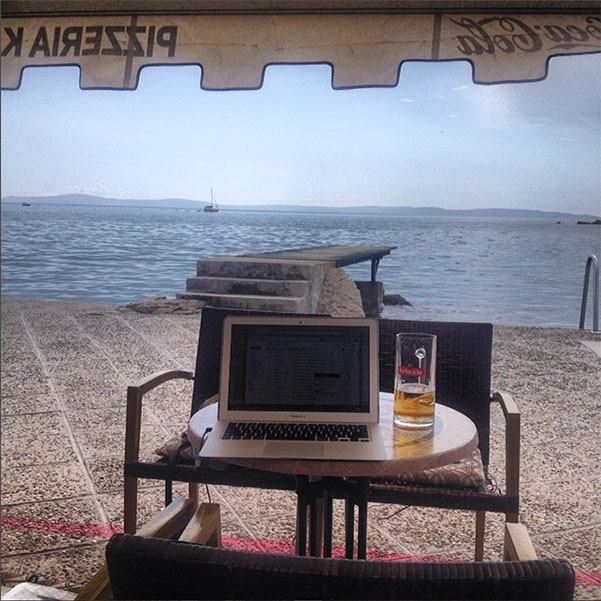
Travis works from the beach in Croatia or anywhere there is wifi! (Photo courtesy of Travis Sherry)
6. How do you balance work and travel?
Now, after of years of trying to figure it out, we try to batch work and batch travel. Instead of trying to do both at once really well. There are certain circumstances where we have to. When we are at home in Philly, that’s the time to move projects forward. That’s the time to make sure anything that needs to get done gets done. We’ve become a lot more organized that way. Then, when we are traveling, we’ve got some really big plans. We’ve got all these projects moving. We are able to tread water. It’s not that we are not working at all; we are doing things that are easier to do [and] are quick. When we are traveling, we are 80% travel and 20% work. It’s hard to build a business and travel.
We have a house in Philly. I was so opposed to moving back into a house. In August 2015, we moved back into the house. We live here when we are at home. Over the last year or two, it’s been about 50% on the road and 50% home.
7. The name of your podcast, Extra Pack of Peanuts, references your hatred of flying when you were younger. How did you overcome this fear? Any tips for others to do the same?
When I was a kid, I don’t know if was fear. I thought I would get sick, and then, I did get sick. I think some of it was naturally getting out of that [mindset]. I’m old enough to know that if you get sick on a plane, it’s not the end of the world. I think the second part was that I just ended up going on to my adult years. I just thought, “This is how I’m going to get to where I’m going to go.” Is it worth it to get sick for a day and then spend two to three weeks in Europe? The ends were worth the means.
I still don’t like flying or enjoy it. But, I also don’t mind it as much. I’m like middle ground. Maybe, I like it a little less than the average person.
Last year, Travis and Heather Sherry had their first child–Whittaker, who will turn one this year. Whittaker took his first flight when he was six months old. They are spending the holidays in their home in Philly and took Whittaker to visit a nearby pumpkin patch recently for this photo. (Photo courtesy of Travis Sherry)
8. How has having a child changed the way you travel? [His son Whittaker is turning one soon!]
It hasn’t been such a change. We still took all the trips we wanted to take. We don’t see that changing.
I guess that thing that does change is that we are going to start traveling slower, and we already have. Instead of going to four cities in 14 days, let’s do seven days in Barcelona and seven days in Budapest. I think we’ve started to slow down some and take our time.
The other big change was that we couldn’t go out at night. We were never huge partiers. We were in Budapest at 9 p.m. [and said] “I guess at some point we need to go back to get him in bed.” There needs to be a market for local babysitters so you can go out one night a week.
Since I’m getting older, there are changes I’d do anyways. We are very last minute especially me. We will book accommodation advance now and less spur of the month.
9. Share two of your favorite travel hacking tips.
The thing that has changed my life the most is just understanding how to use mile and points. Getting a good travel rewards card. Understanding how it works and how those points work. Just starting with one [card] and earning those points, then using them once [is the best way to start.]
One of the things we started doing is giving chocolates to flight attendants. I called it a trick but its’s more of a thing I just like to do. We bring chocolates for flight attendants. I make sure there’s enough for everyone on the plane. I give them to the flight attendants when I get on the plane. I say thanks for taking care of us. I appreciate it. All of it is true. That always puts a smile on their face. We’ve got upgraded to business class before because of it. They’ll come and give you free drinks. They are always super nice. It can never hurt to make the flight attendants day better.
I always pack in a carry on. We both always pack in a carry on. To me, only using a carry on eliminates a lot of stress [worrying] “Is my luggage going to get lost?” We only use carry-ons 90% of the time. Now, we might have to check a crib. We don’t have to pay baggage fees.
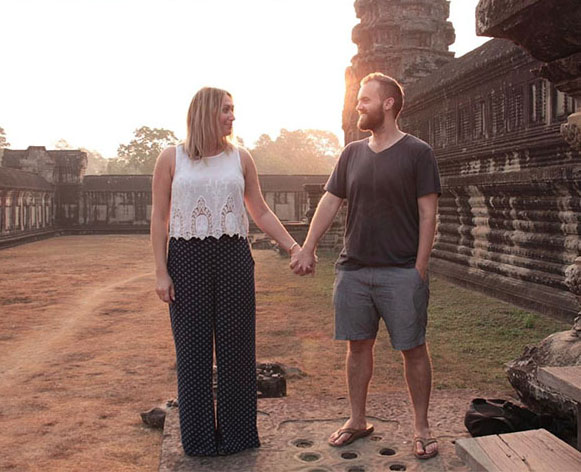
Travis and Heather spent a lot of time traveling around Asia when they lived in Japan and snapped this shot at Angkor Wat in Cambodia. They like to avoid spending the winter in Philly so they are heading to Mexico in January. (Photo courtesy of Travis Sherry)
10. What is your next adventure?
Our next adventure is January and February we will be spending in Mexico. We will be spending two months in Mexico to avoid the winter. We don’t have anything on the calendar yet for next year. If I never spend January and February in Philly again, I’d be fine with this.
This idea for living somewhere for two months. It’s not so much to travel to region. It’s to live there and get work done, but just be in a better place than Philly in winter.
For more travel hacking tips from Travis Sherry, visit ExtraPackofPeanuts.com, listen to Travis’ podcast and follow him on Instagram, Twitter and YouTube.
____________________________________________________
*Please note some Amazon affiliate links are included above. If you click on the link and make any type of purchase, I earn a small commission with no additional cost to you. I hope you found this post helpful and appreciate your support of the blog. Please email me if you have questions.
____________________________________________________
COMING UP NEXT
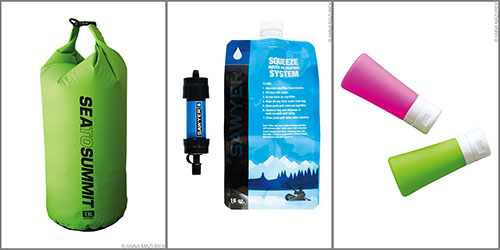
Travel Gift Ideas
2018 has been a year of big adventures for me and Alfred, the globetrotting gnome! Here’s a few ideas (big and small) to help you find the perfect gifts for friends and family. Feel free to add these to your own Christmas list for Santa!